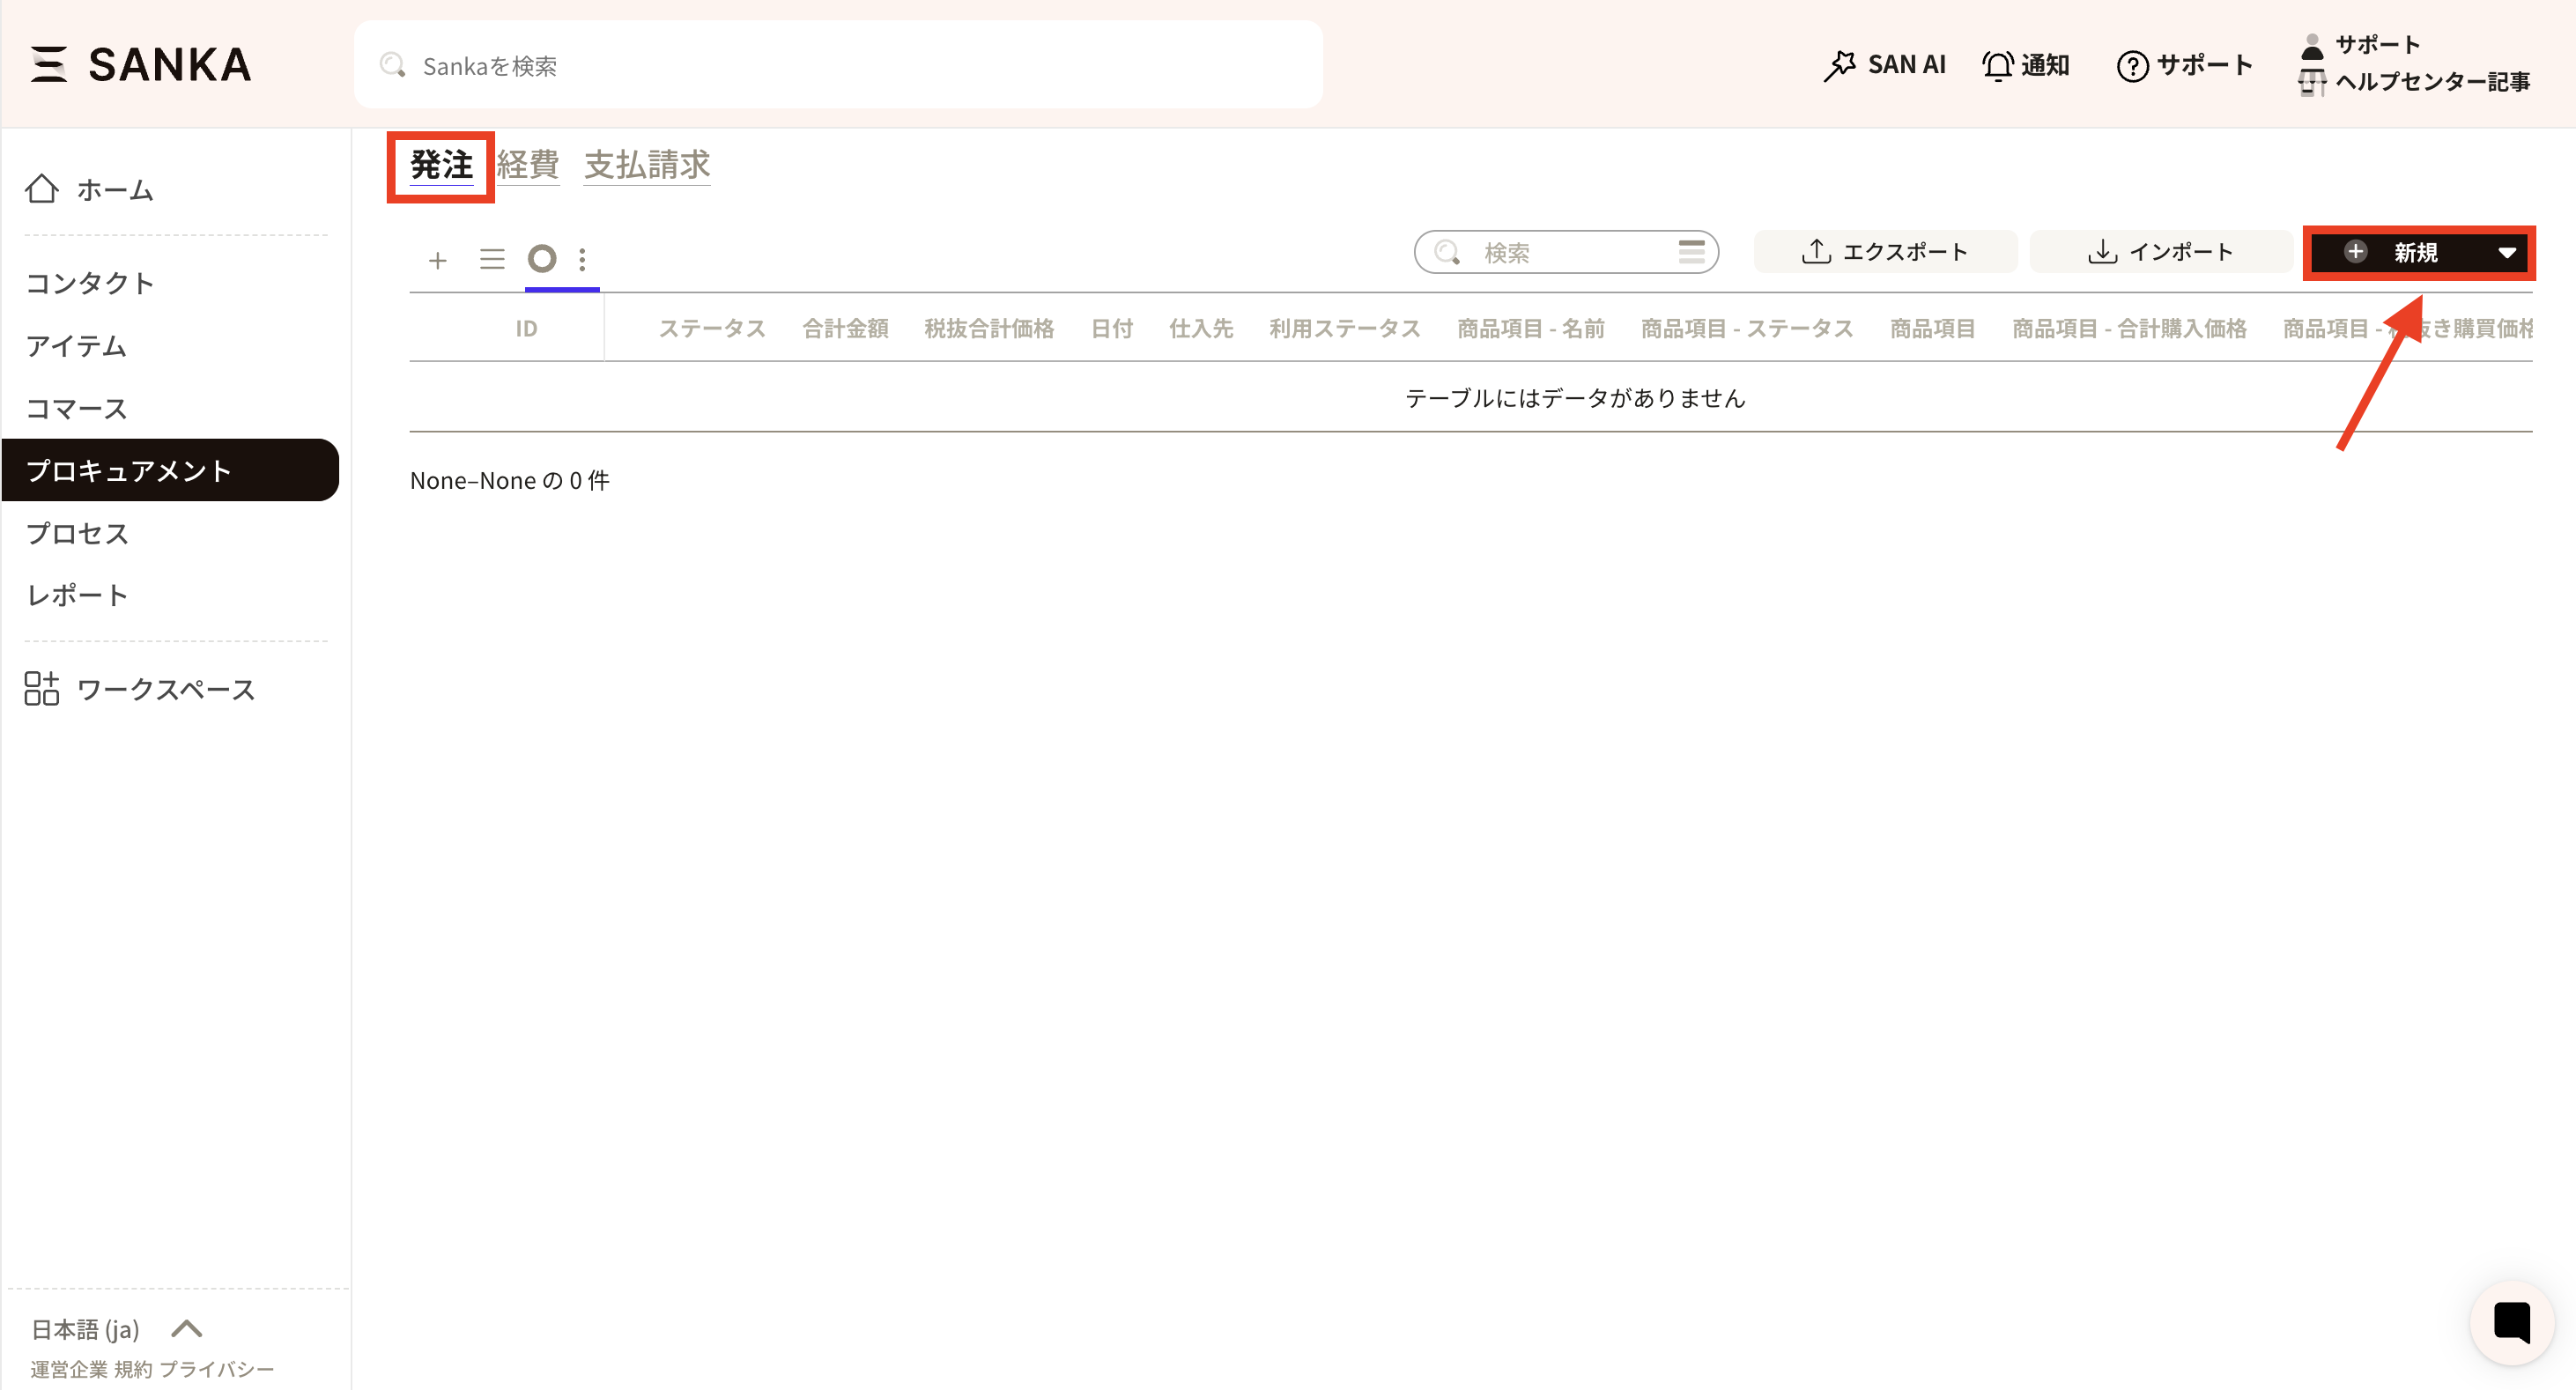
Purchase order object overview
Purchase order object overview
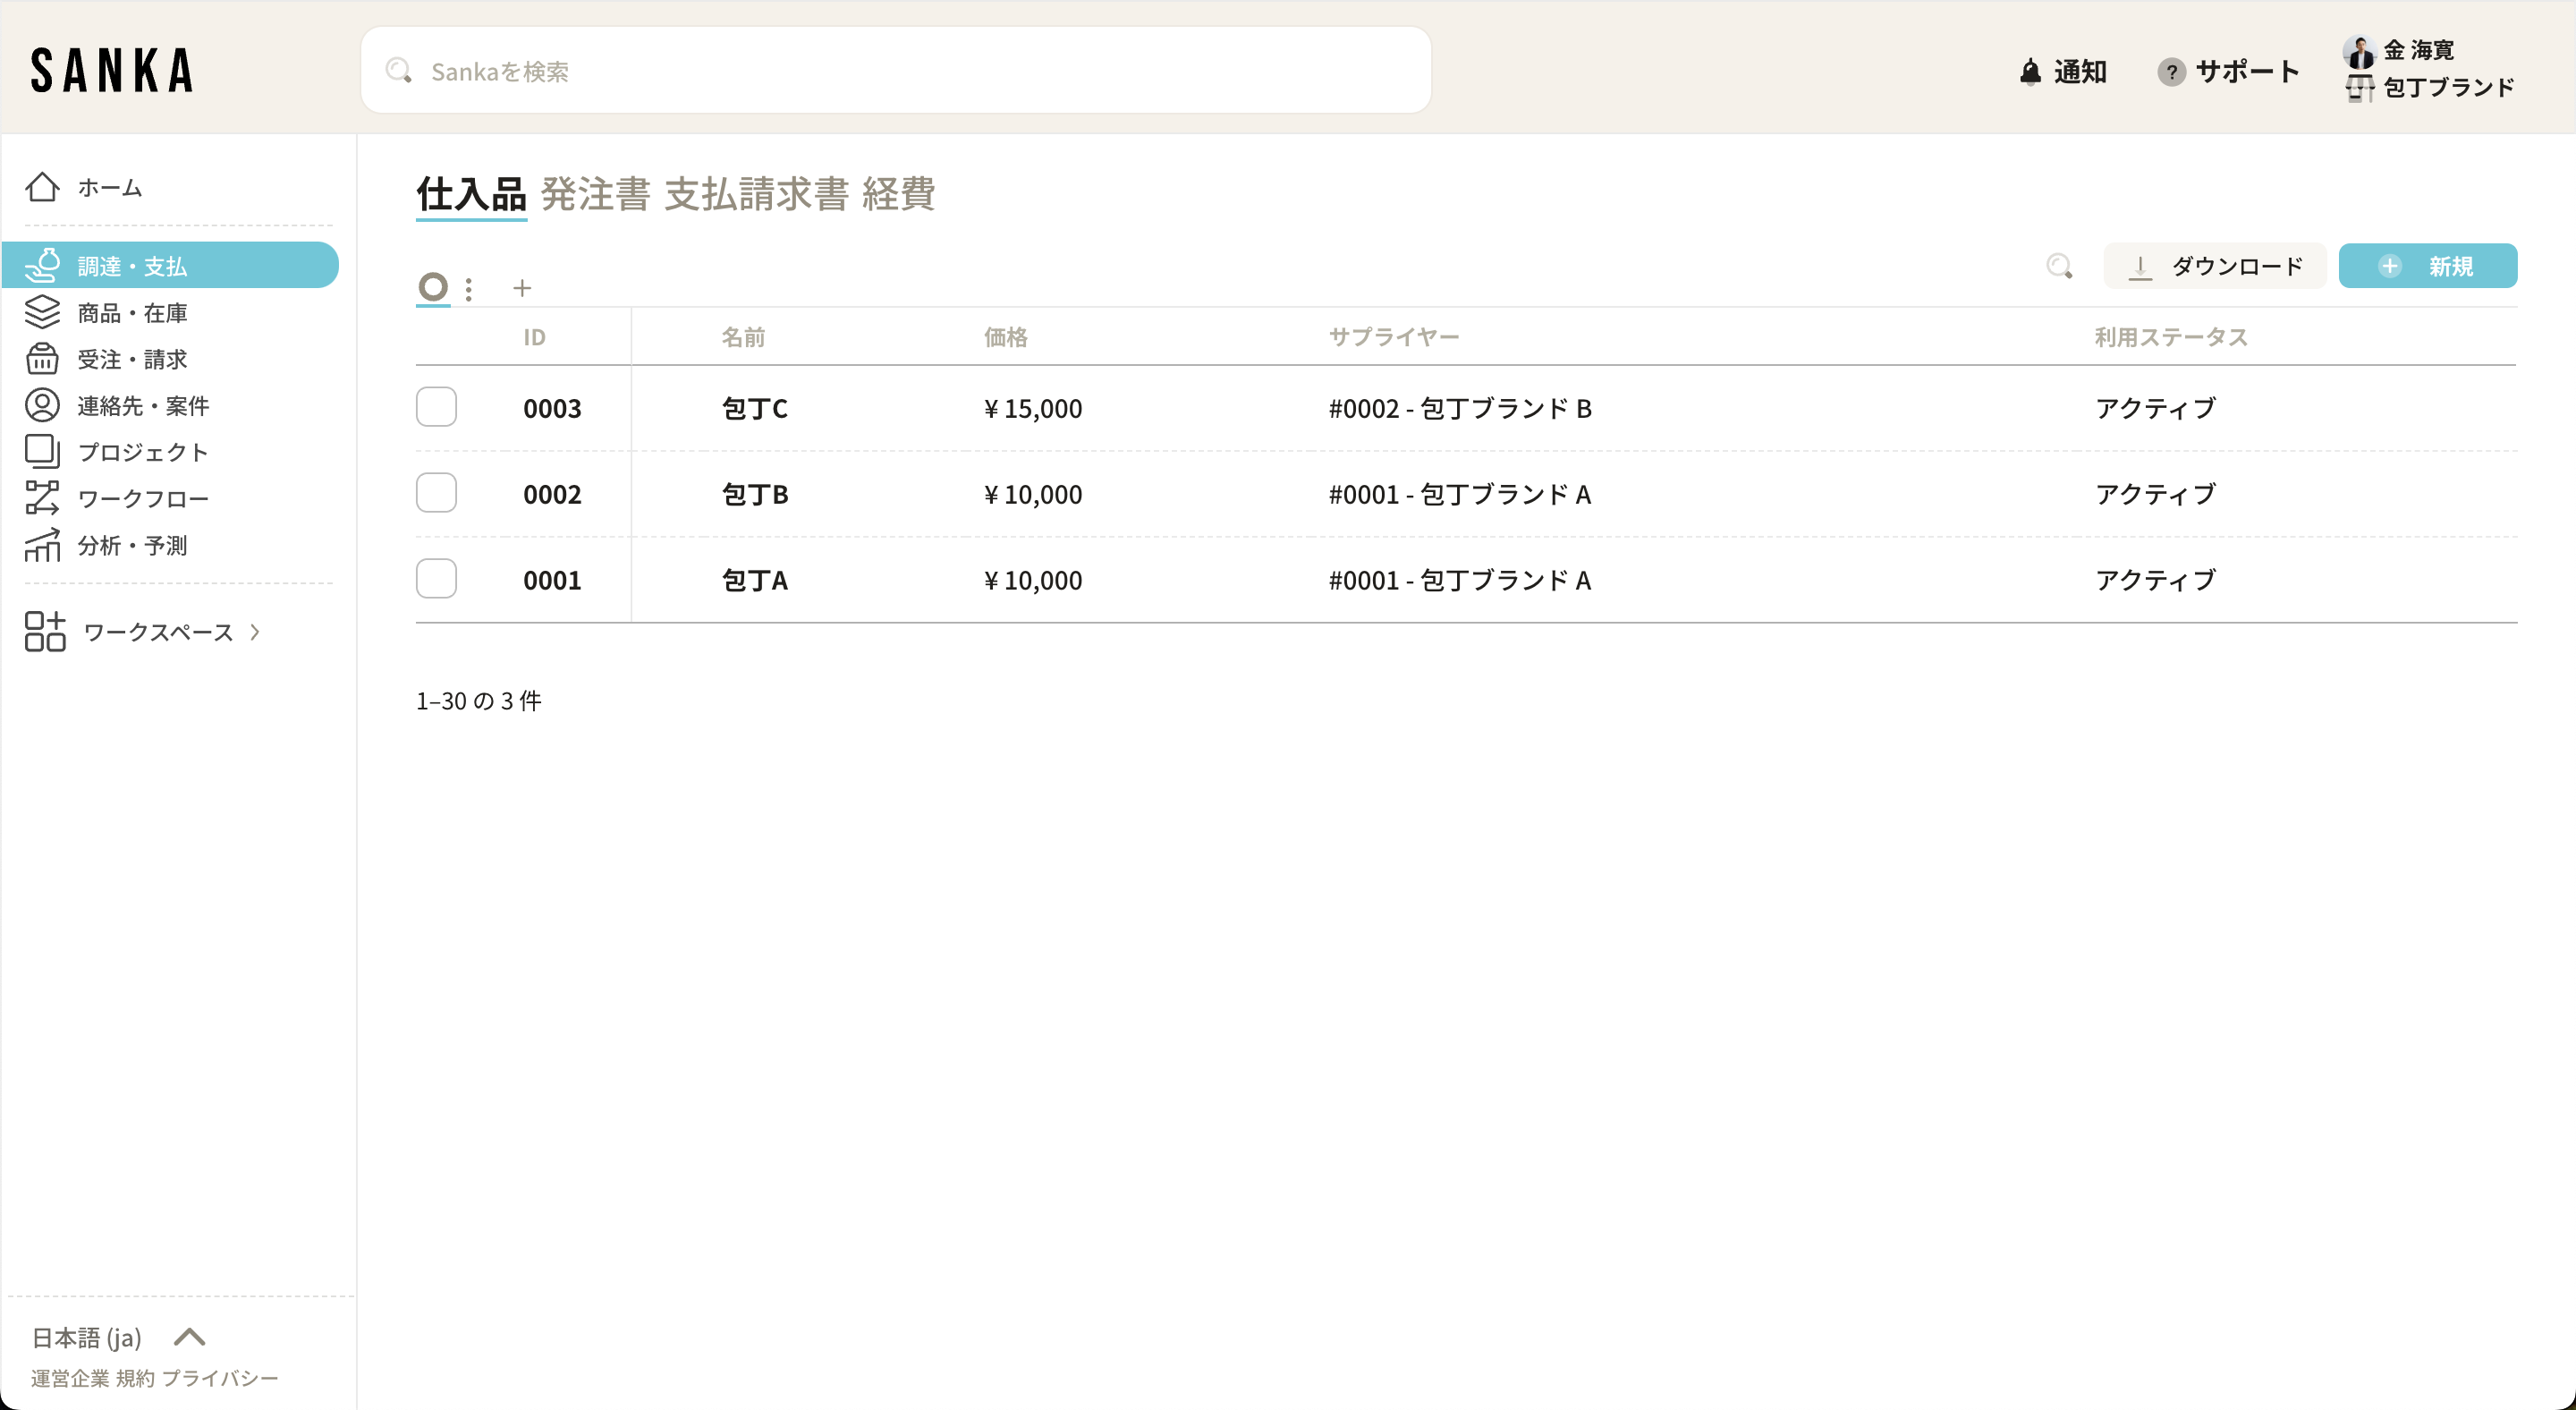
What is an “order object” in Sanka?
A purchase order object is a database for creating and managing purchase orders.What you can do with the order object
It provides a way for companies to streamline the process of creating, sending, and managing purchase orders for suppliers.- Creating a purchase order: You can create a purchase order on Sanka.
- Purchase order management: Past history can be managed centrally, so you can quickly check the information you need.
- Status Tracking: You can set statuses so you can track the progress of your orders, including draft, vendor approval, and paid.
Key properties of purchase order object
- Purchase ID: A unique identifier given to each purchase order, allowing businesses and customers to easily track and reference it.
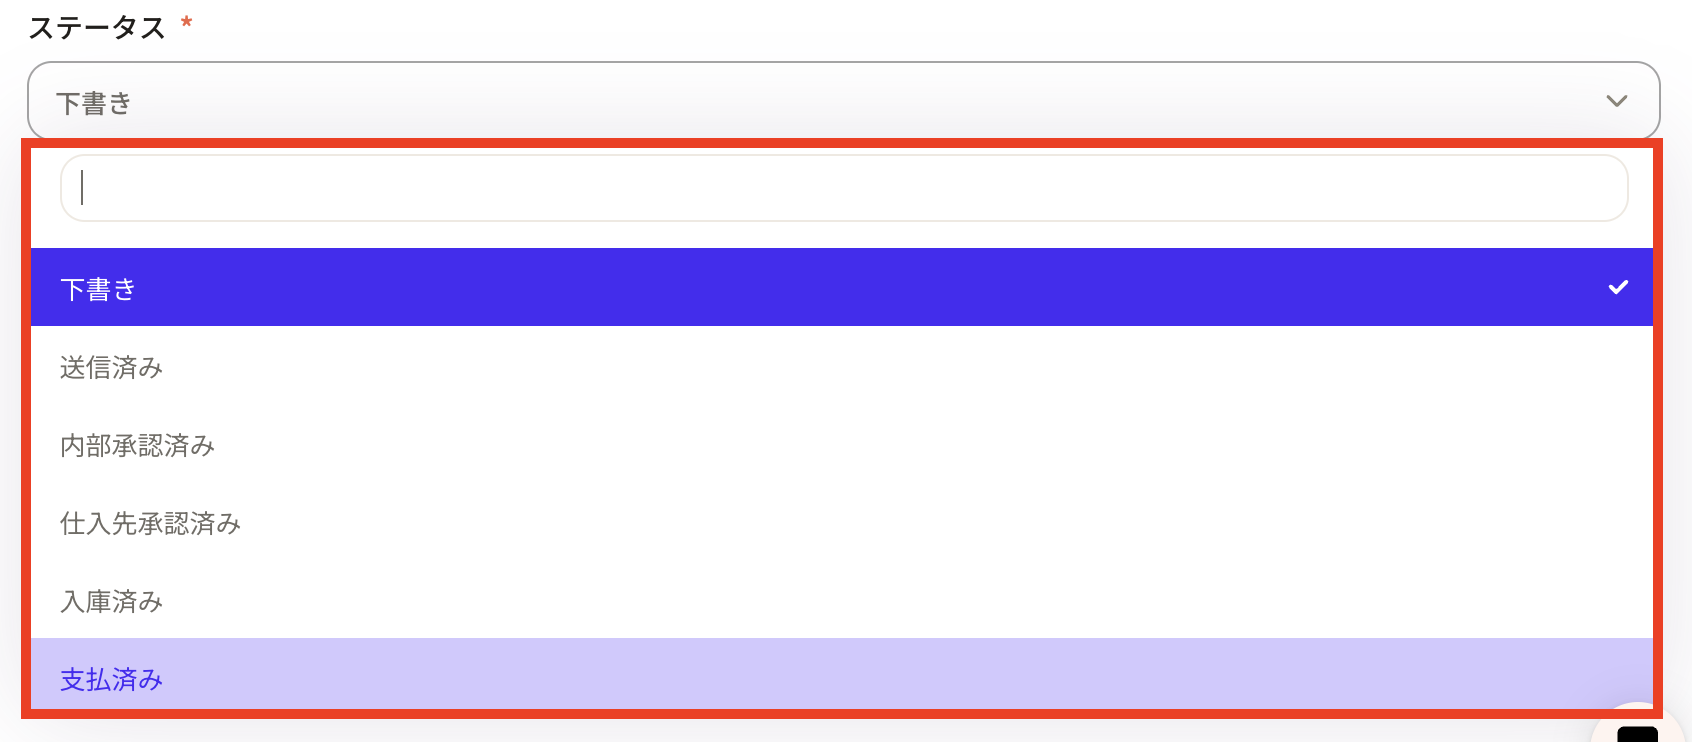
- Status: Track the current progress of your purchase order by setting the status: Draft, Sent, Internally Approved, Supplier Approved, Received, and Paid.
- Date: The date when the purchase order was created.
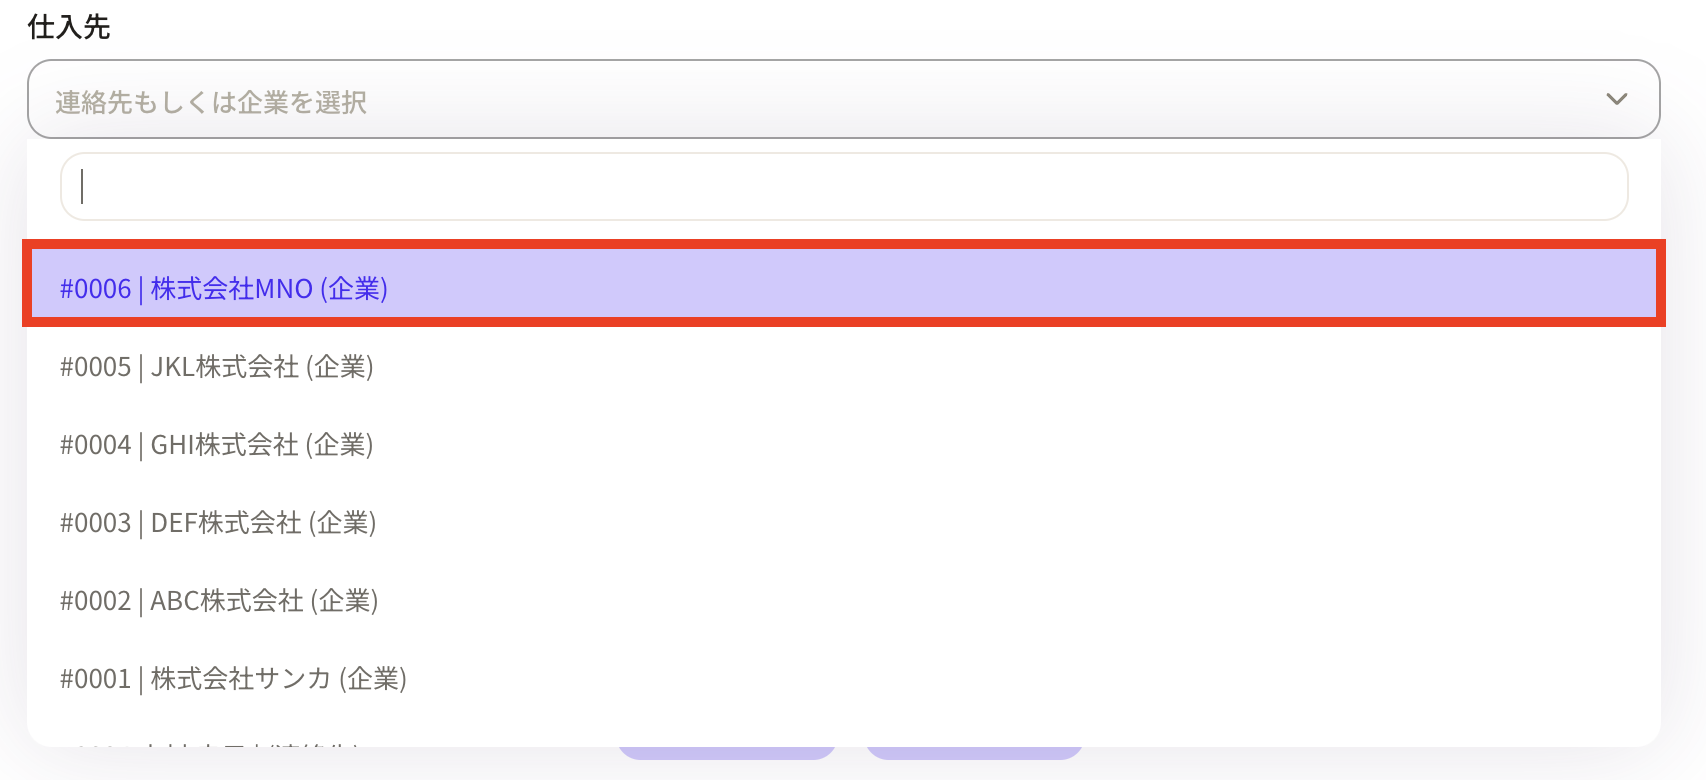
- Supplier: Can be registered from the supplier information registered in the "Company" object or "Contact" object.
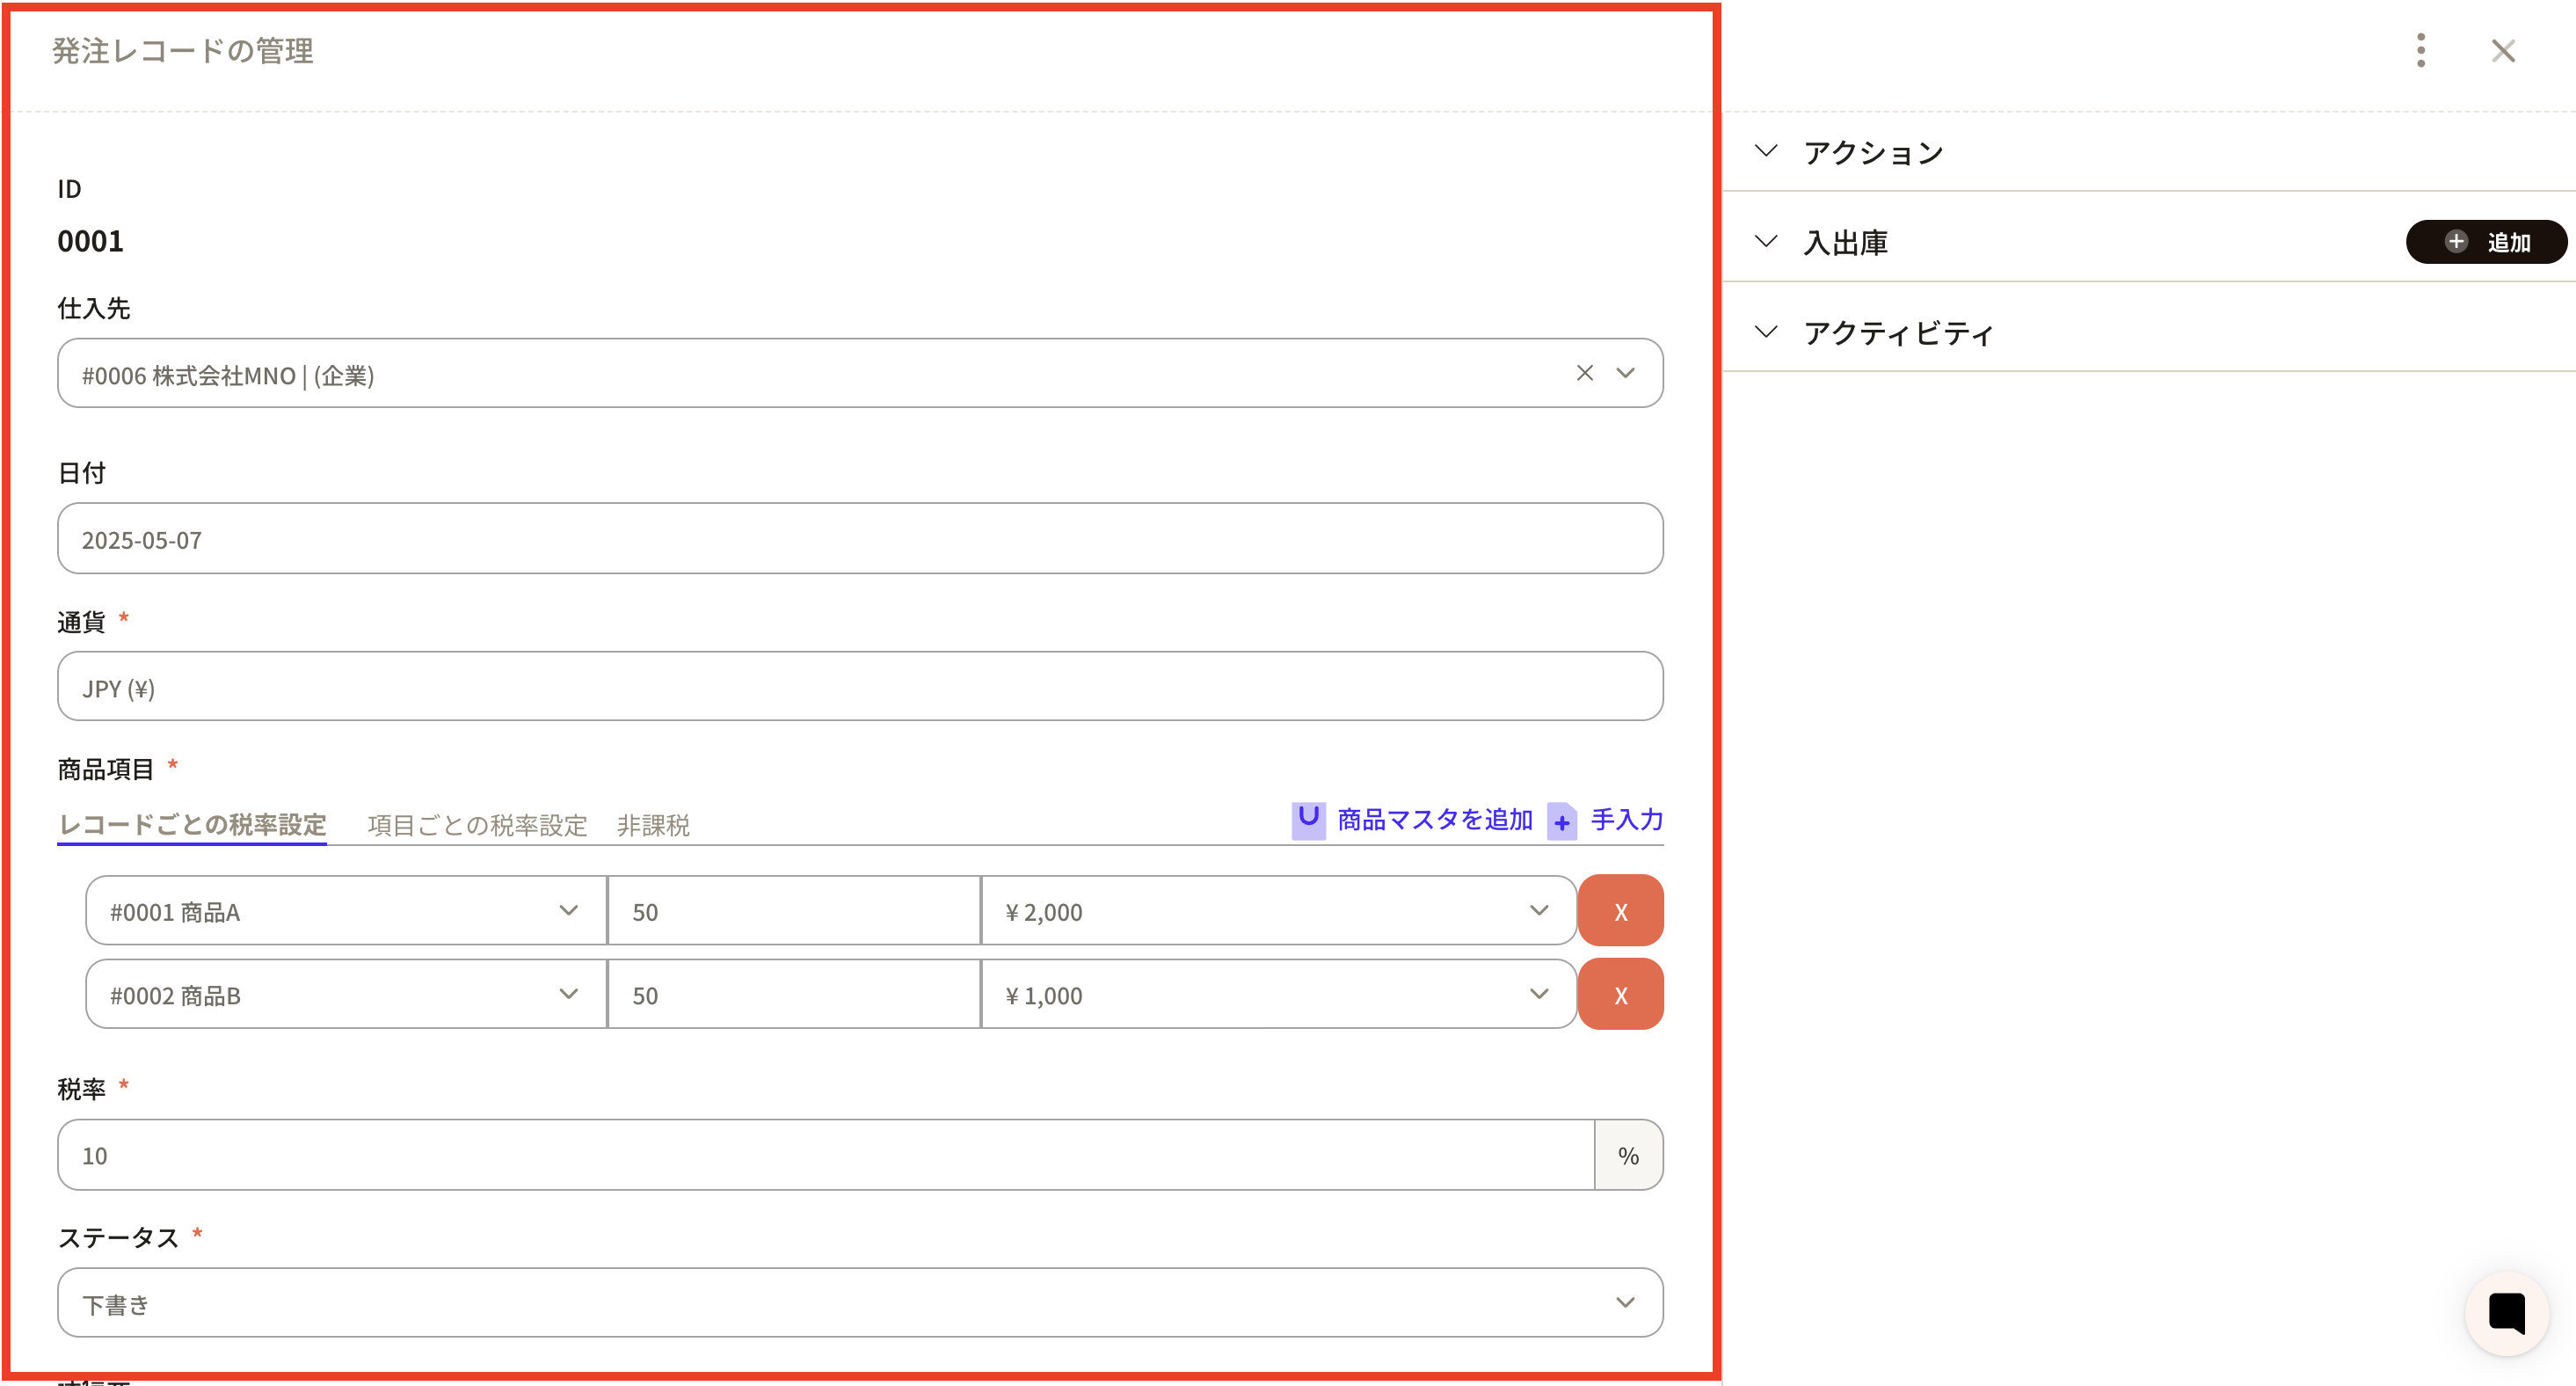
 ②The "Order Record" screen will be displayed, so enter the necessary information.
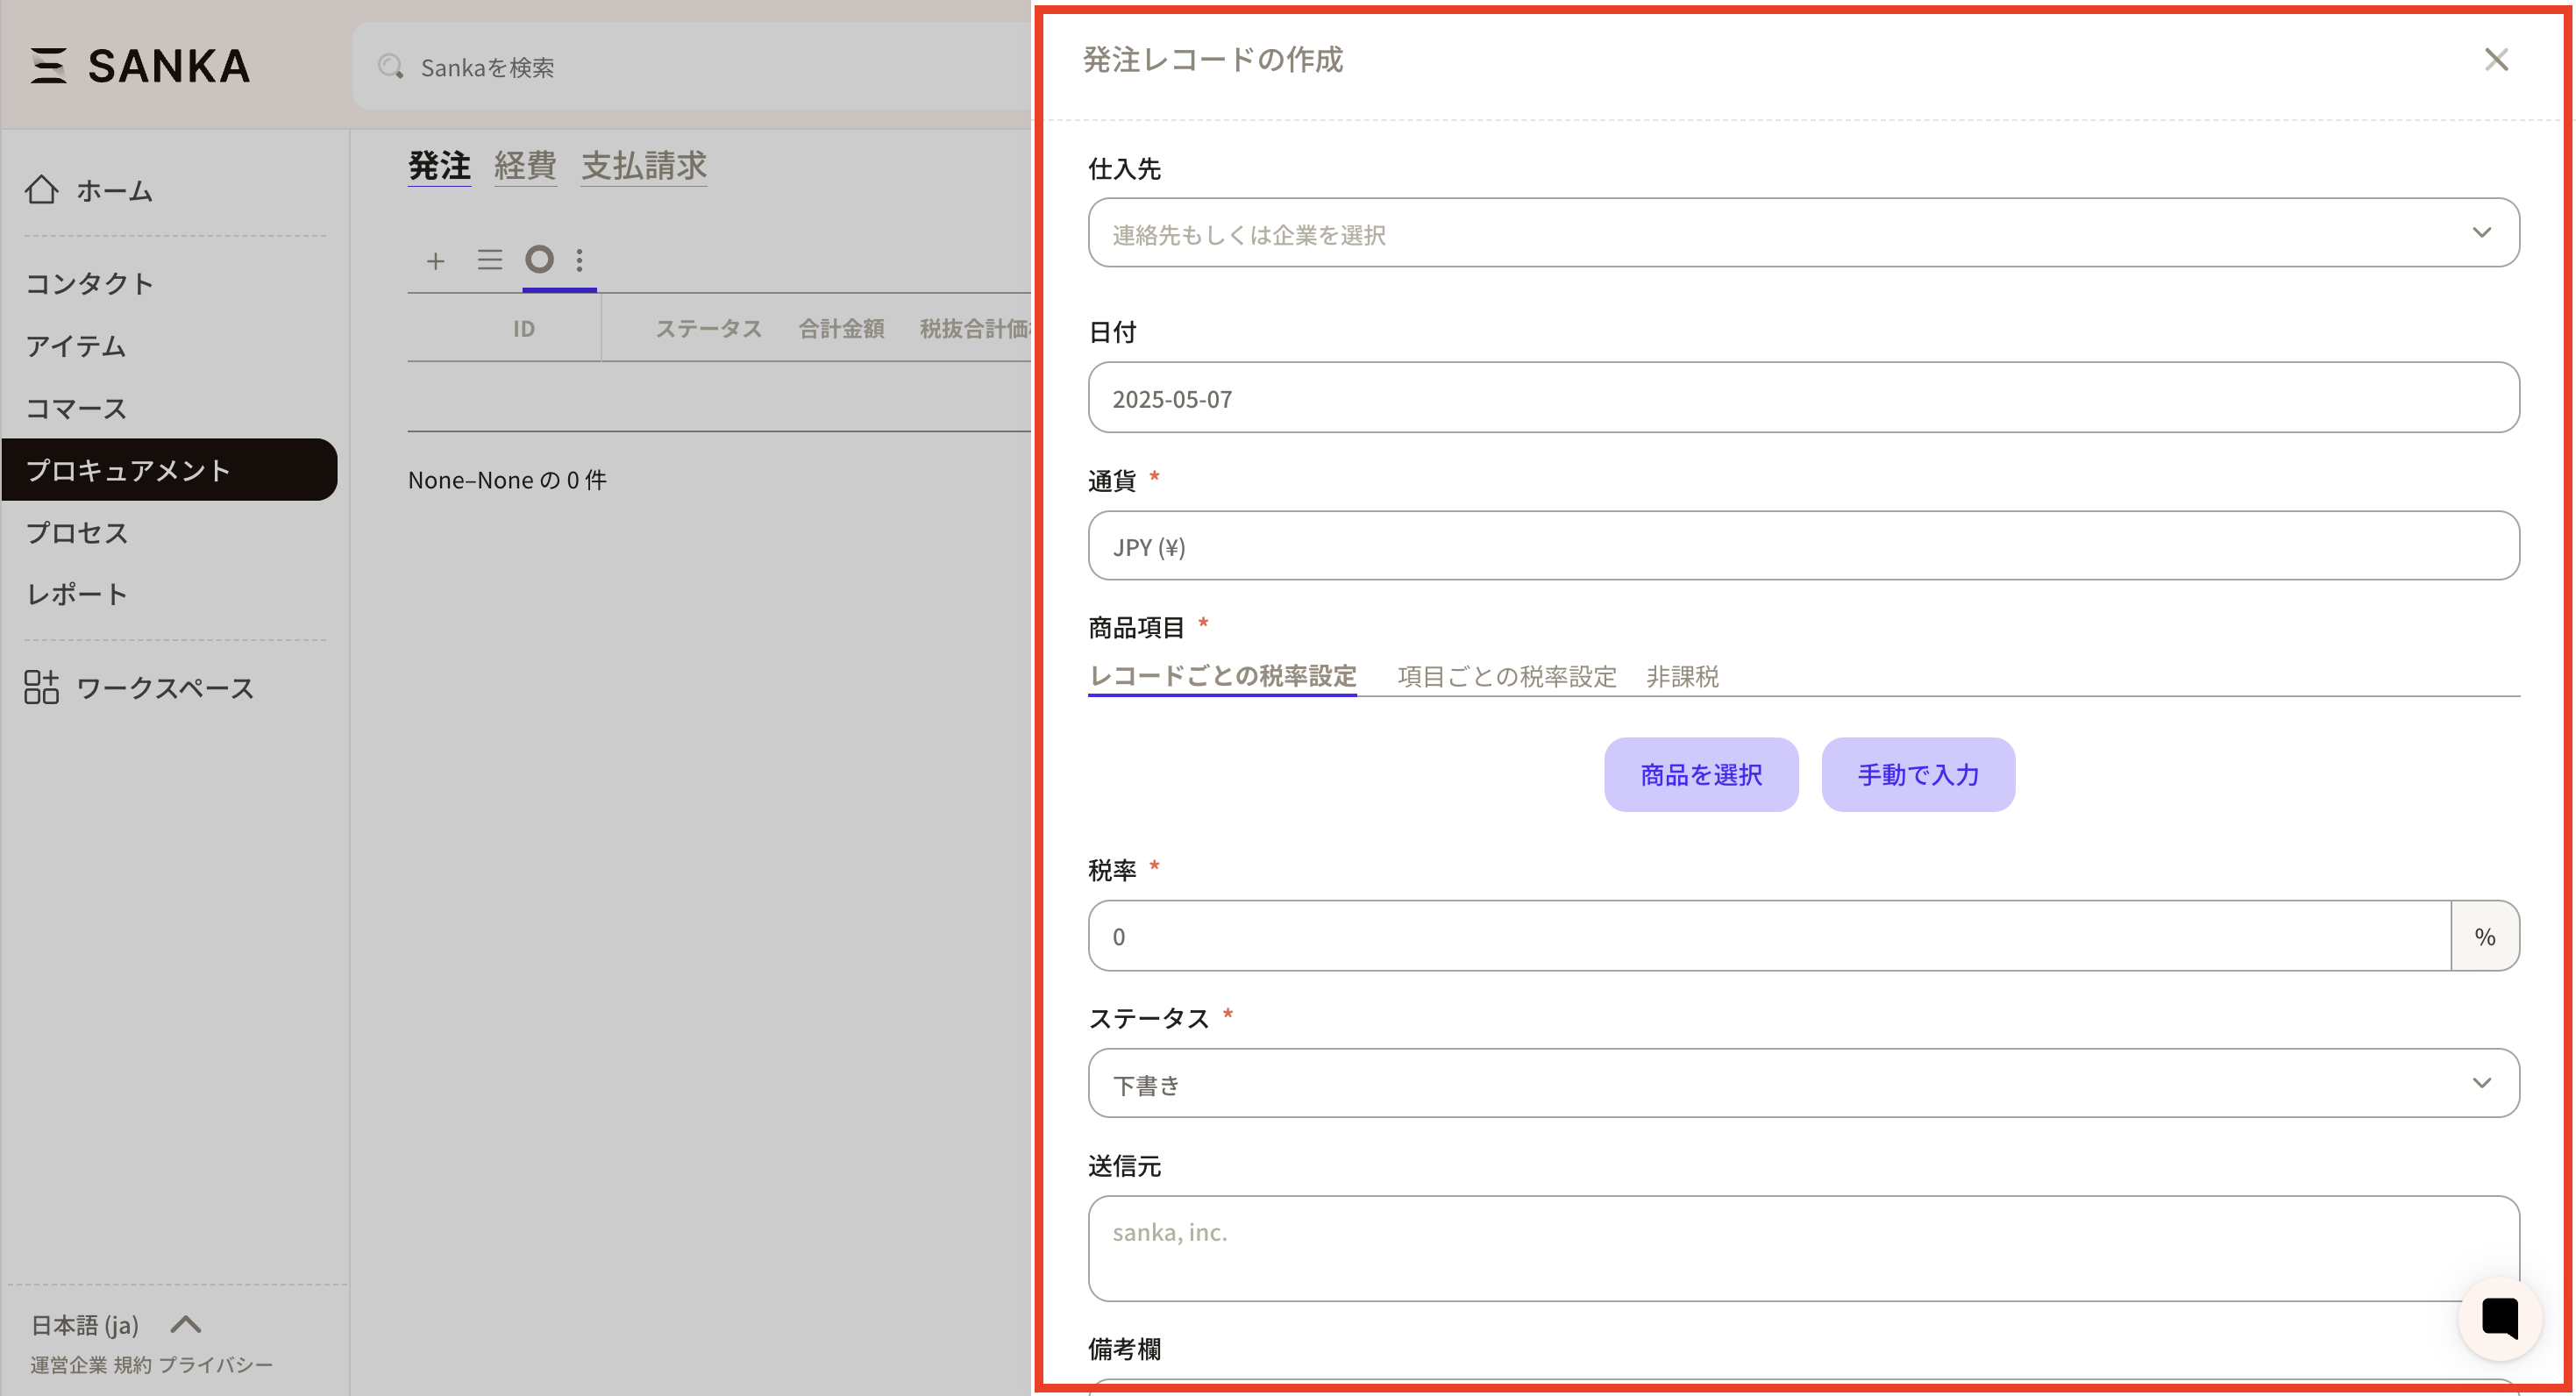 ③ First, set the "Supplier". Information registered in company objects and contact objects is displayed.
 ④Set the “Date”. When you click on the frame, a calendar will be displayed and you can set it freely.
 ⑤ Select the “currency” to apply.
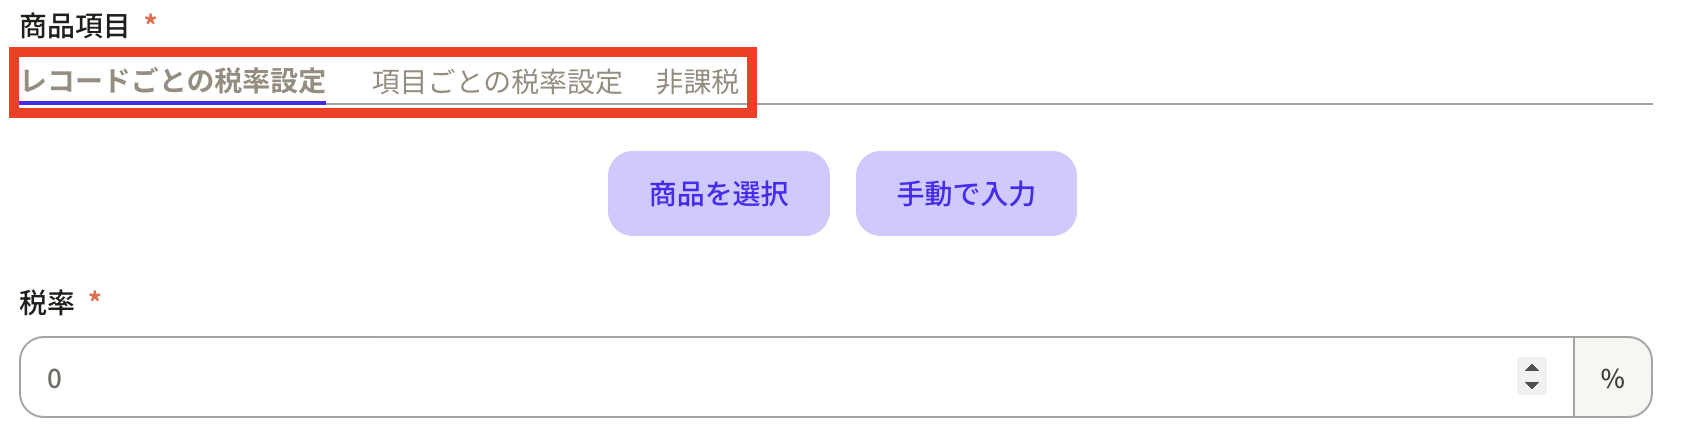
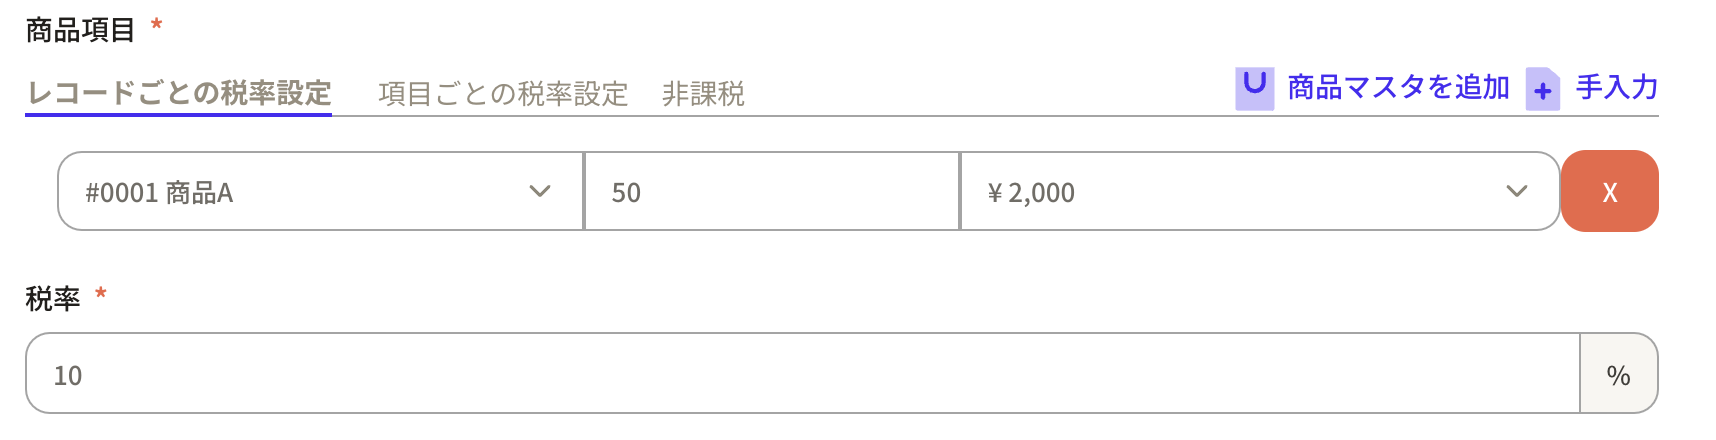
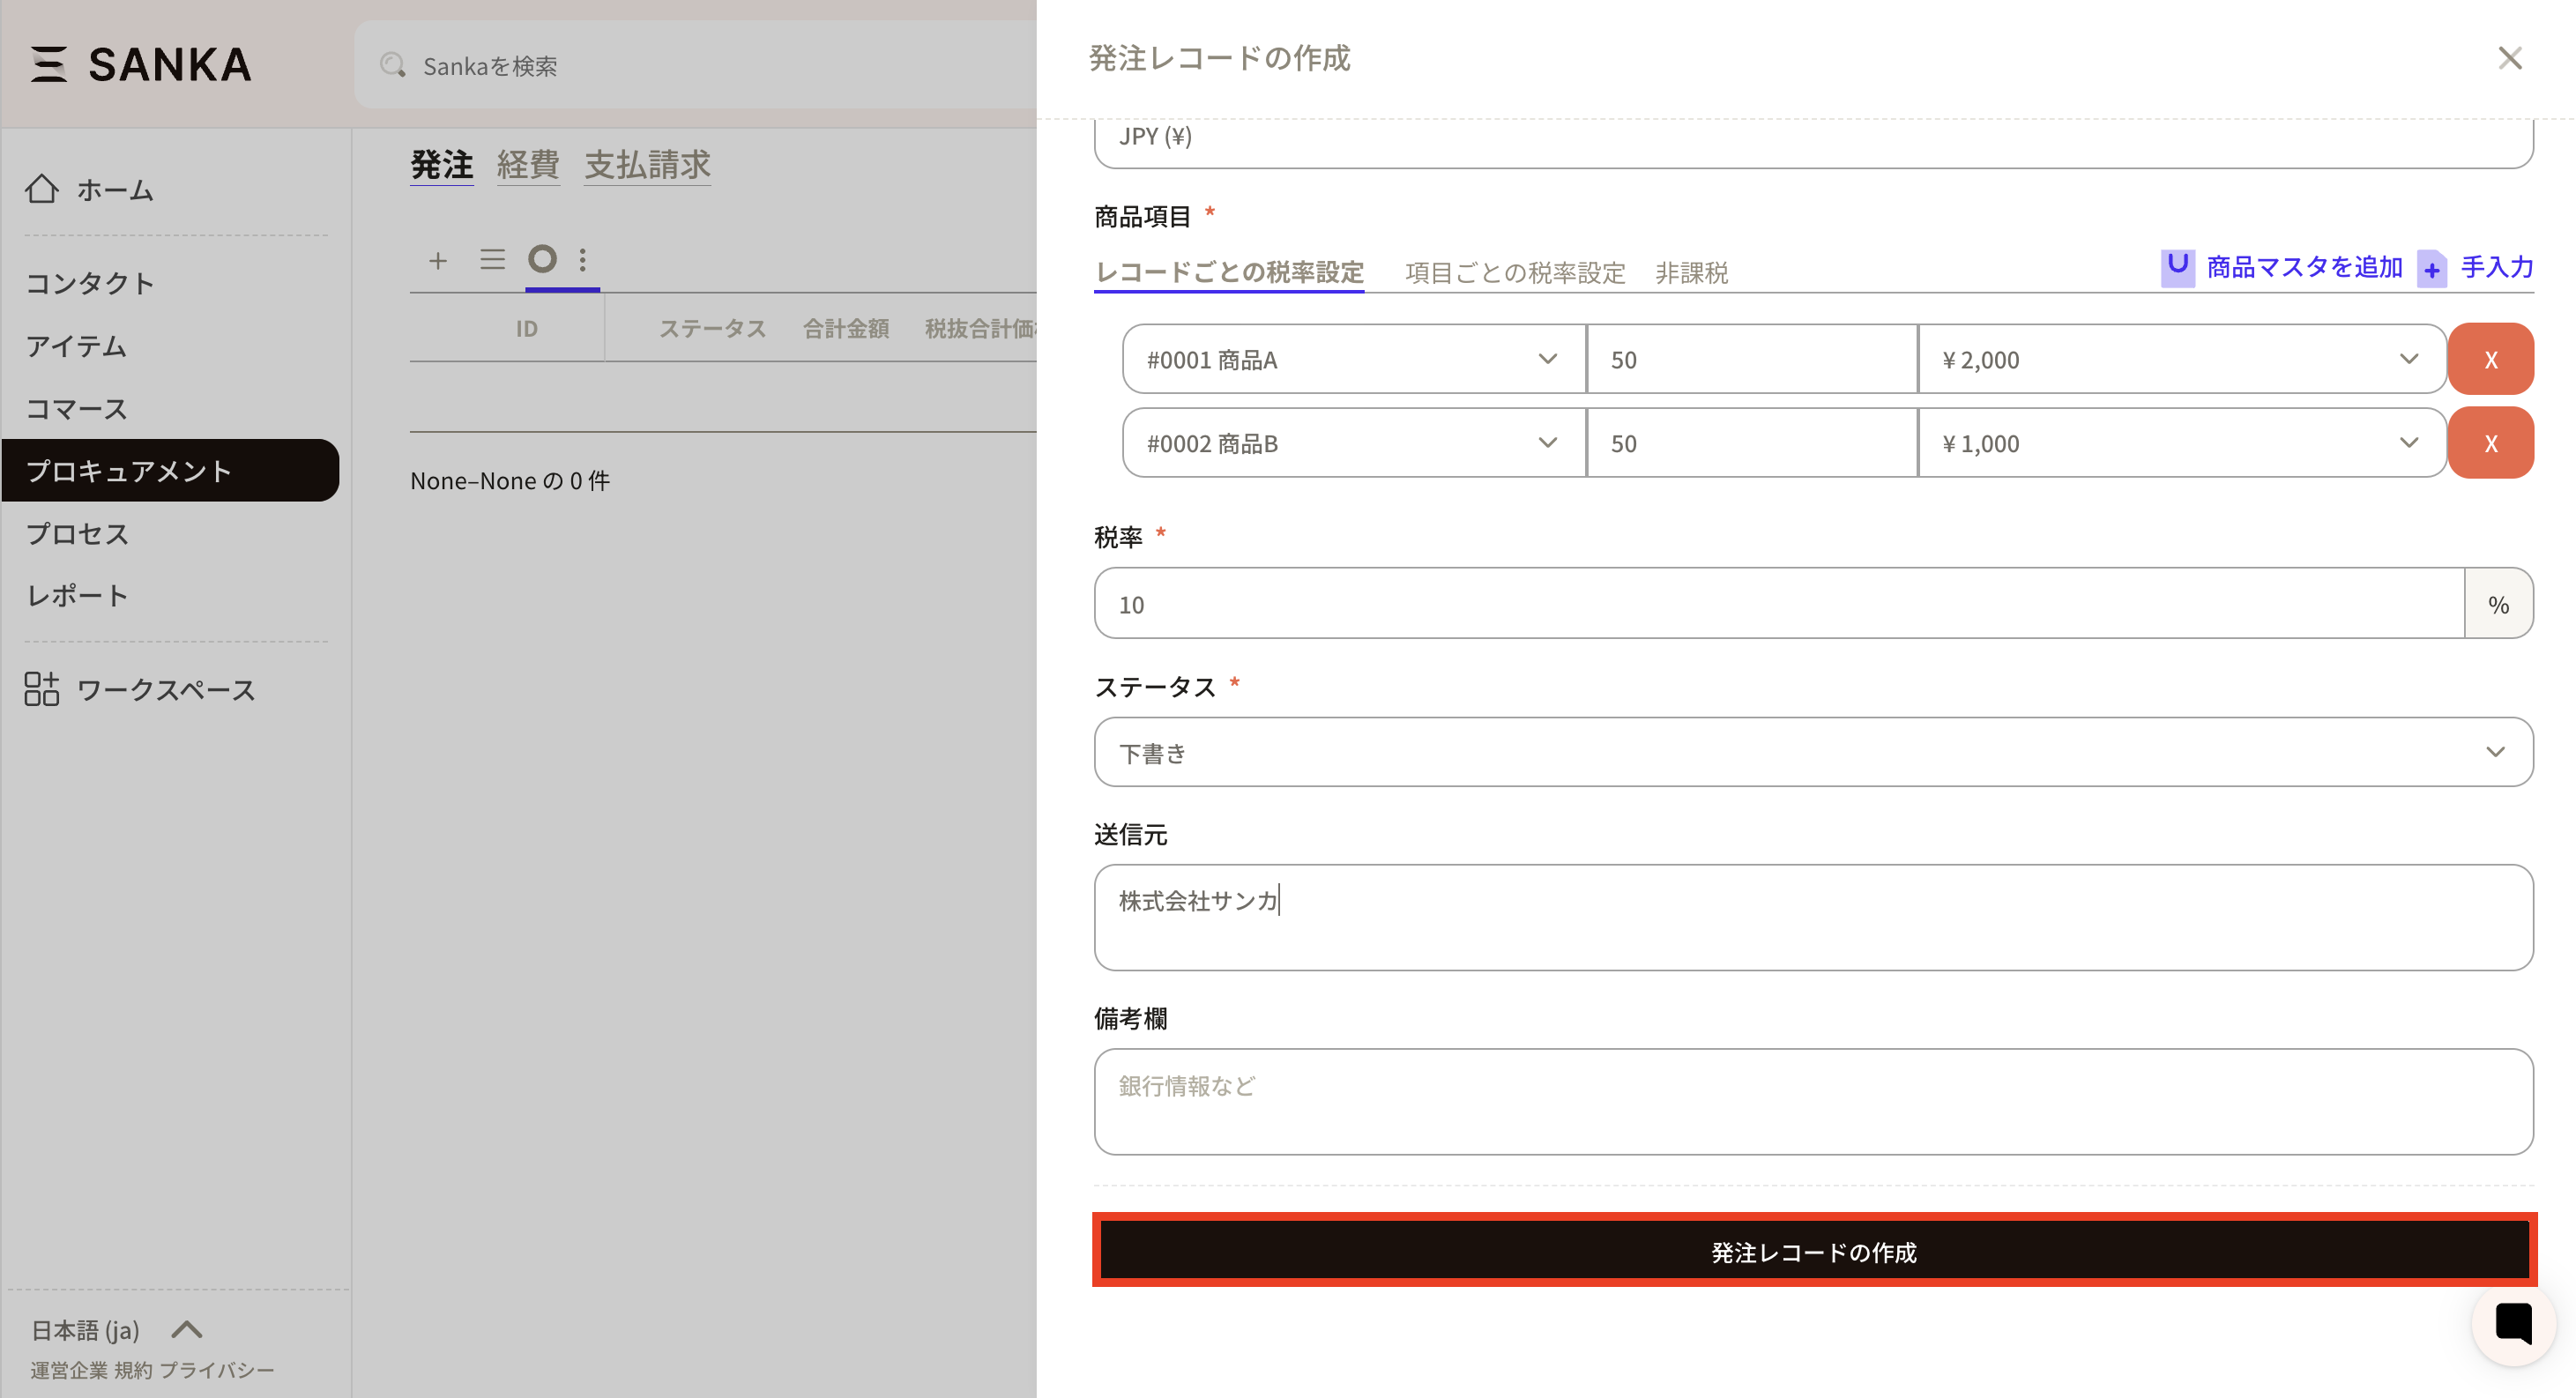
 ⑥Next, select the products to be listed on the purchase order. First, let's set the tax rate.
Tax rates can be set in three ways:
⑥Next, select the products to be listed on the purchase order. First, let's set the tax rate.
Tax rates can be set in three ways:
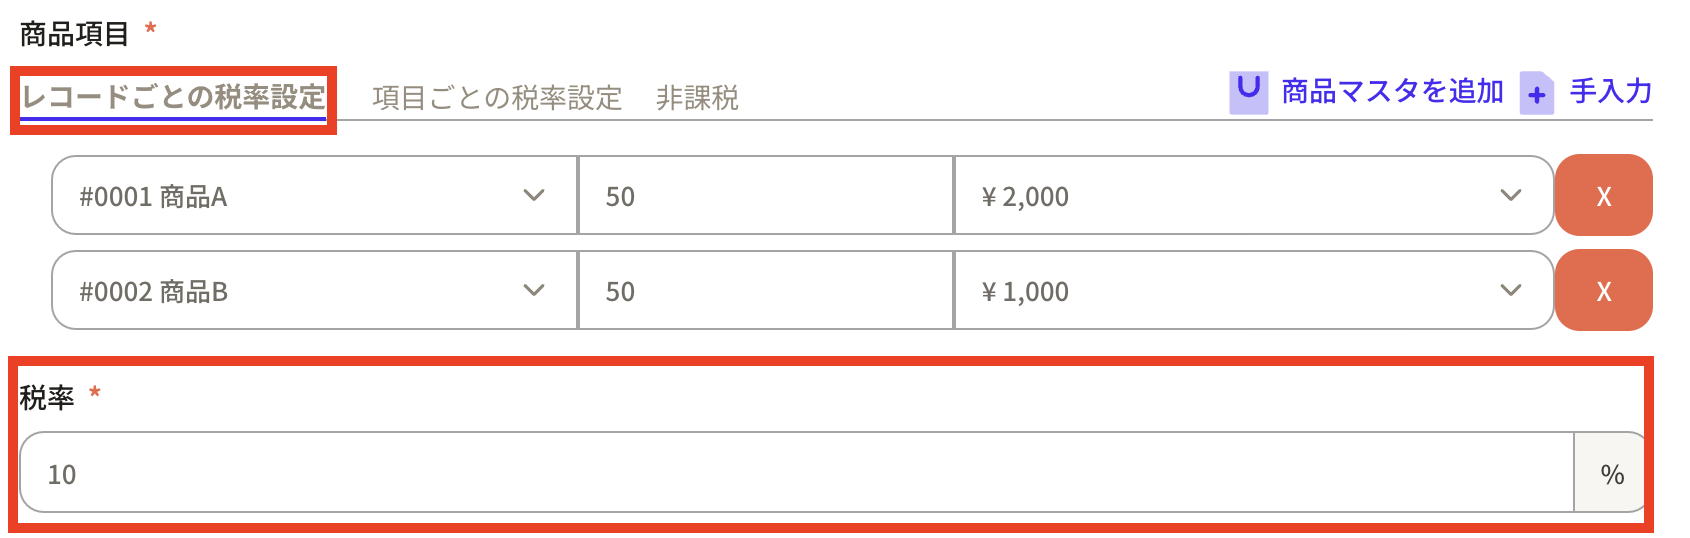
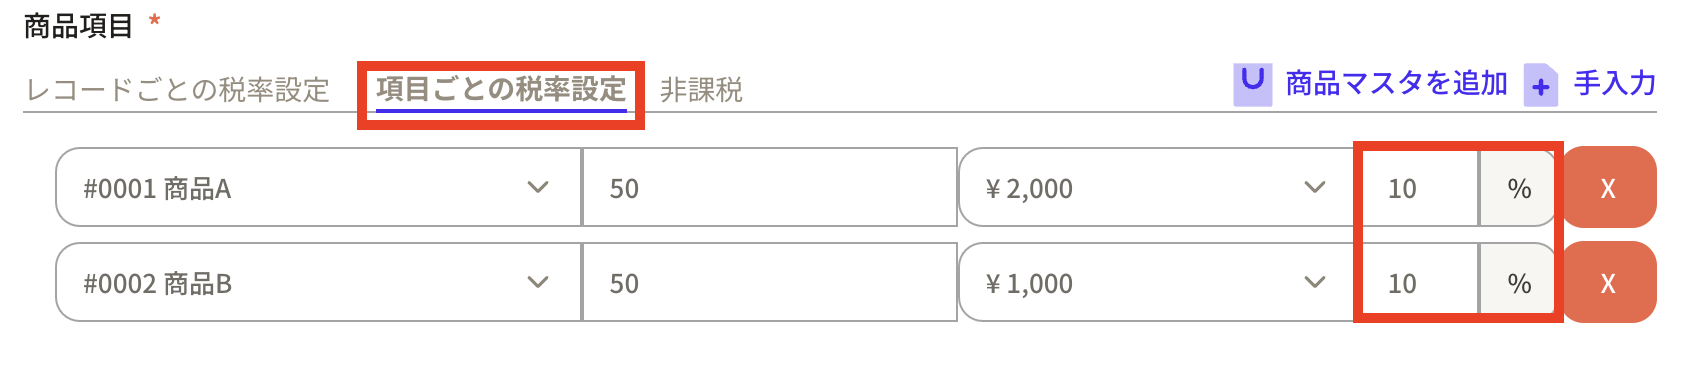
- Tax rate setting for each record: The same tax rate is set for all products in the purchase order. -Setting tax rates for each item: You can set different tax rates for each product.
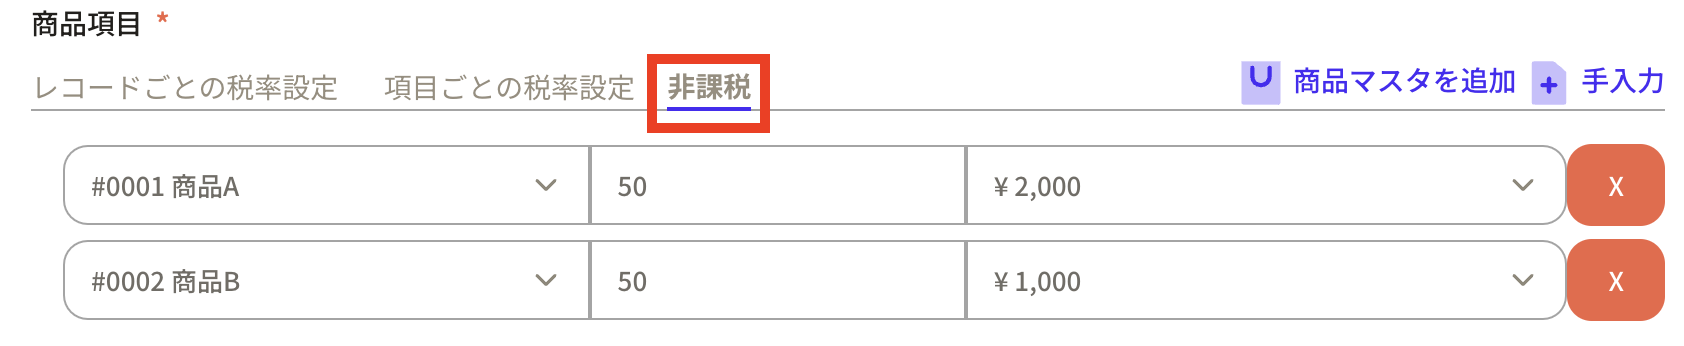
- Tax-free: No tax rate is set and is not applied to purchase orders.
 Example 1: Tax rate settings for each record
 Example 2: Setting tax rate for each item
 Example 3: Tax exempt
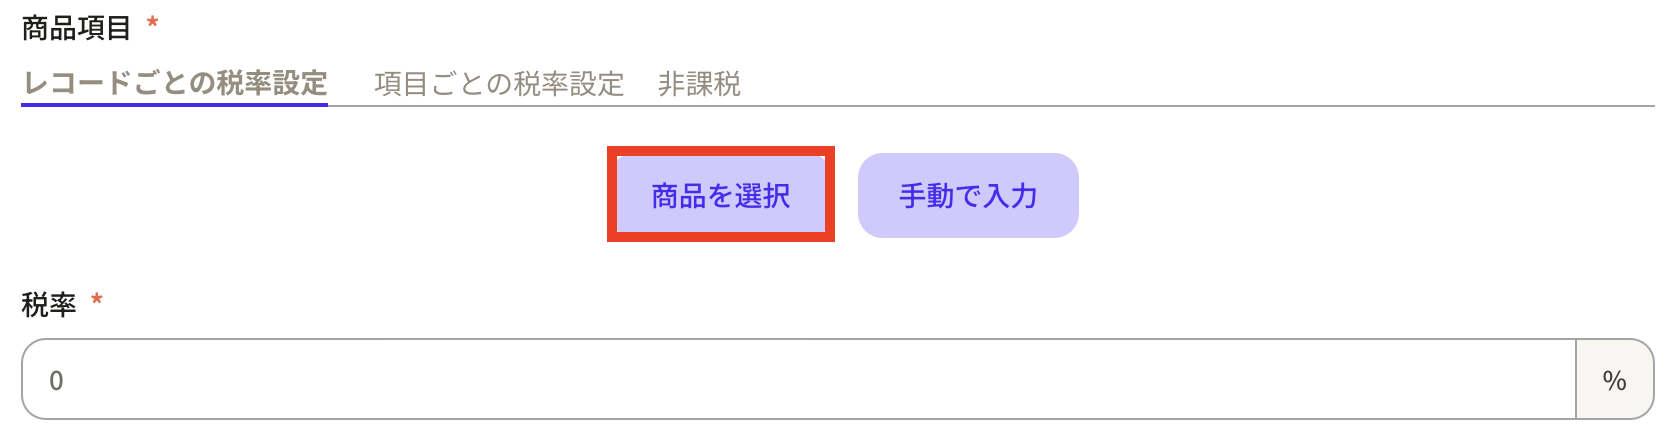
 ⑦ There are two ways to input products:
- Select product: This is a method to select the relevant product from the product records registered in Sanka.
- Manual input: This is a method of manually inputting product information.
 ⑧ When you select a product, the products registered in the product record will be displayed.
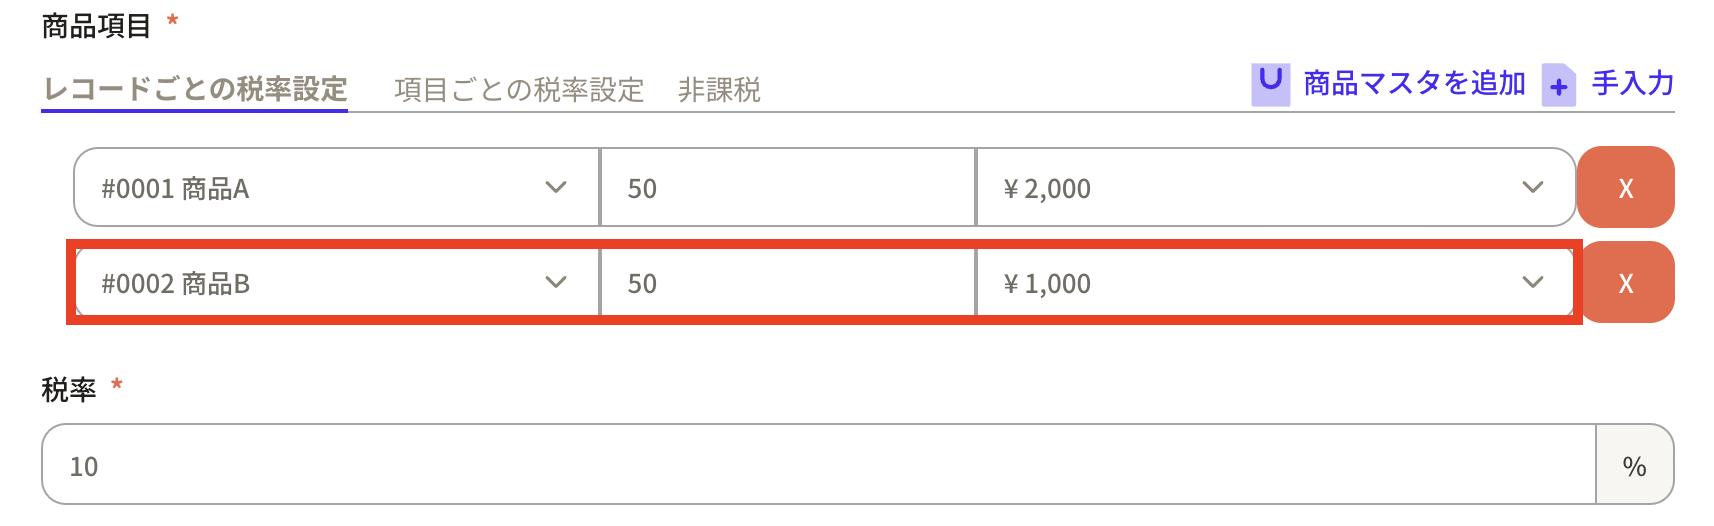
This time, as an example, I would like to order 50 pieces of product A and 50 pieces of product B.
Please note that the purchase price registered in the product record will be automatically added to the unit price.
⑧ When you select a product, the products registered in the product record will be displayed.
This time, as an example, I would like to order 50 pieces of product A and 50 pieces of product B.
Please note that the purchase price registered in the product record will be automatically added to the unit price.
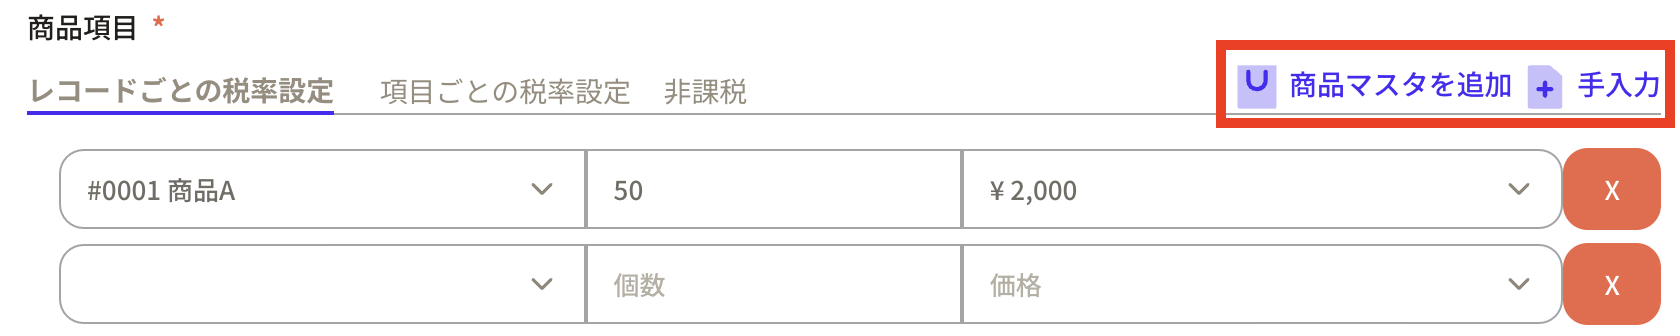
 ⑨ If you want to increase the number of product items, click "+Add product master" in the upper right corner and an additional blank field will be displayed.
 ⑩Enter 50 items of product B. If a tax rate is applied, please enter the tax rate.
 ⑪Set the status according to the order status.
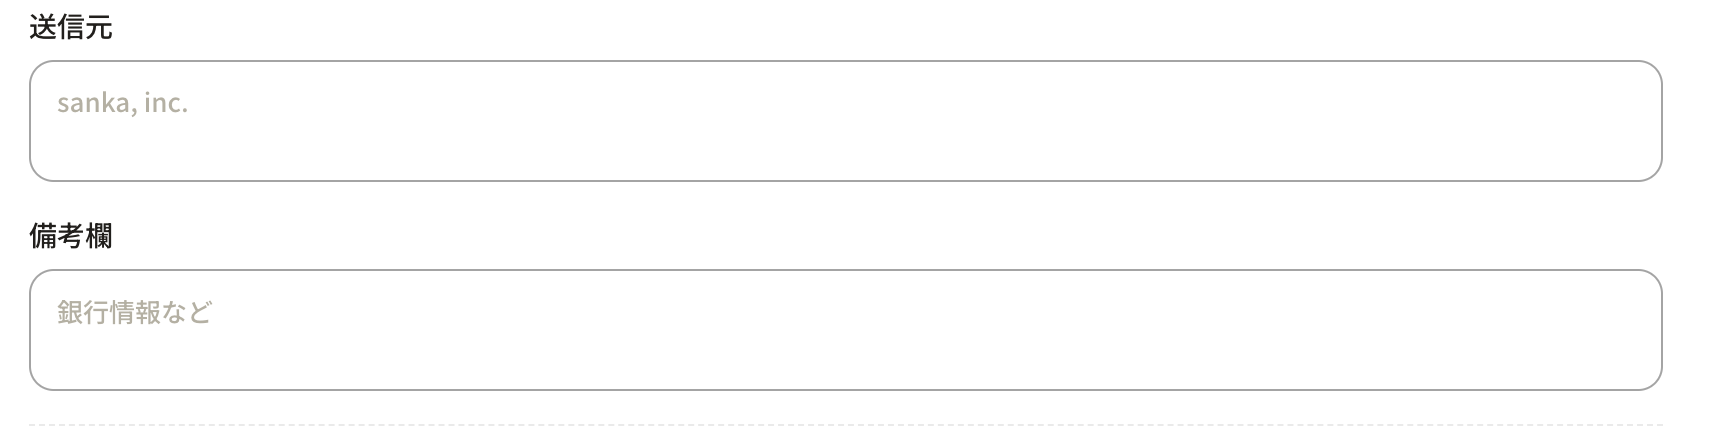
 ⑫ Enter the "Sender" and "Remarks" fields.
 ⑬After entering the required information, press the "Create Order Record" button to register.
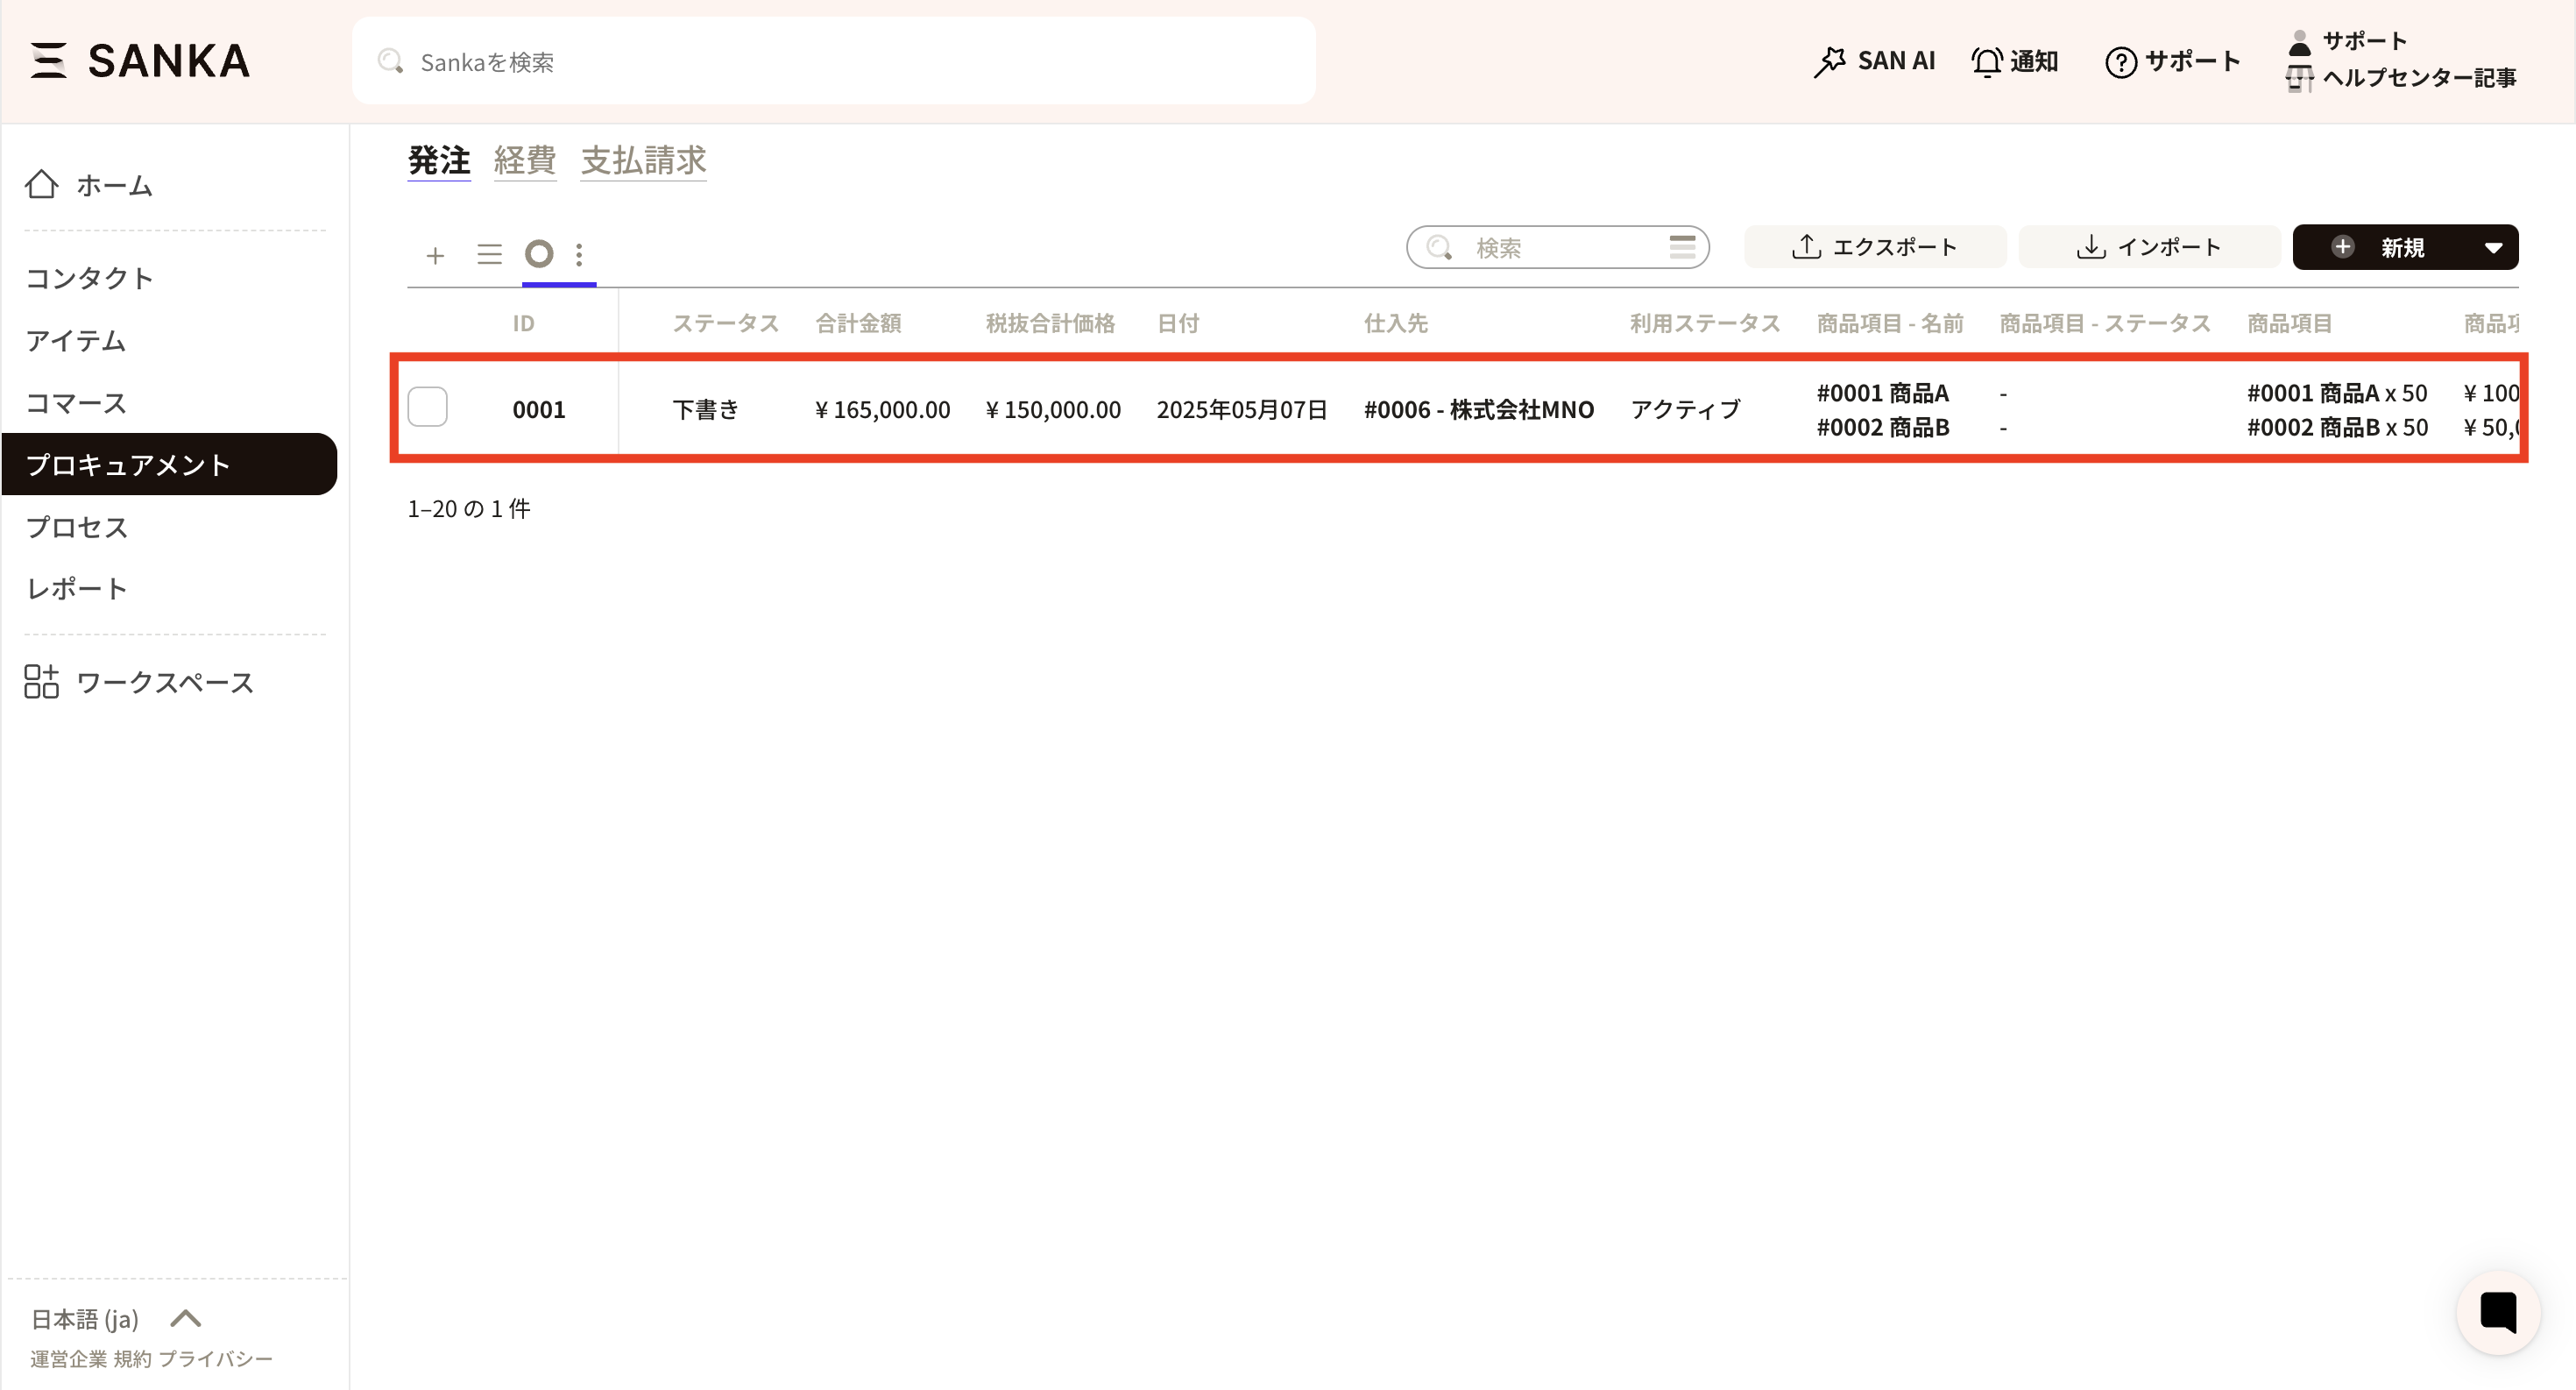
 ⑭The registered contents will be displayed on the "Purchase order" object screen.
How to delete/modify registered record information
How to modify registered record information
①Click the ID of the corresponding record.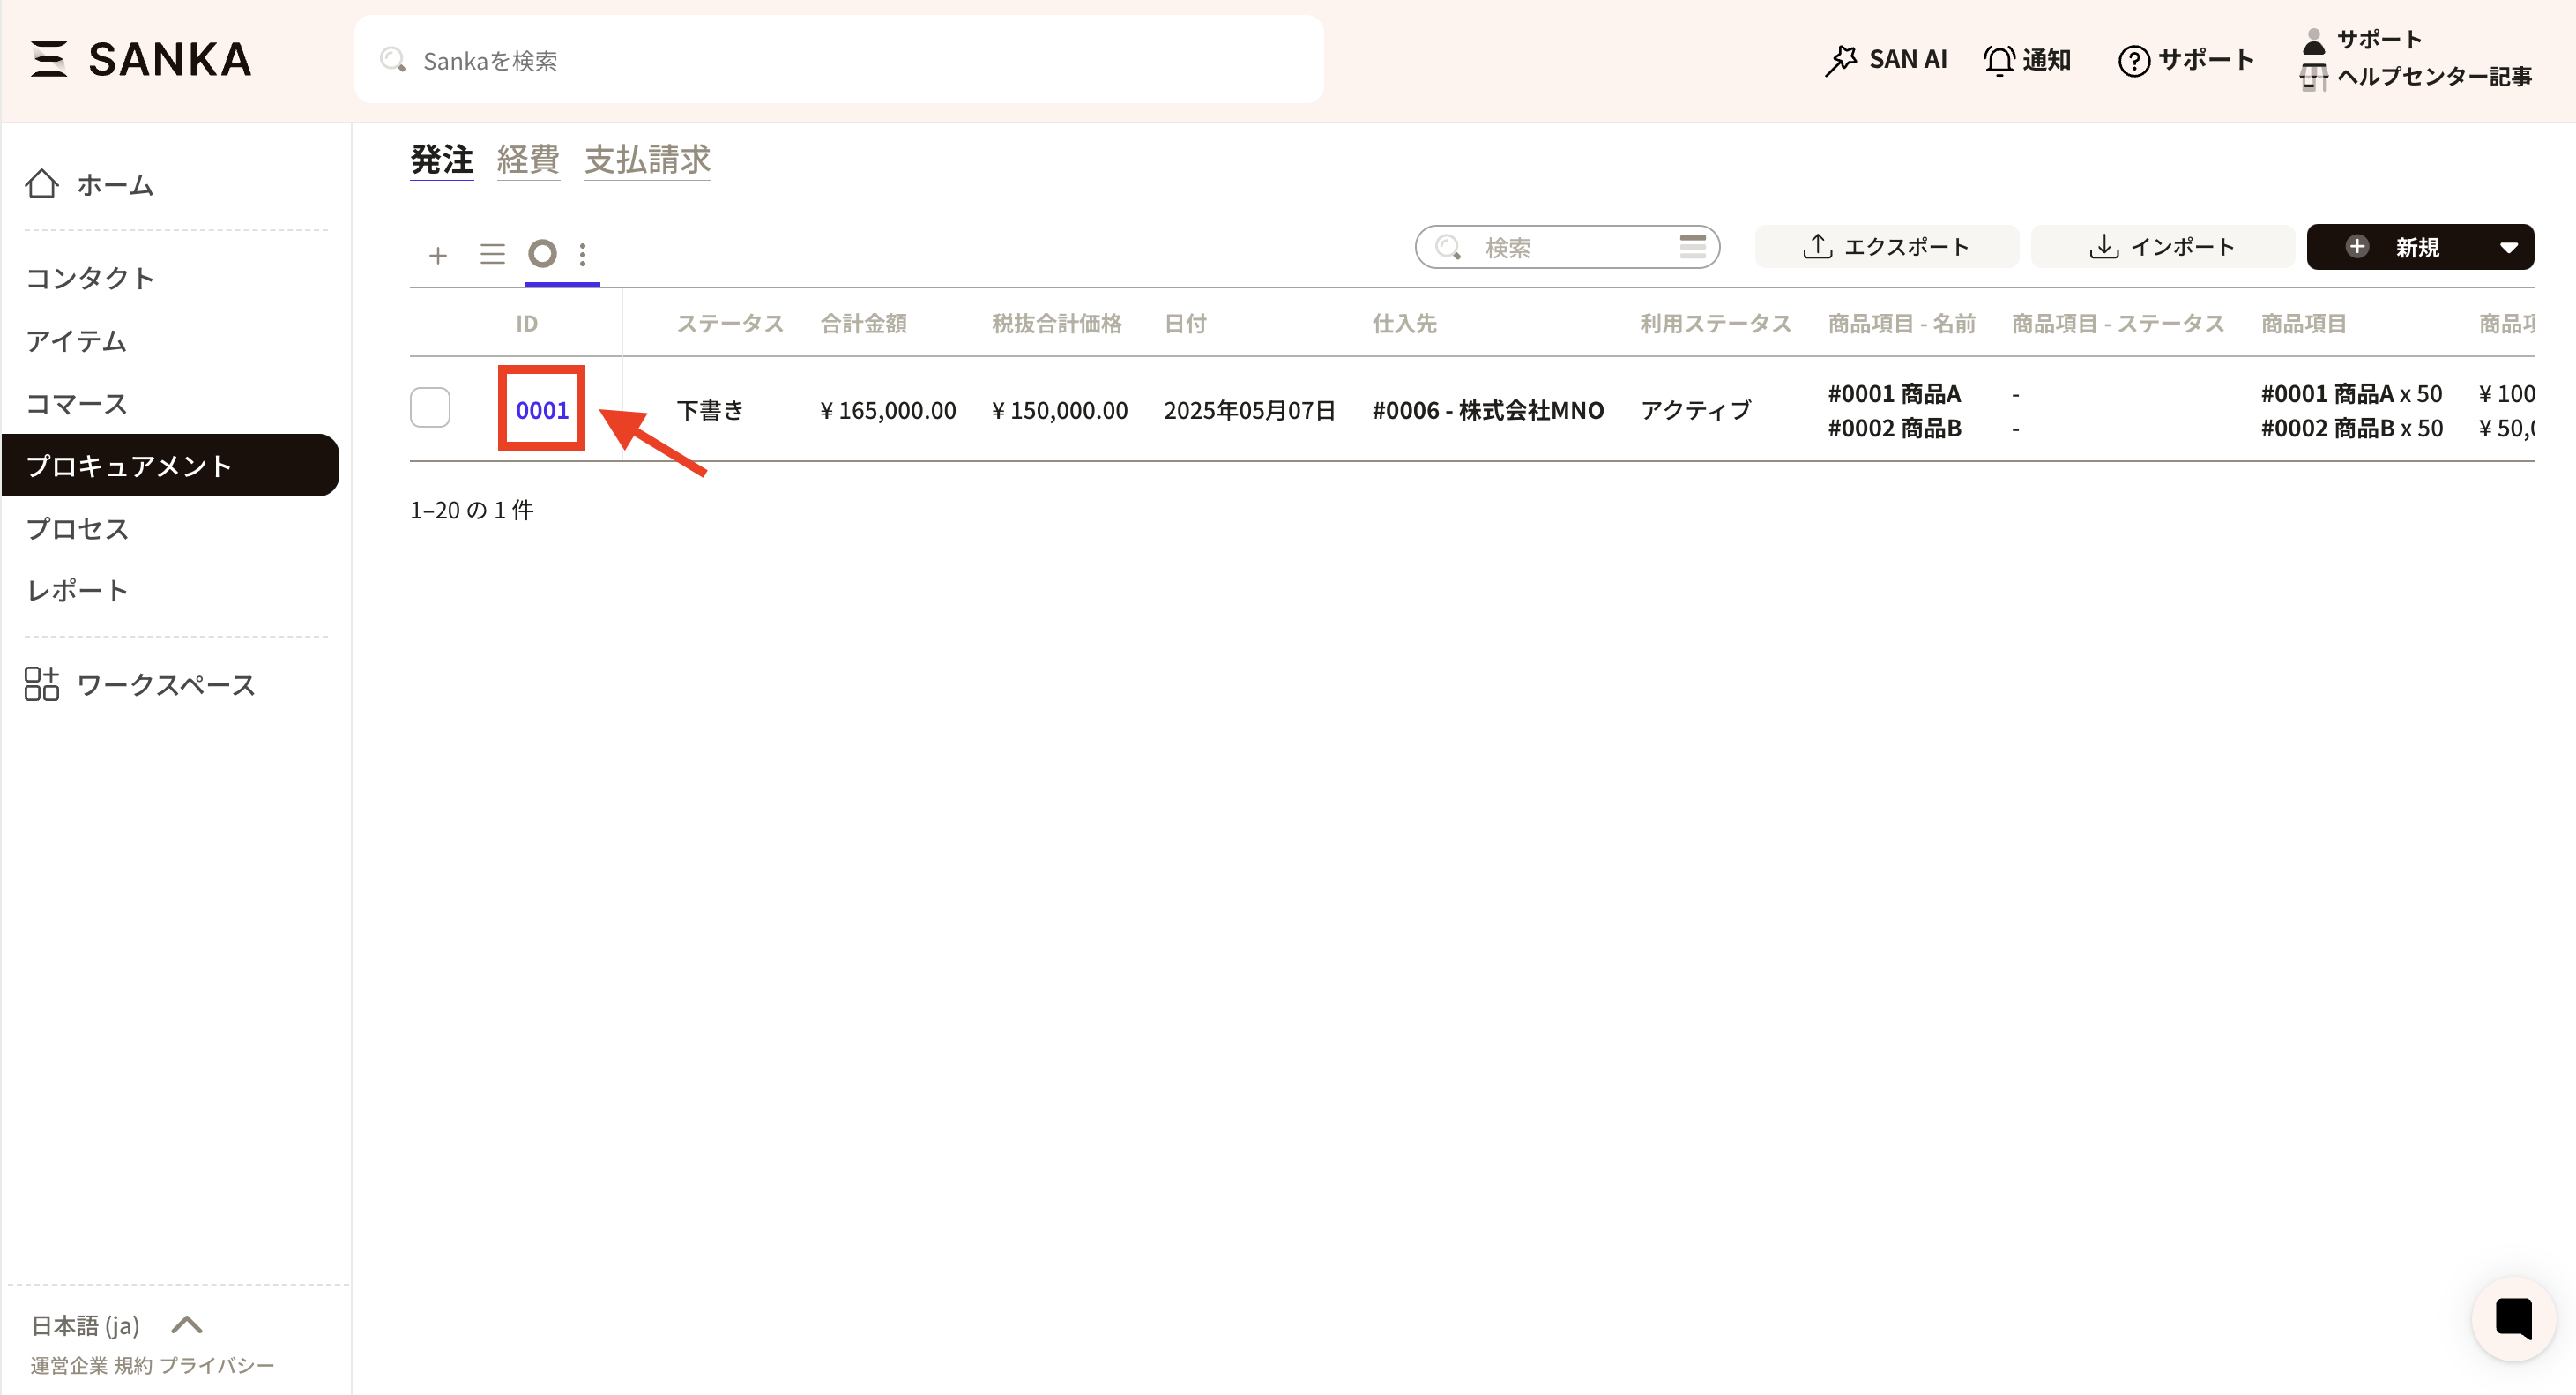 ②Click on "ID" to display the "Manage Order Records" menu, where you can modify the information. For example, change your status.
Finally, click "Update".
②Click on "ID" to display the "Manage Order Records" menu, where you can modify the information. For example, change your status.
Finally, click "Update".
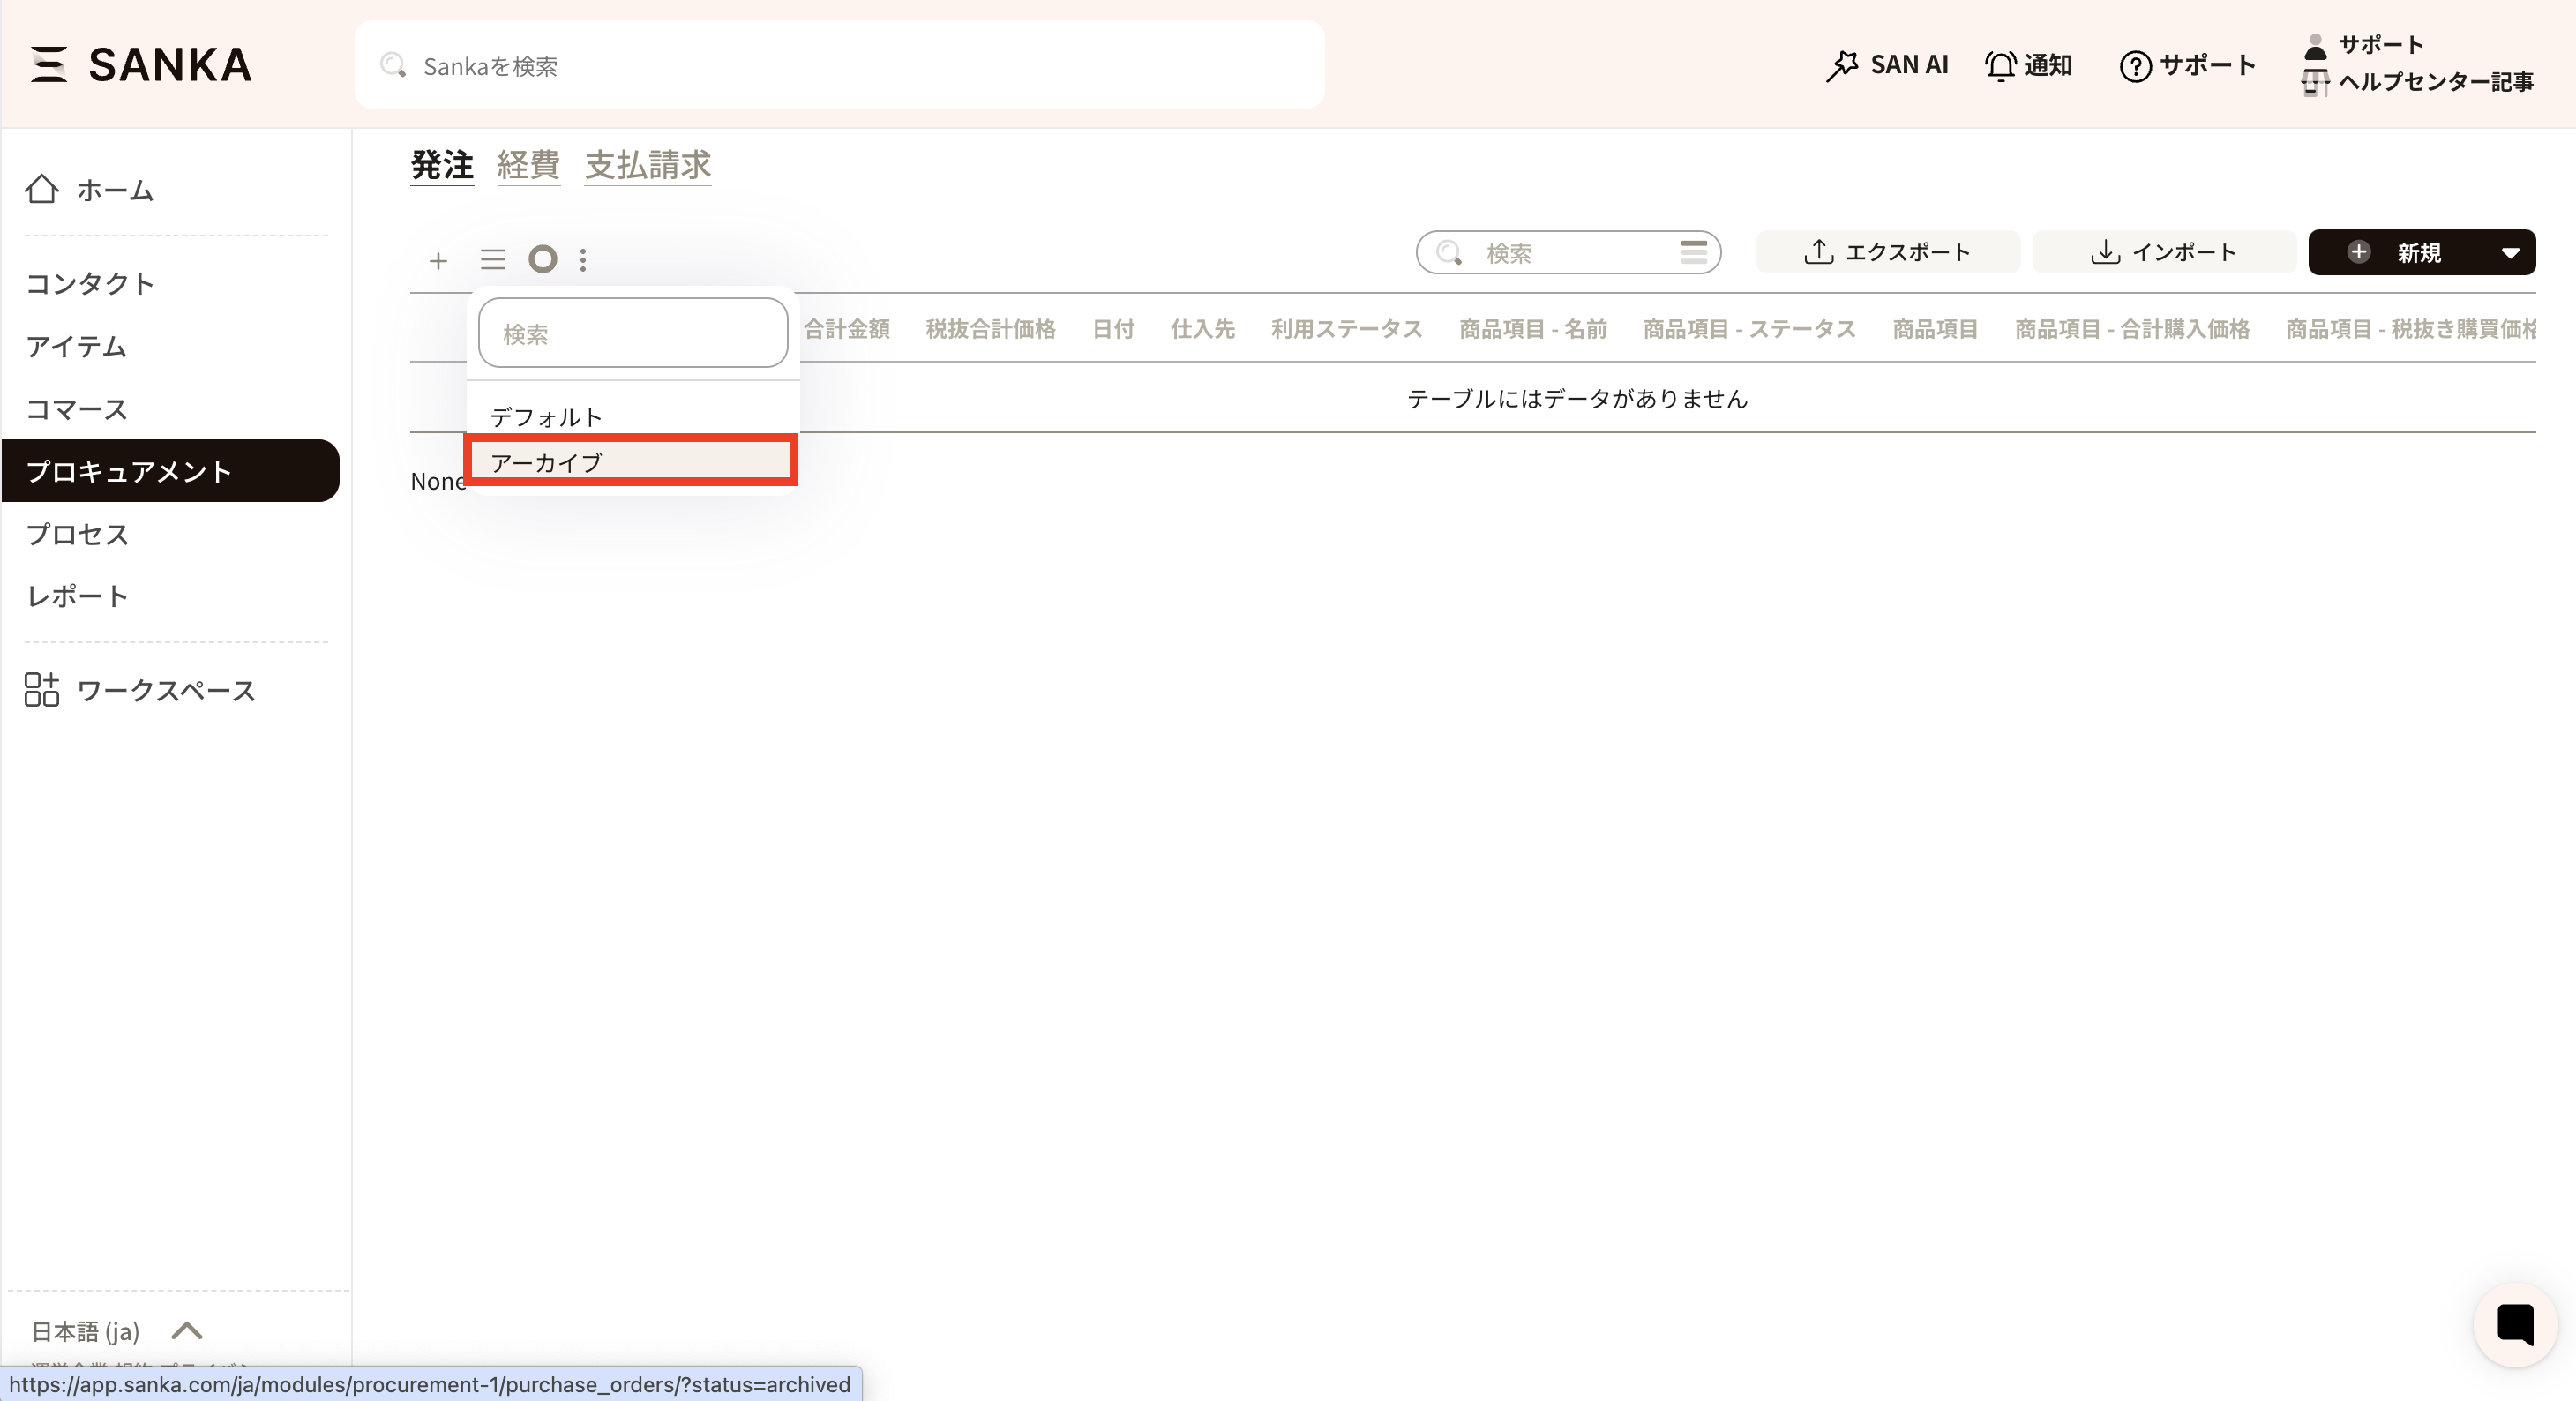
How to archive record information
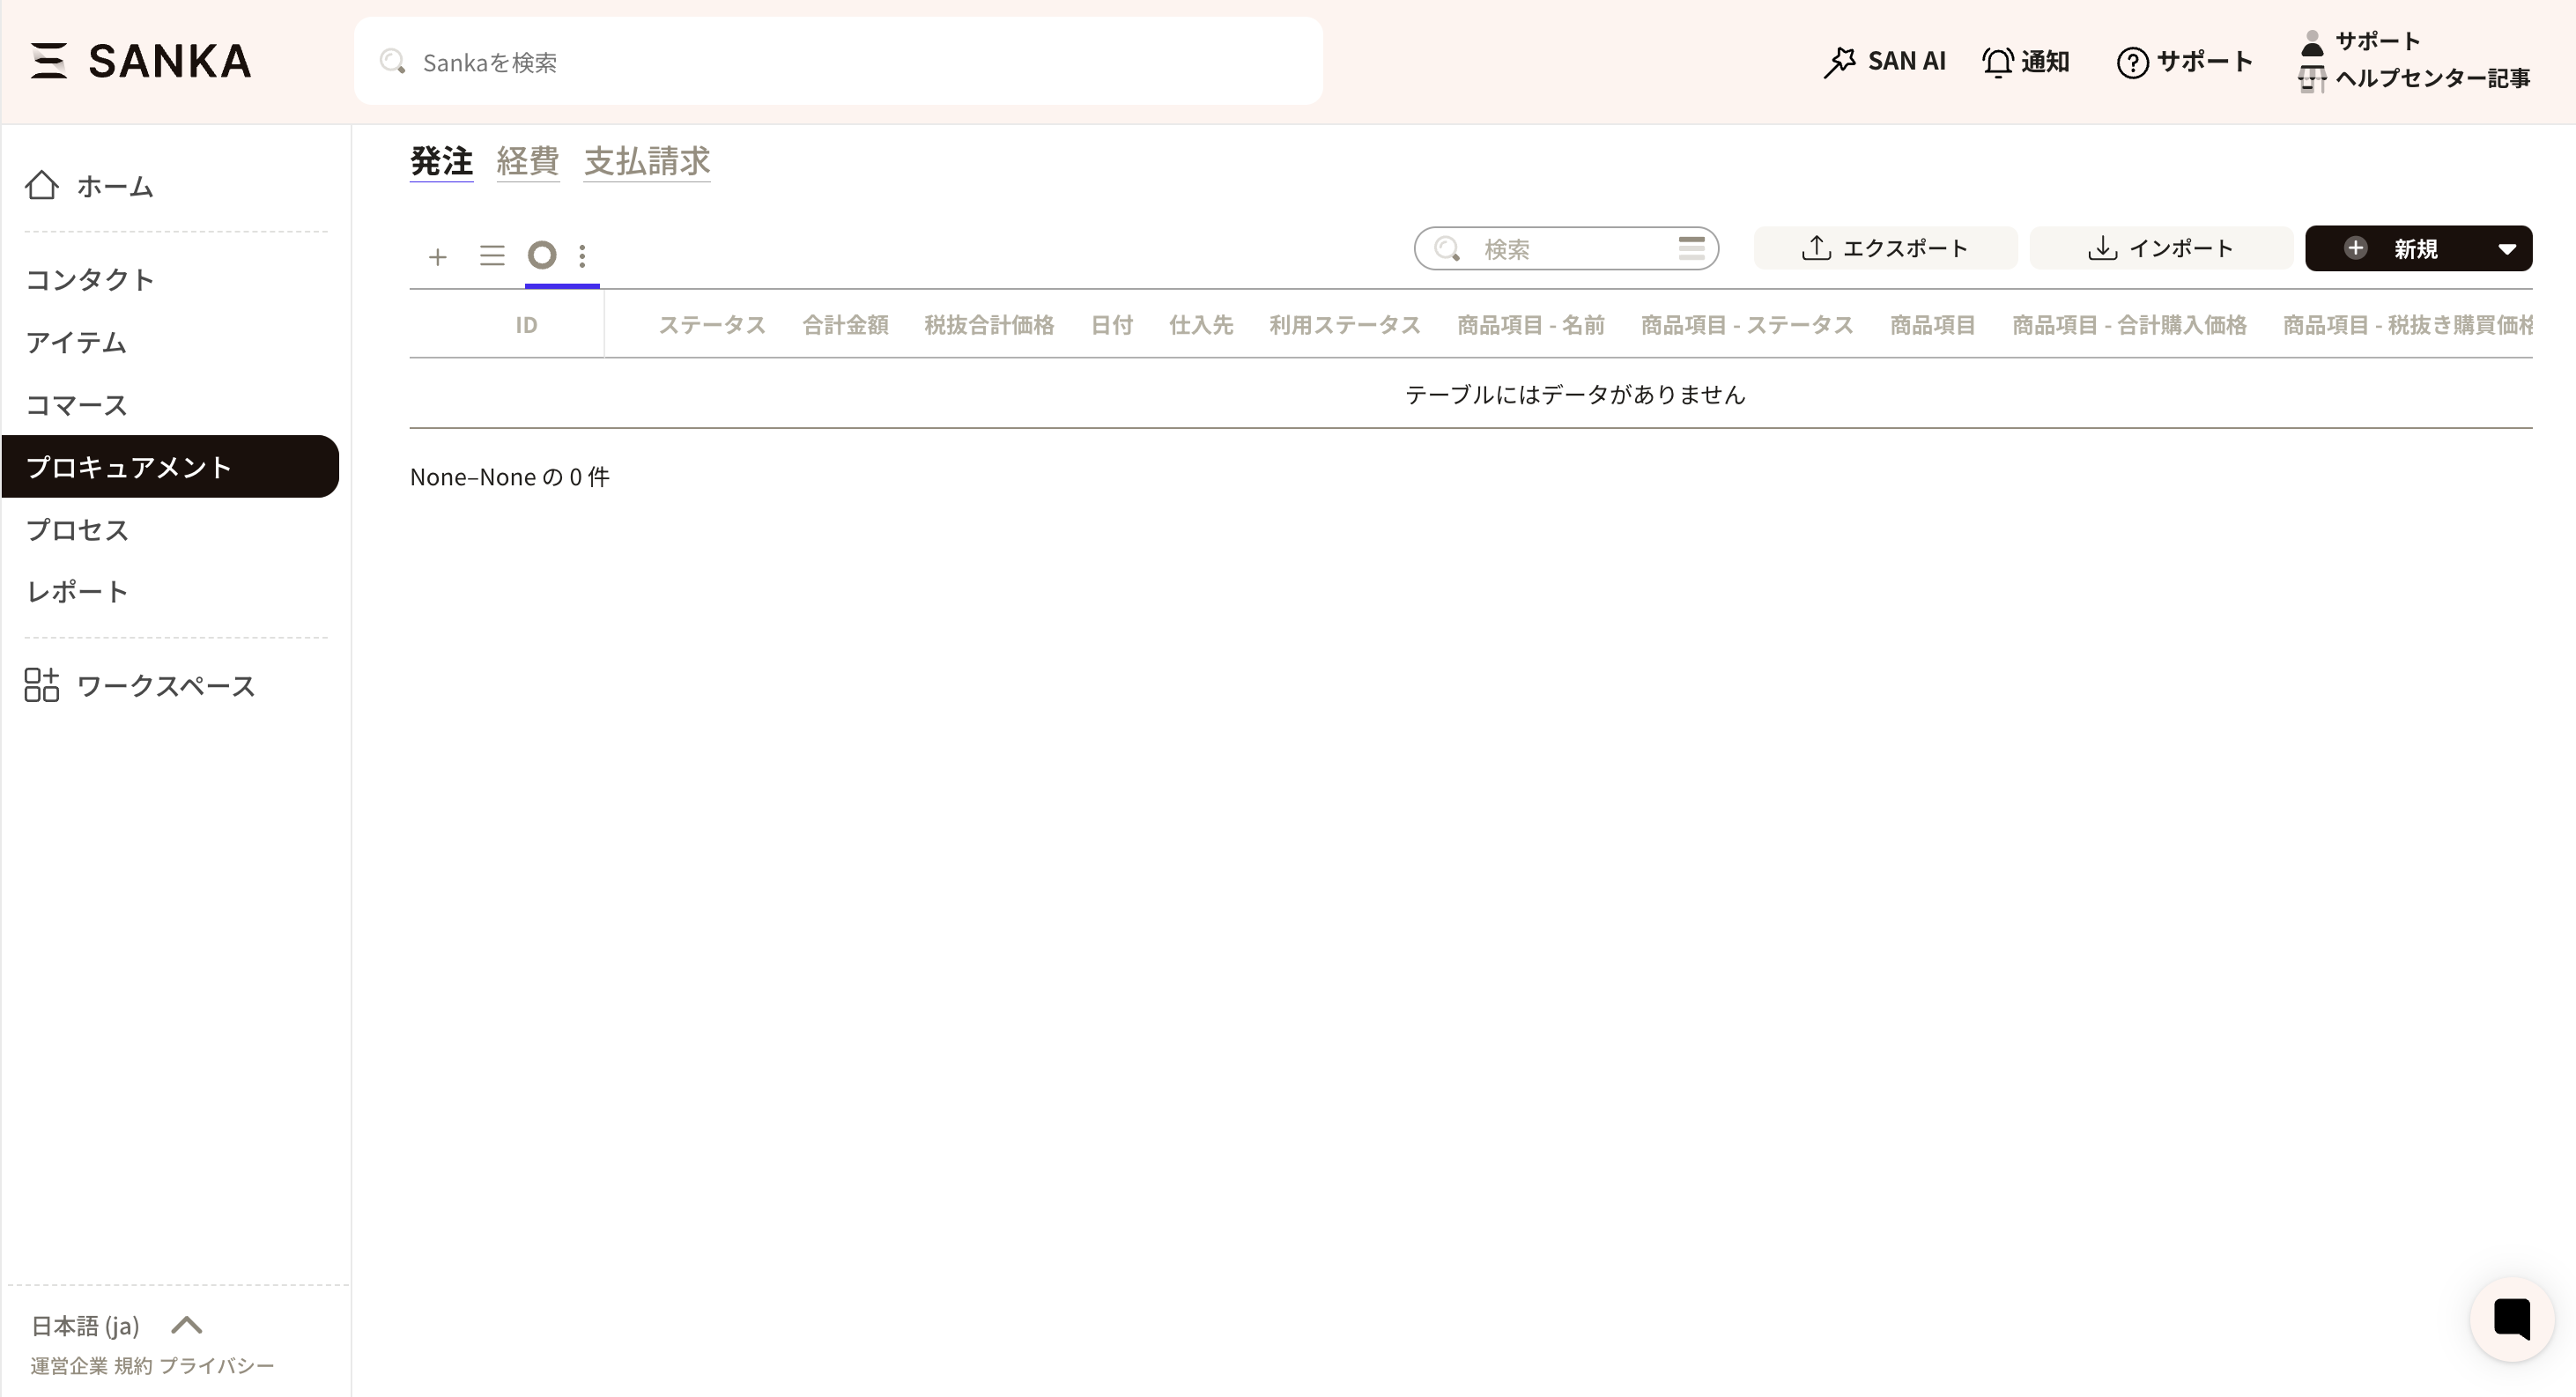
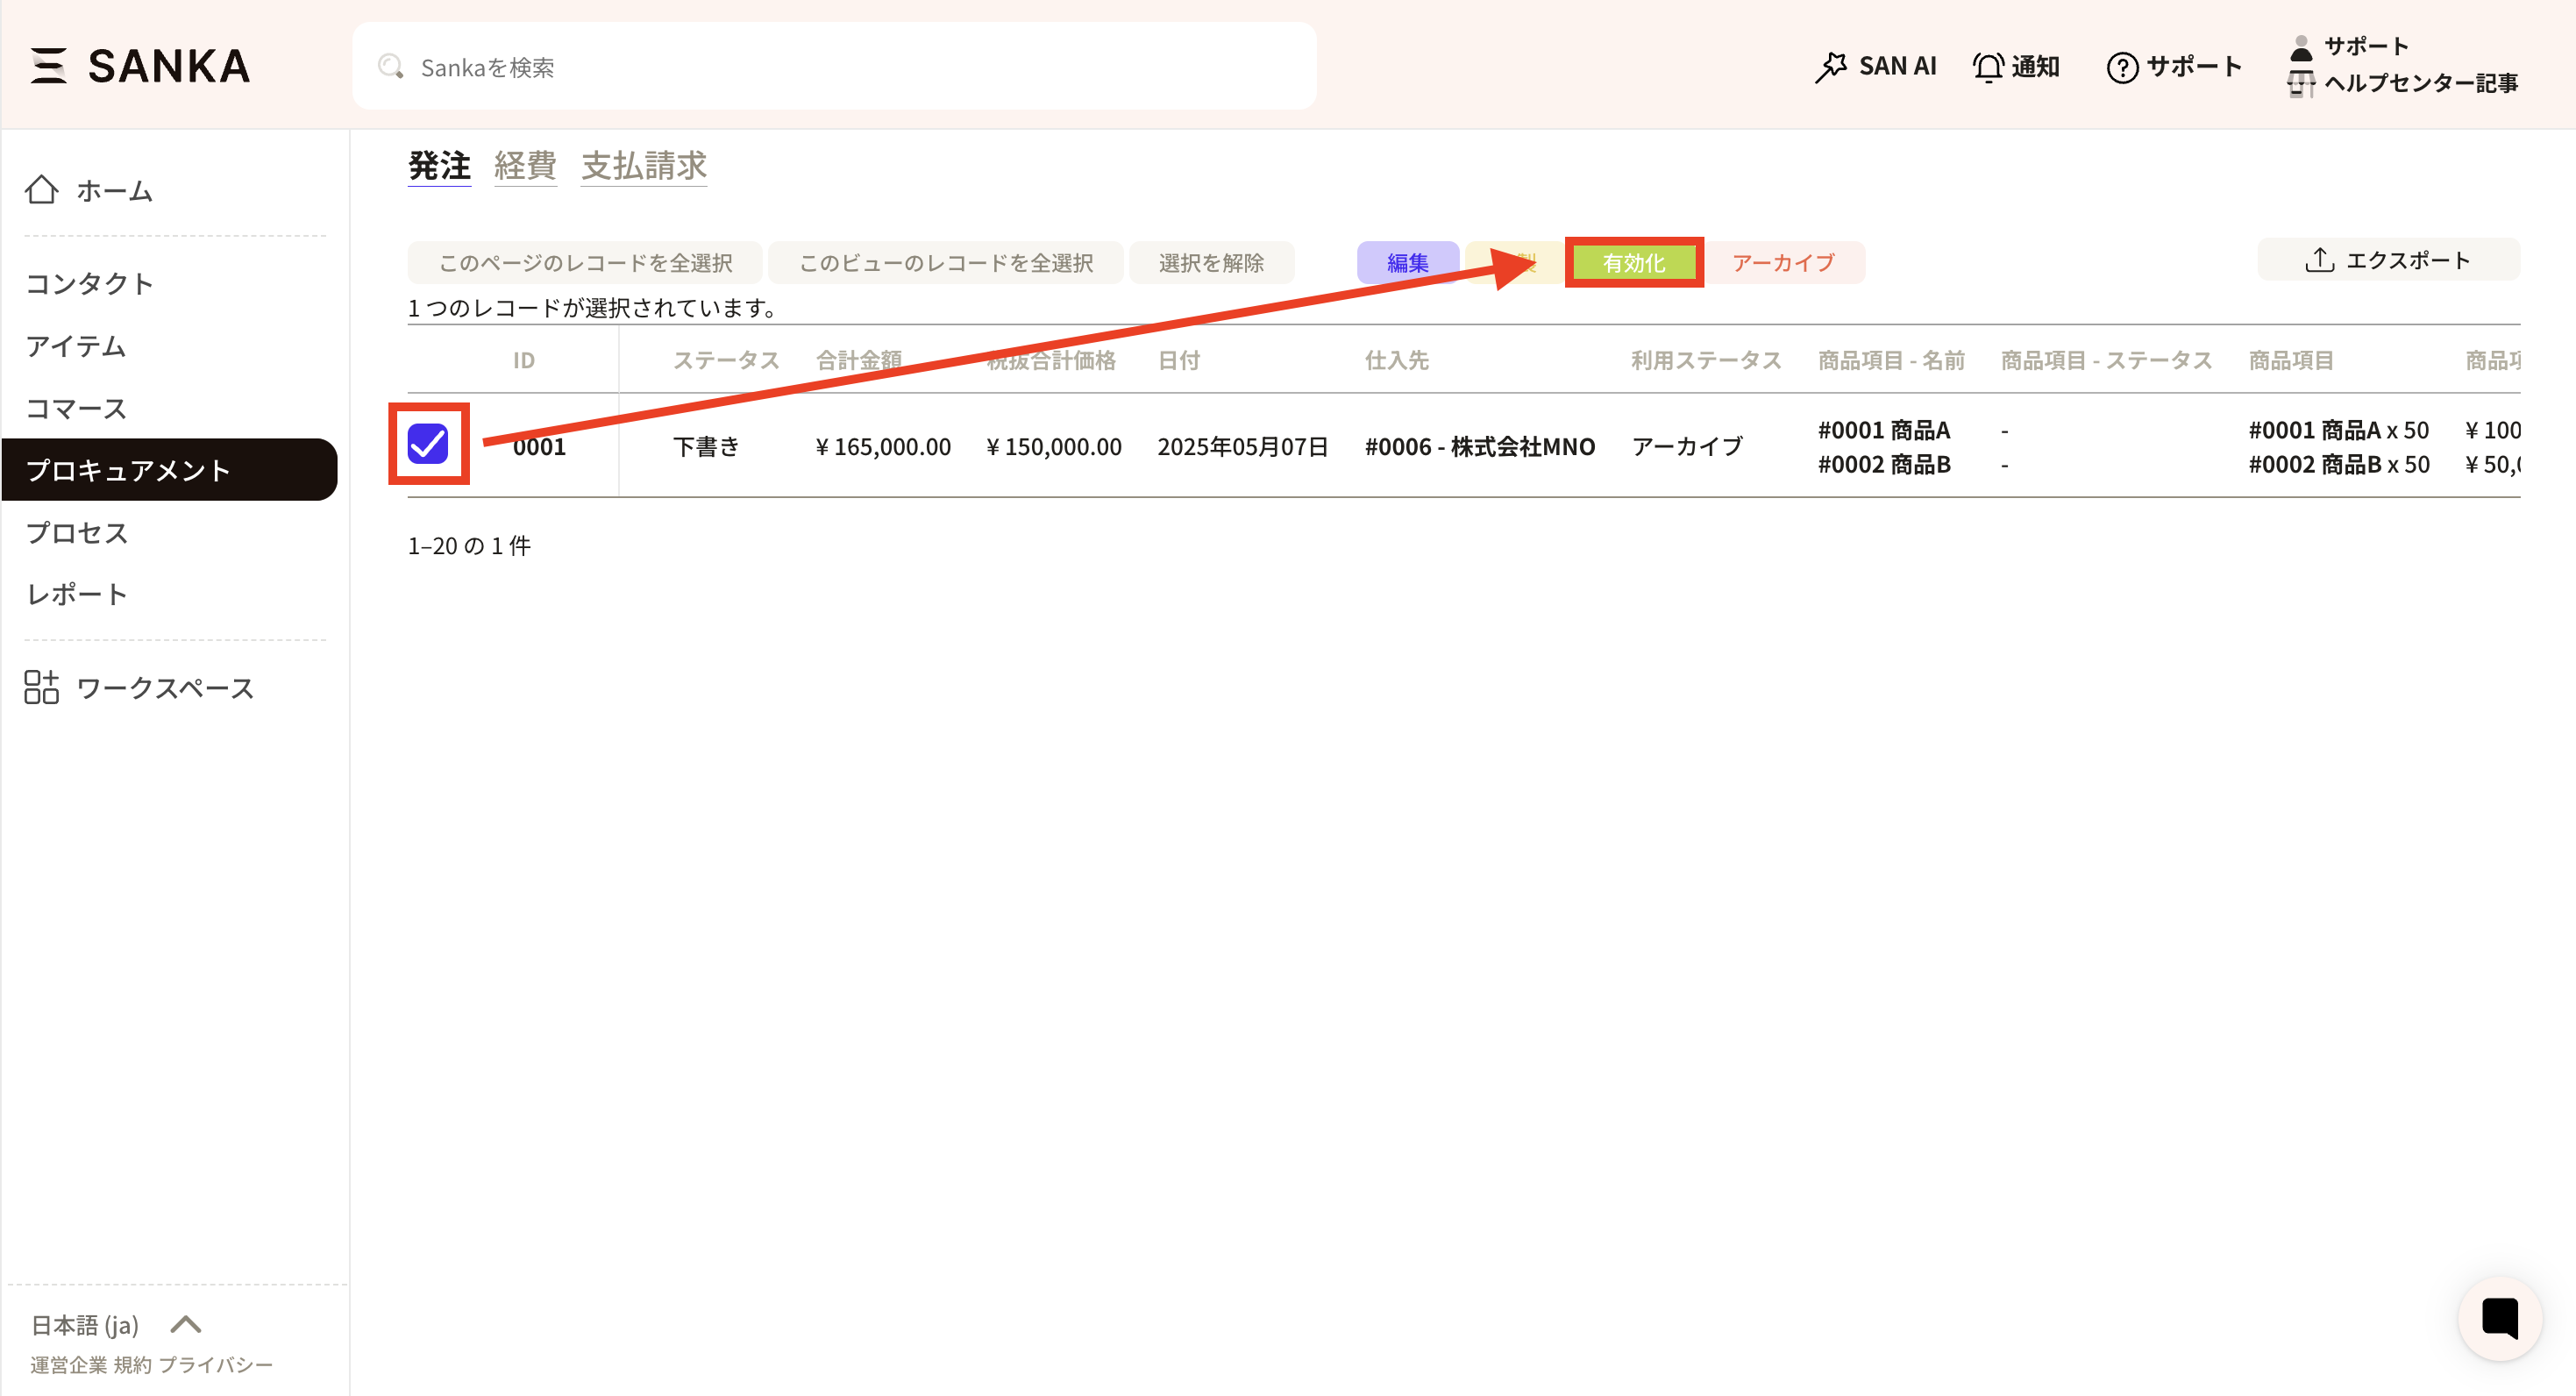
By using the archive function, you can hide registered purchase order information from the table. ①Click the box of the purchase order you want to archive and select "Archive".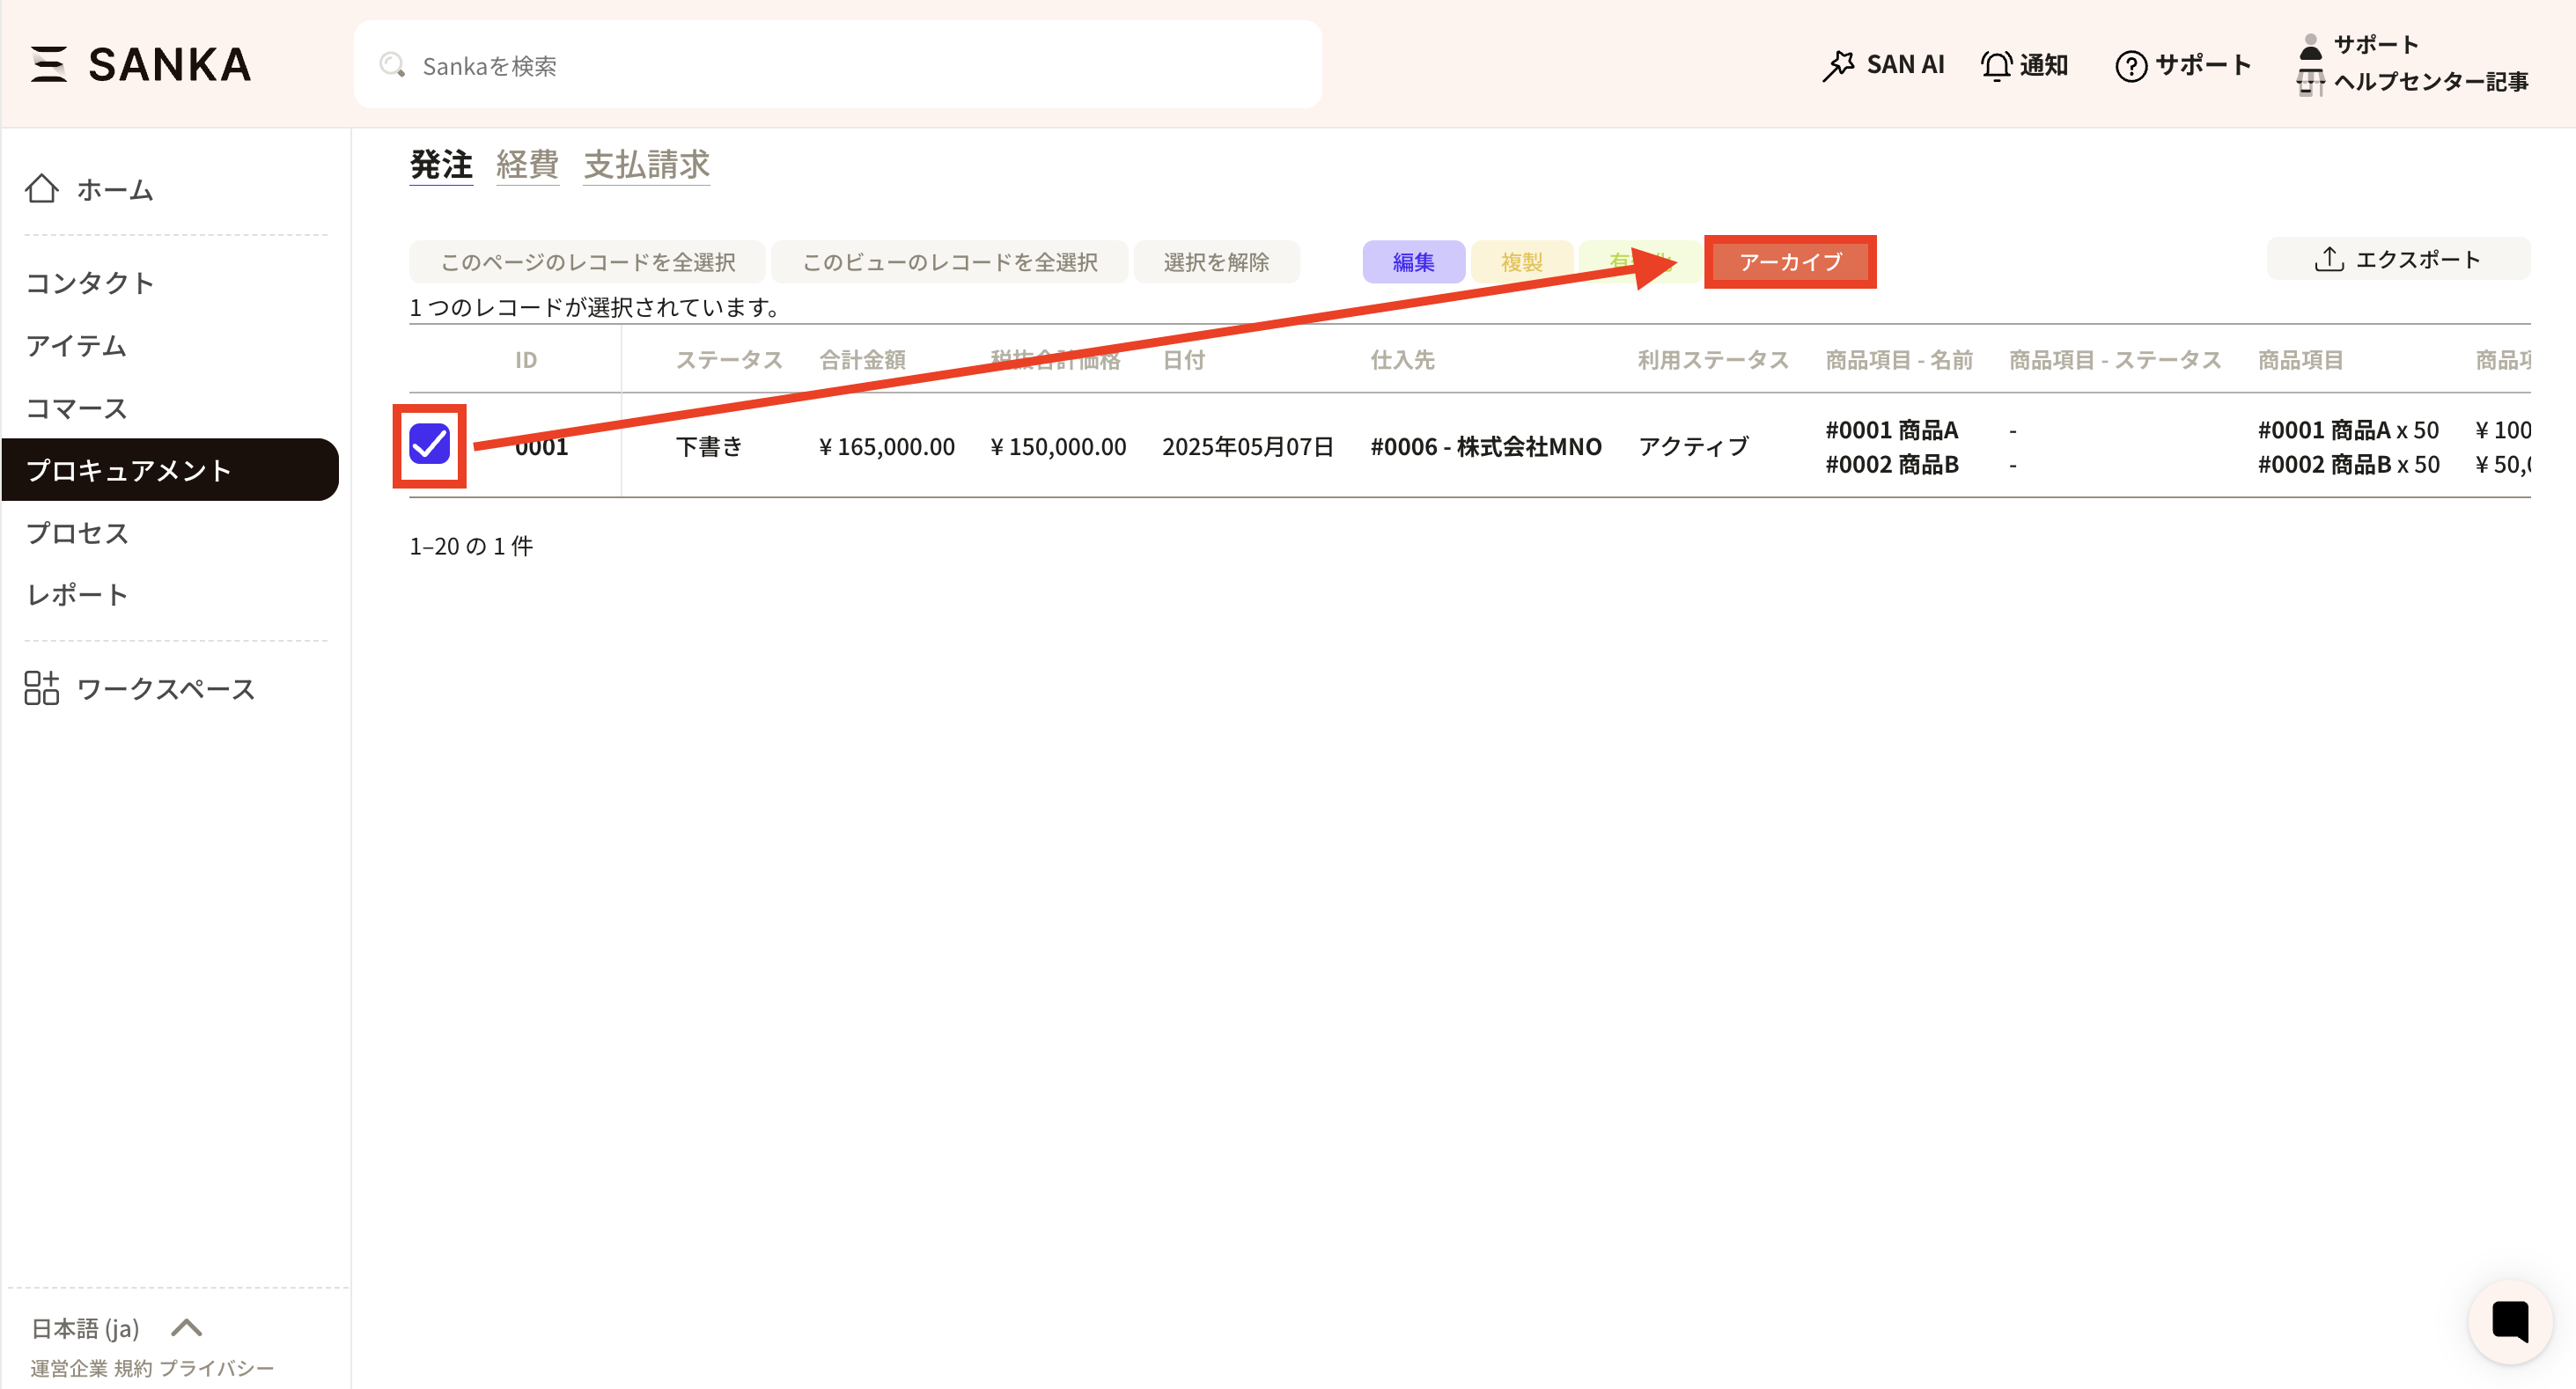 ② Archived records will no longer be displayed in the list.
 ③ If you want to cancel the archive, go to the three-line mark at the top left of the record list.
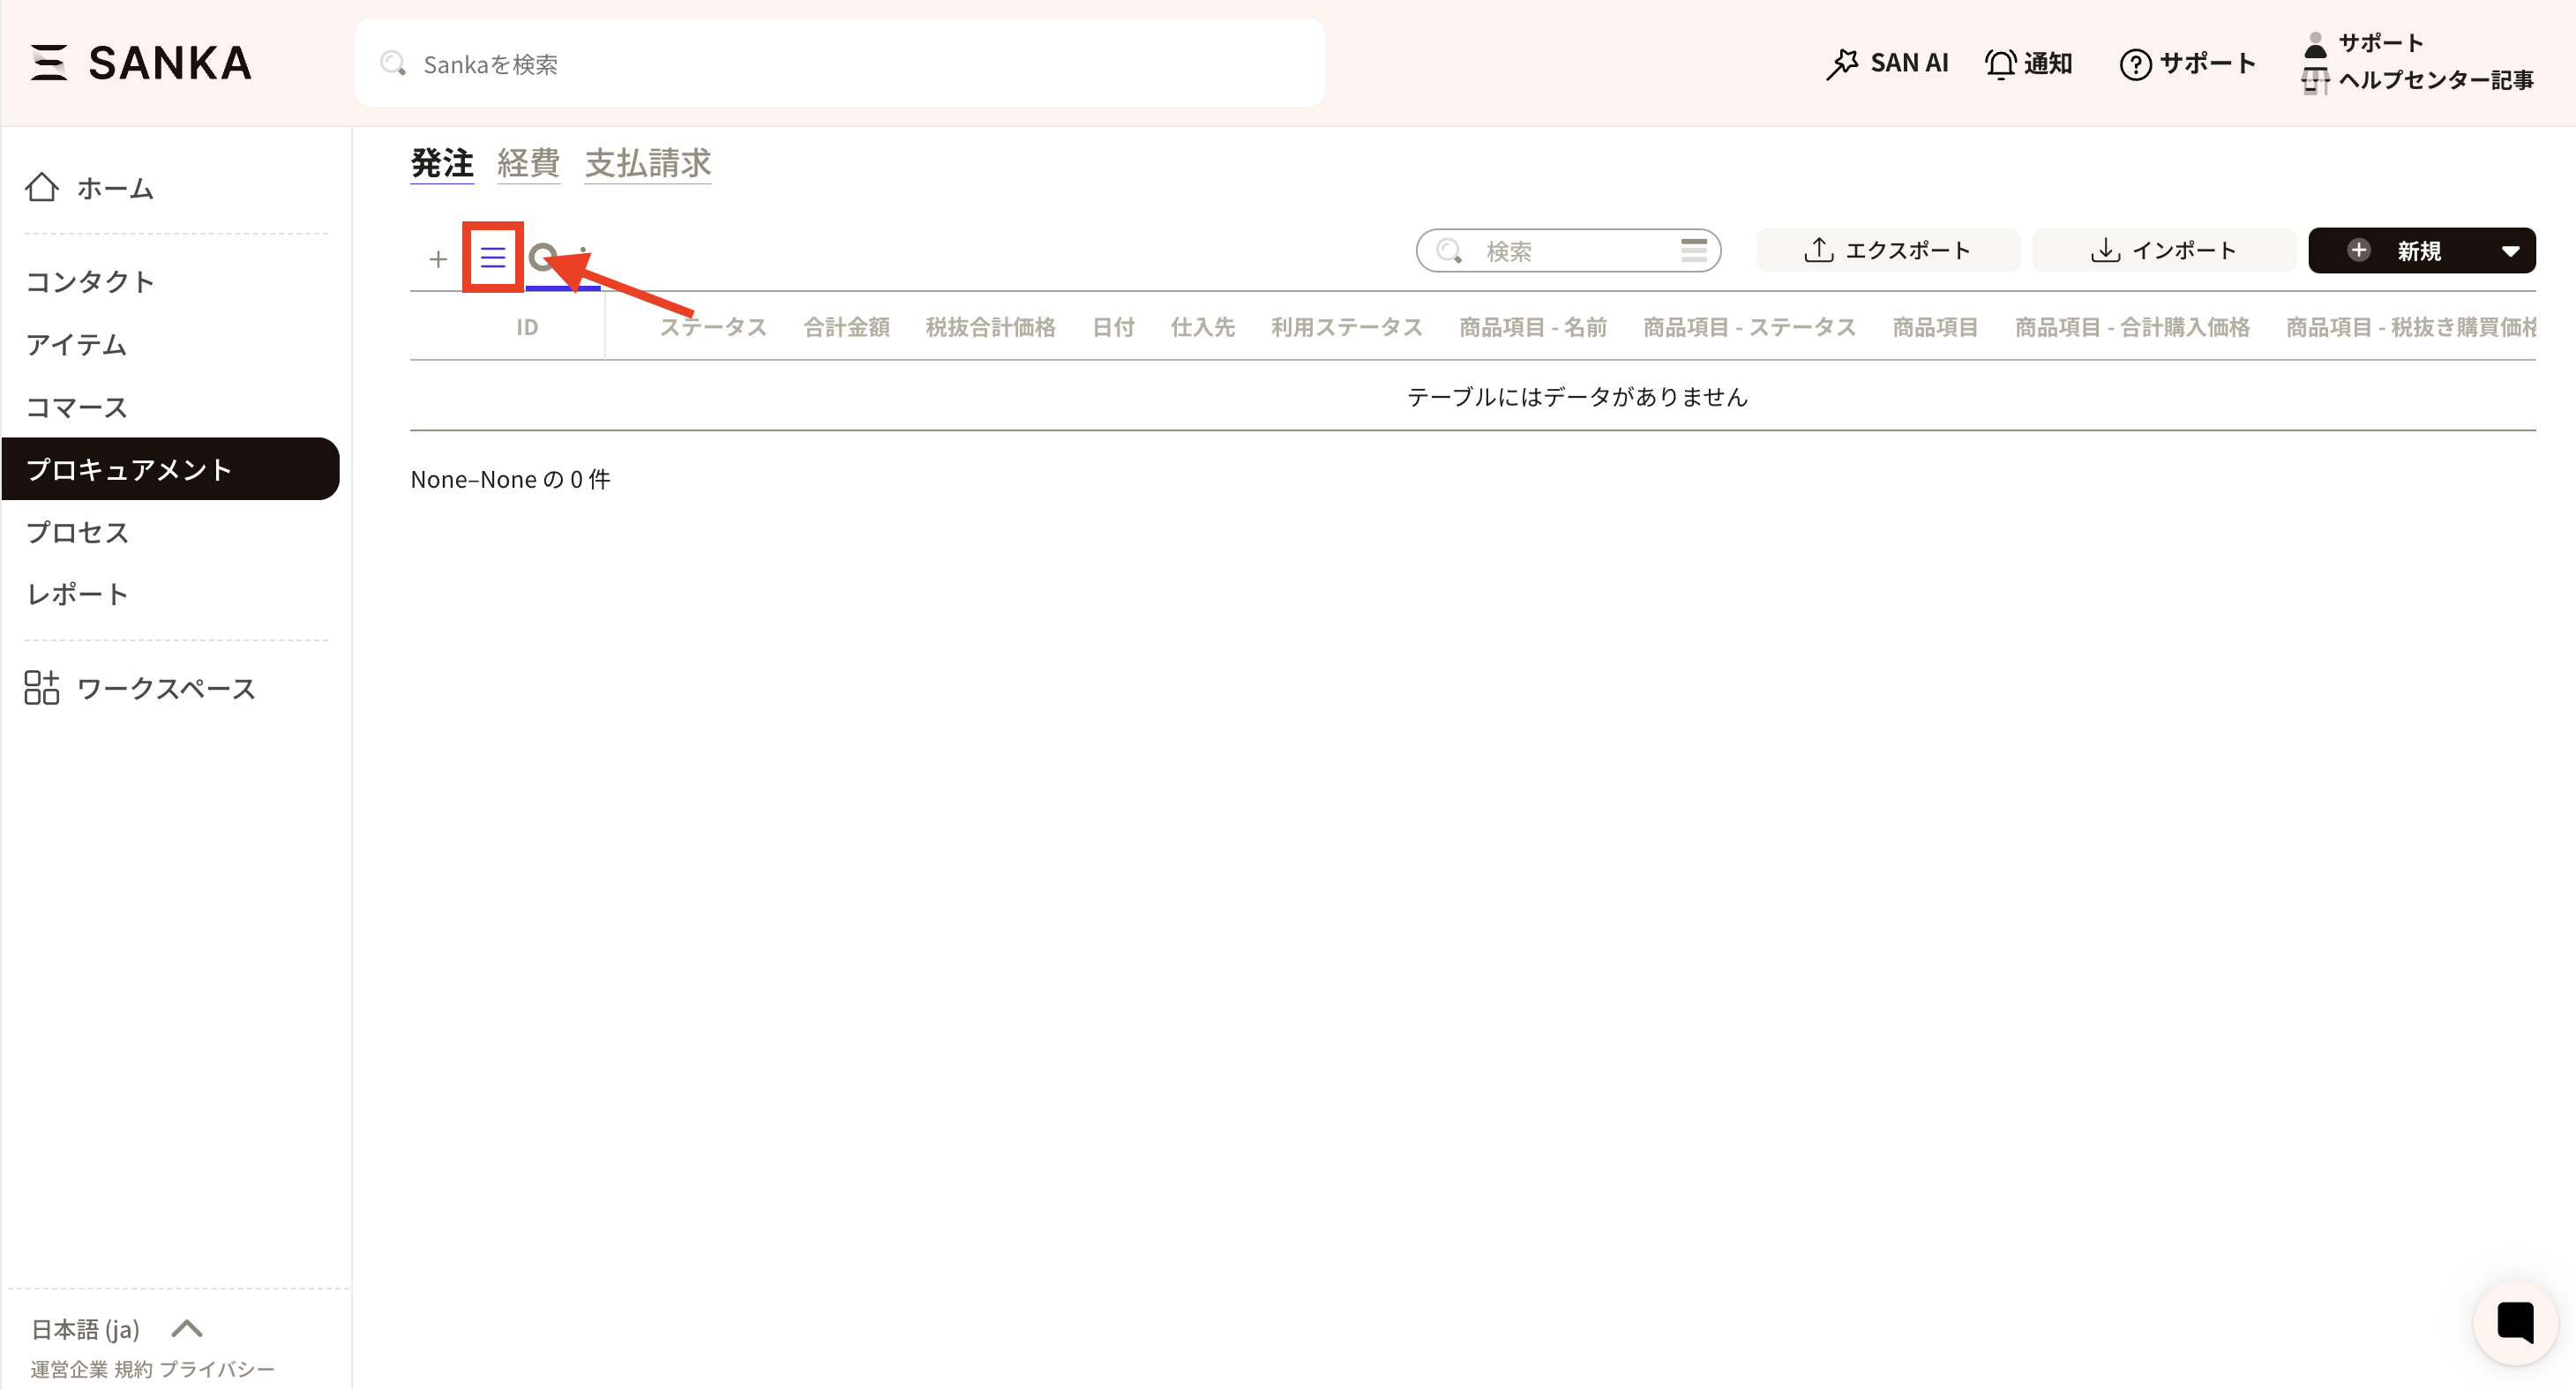 ④ Select the archive.
 ⑤ A list of records that have been archived so far will be displayed. Click the checkbox of the applicable record and press the Activate button.
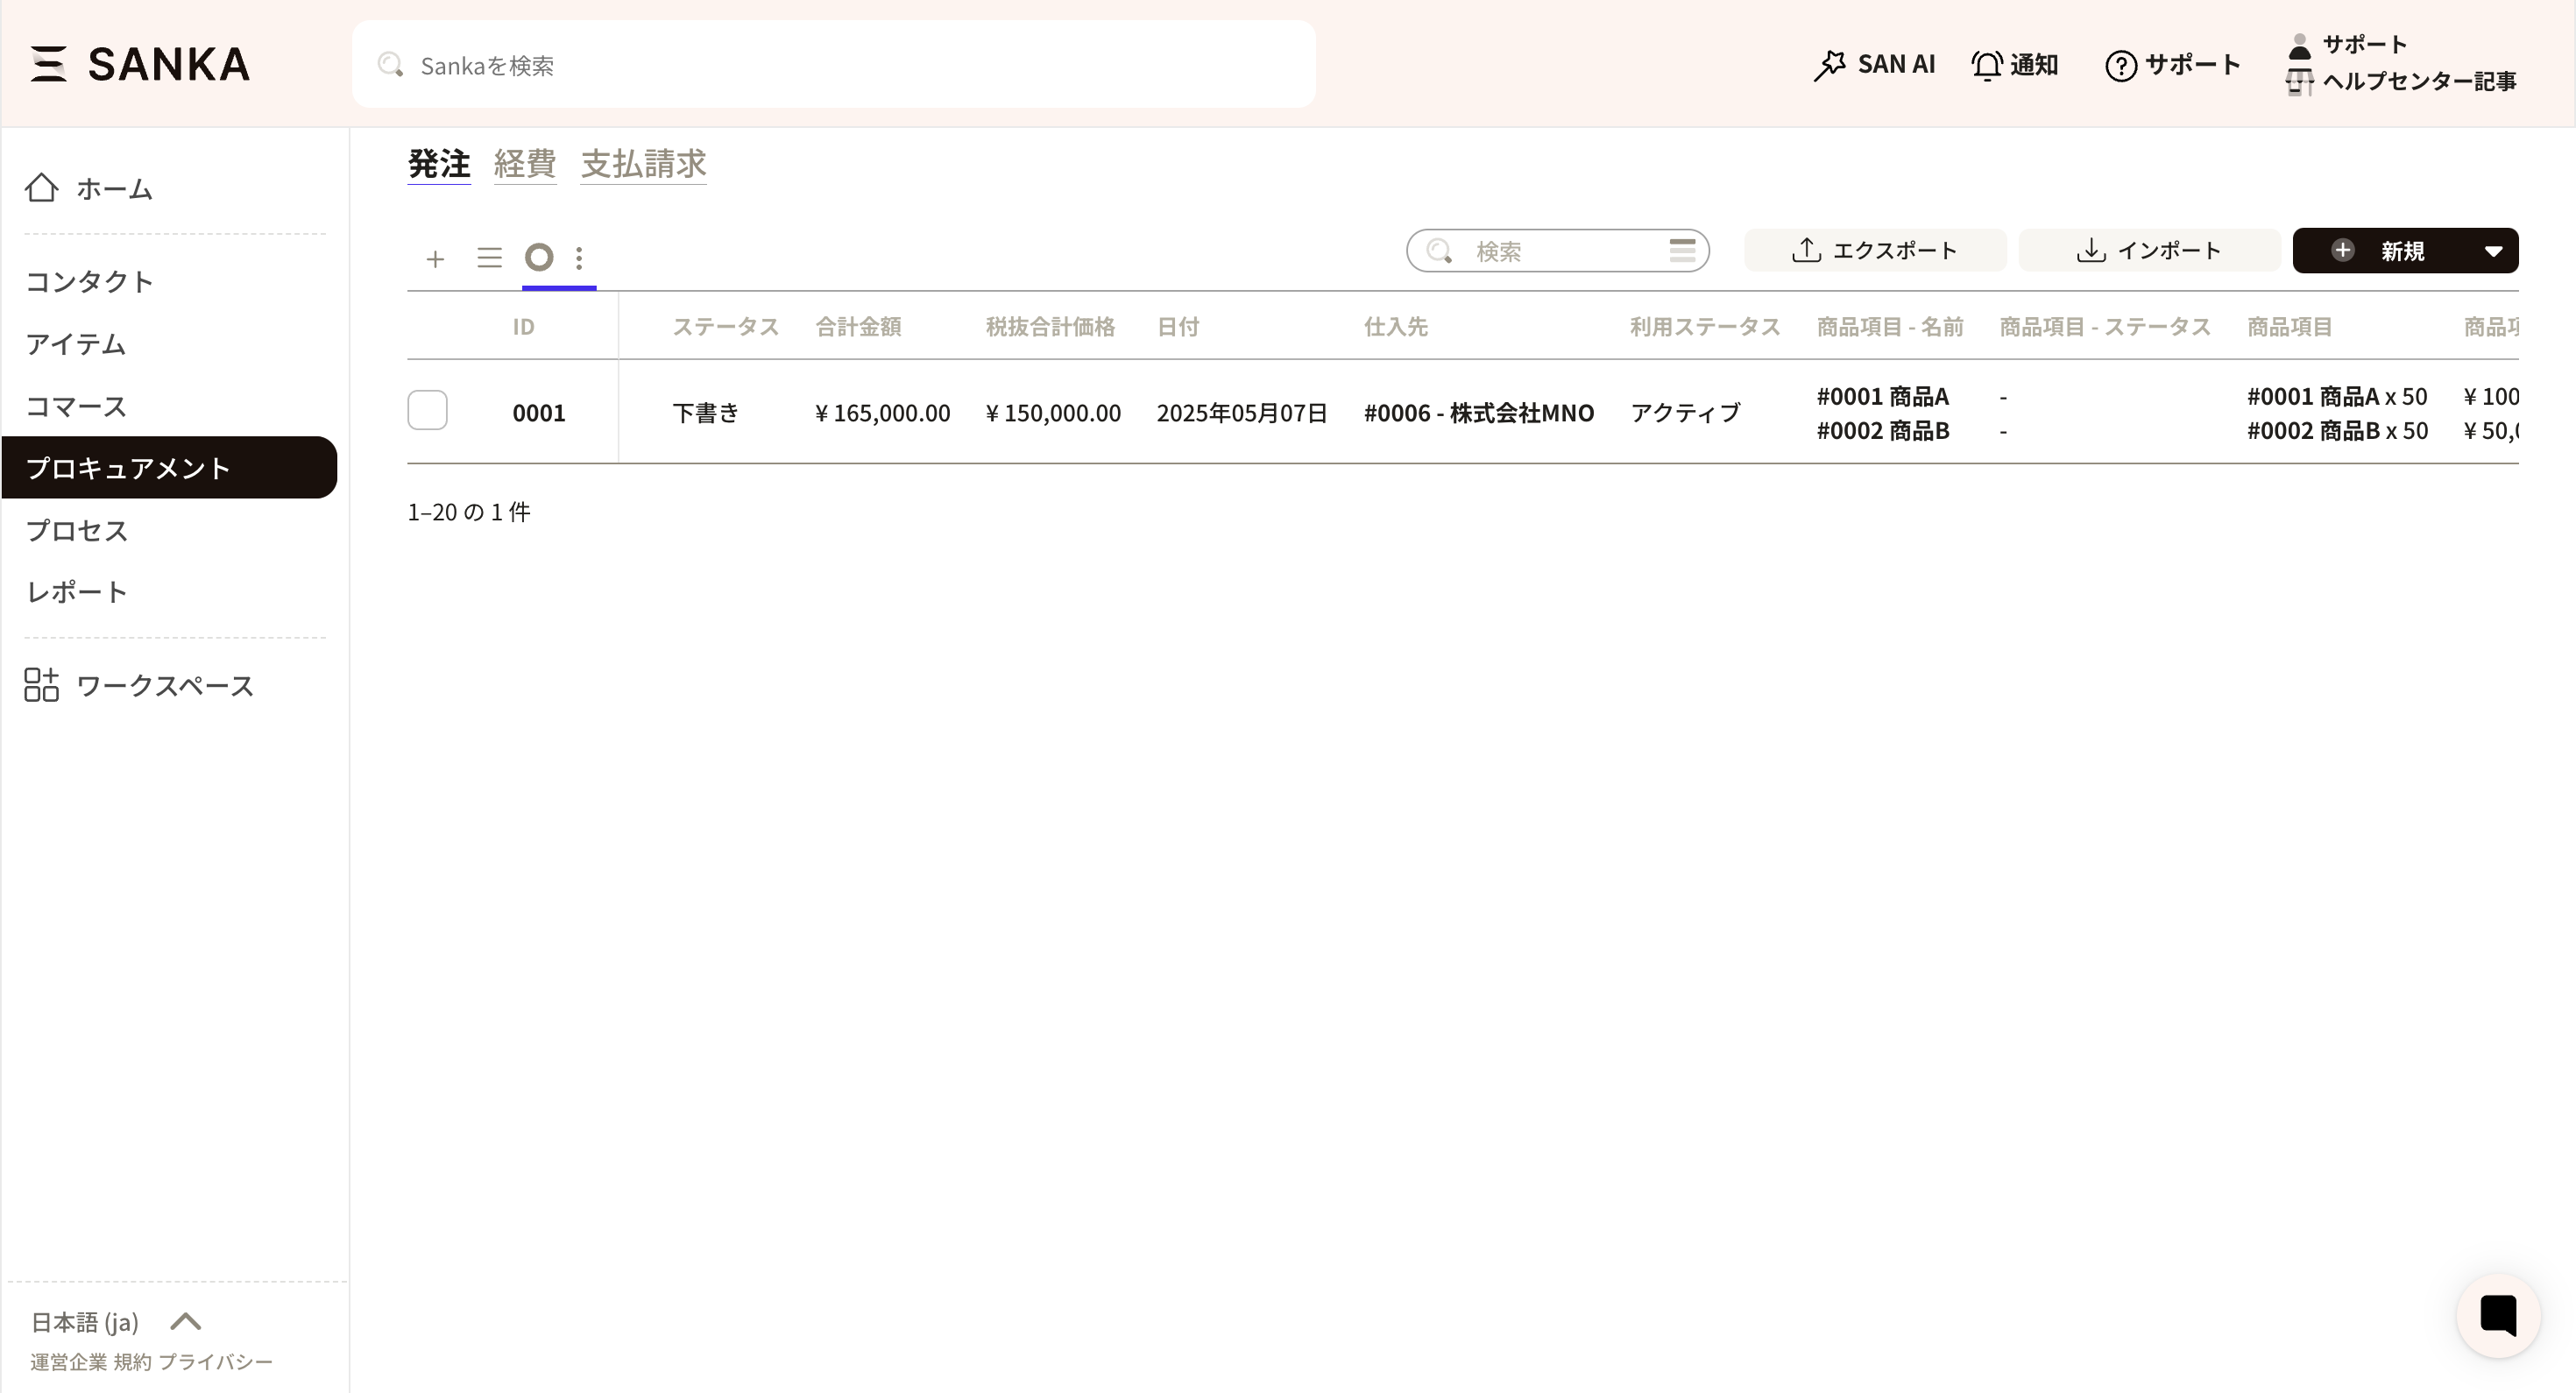
 ⑥ The activated record will return to normal display.
How to manage purchase orders and status for each item
This guide explains how to manage the status of each purchase order item and product in procurement and purchasing operations. Specifically, we will explain how to create and manage purchase orders, manage partial deliveries, status management, payment management, and invoice management. In the video below, you can check the method while watching the demo screen. Please also check.Create and manage purchase orders
When ordering or sourcing, use Sanka's "Procurement" menu. First, create a master of purchased items and issue a purchase order. In this example, we assume that you are ordering one knife A and one knife B.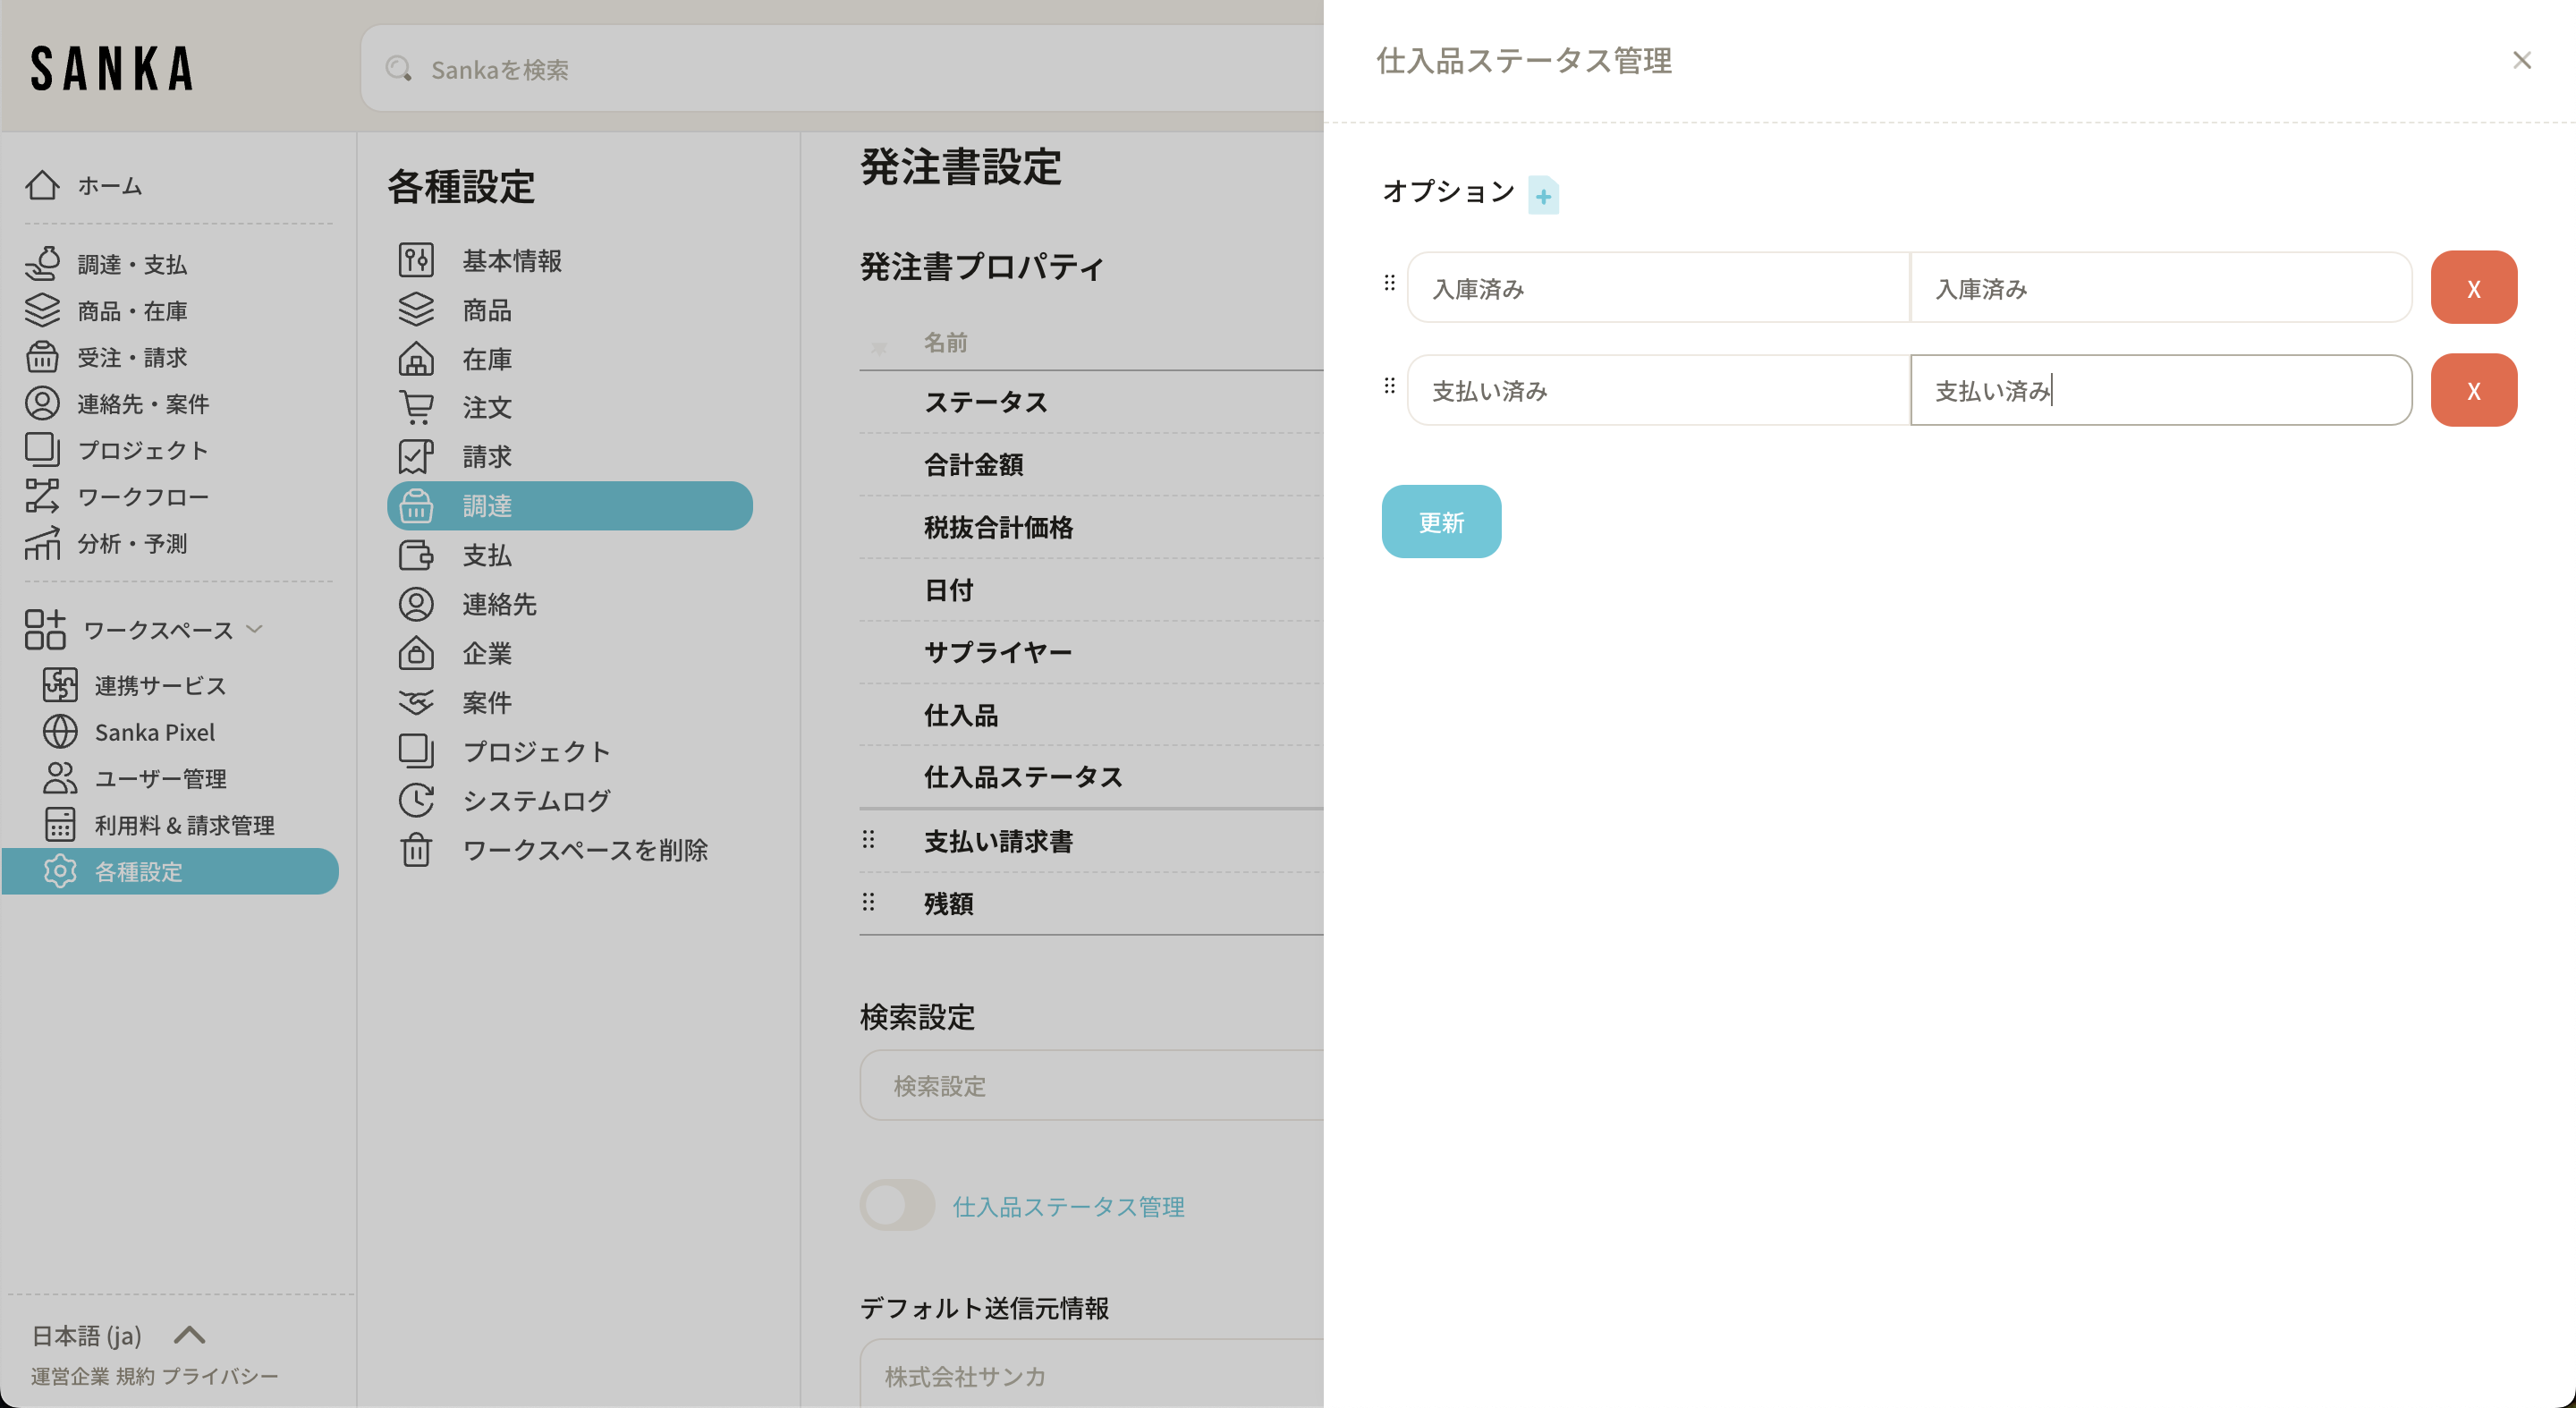
- Create a purchased items master : First, create a "purchased items" master. This example includes knives A, B, and C.
- Issuing a purchase order: Create a purchase order and send it to the supplier. A purchase order describes the items to be ordered and is managed as needed.
How to manage partial deliveries
When you place a purchase order, the ordered products may only be partially delivered. Sanka provides detailed control over the status of purchase orders to accommodate partial deliveries.- Status management settings: Turn on "Purchase status management" in the procurement menu. This allows you to manage each status individually, such as ordered, received, and paid.
- Update purchase order status : When the product is delivered, the status is changed to "In stock" and subsequent payment status is also managed.
Status management details
Purchasing order status management is important to keep track of product receipt and payment status in detail.- Ordered status : After issuing and sending the purchase order, set the status to "Ordered".
- In stock status: When the product is in stock, it will be changed to "In stock".
- Paid status: When the delivery note is received and payment is completed, the status will be updated to "Paid".
Status management for each product
If you want to manage the status of each product rather than each purchase order, use the item table.- Item table settings : Set up "Purchase status management" in item table format. This allows you to see the status of each product individually, giving you more control.
- Add rows : Manage the status of each product by setting the rows to increase according to the number of products.
Payment management and invoice management
Payment management is important after the purchased goods are delivered. With Sanka, you can centrally manage your payment status, including invoice management.- Update your payment status: Once you receive your invoice, update your payment status to "Paid".
- Bill management: Register your bill information in Sanka to easily manage payments.