Receipt object overview
Introducing how to create and manage deposit objects.
Deposit object overview
In Sanka's order management solution, the receipt object is a key feature for recording and managing the financial aspects of a transaction. Deposits are used as a means of specifying payment for an order and accurately understanding the flow of money between a business and a customer. The deposit object is used for the following purposes:- Proof of payment
- Unified management of transaction history with customers
- Coordination with sales invoices and orders
- Response to financial reports and audits
Using deposit objects
Receipt objects support your operations through the following key features: Payment records: Deposit records explicitly record payments from business partners, allowing you to clearly manage the amount, content, and timing. **Verification with orders: **By comparing the deposit details with the original order, it is possible to prevent unpaid and excessive deposits. **Building trusting relationships with customers: **By sharing appropriate payment records, you can build highly reliable business relationships with your customers. **Record storage: **By centrally managing deposit records on Sanka, you can use them for future reference and reporting. Coordination with other objects: By linking with order, delivery, and sales invoice objects, you can consistently manage the entire transaction flow.Importance of deposit objects
Receipt objects play an important role in corporate financial management for the following reasons: Accurate financial management: Accurately record all payments to keep your balances consistent. Transaction visualization: Instantly understand which customers paid for which orders, when and how much they paid. Trouble avoidance: When troubles such as erroneous deposits or non-payments occur, you can quickly respond based on records. Improved operational efficiency: Integrated with Sanka's management system to ensure smooth deposit processing. Legal Compliance/Audit Response: Keeping a clear history of deposits will also be useful for internal audits and tax compliance.Default properties for deposit objects
The receipt object contains the following key fields: “Deposit ID”: A unique identifier that allows each deposit record to be tracked and referenced. “Customer Information”: Contains information such as customer name, address, and contact information, which helps clarify where the payment should be made. "Product Details": Provides detailed information about the product to be paid for (product name, quantity, unit price, etc.). “Deposit Date”: Indicates the date on which the deposit was recorded. Status: Track the progress of your deposit (draft, sent, scheduled, paid). With this information, the receipt object maintains the integrity of your financial records and provides a mechanism for future review and auditing.Conclusion
Sanka's Receipt Object is a core feature that helps businesses manage their finances accurately and efficiently. Transparency of the entire transaction is ensured through accurate records and coordination with other objects, providing highly reliable information for a wide range of operations such as customer support, auditing, and reporting. By leveraging Sanka's management capabilities, businesses can minimize errors in payment processing and create a foundation for sustainable growth.How to register a new deposit record
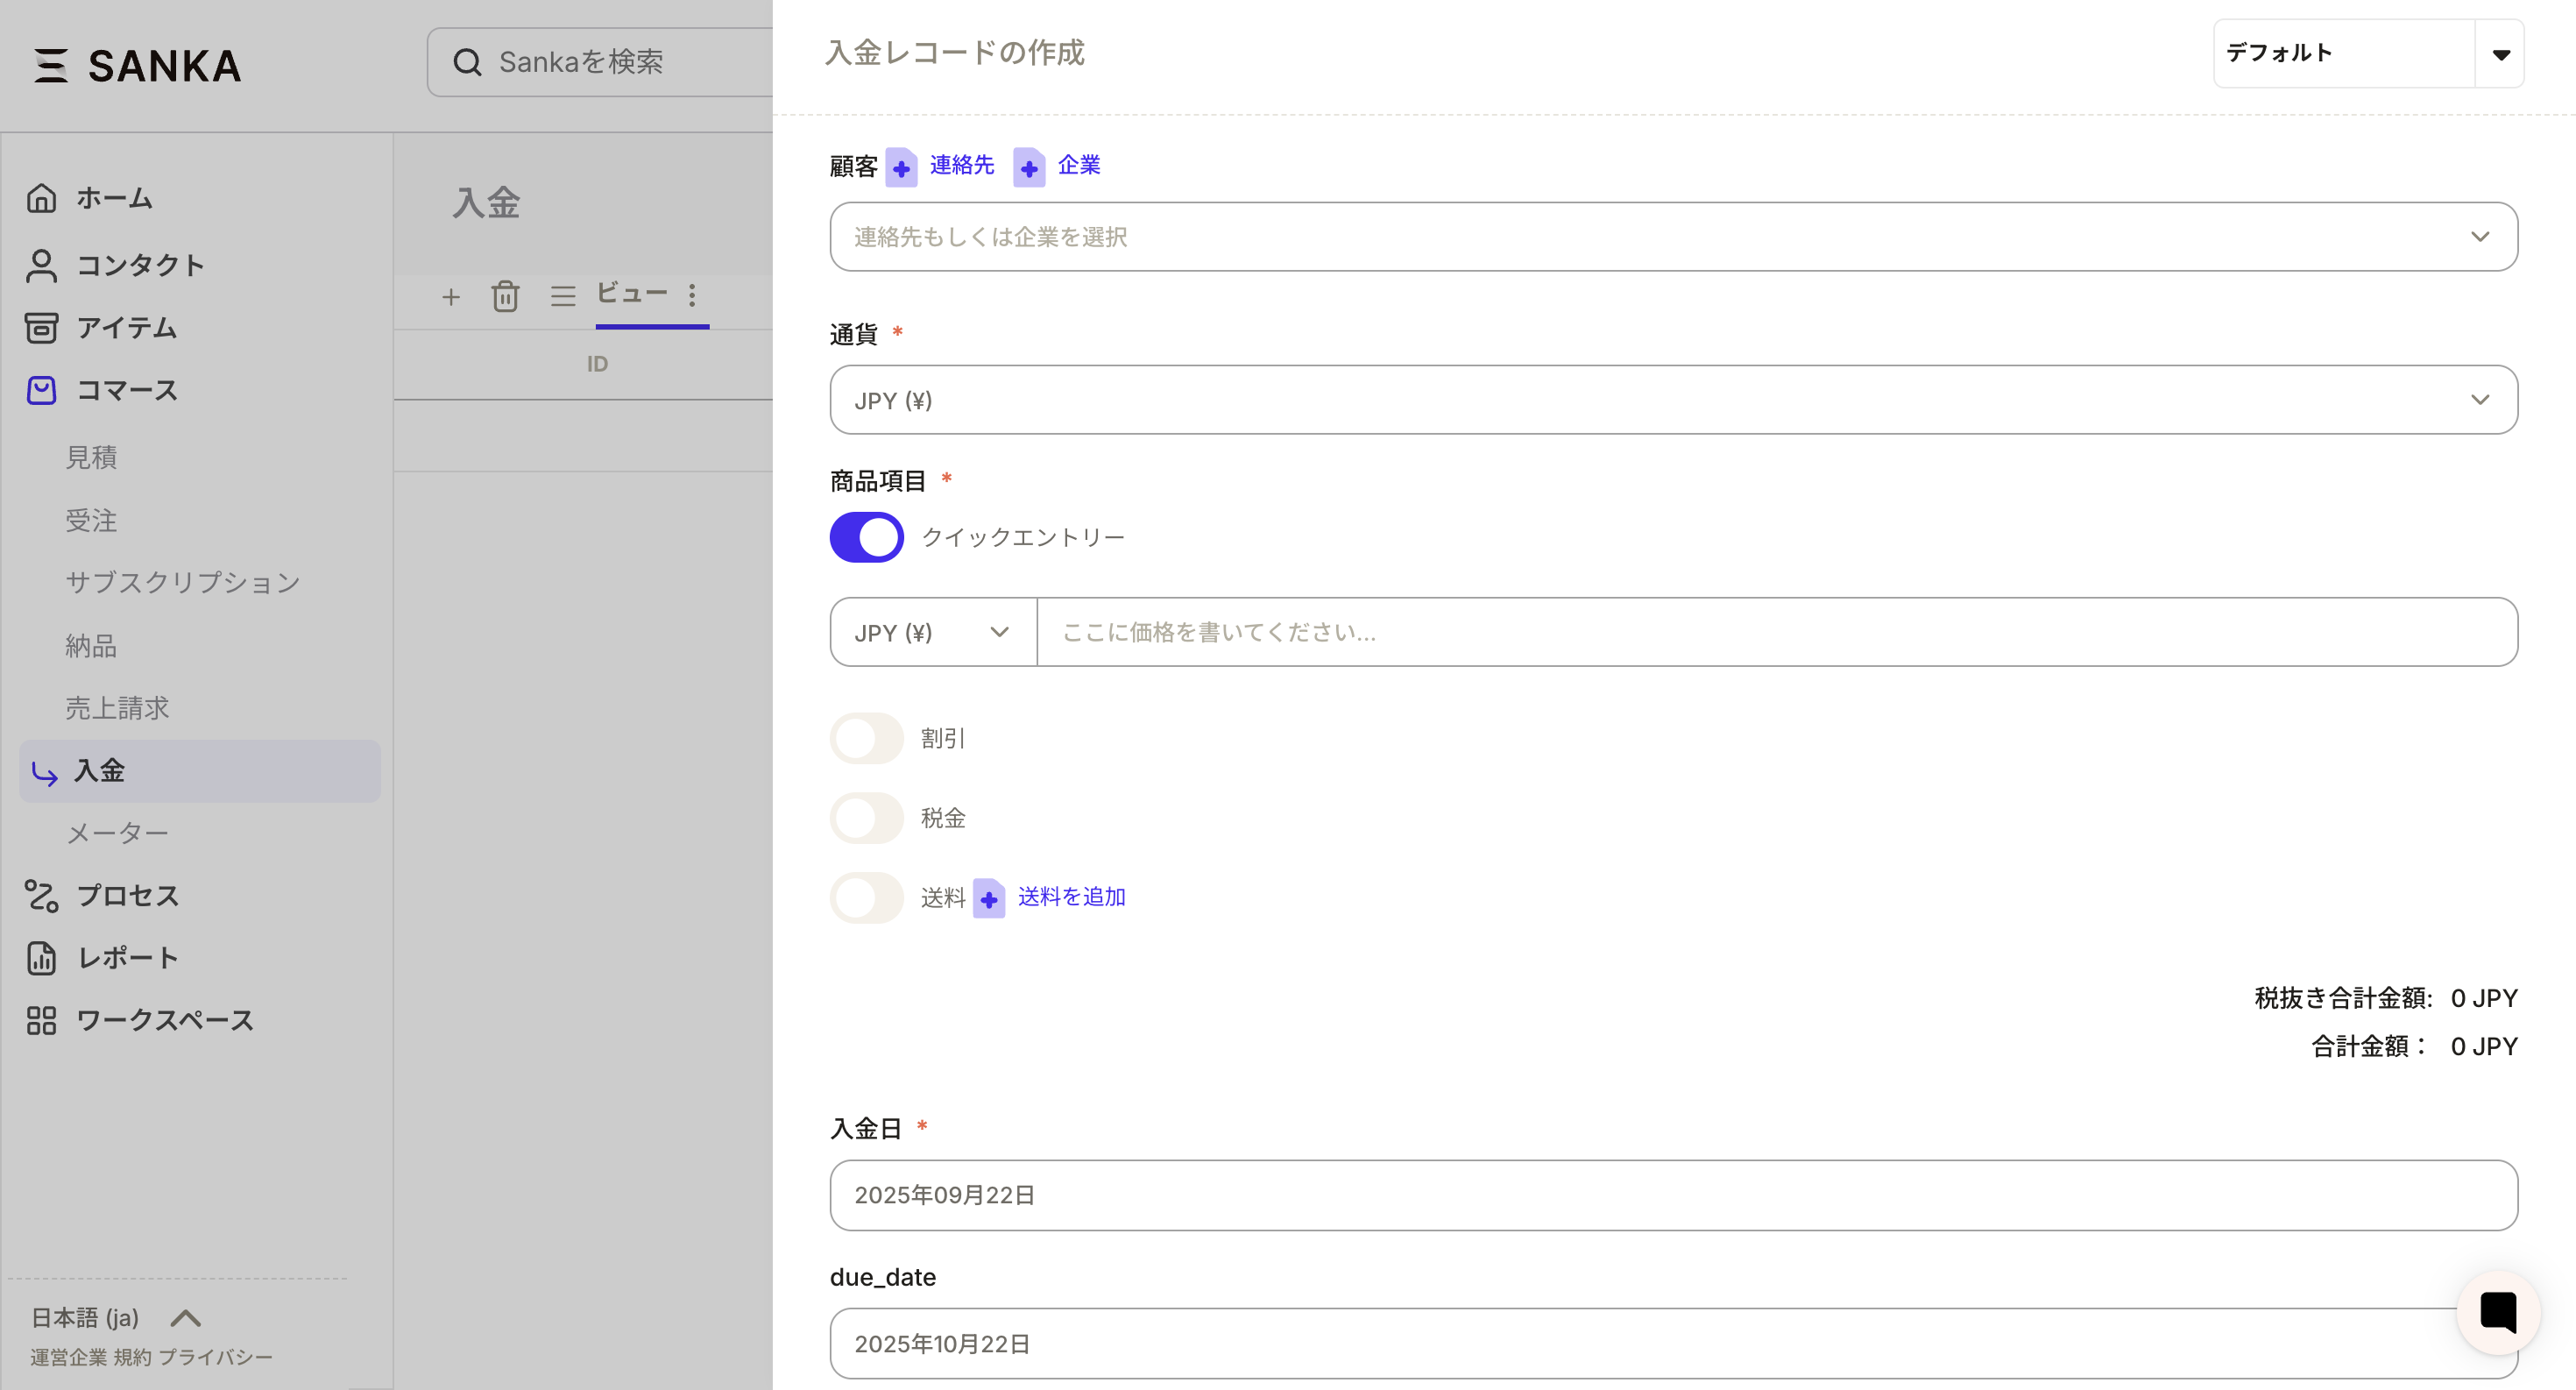
In Sanka, a unique ID is assigned to each deposit record, and it is possible to link it with necessary information such as products and business partners. You can also set a status for each record (draft, sent, scheduled, paid), making it easy to track its status. ① Select the “Deposit” object and click the “New” button at the top right of the screen.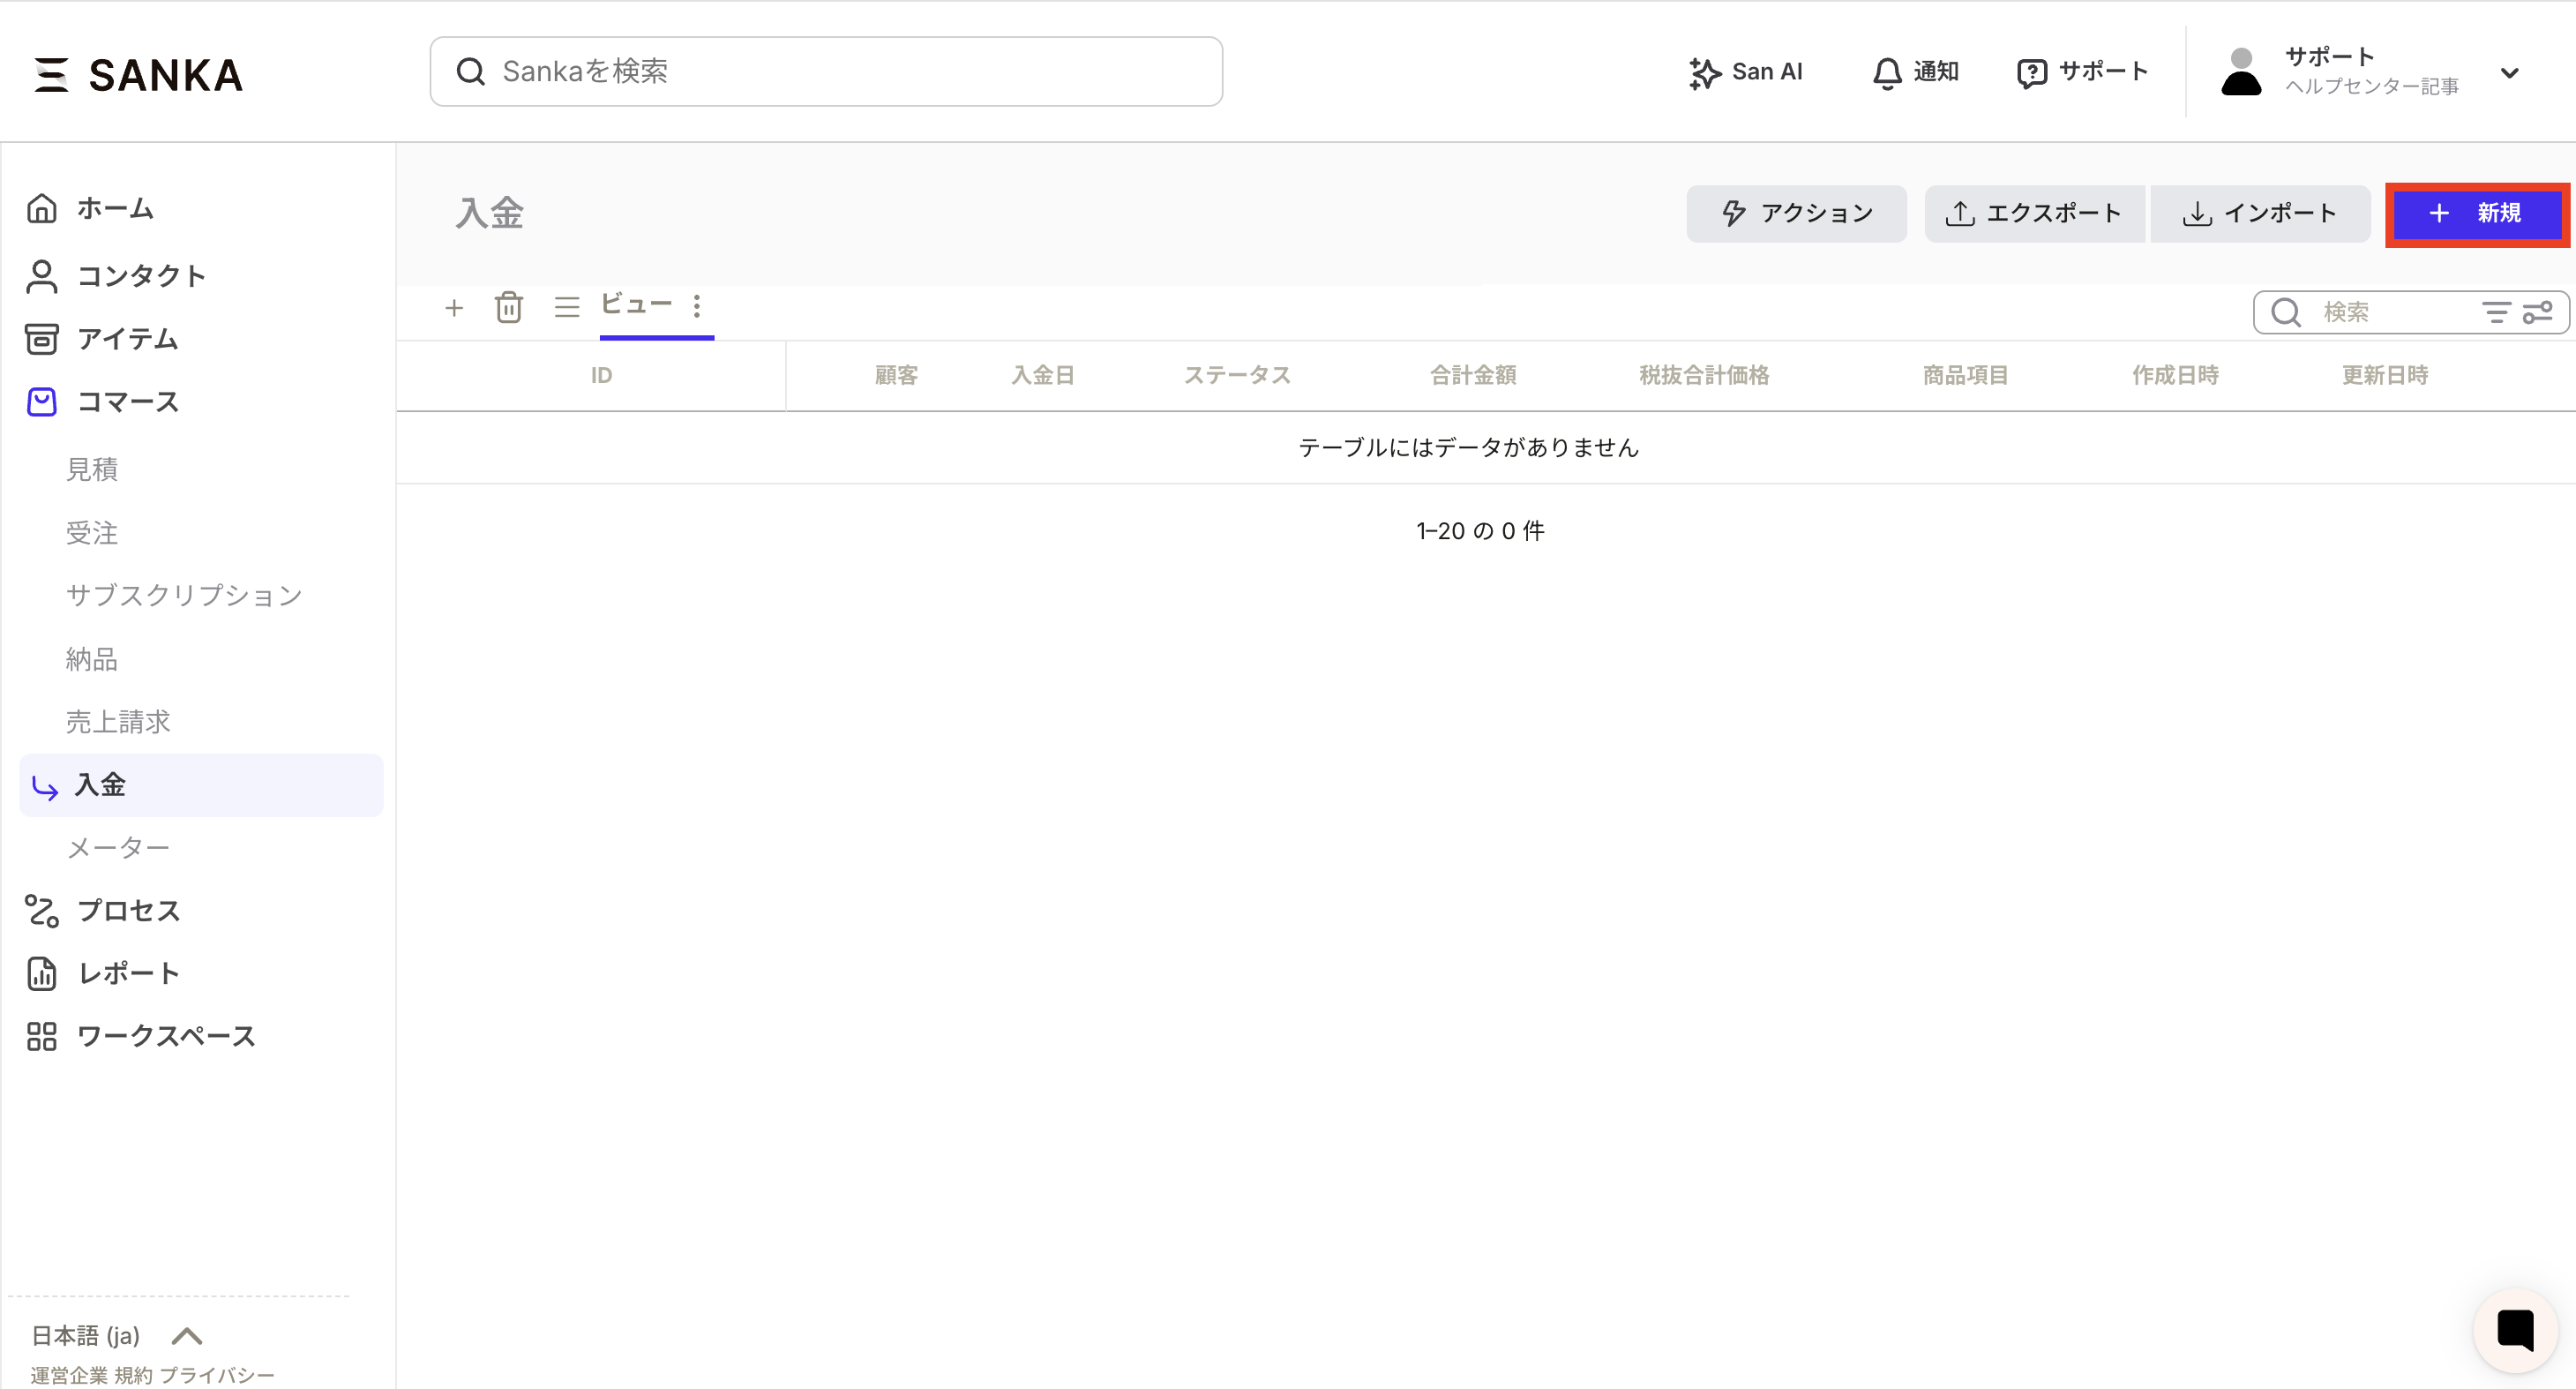 ②The “Create Deposit Record” screen will be displayed, so enter the necessary information.
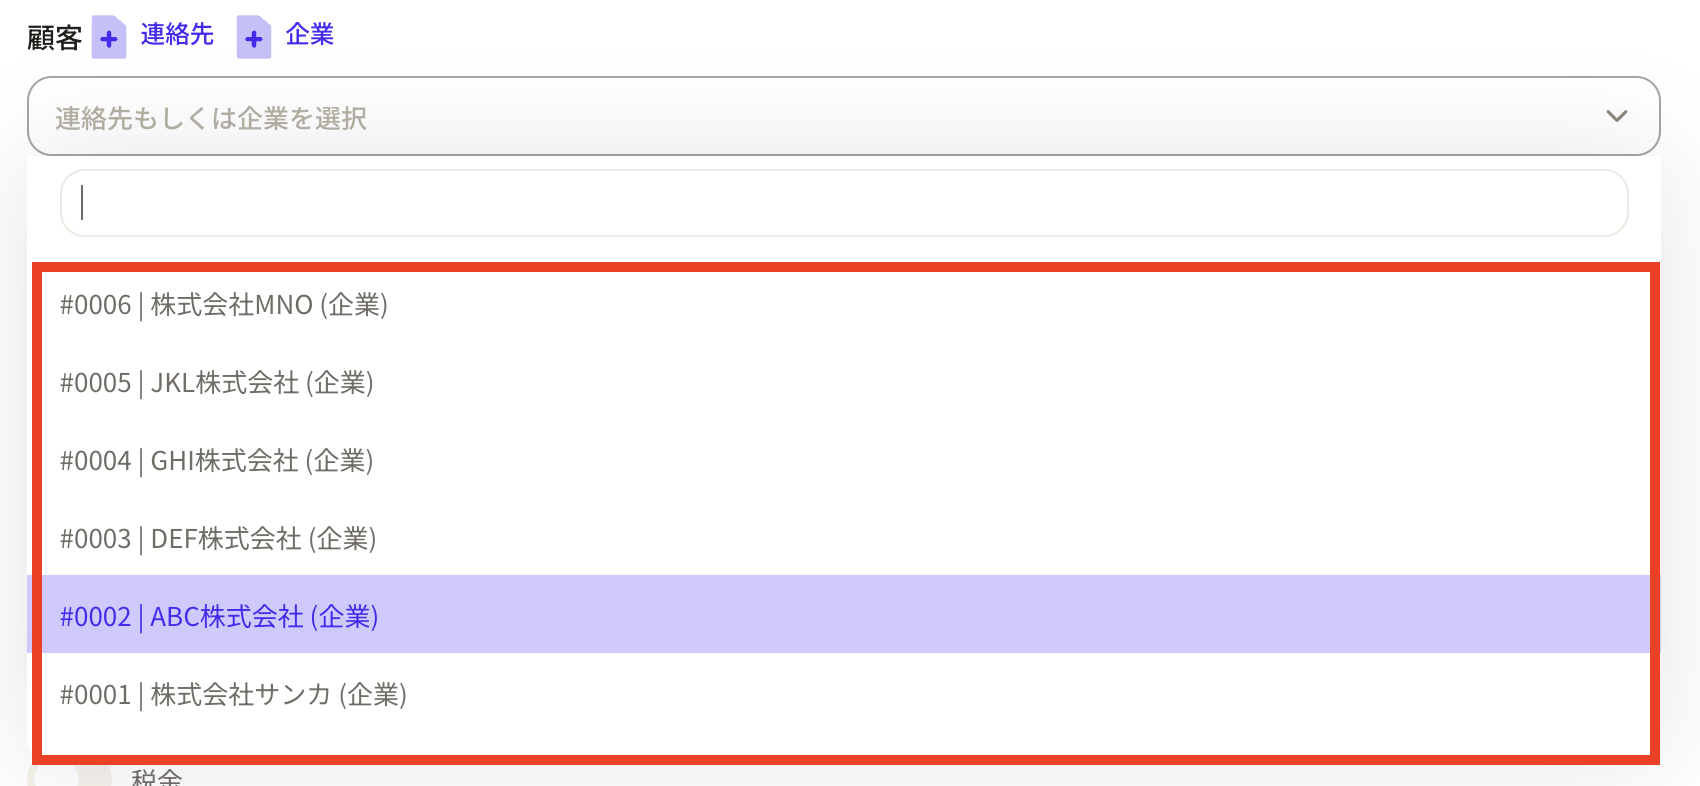
 ③Click on "Customer" to display registered business partner information.
If you do not have business partner information, you can add it directly using the "+Contact" and "+Company" buttons. *Customer information newly registered here will be registered in the object.
③Click on "Customer" to display registered business partner information.
If you do not have business partner information, you can add it directly using the "+Contact" and "+Company" buttons. *Customer information newly registered here will be registered in the object.
 ④ Next, select the “currency” to apply.
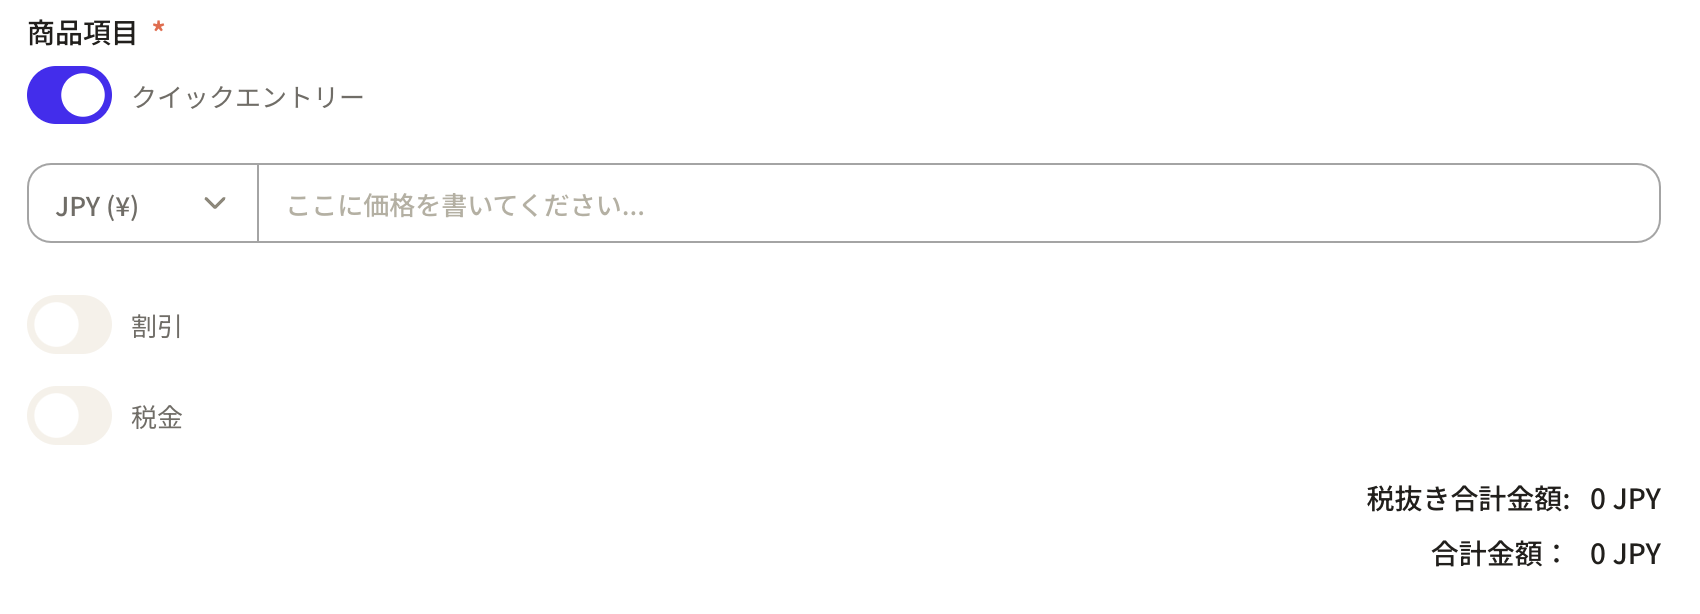
 ⑤Set the product items. If you turn on quick entry, you can only register the amount.
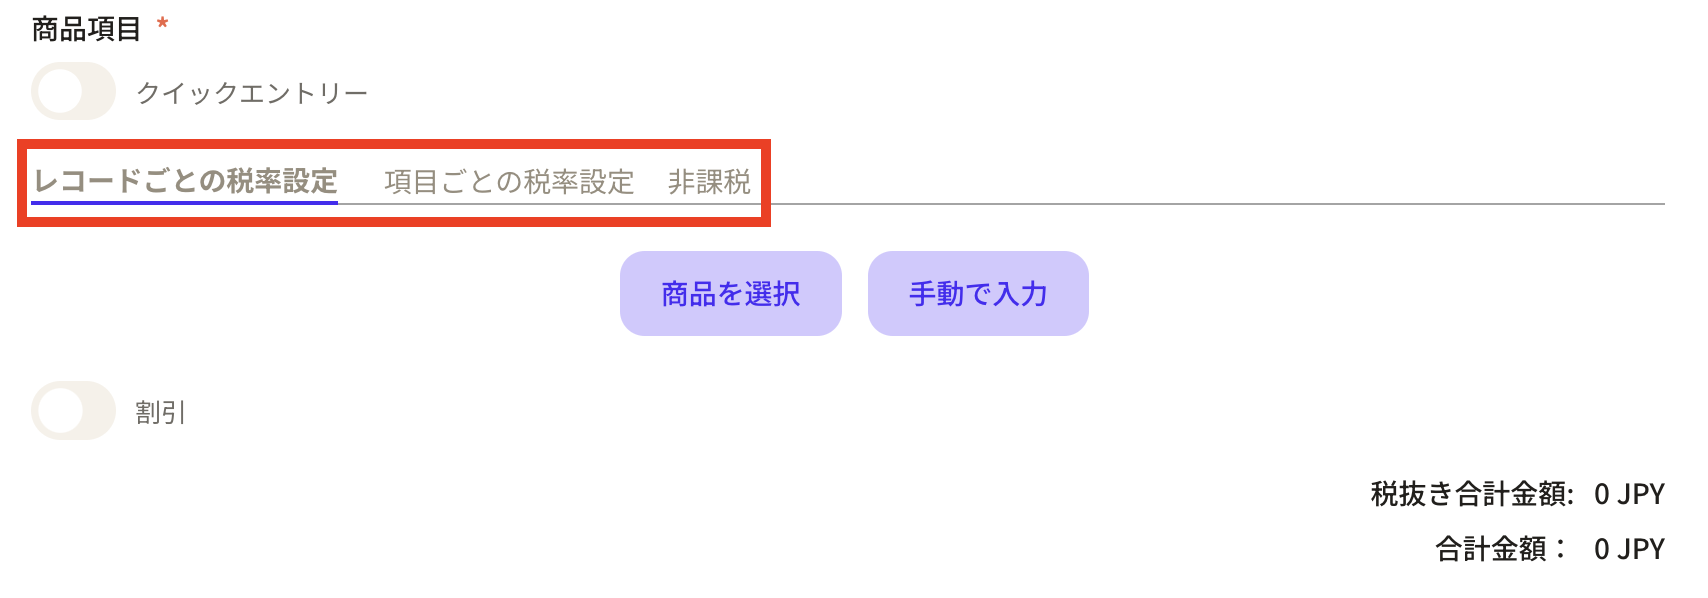
 ⑥If you want to register product items, turn off quick entry.
Before entering product items, first set the "tax rate".
Tax rates can be set in three ways:
⑥If you want to register product items, turn off quick entry.
Before entering product items, first set the "tax rate".
Tax rates can be set in three ways:
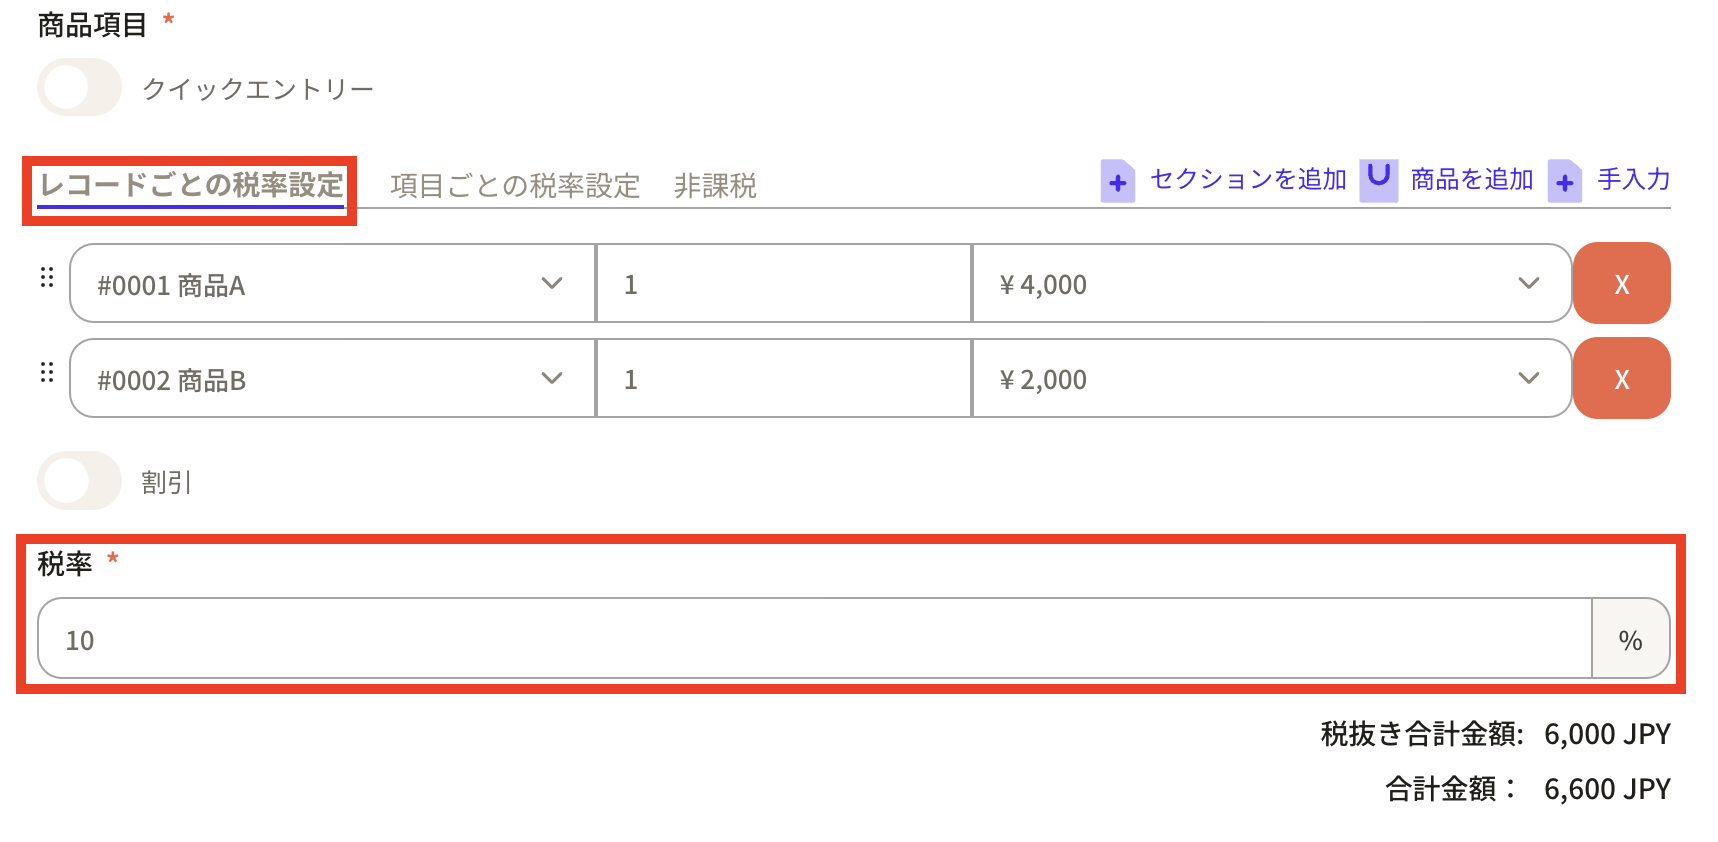
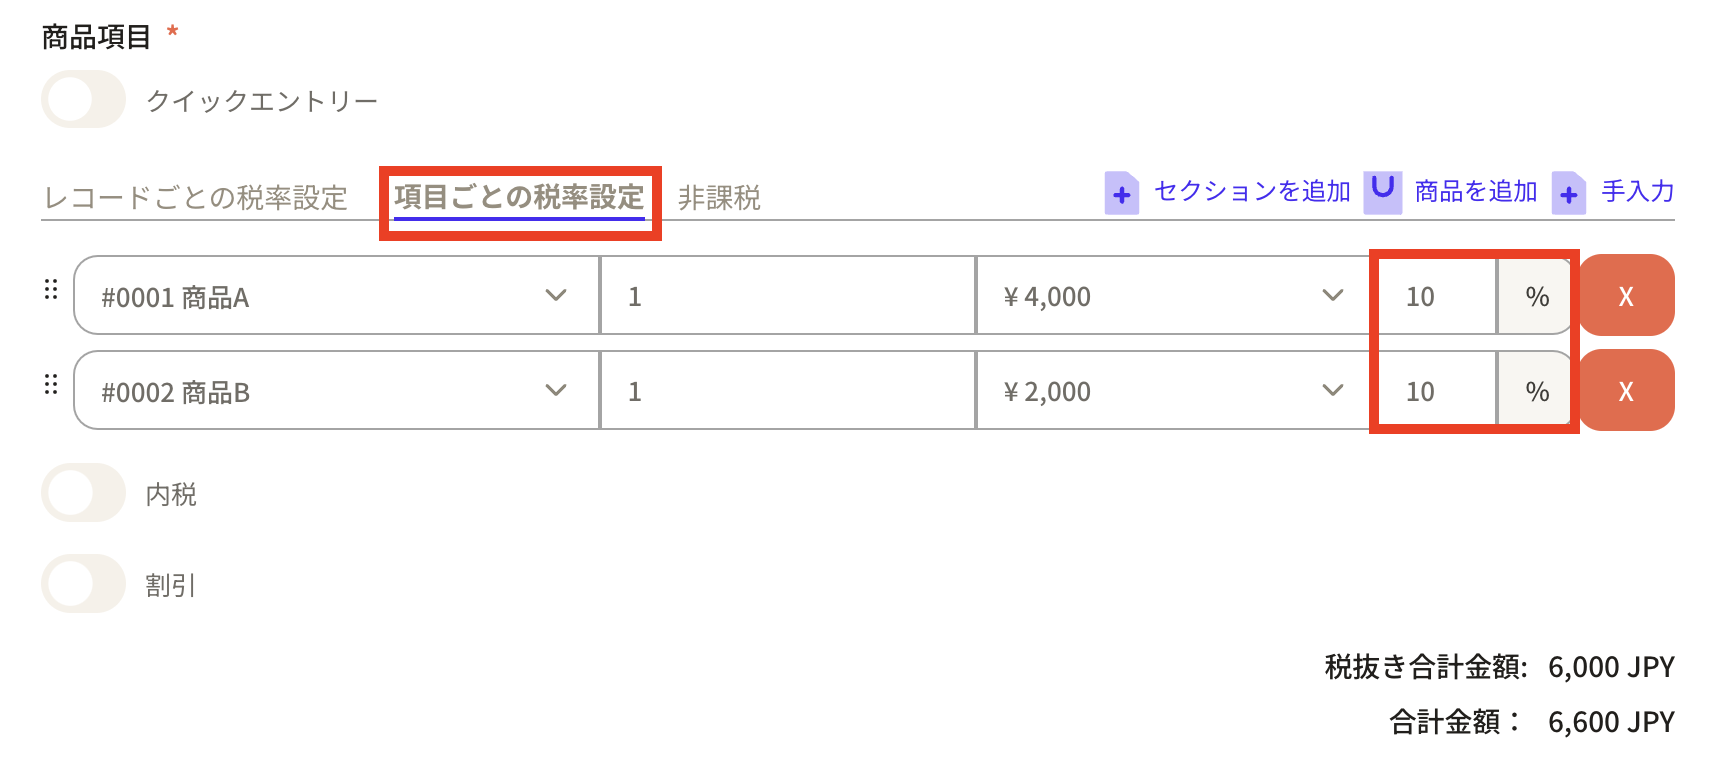
- Tax rate setting for each record: The same tax rate is set for all products in the record. -Setting tax rates for each item: You can set different tax rates for each product.
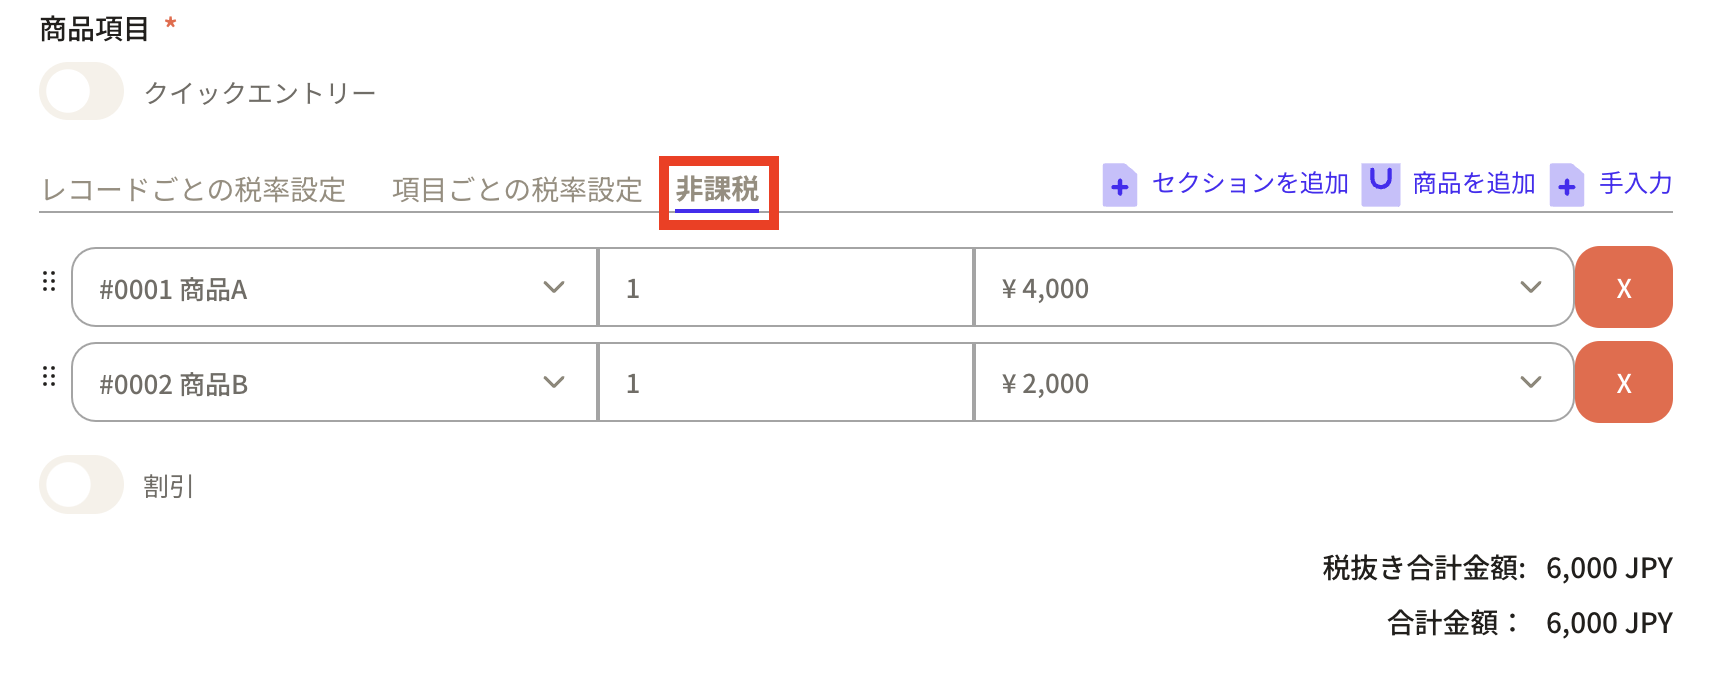
- Tax-free: No tax rate is set and it is not applied to receipts.
 Example 1: Tax rate settings for each record
 Example 2: Setting tax rate for each item
 Example 3: Tax exempt
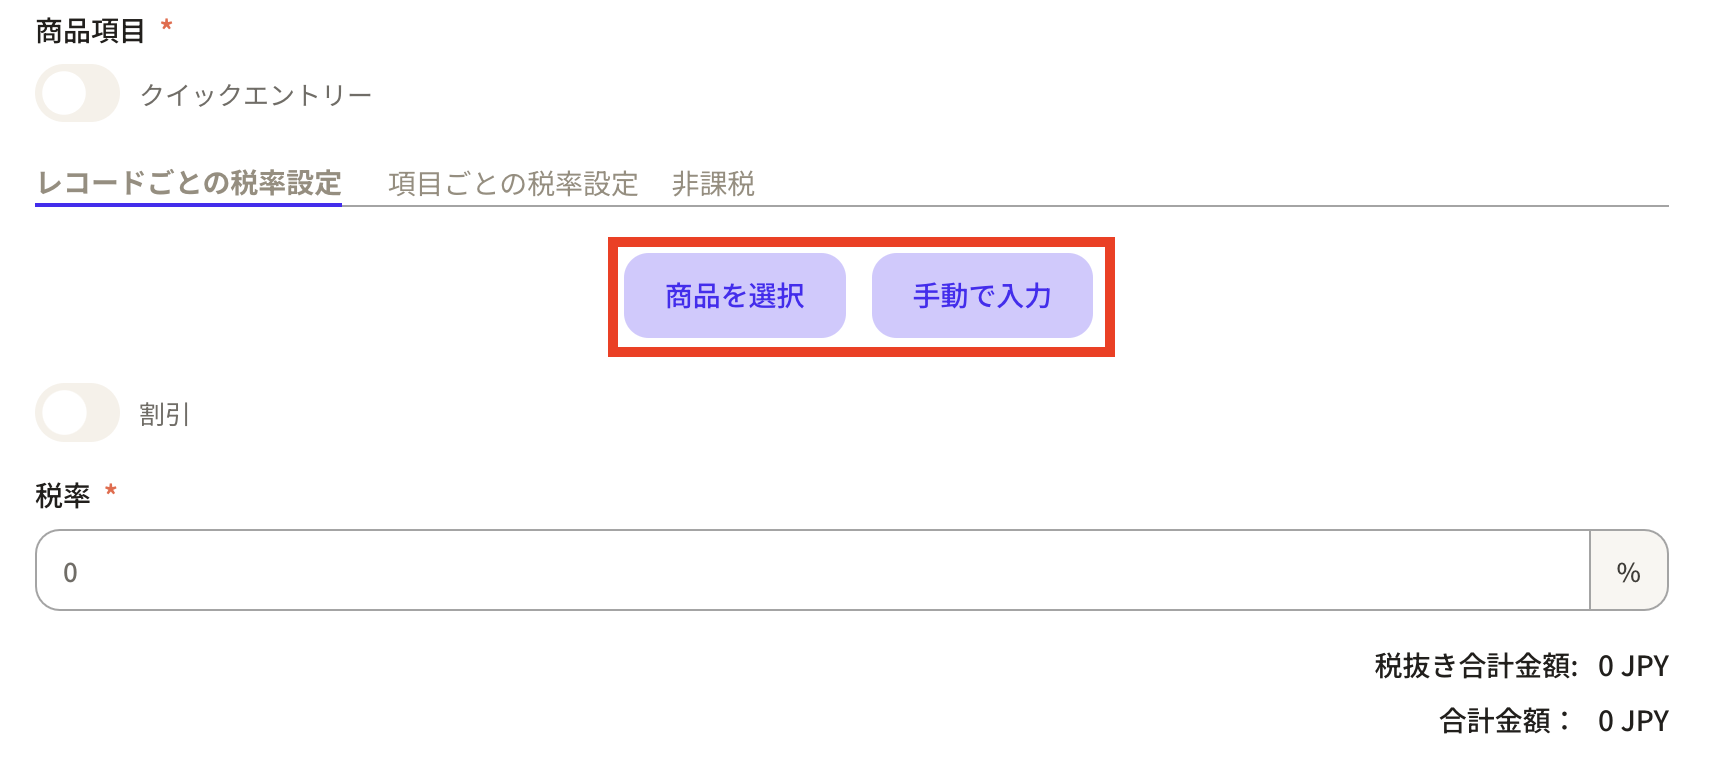
 ⑦ There are two ways to input products:
Set product items.
⑦ There are two ways to input products:
Set product items.
- Select product: This is a method to select the relevant product from the product master registered in Sanka.
- Manual input: This is a method of manually inputting product information.
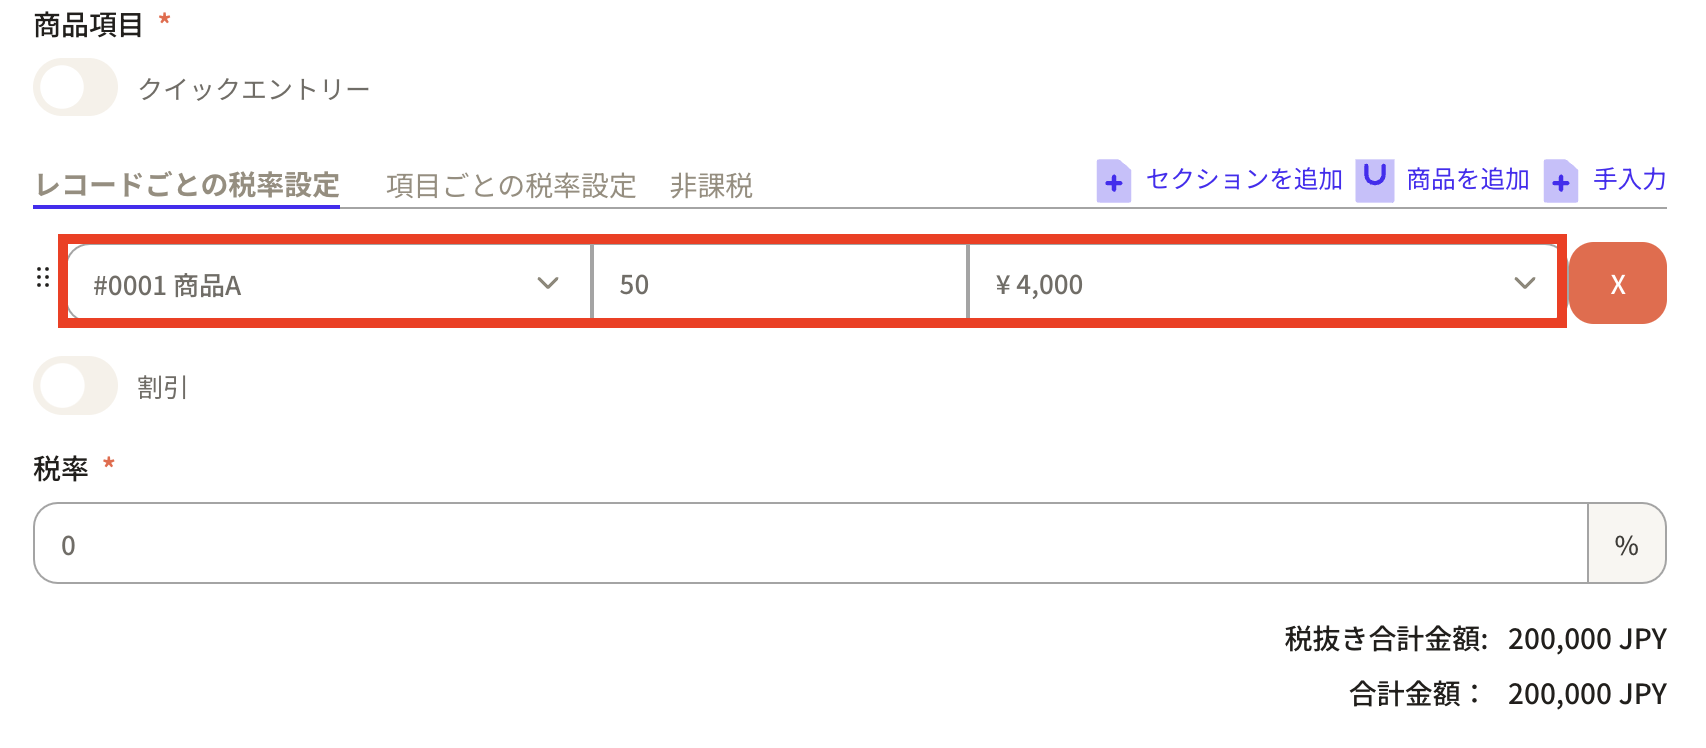
 When you select a product, the products registered in the product master will be displayed.
As an example, we will create a payment record for 50 parts A and 50 parts B.
First, select part A and enter the quantity of 50 pieces.
Please note that the amount at the time of product master registration will be automatically added to the unit price.
When you select a product, the products registered in the product master will be displayed.
As an example, we will create a payment record for 50 parts A and 50 parts B.
First, select part A and enter the quantity of 50 pieces.
Please note that the amount at the time of product master registration will be automatically added to the unit price.
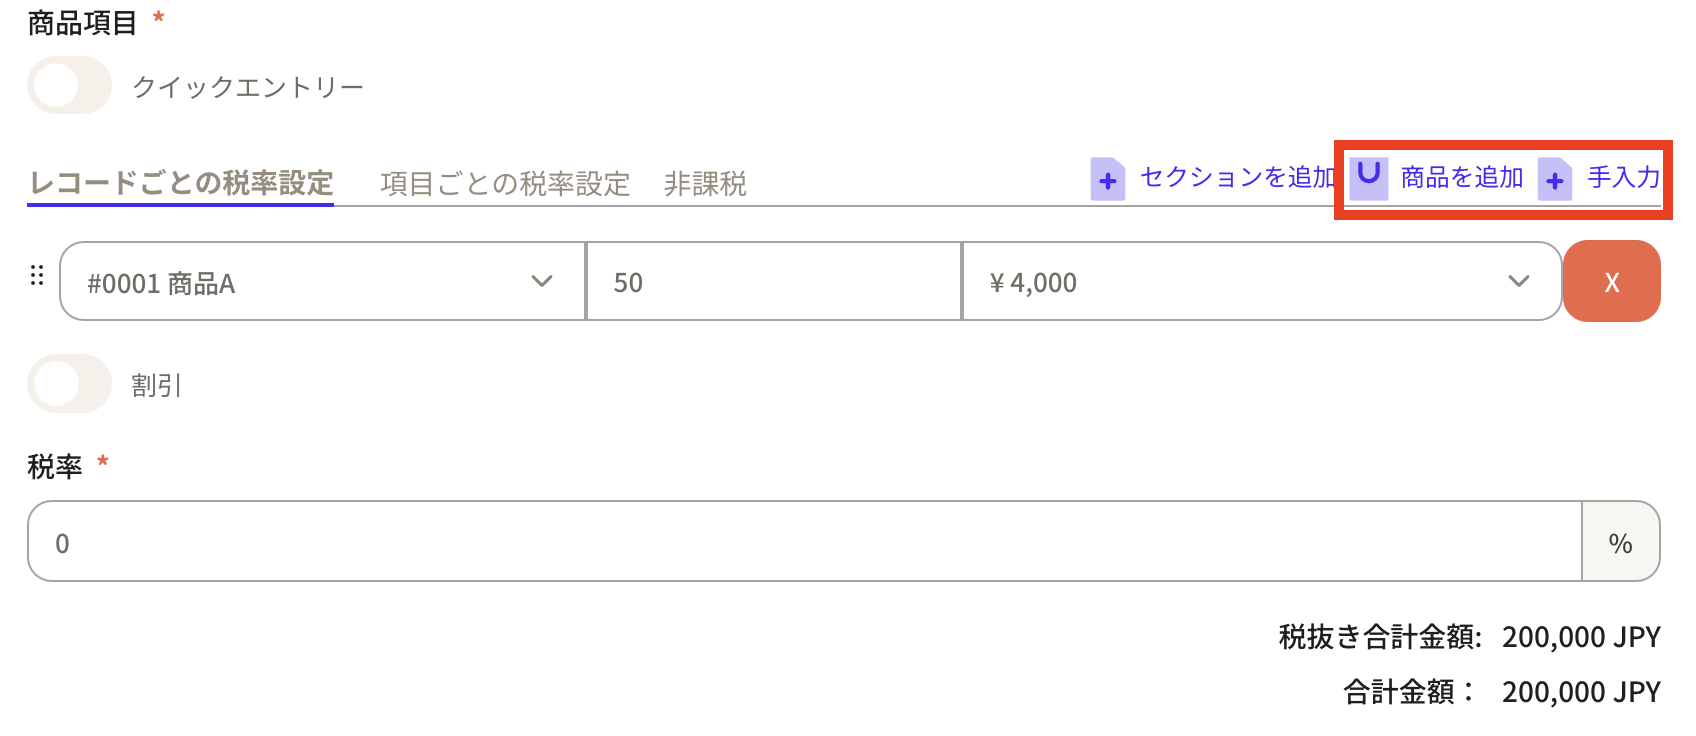
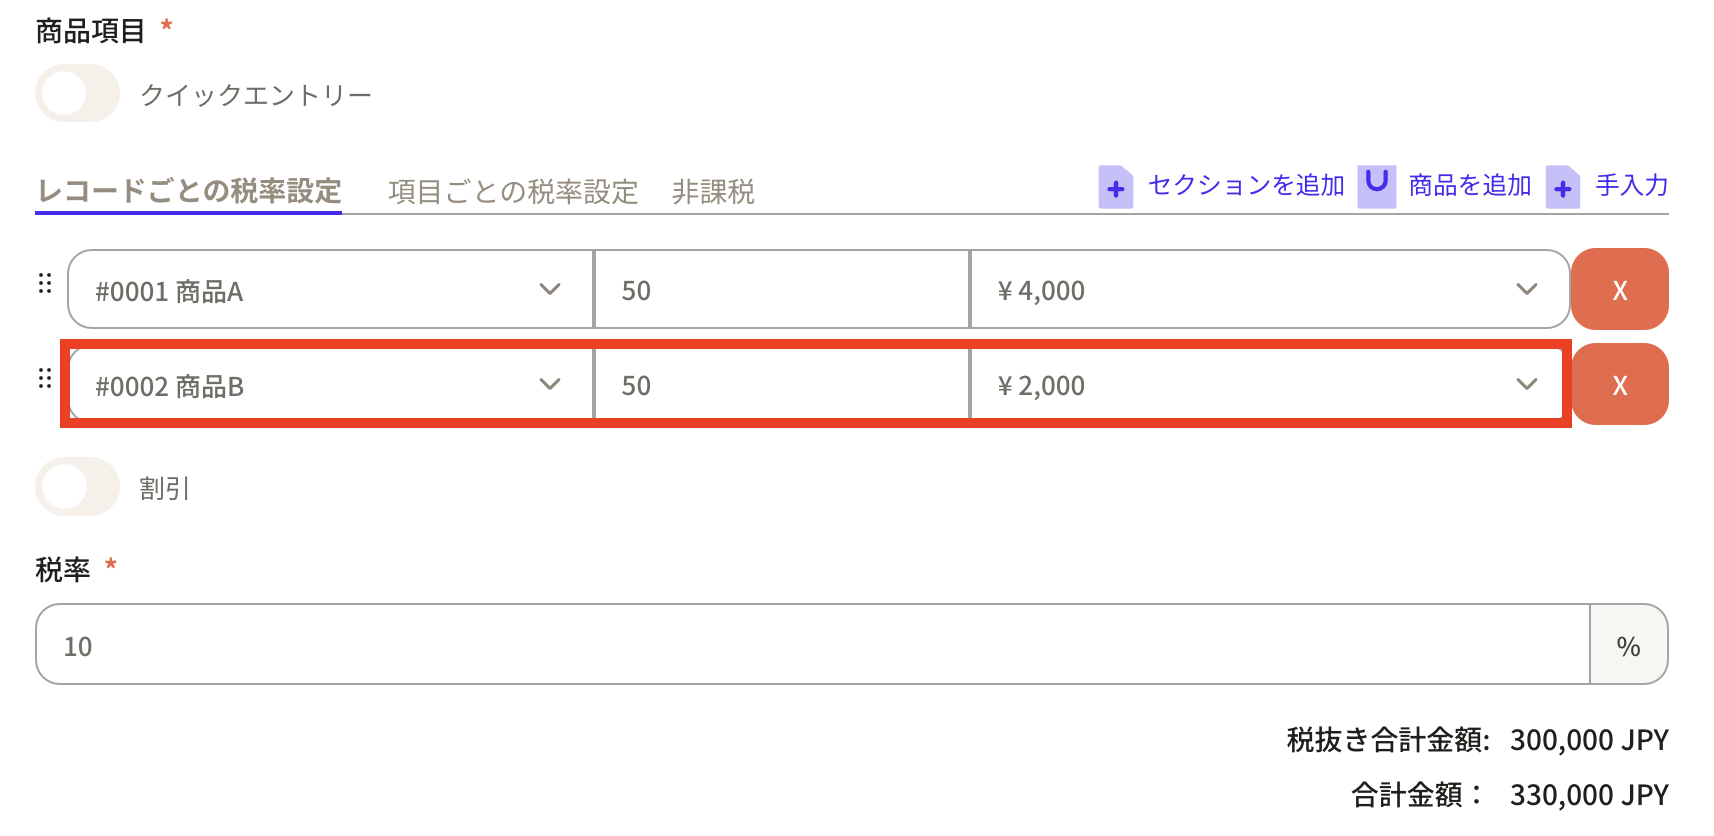
 If you would like to increase the number of items listed in the deposit record, click "+Add item" in the upper right corner and additional blank fields will be displayed.
 Enter part B, 50 pieces. Also, set the tax rate.
 ⑧If you want to apply discounts, taxes, and shipping fees, turn on the button and you can set it.
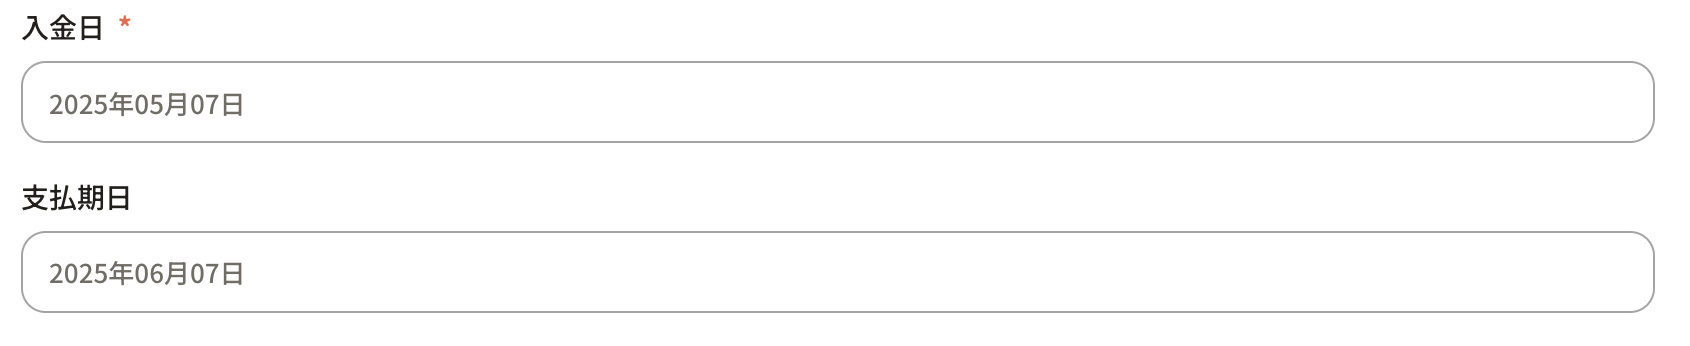
 ⑨ "Deposit date" and "Payment date" will display the date of the record creation by default, but you can change it if necessary.
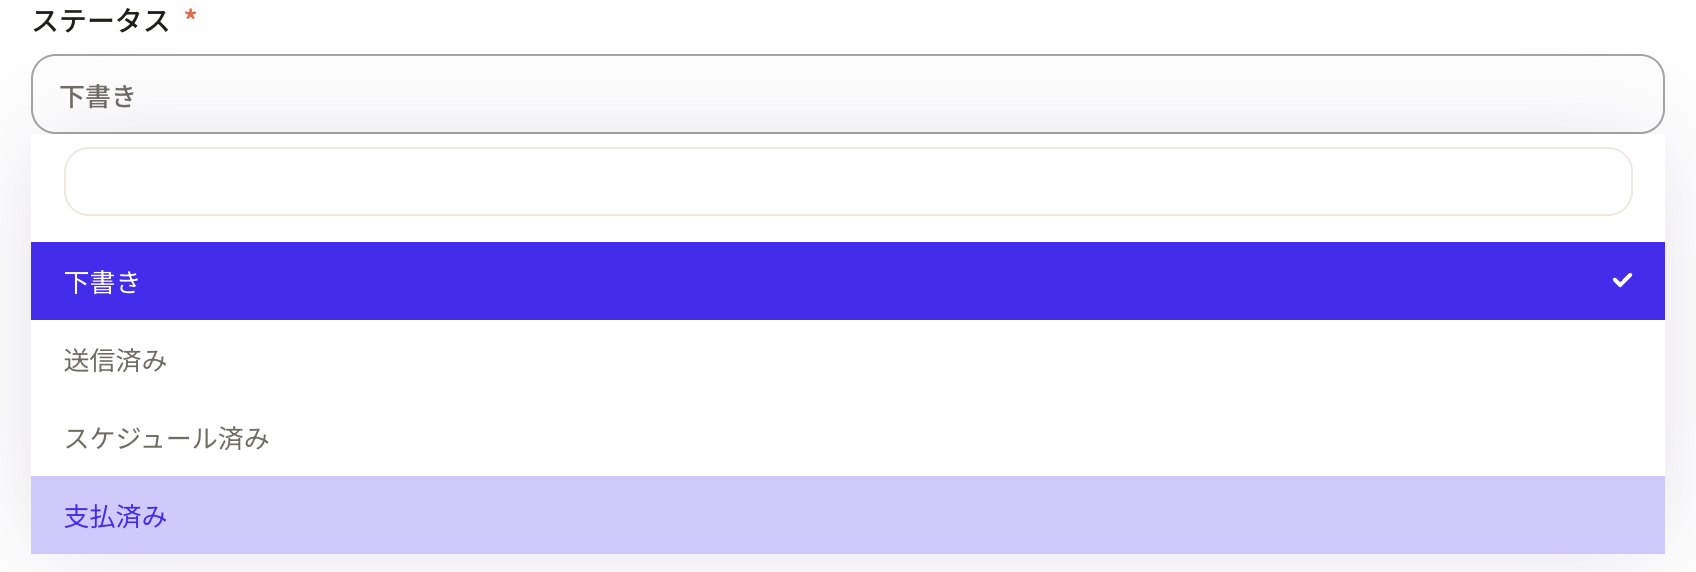
 ⑩ Select the sales invoice status in “Status”.
You can choose from Draft, Sent, Scheduled, and Paid. *This status can be changed from properties.
⑩ Select the sales invoice status in “Status”.
You can choose from Draft, Sent, Scheduled, and Paid. *This status can be changed from properties.
 ⑪After entering the required information, click “Create Record”.
 ⑫The registered details will be displayed on the “Deposit” object screen.
The "total amount" and "total price excluding tax" will be automatically calculated.
⑫The registered details will be displayed on the “Deposit” object screen.
The "total amount" and "total price excluding tax" will be automatically calculated.
How to modify registered information
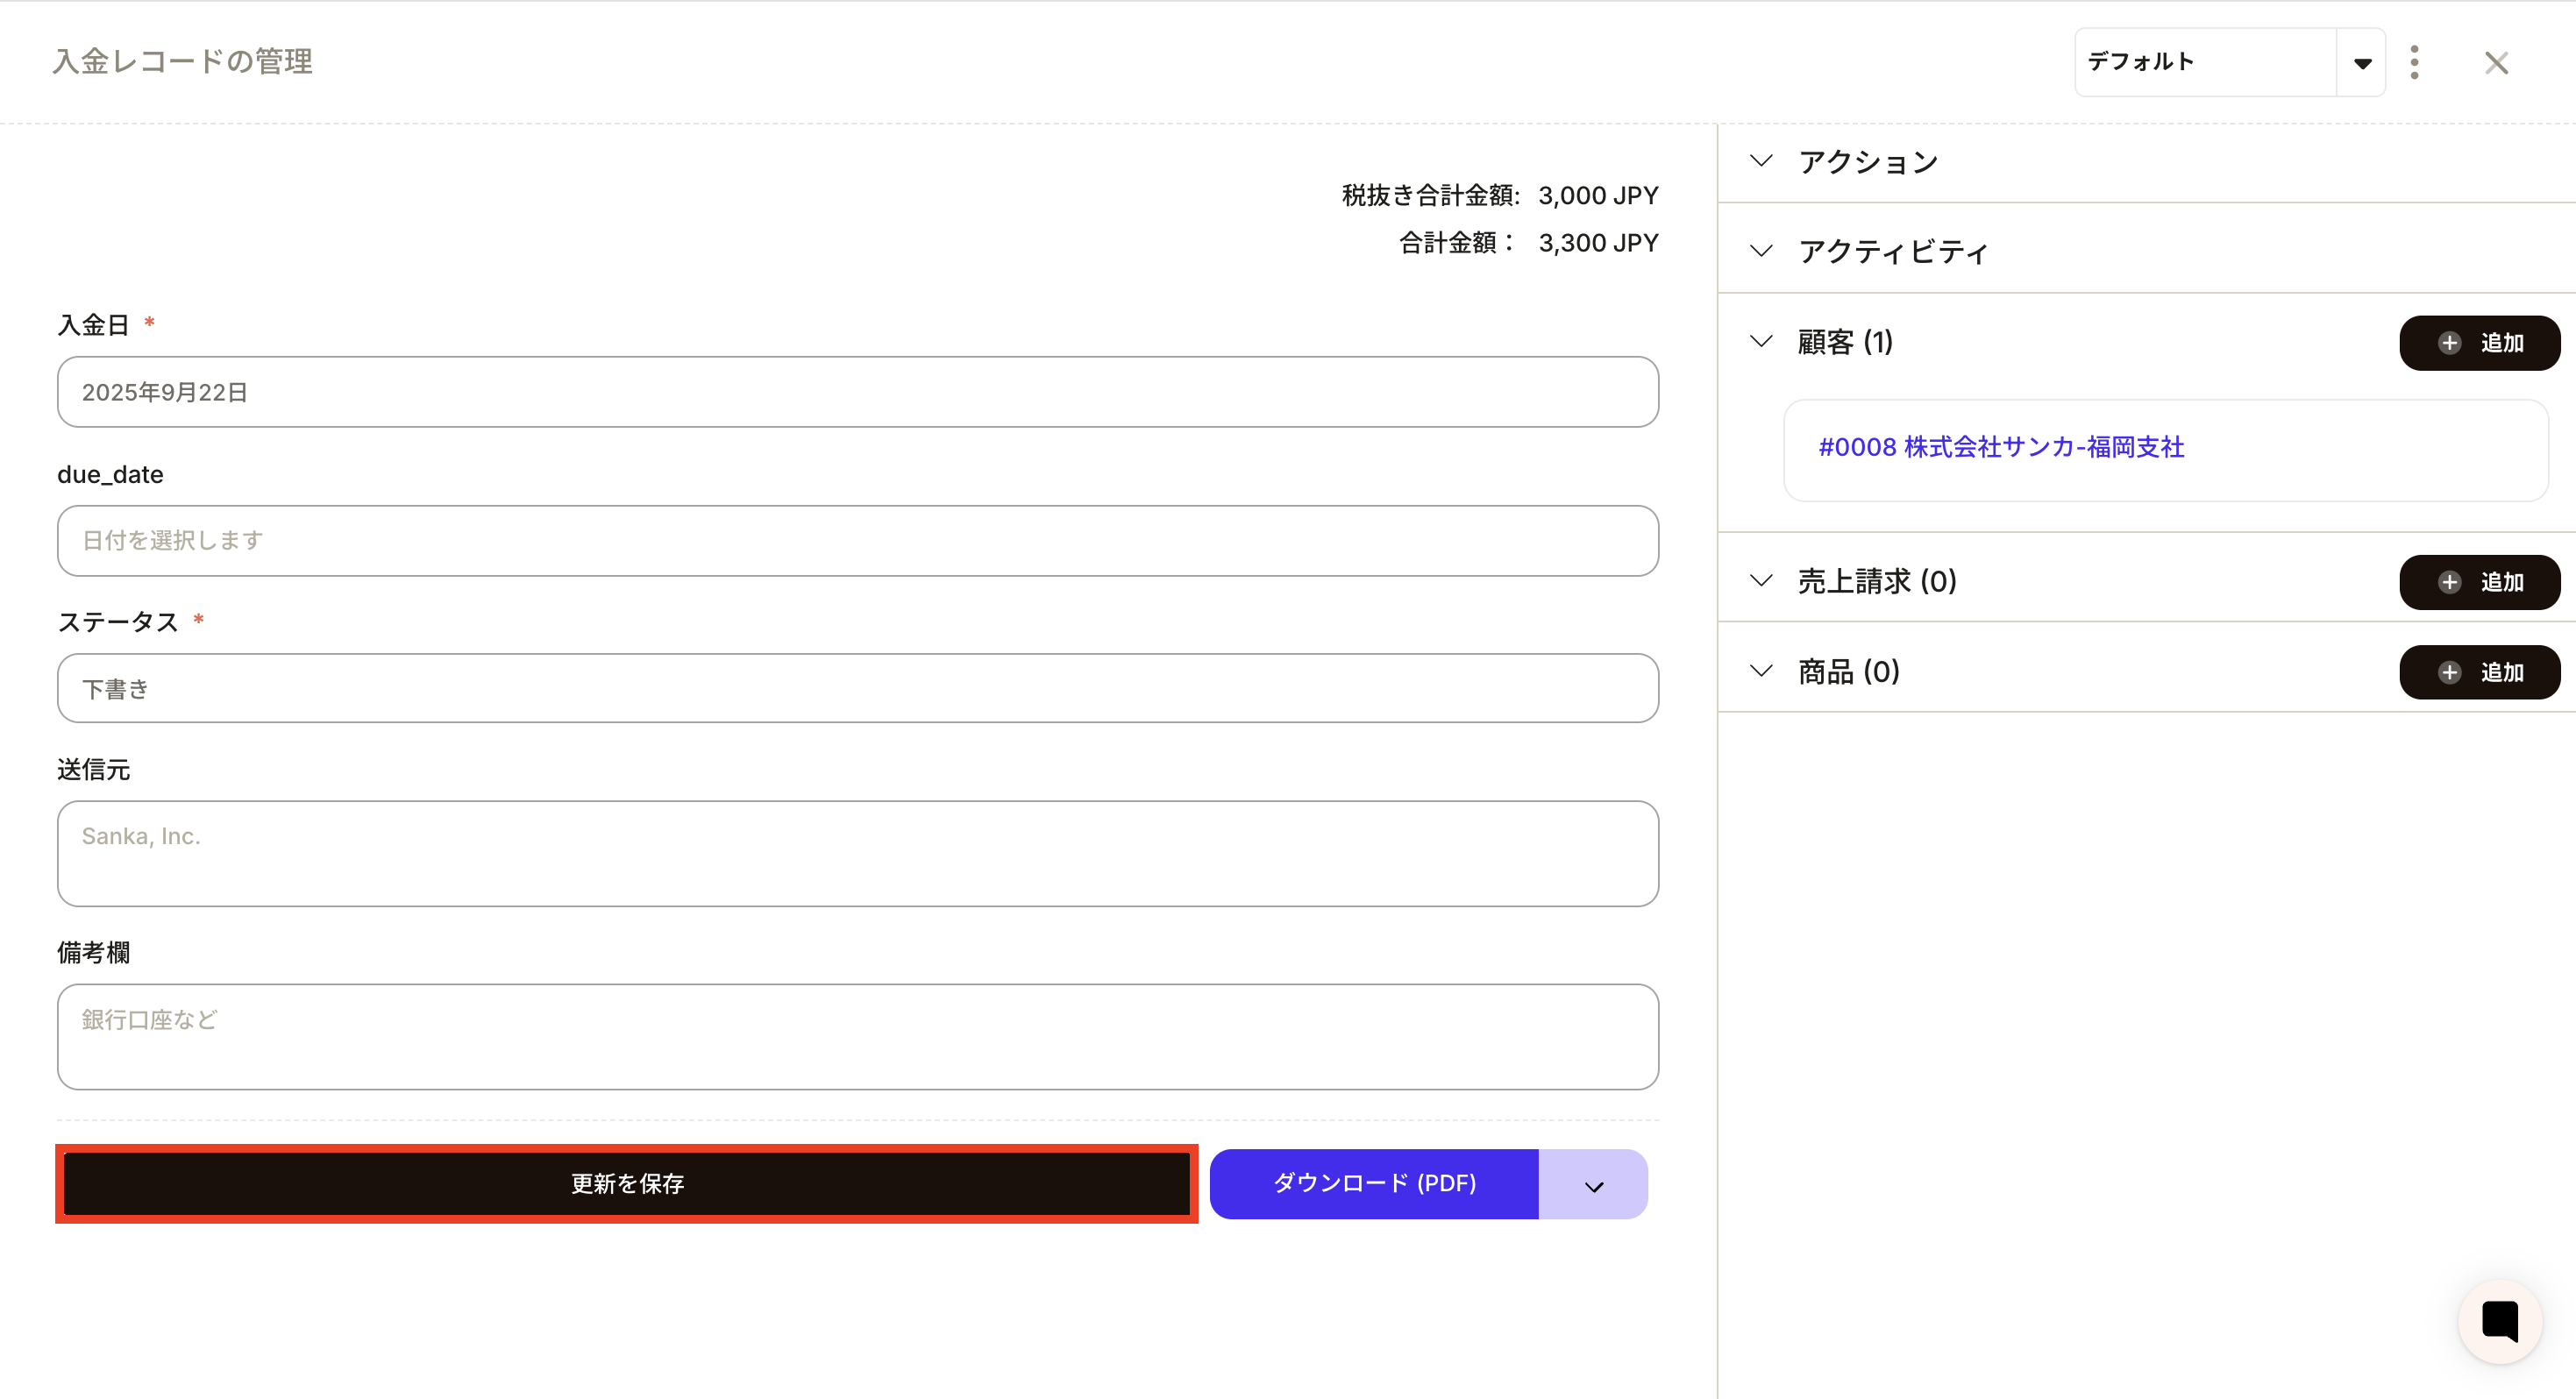
Master how to edit record information. ① Select the ID of the applicable record.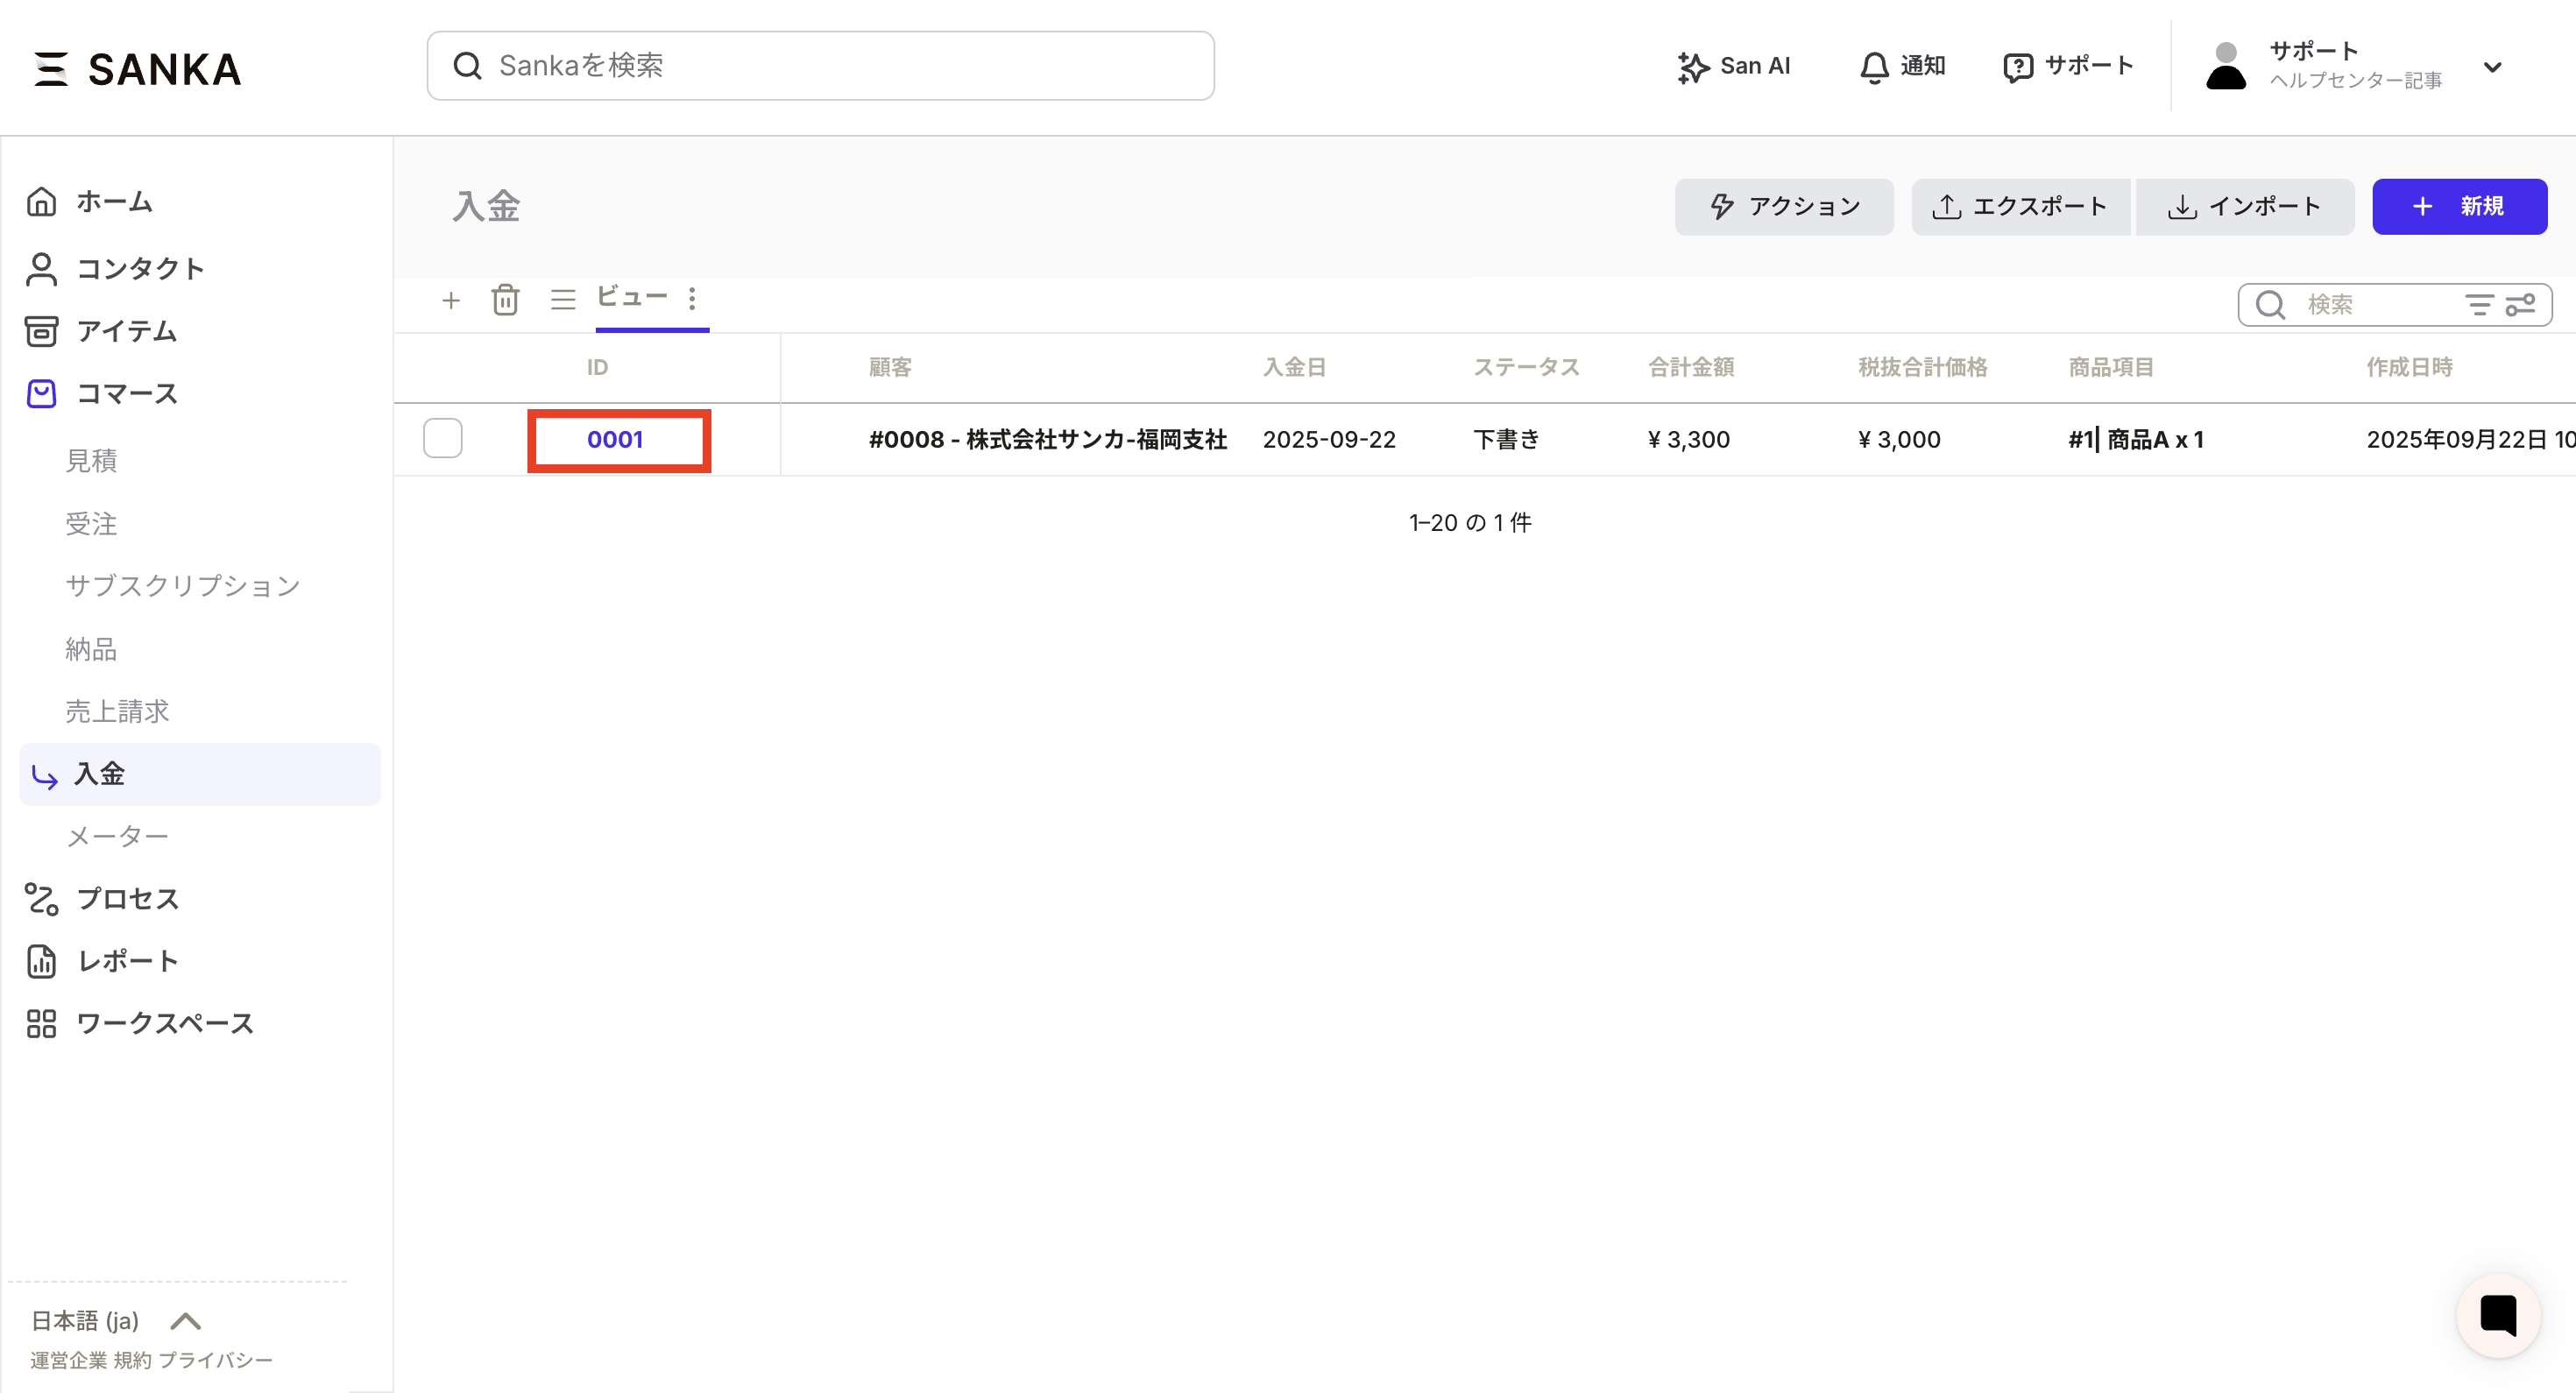 ②The "Manage deposit records" menu will be displayed, allowing you to modify the information.
Finally, click "Save Updates".
②The "Manage deposit records" menu will be displayed, allowing you to modify the information.
Finally, click "Save Updates".
How to archive and delete registered information
You can hide registered deposit information from the table using the archive function. It is also possible to delete records. ① Click the checkbox of the record you want to archive and select the "Archive" button. ② Archived records will no longer be displayed.
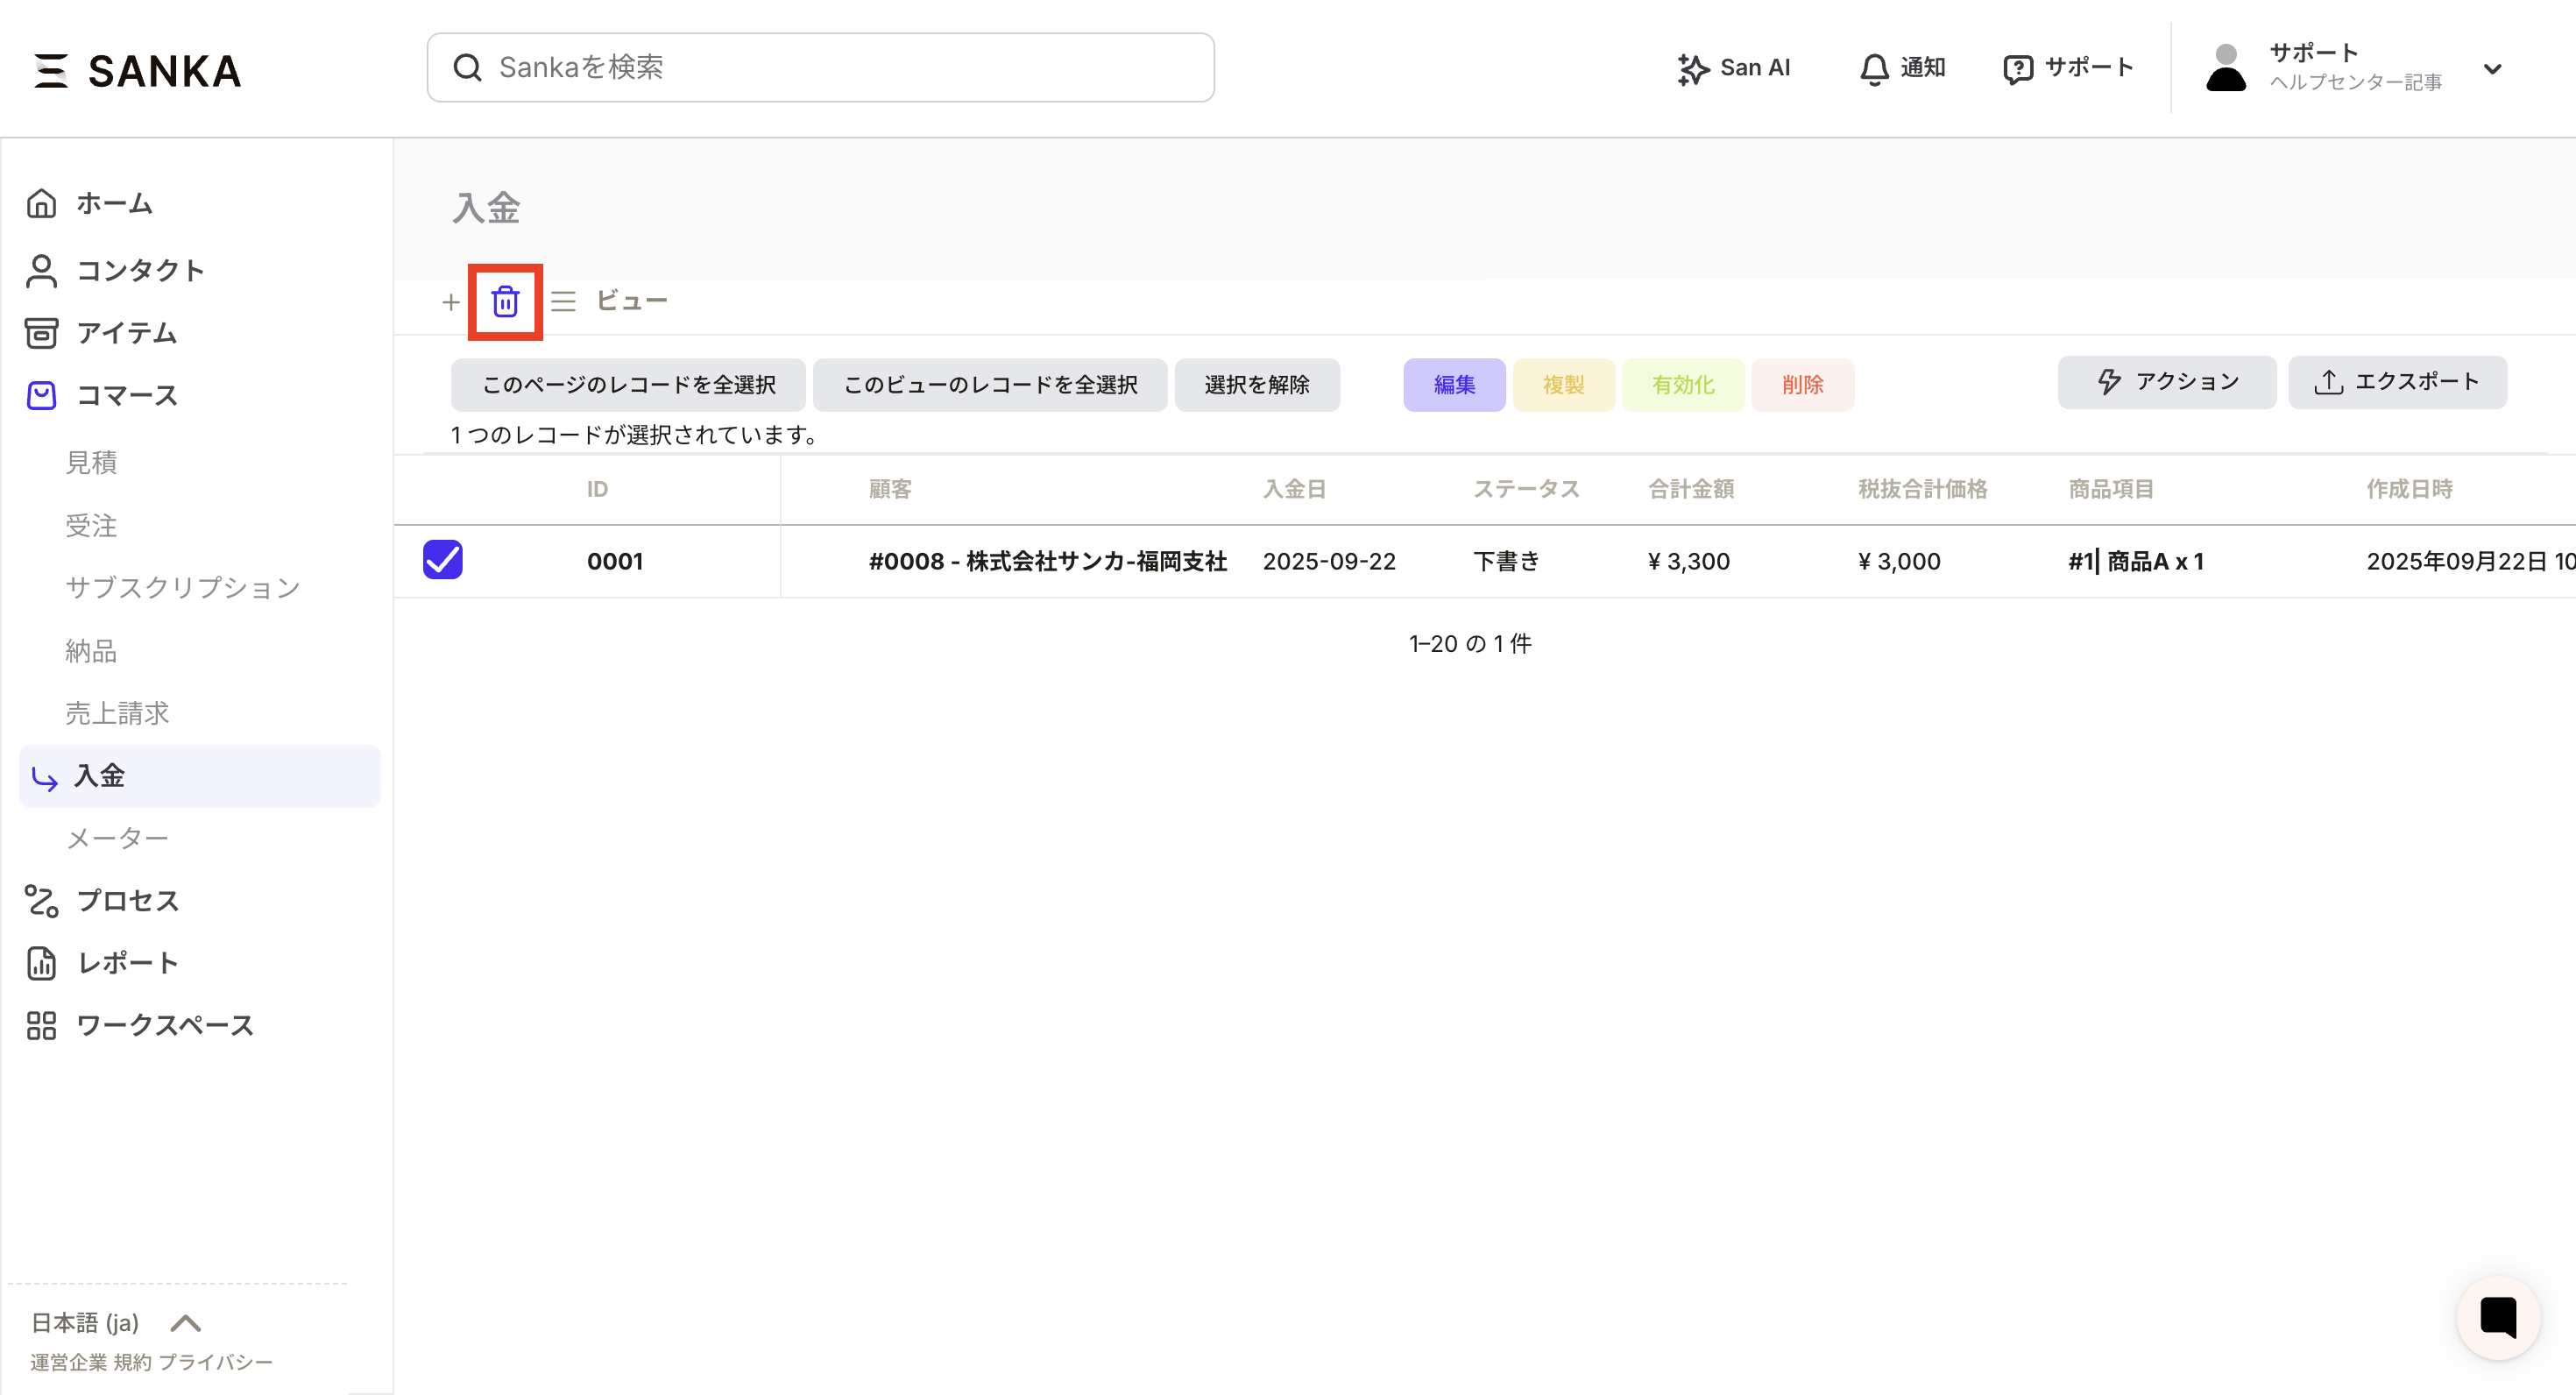
 ③ If you want to release or delete an archive record, press the trash can mark at the top left of the object.
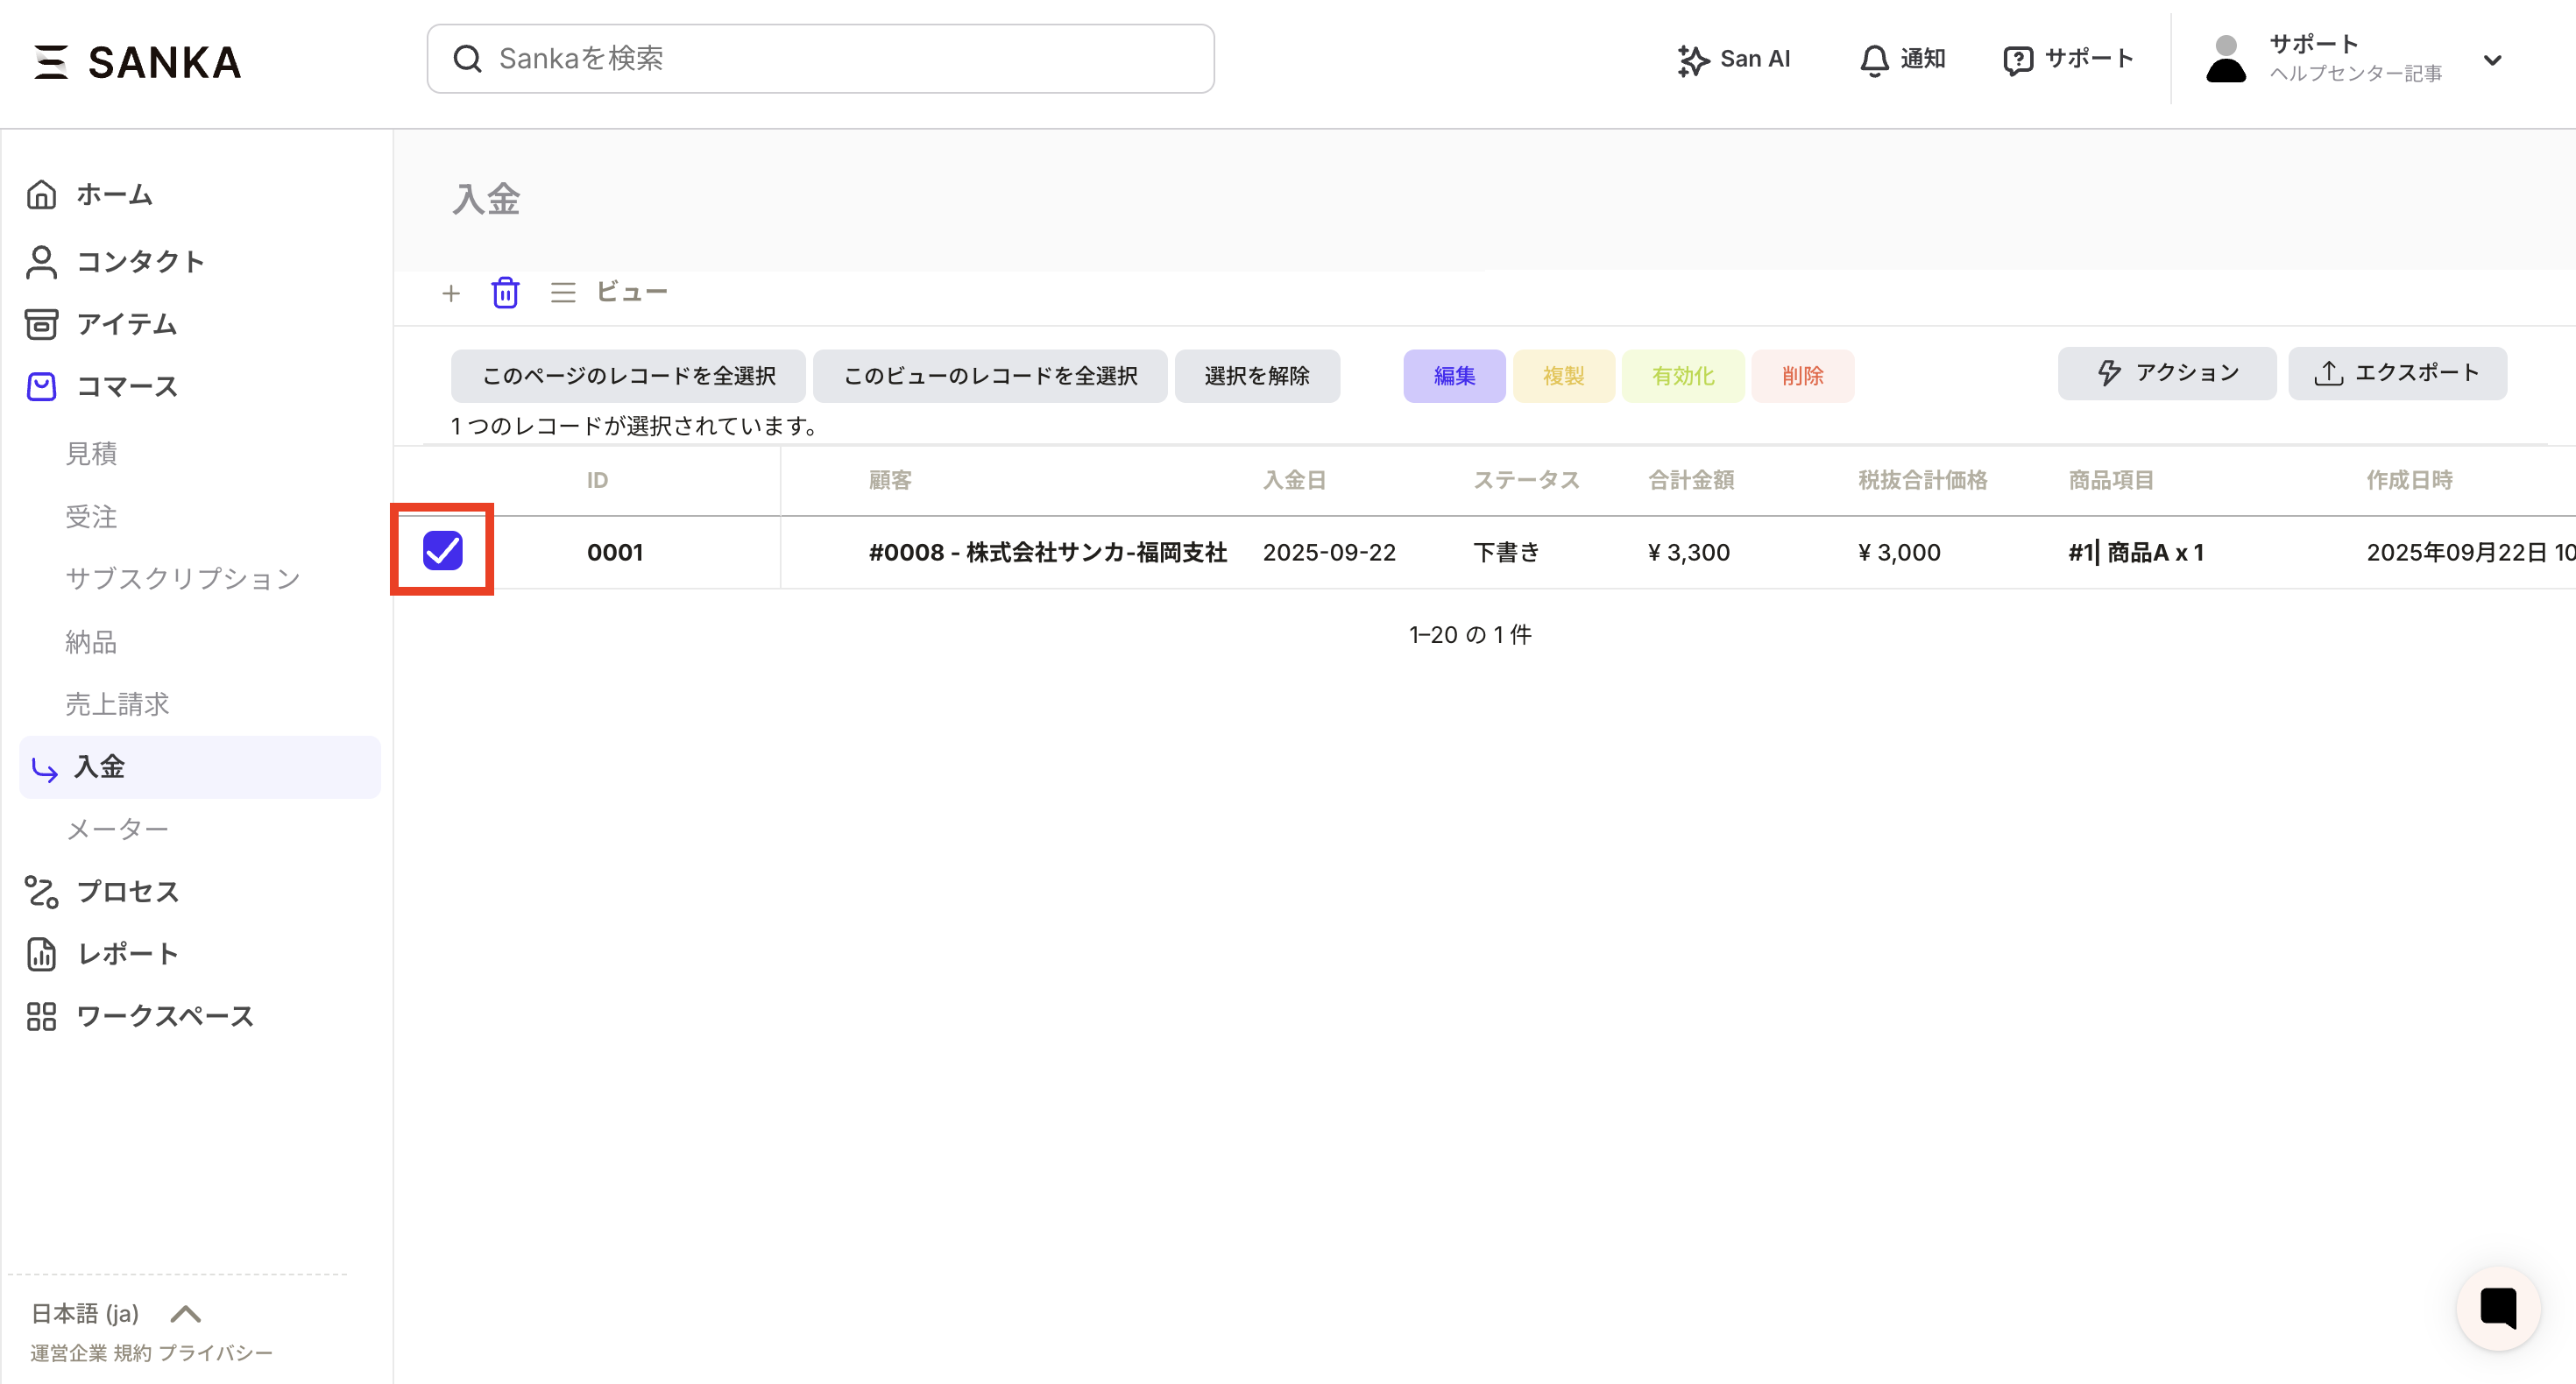
 ④ Select the checkbox of the corresponding ID.
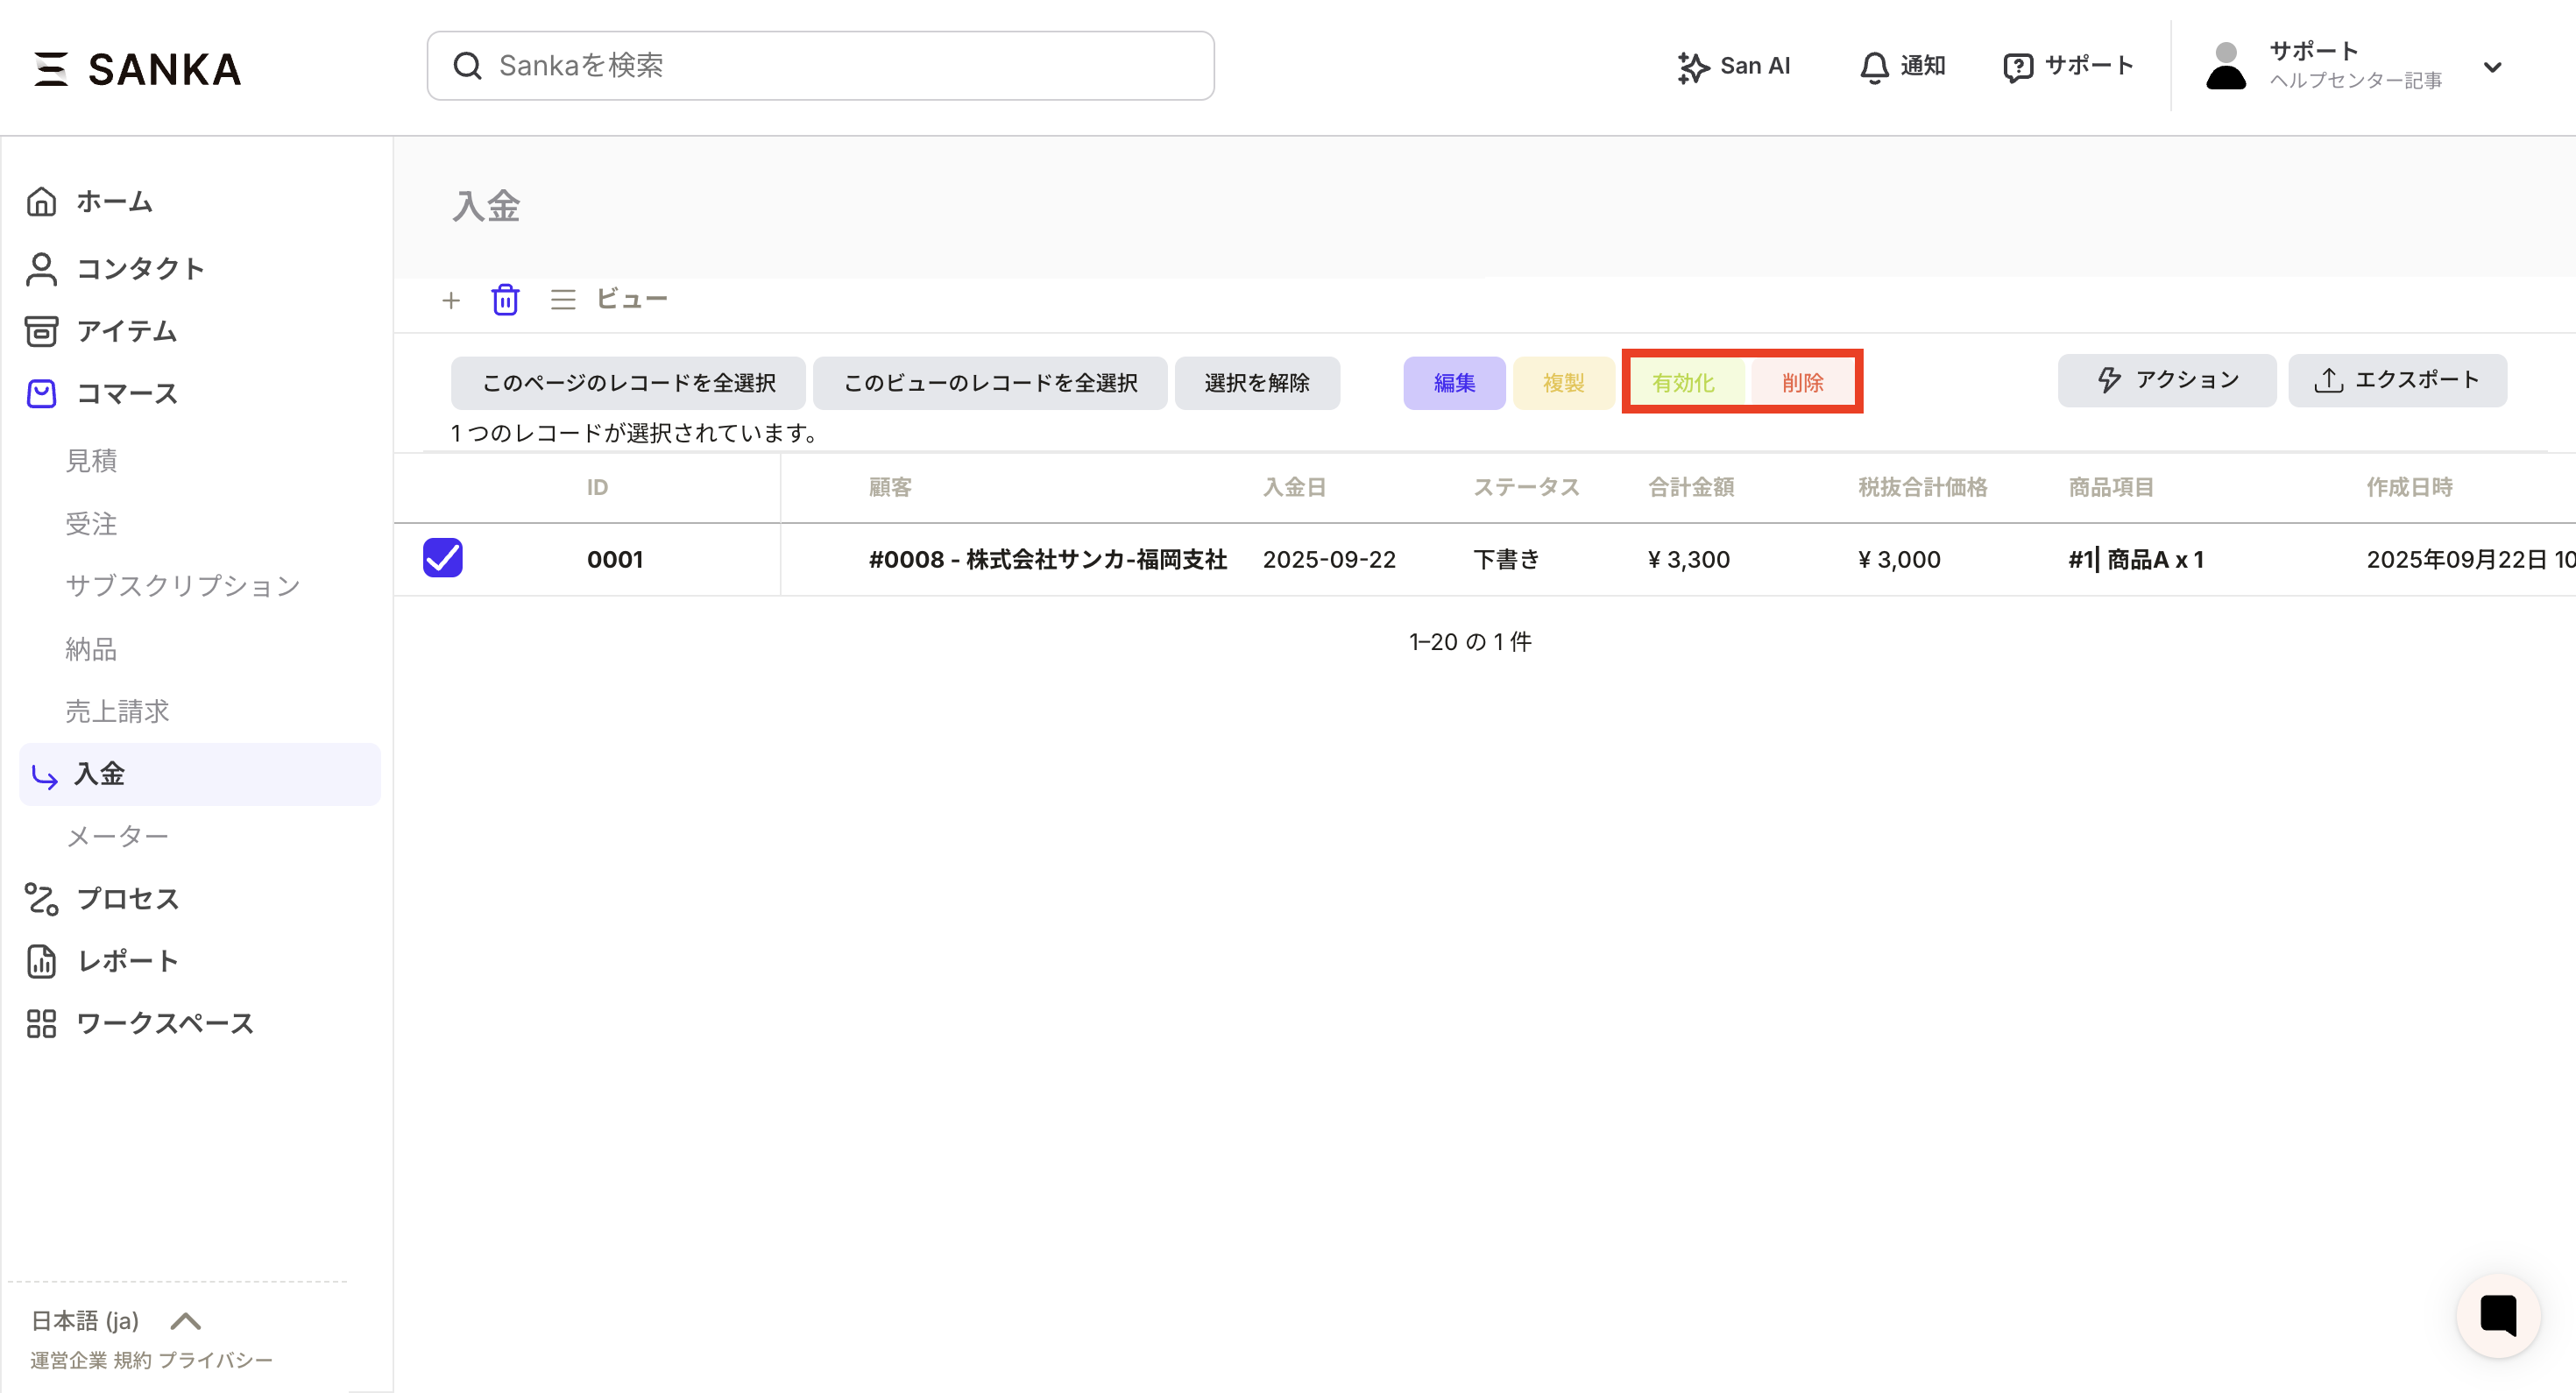
 ⑤If you want to cancel the archive, press the Activate button. The activated record returns to the view.
To delete, press the delete button. Please be careful as deleted data cannot be recovered.
⑤If you want to cancel the archive, press the Activate button. The activated record returns to the view.
To delete, press the delete button. Please be careful as deleted data cannot be recovered.