Journal object overview
How to create and manage journal records
**Journal object is a database for managing accounting transactions. **
 **② The "Create journal record" menu will be displayed, so enter the necessary information. **
 **③ Details of the required items are as follows. **
**“Business Partner”: Click the frame to display the transaction information that has already been registered, so select the appropriate one. You can add new customer information by pressing the "+Contact" and "+Company" buttons. **
**“Transaction date”: Click on the frame to display a calendar and select the day of the transaction. **
**“Tax rate”: Select from taxable sales 10%, taxable sales 8%, and non-taxable sales. **
**"Item": Enter the account item. Click "Add item" in the upper right to add a frame. **
**"Memo": Enter any notes regarding the transaction. **
**④Here, as an example, we will record the journal entry when 1 million yen of sales proceeds are deposited into a bank account. **
**After entering the required information, click the "Create Journal Record" button. **
**③ Details of the required items are as follows. **
**“Business Partner”: Click the frame to display the transaction information that has already been registered, so select the appropriate one. You can add new customer information by pressing the "+Contact" and "+Company" buttons. **
**“Transaction date”: Click on the frame to display a calendar and select the day of the transaction. **
**“Tax rate”: Select from taxable sales 10%, taxable sales 8%, and non-taxable sales. **
**"Item": Enter the account item. Click "Add item" in the upper right to add a frame. **
**"Memo": Enter any notes regarding the transaction. **
**④Here, as an example, we will record the journal entry when 1 million yen of sales proceeds are deposited into a bank account. **
**After entering the required information, click the "Create Journal Record" button. **
 **⑤You can confirm that it has been registered on the record screen list. **
 **② The "Journal record management" menu will be displayed, allowing you to modify the information. Finally, click "Update". **

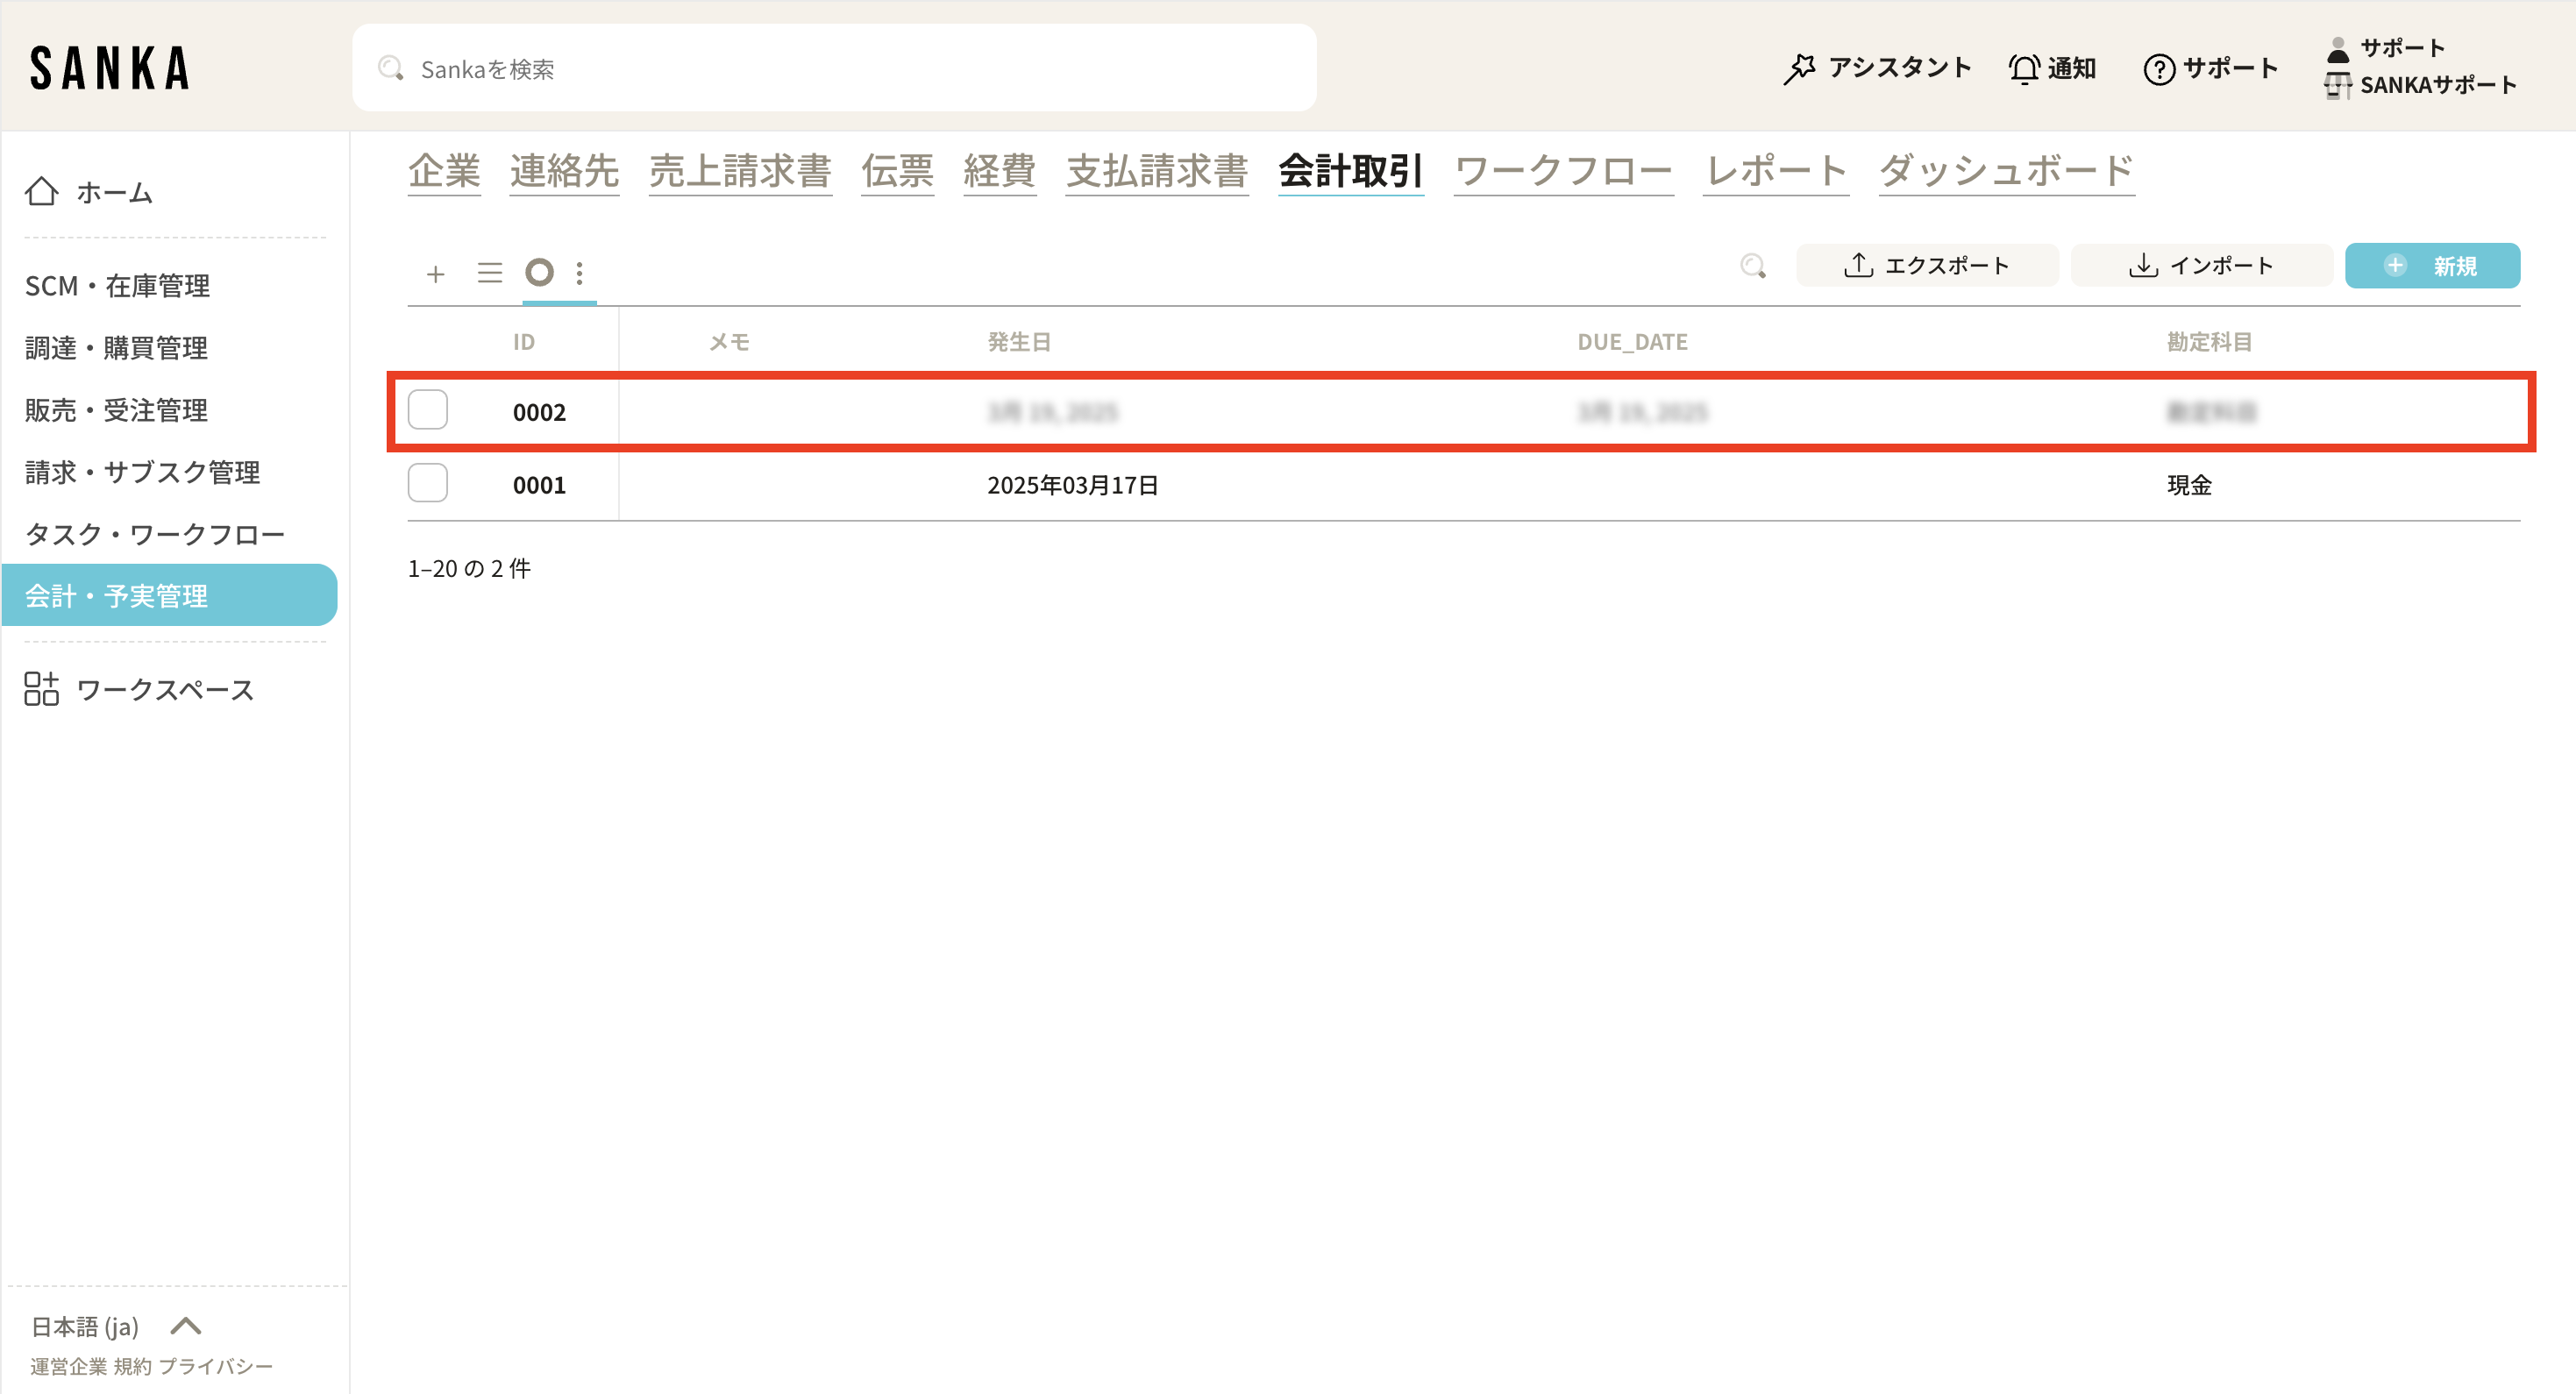
 **② Archived items will be grayed out. **
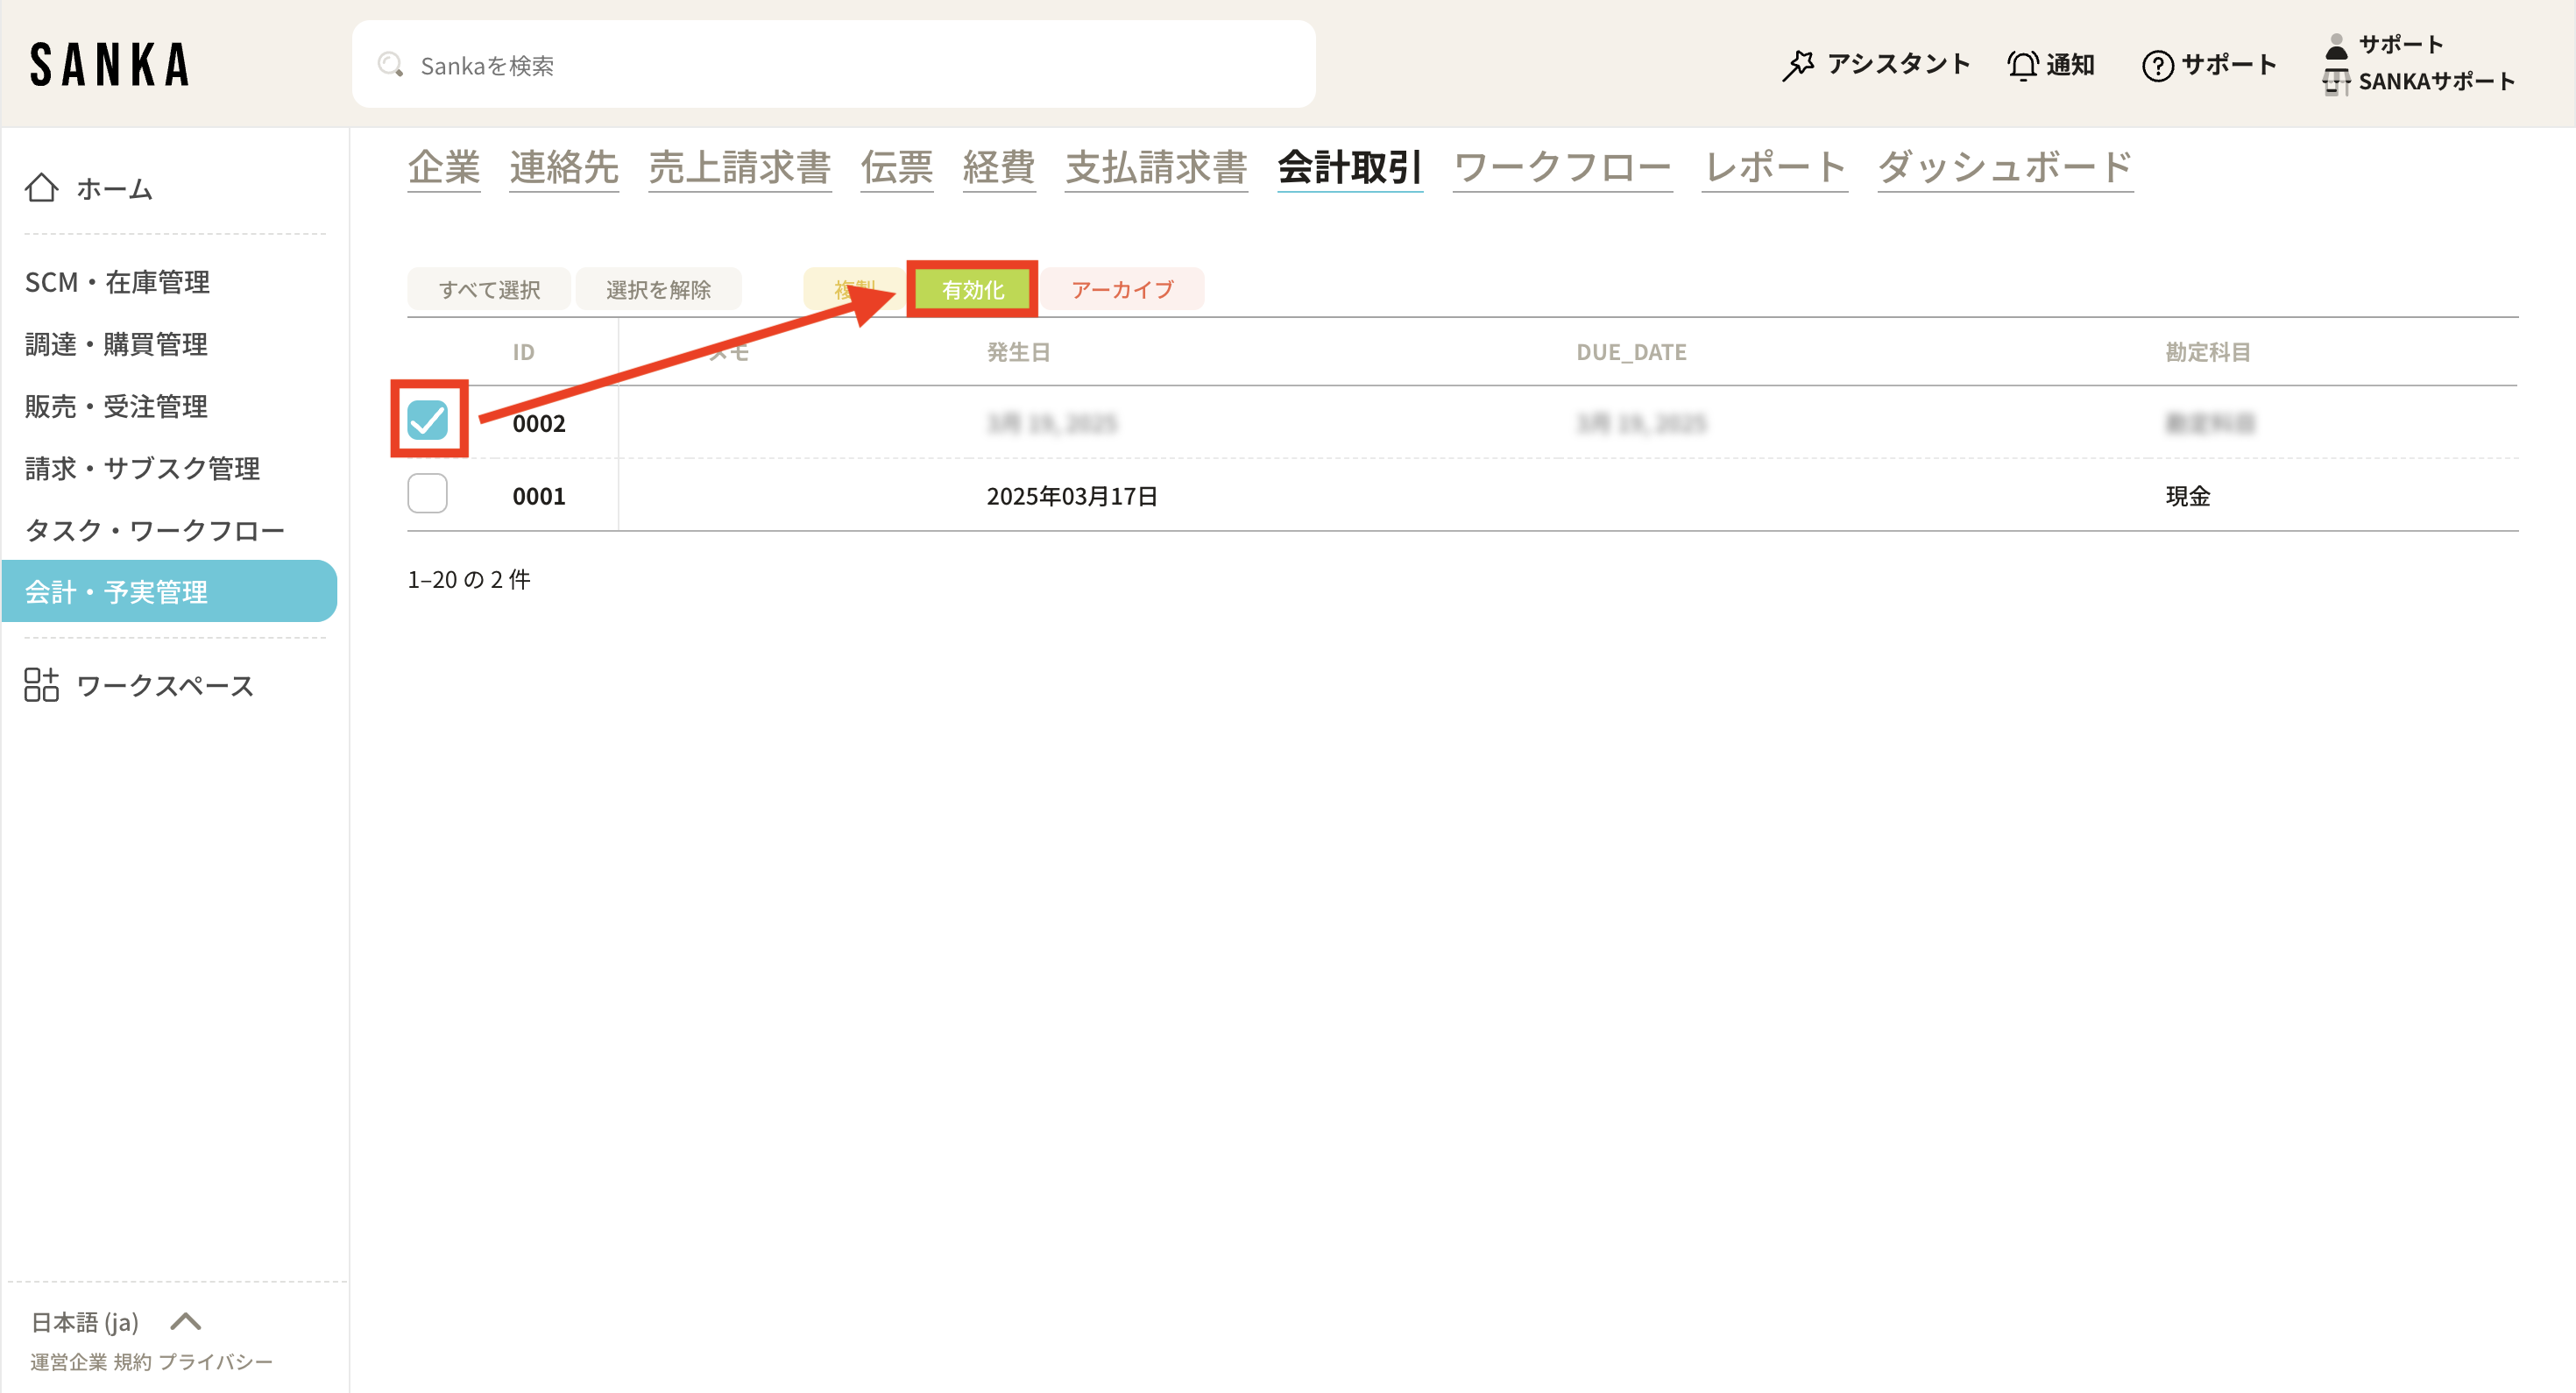
 **③ If you want to cancel the archive, click the box for the relevant item and select "Enable". **
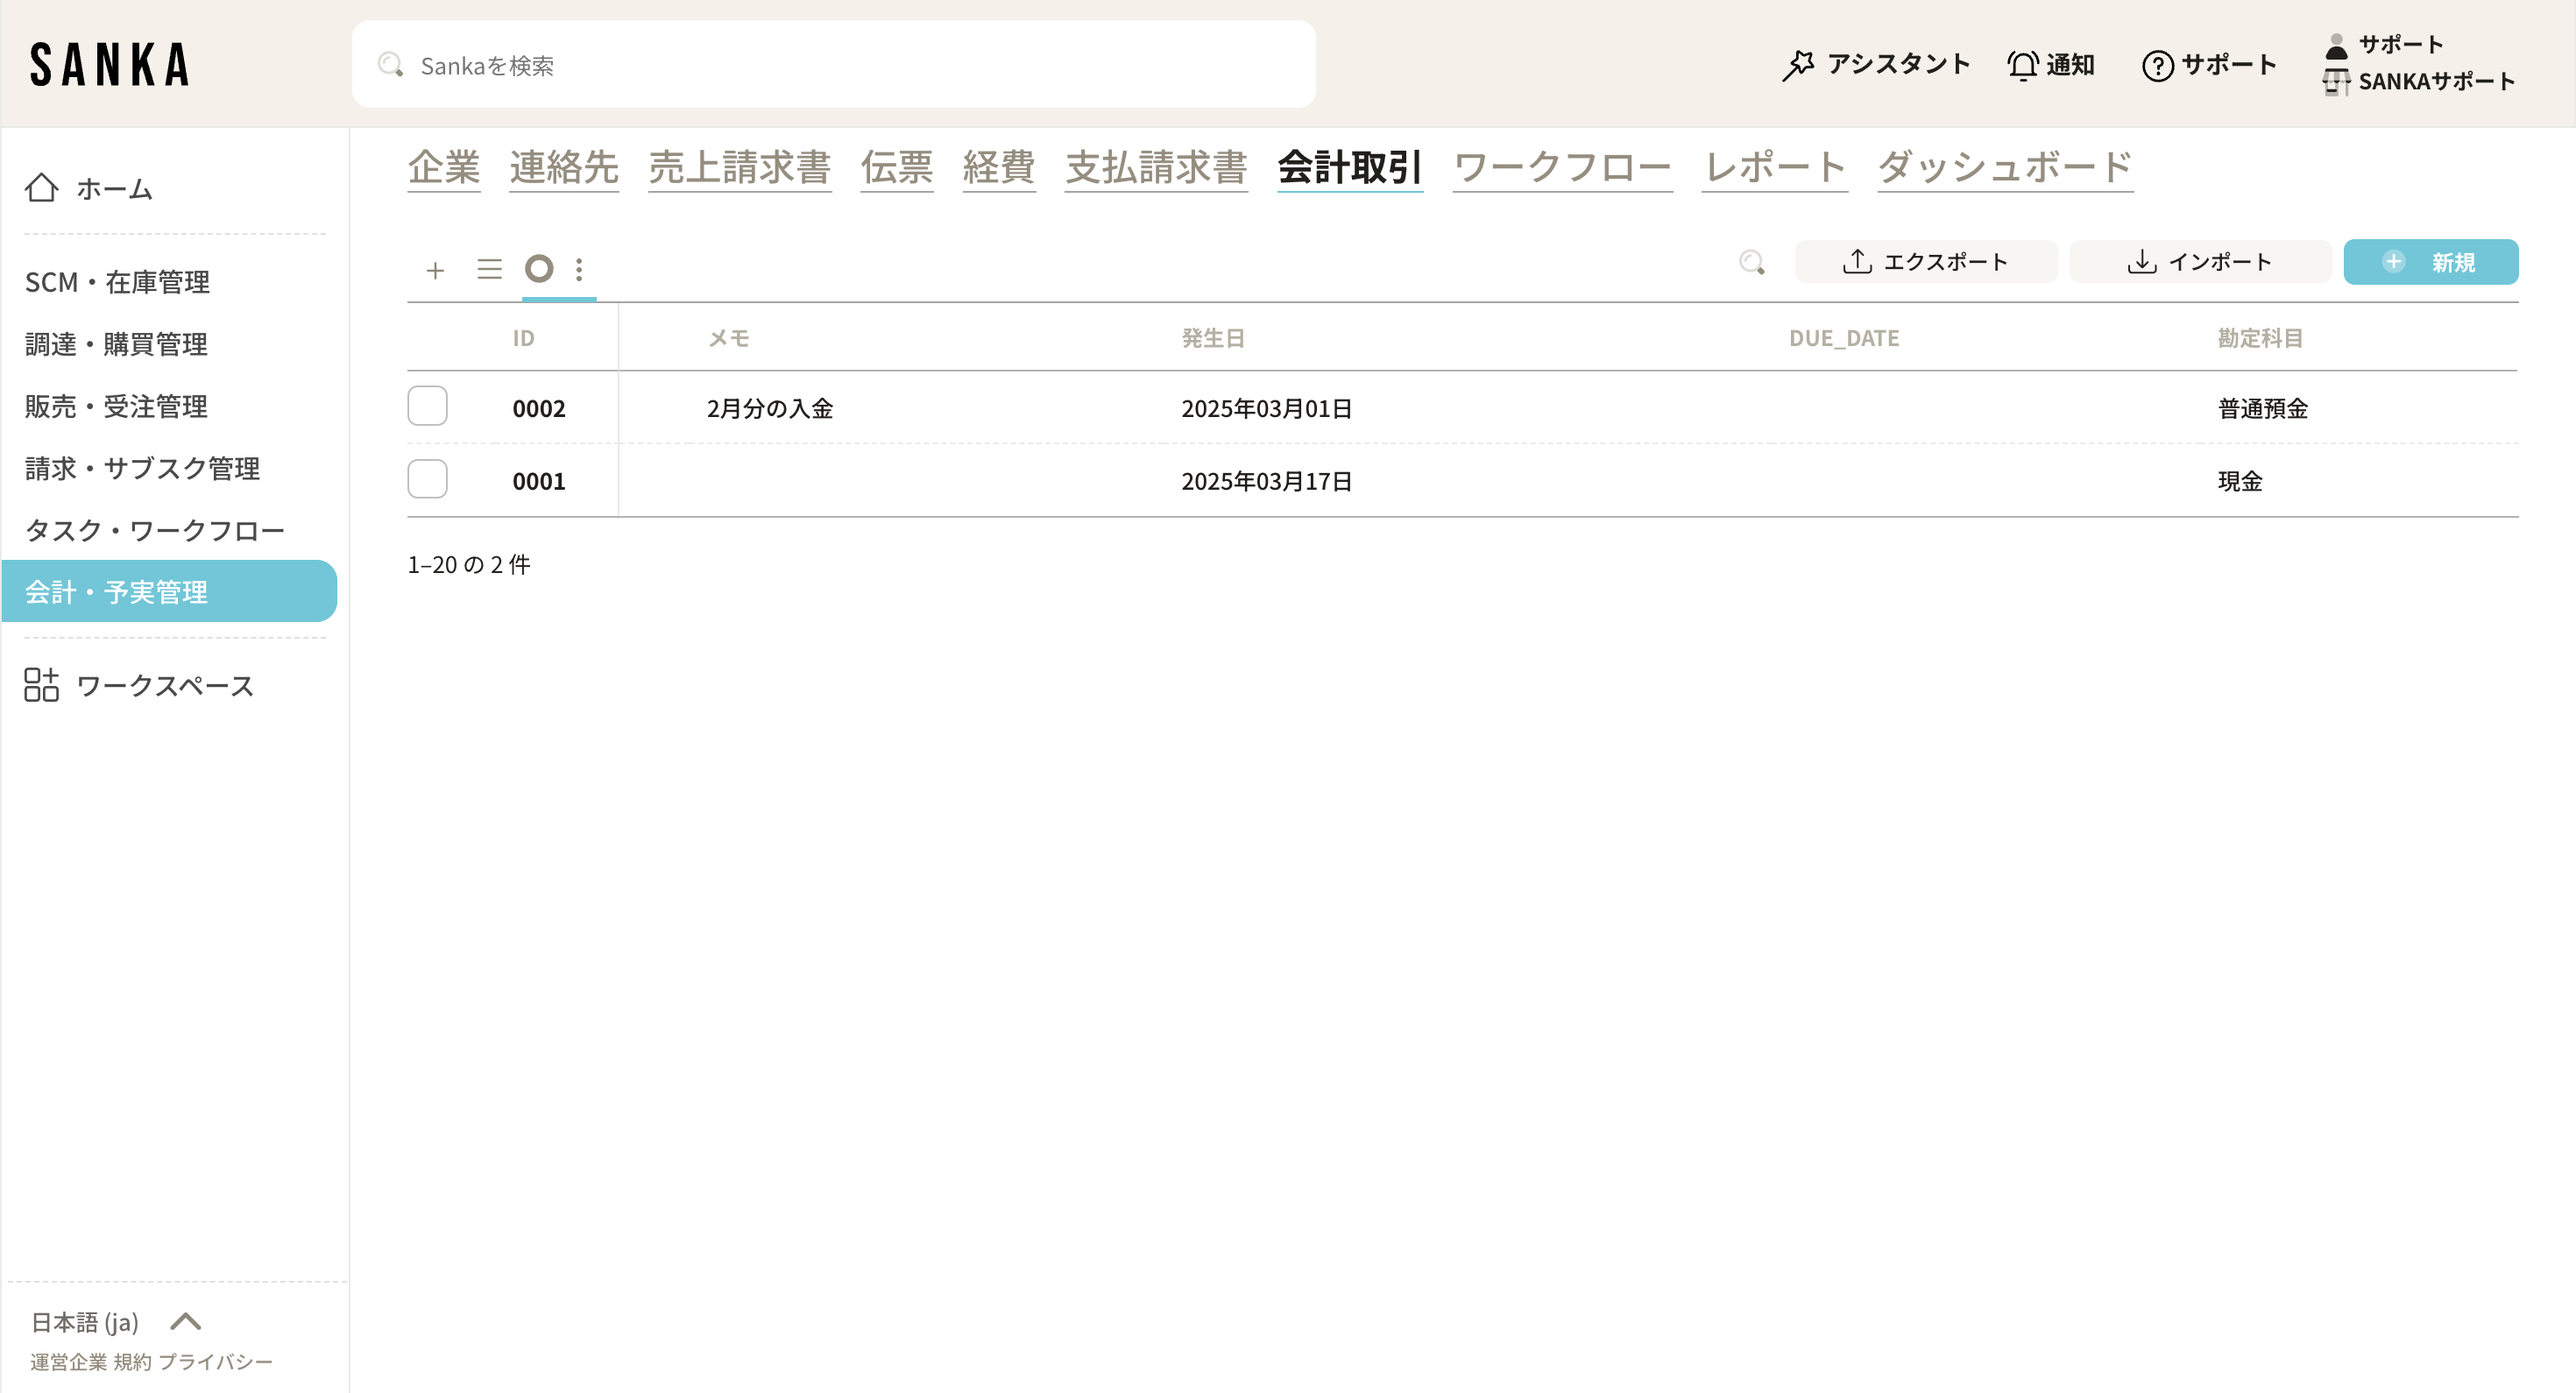
 **④ The enabled item will be grayed out and will return to normal display. **
What you can do with journal objects
- **Journal entry: Bookkeeping work to record accounting transactions. Journalized transactions are ultimately summarized in financial statements such as a balance sheet and an income statement. **
- **Understanding the business situation: Organizing income, expenses, assets, debts, etc. will serve as material for management decisions. **
Default properties for journal objects
- **Business partner: Records information about the business partner (customer, supplier, etc.). **
- **Transaction date: Register the date when the accounting transaction occurred. **
- **Tax rate: Set the tax rate applied to the transaction and use it to calculate the tax amount. **
- **Item: Set account. **
- **Note: Feel free to enter any additional information regarding the transaction. **
What you will learn from this article
- How to register journal records
- How to modify and manage registered records
How to register journal records
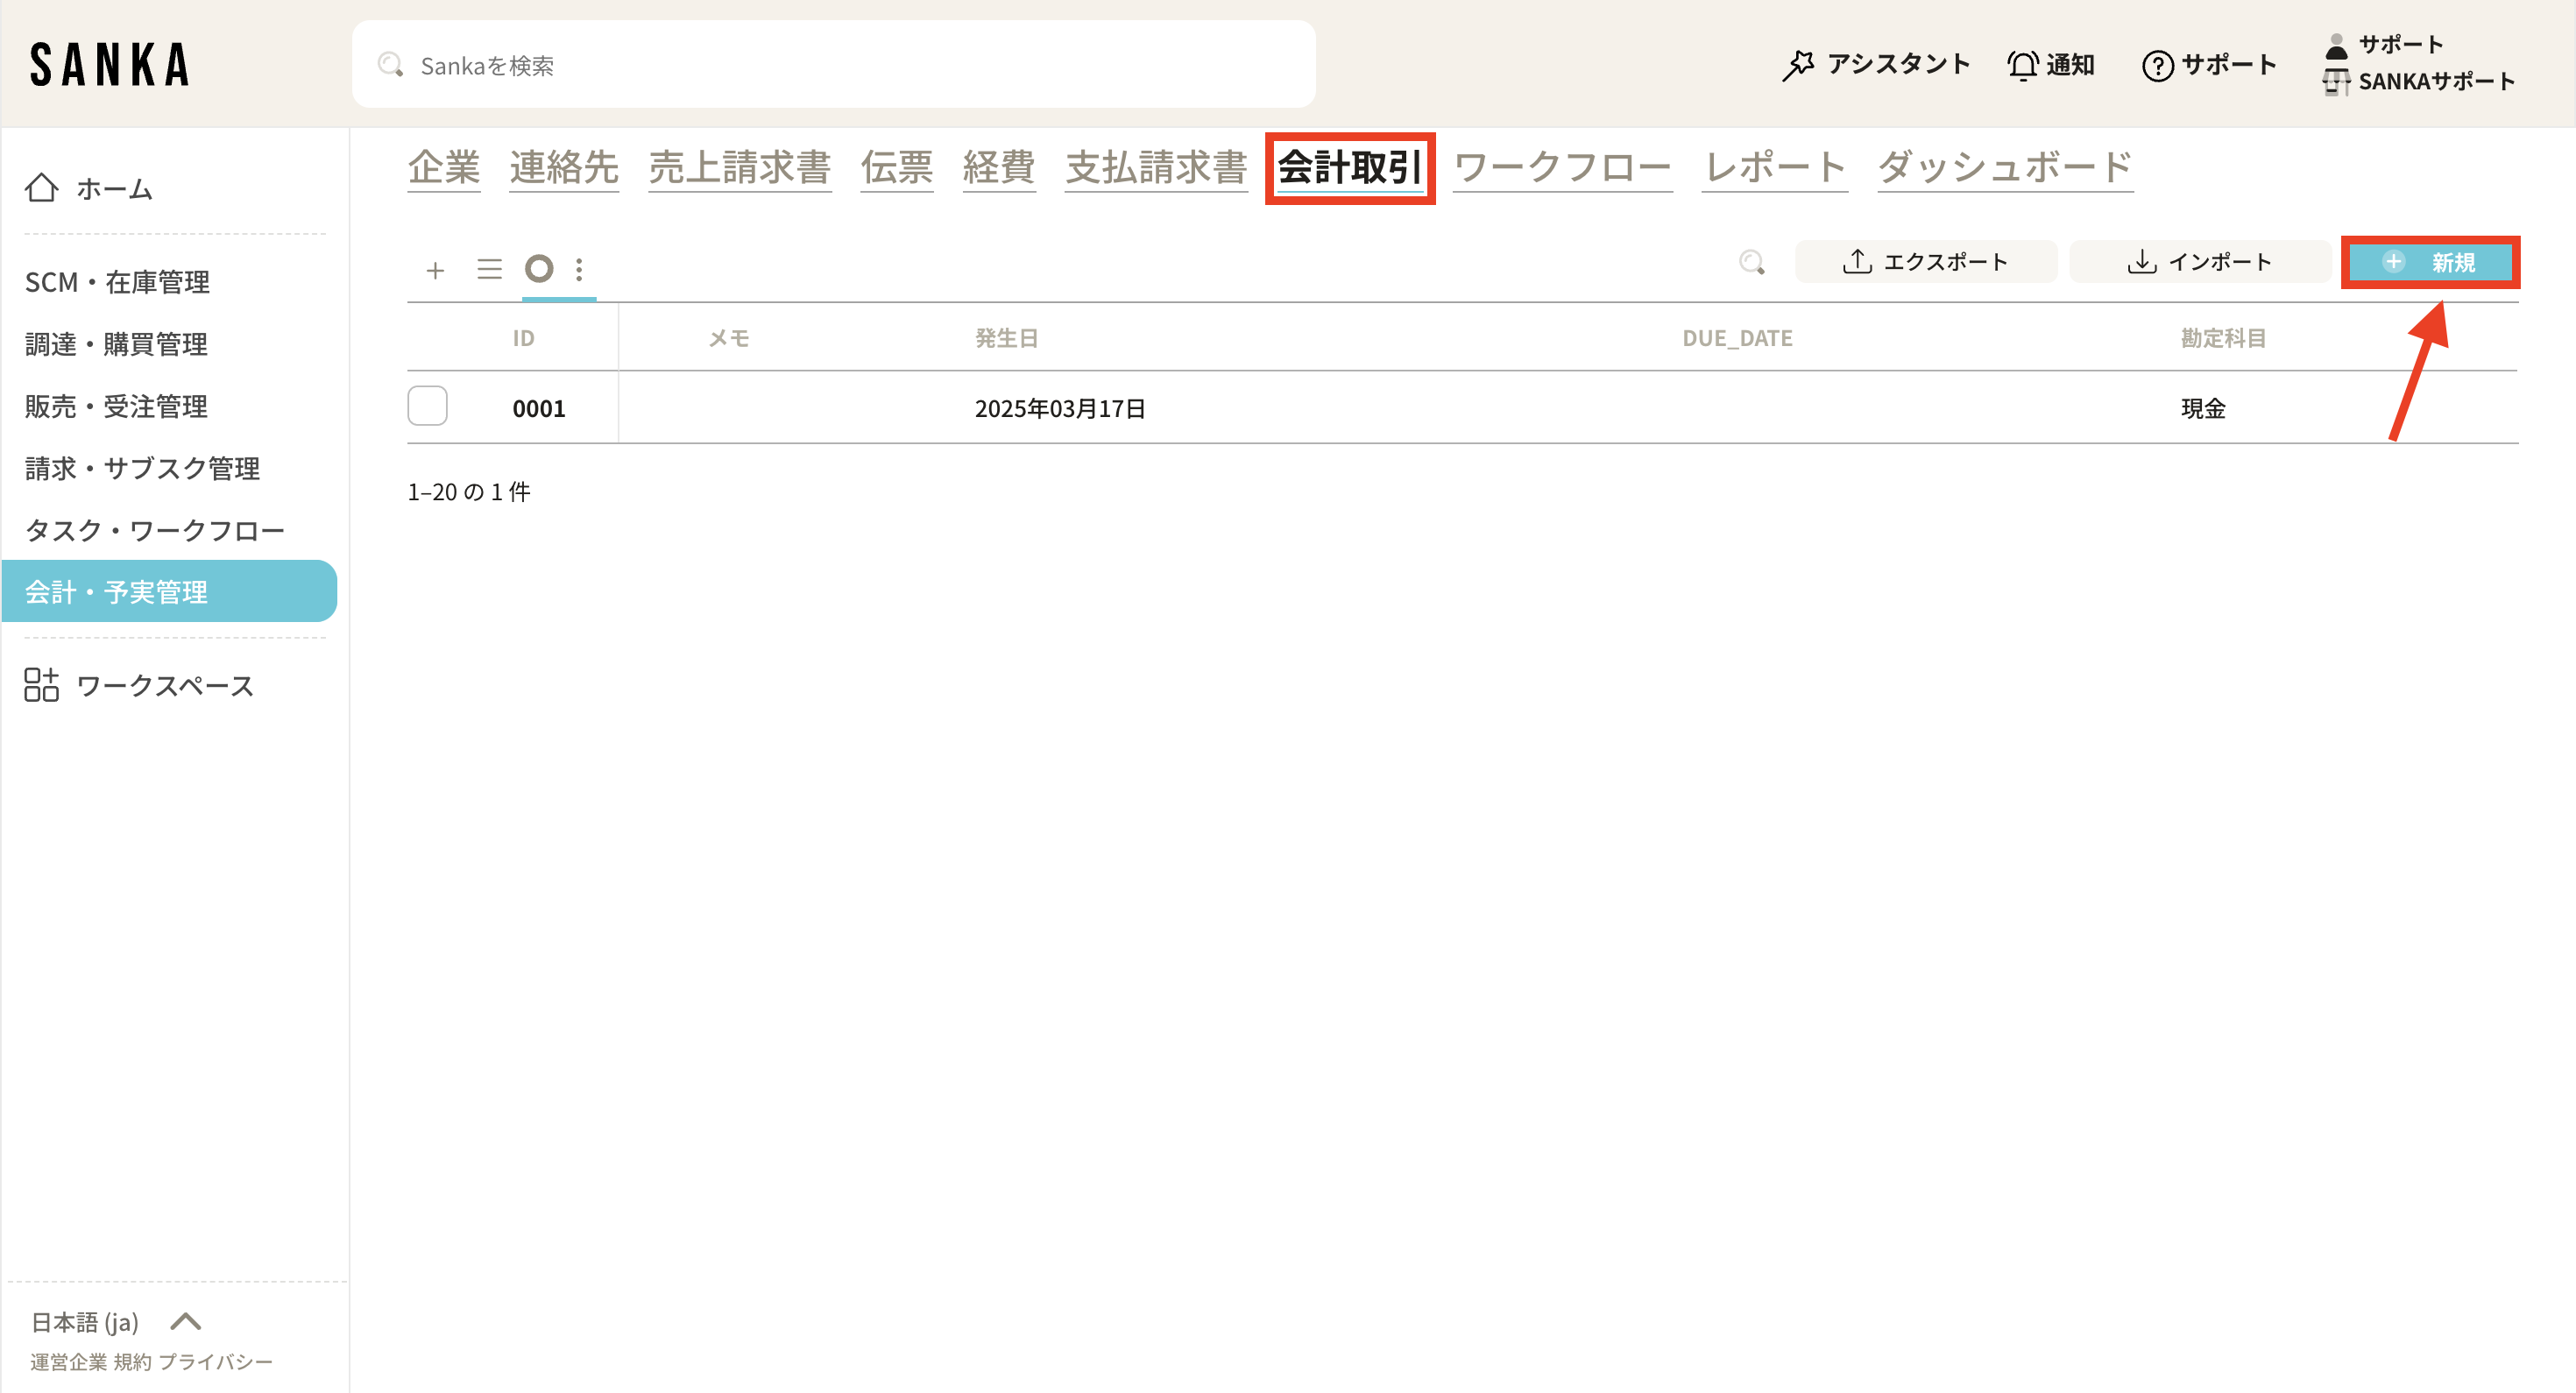
**① Select the “Journal” object. Click the "New" button at the top right of the screen. **
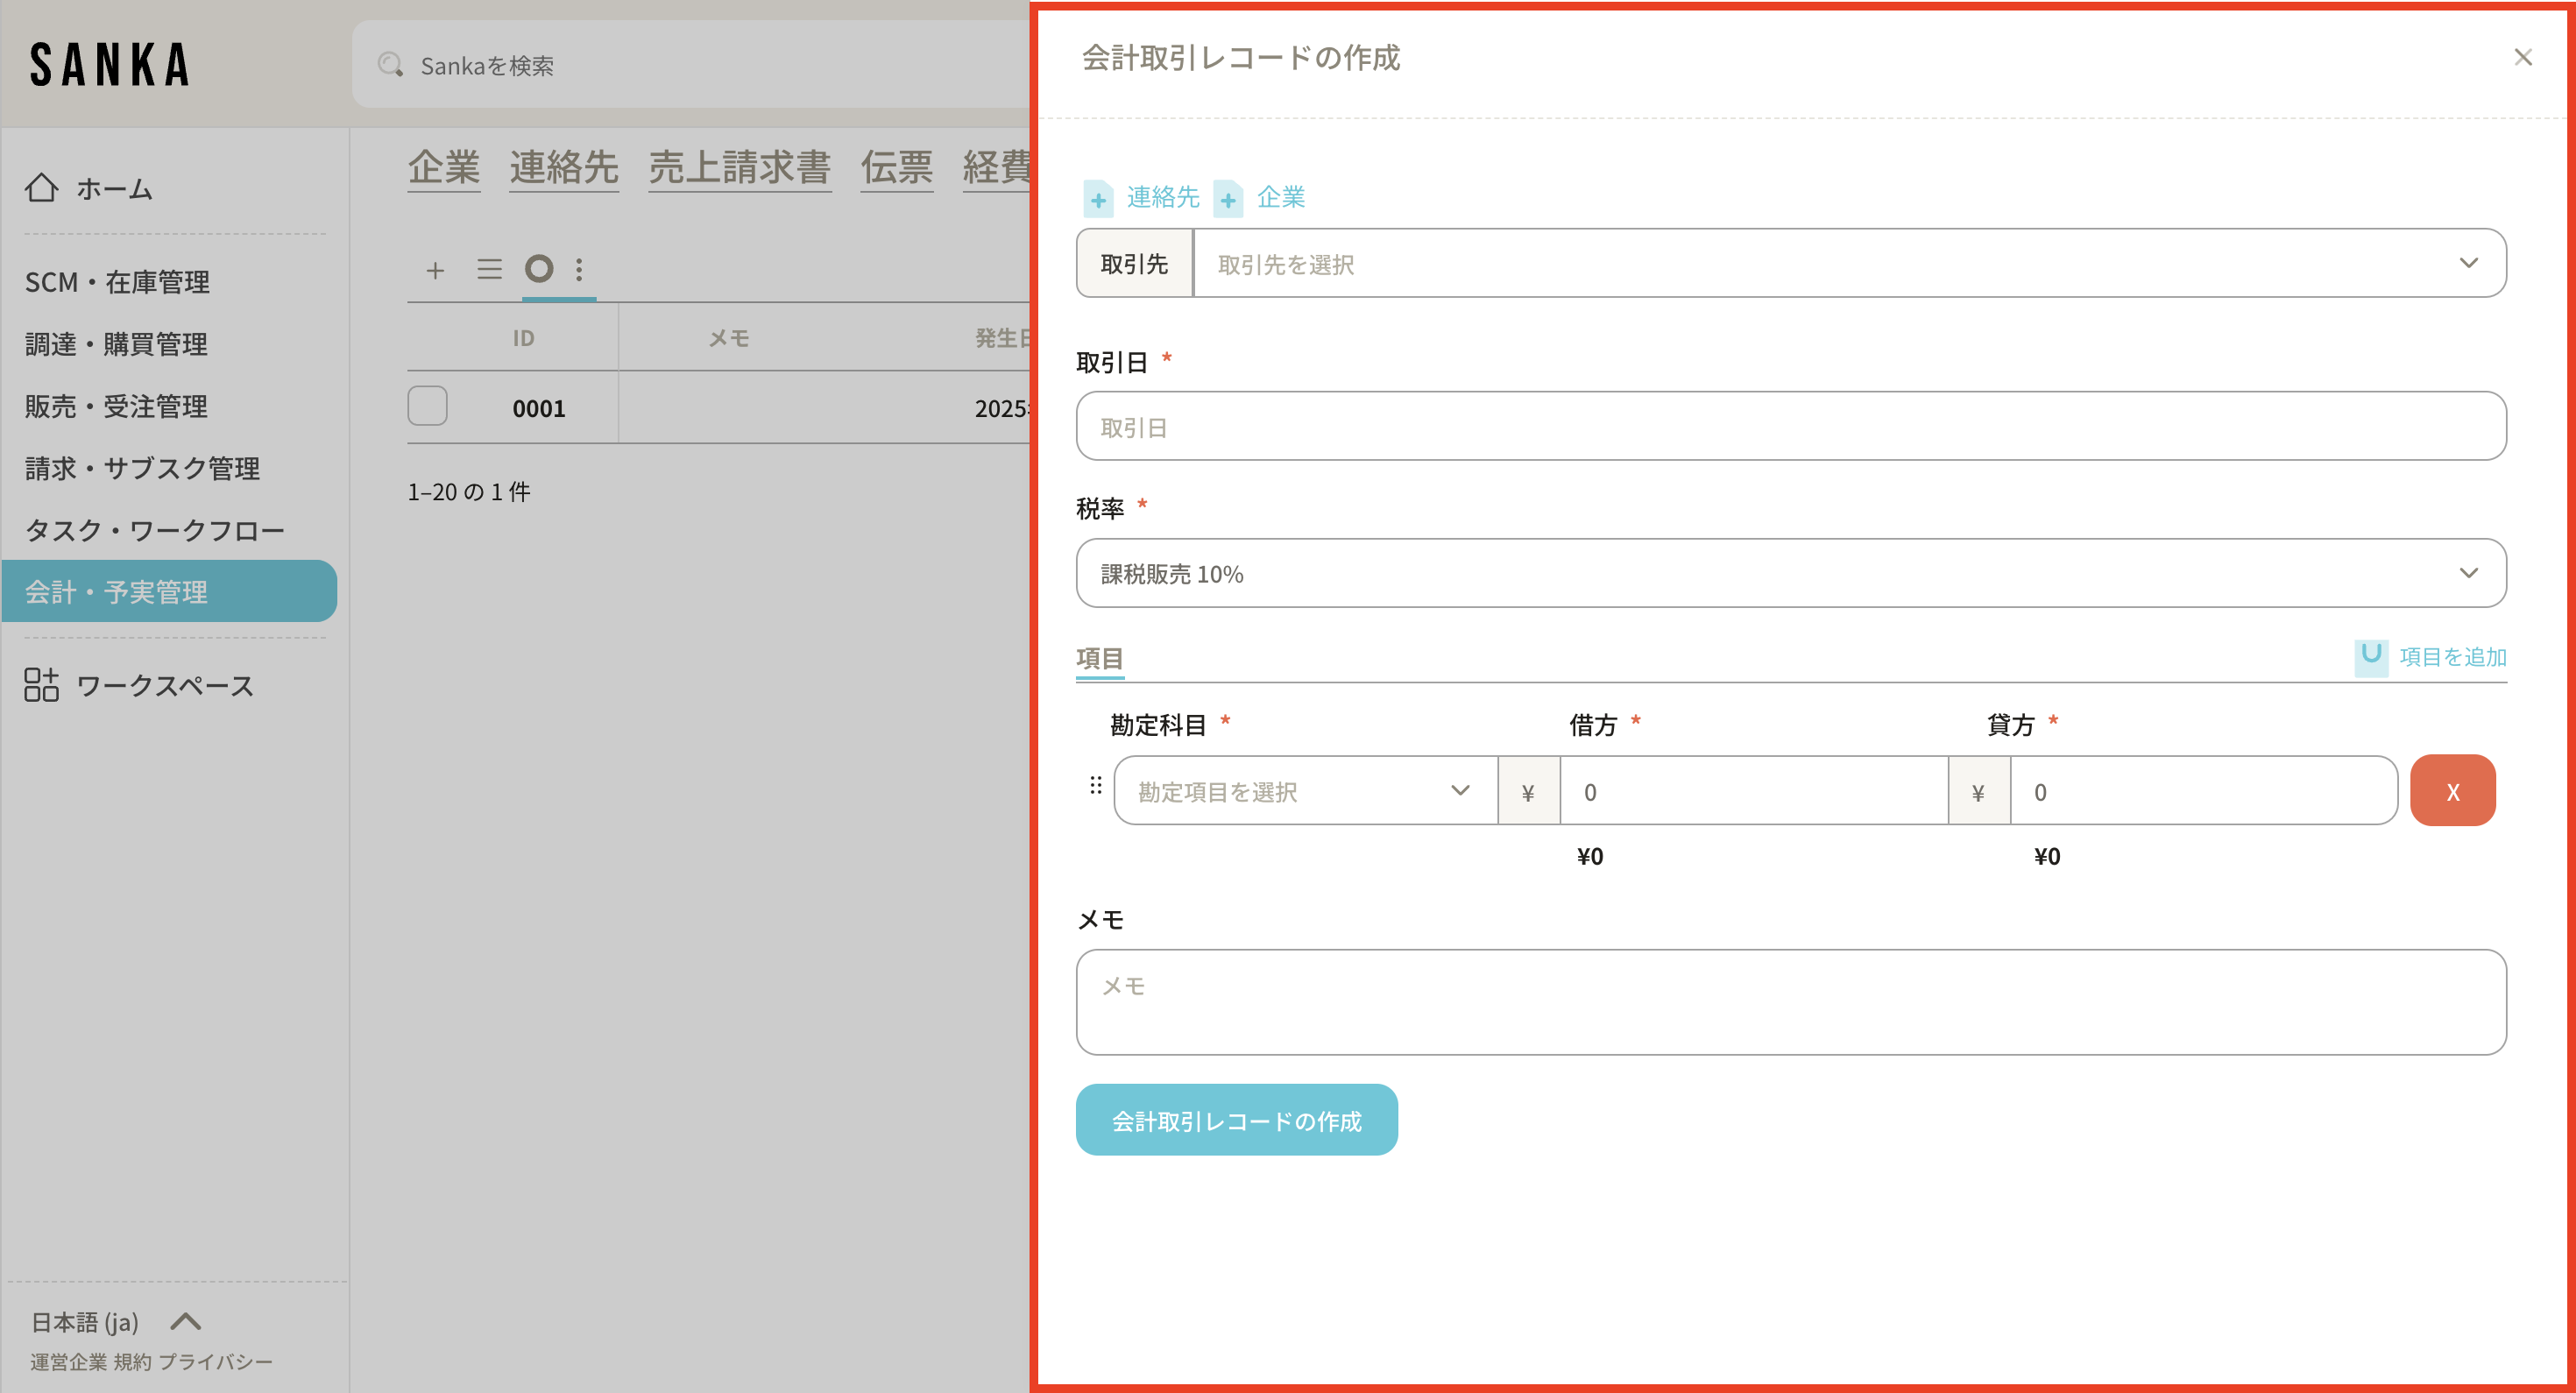
**② The "Create journal record" menu will be displayed, so enter the necessary information. **
**③ Details of the required items are as follows. **
**“Business Partner”: Click the frame to display the transaction information that has already been registered, so select the appropriate one. You can add new customer information by pressing the "+Contact" and "+Company" buttons. **
**“Transaction date”: Click on the frame to display a calendar and select the day of the transaction. **
**“Tax rate”: Select from taxable sales 10%, taxable sales 8%, and non-taxable sales. **
**"Item": Enter the account item. Click "Add item" in the upper right to add a frame. **
**"Memo": Enter any notes regarding the transaction. **
**④Here, as an example, we will record the journal entry when 1 million yen of sales proceeds are deposited into a bank account. **
**After entering the required information, click the "Create Journal Record" button. **
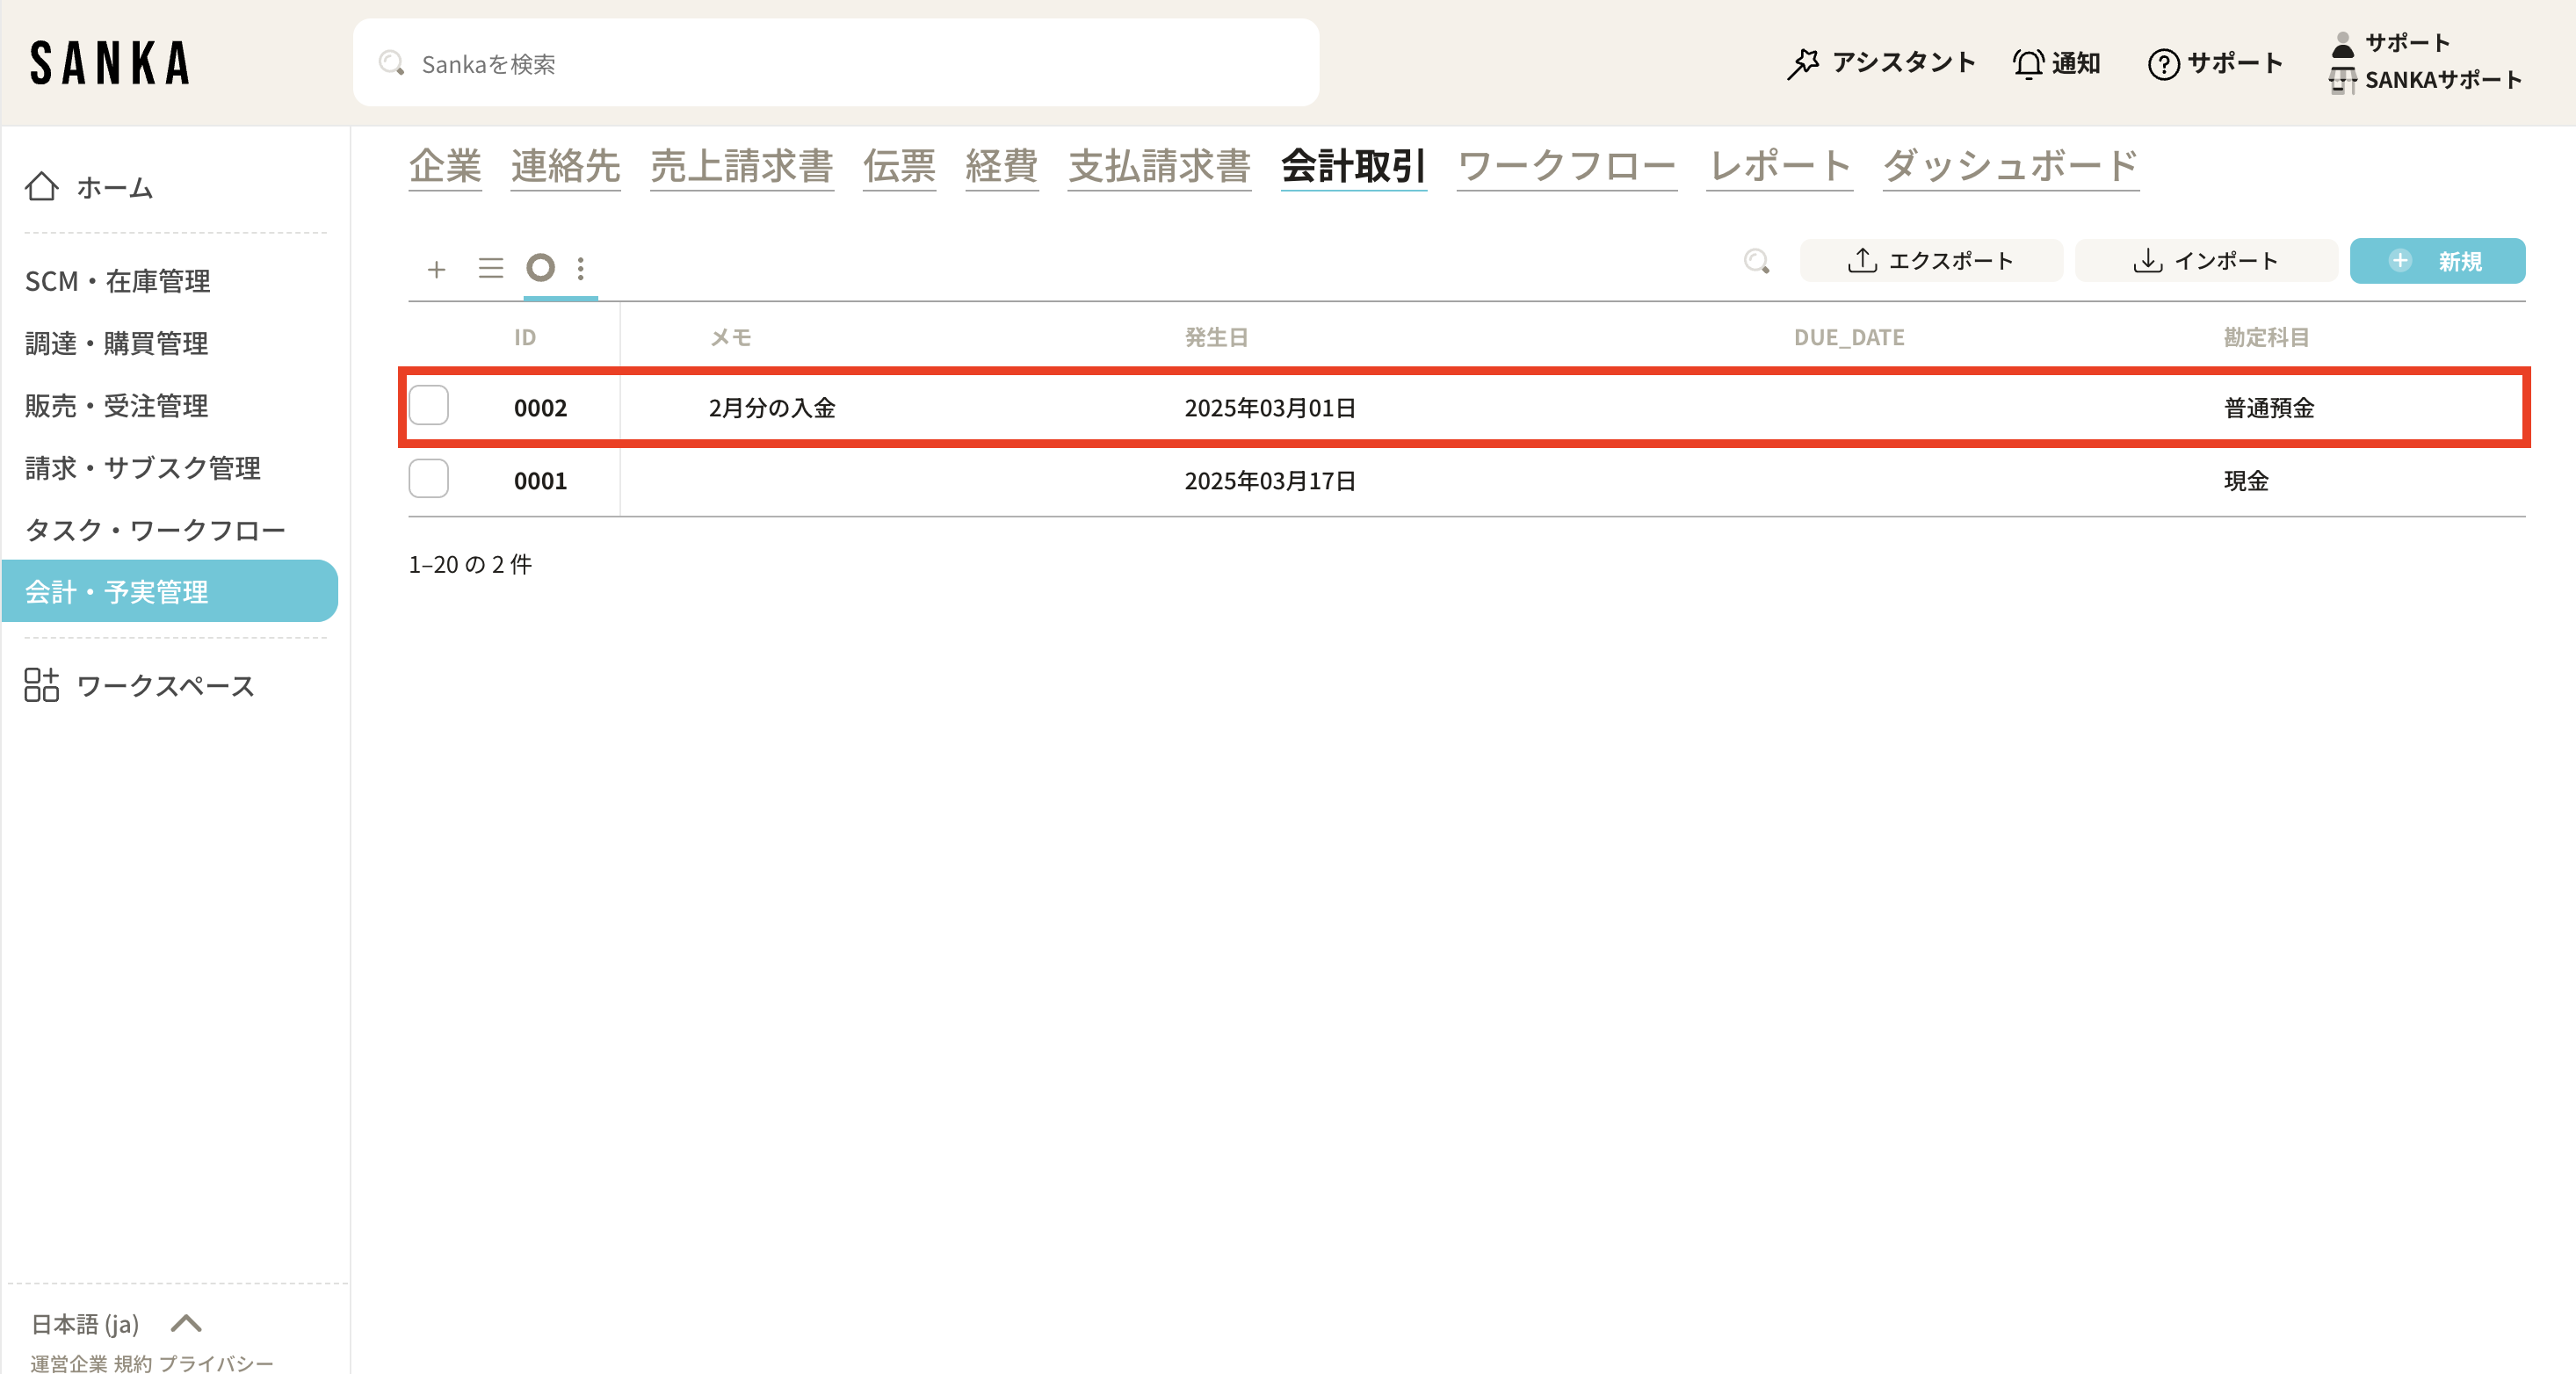
**⑤You can confirm that it has been registered on the record screen list. **
How to modify and manage registered records
How to modify registered records
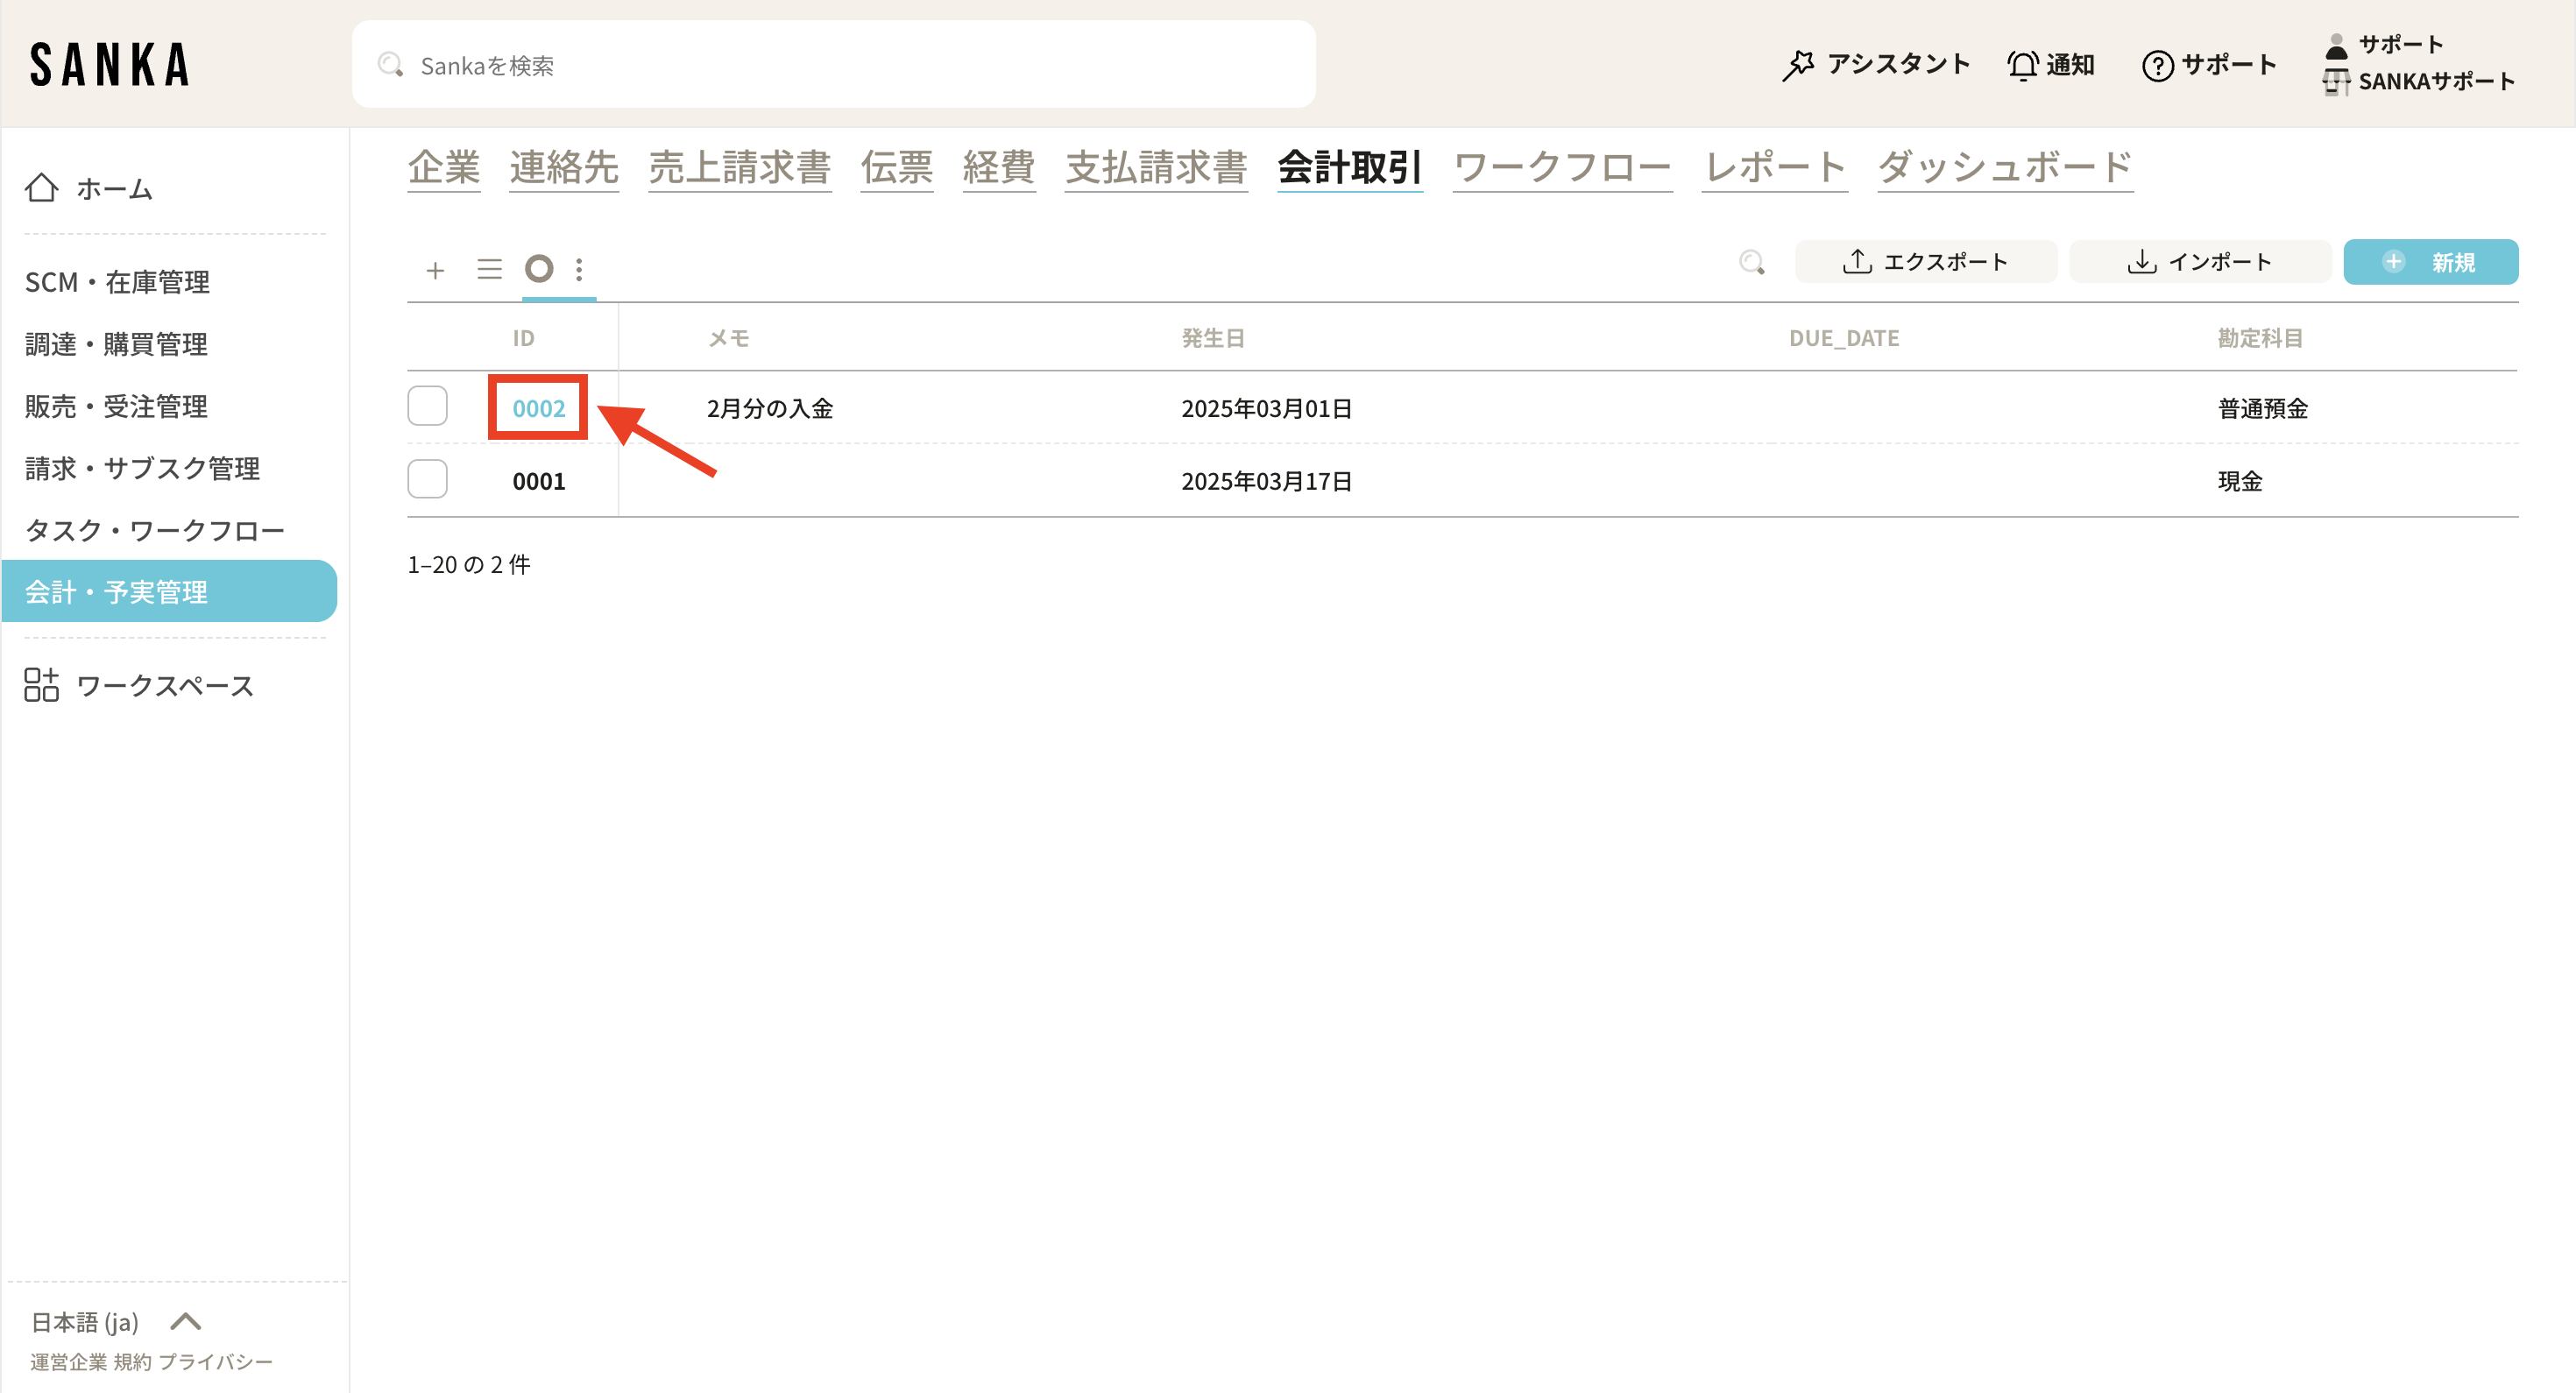
**① Click the subscription ID of the edited record from the record list screen of the "Journal" object. **
**② The "Journal record management" menu will be displayed, allowing you to modify the information. Finally, click "Update". **
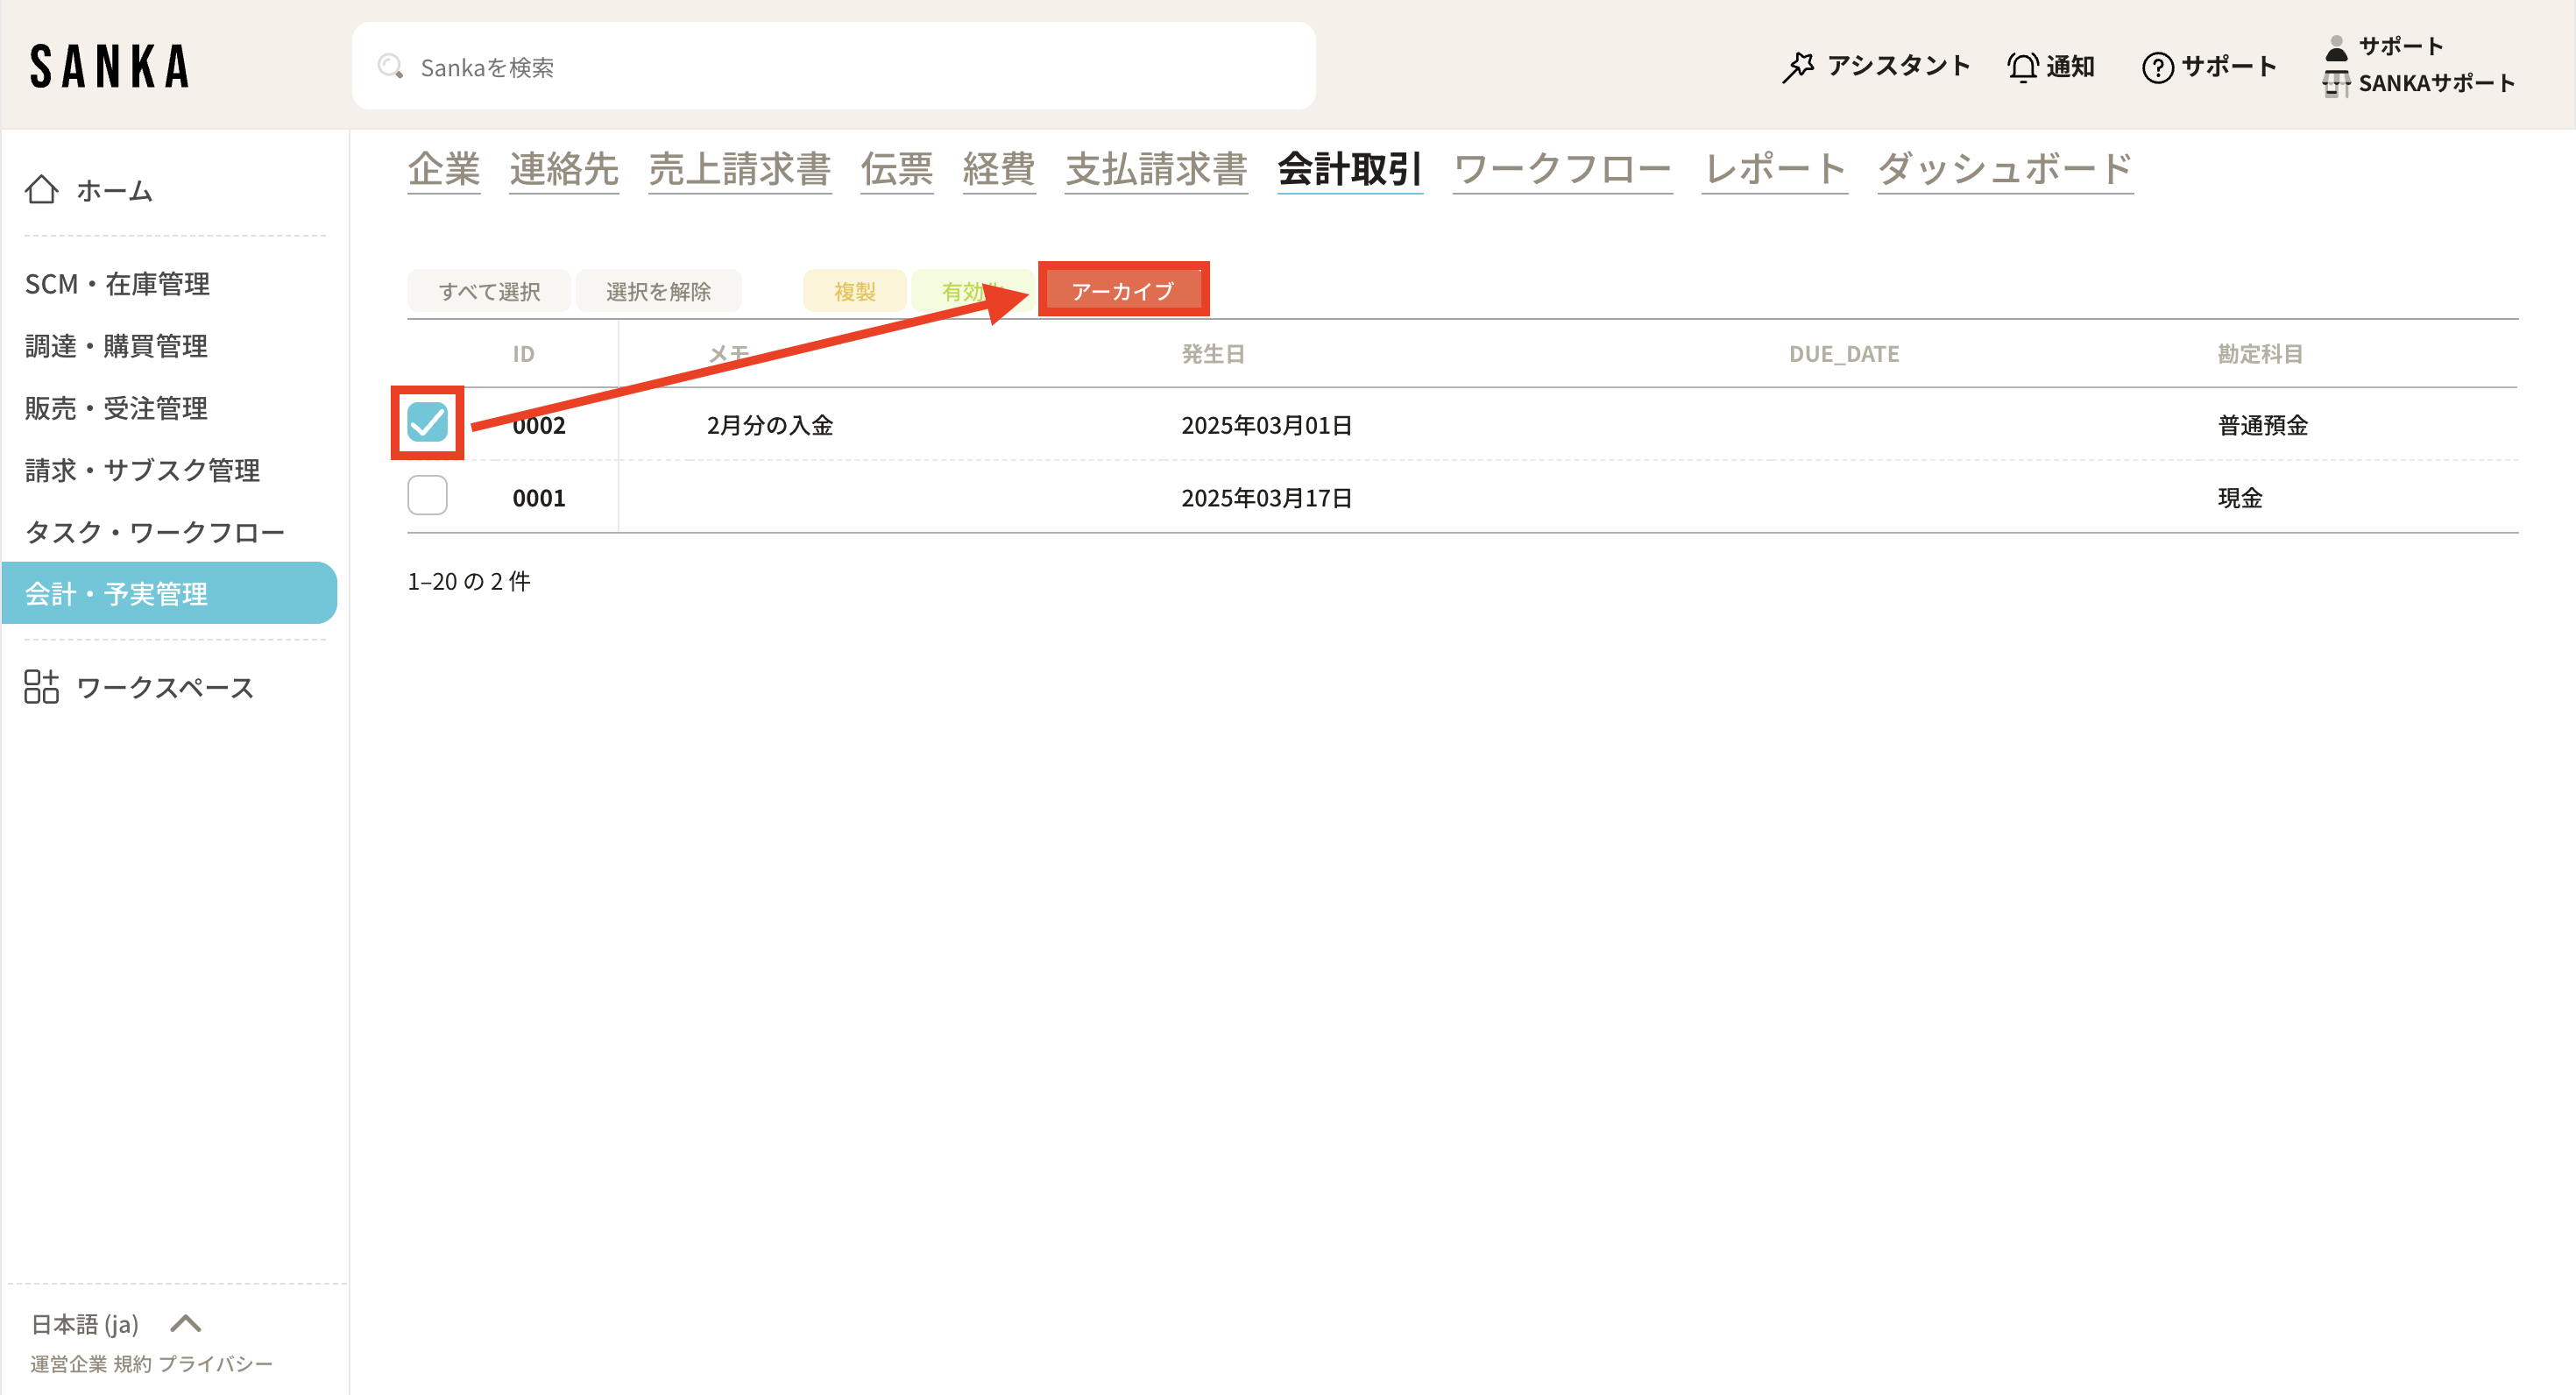
How to archive records
**Once registered with Sanka, it cannot be deleted. Therefore, you can use the archive function to hide registered records from the list table. ** **① Click the box of the item you want to archive from the record list screen of the journal object and select "Archive". **
**② Archived items will be grayed out. **
**③ If you want to cancel the archive, click the box for the relevant item and select "Enable". **
**④ The enabled item will be grayed out and will return to normal display. **