Set product configuration
This section explains the steps to add configuration properties and link child parts to a parent product.
the purpose
By linking parent products and child parts with the "composition" property, you can centrally manage the breakdown of set products and assembled products. This article explains the steps from property creation to form reflection, product creation, and configuration registration.How to create product composition
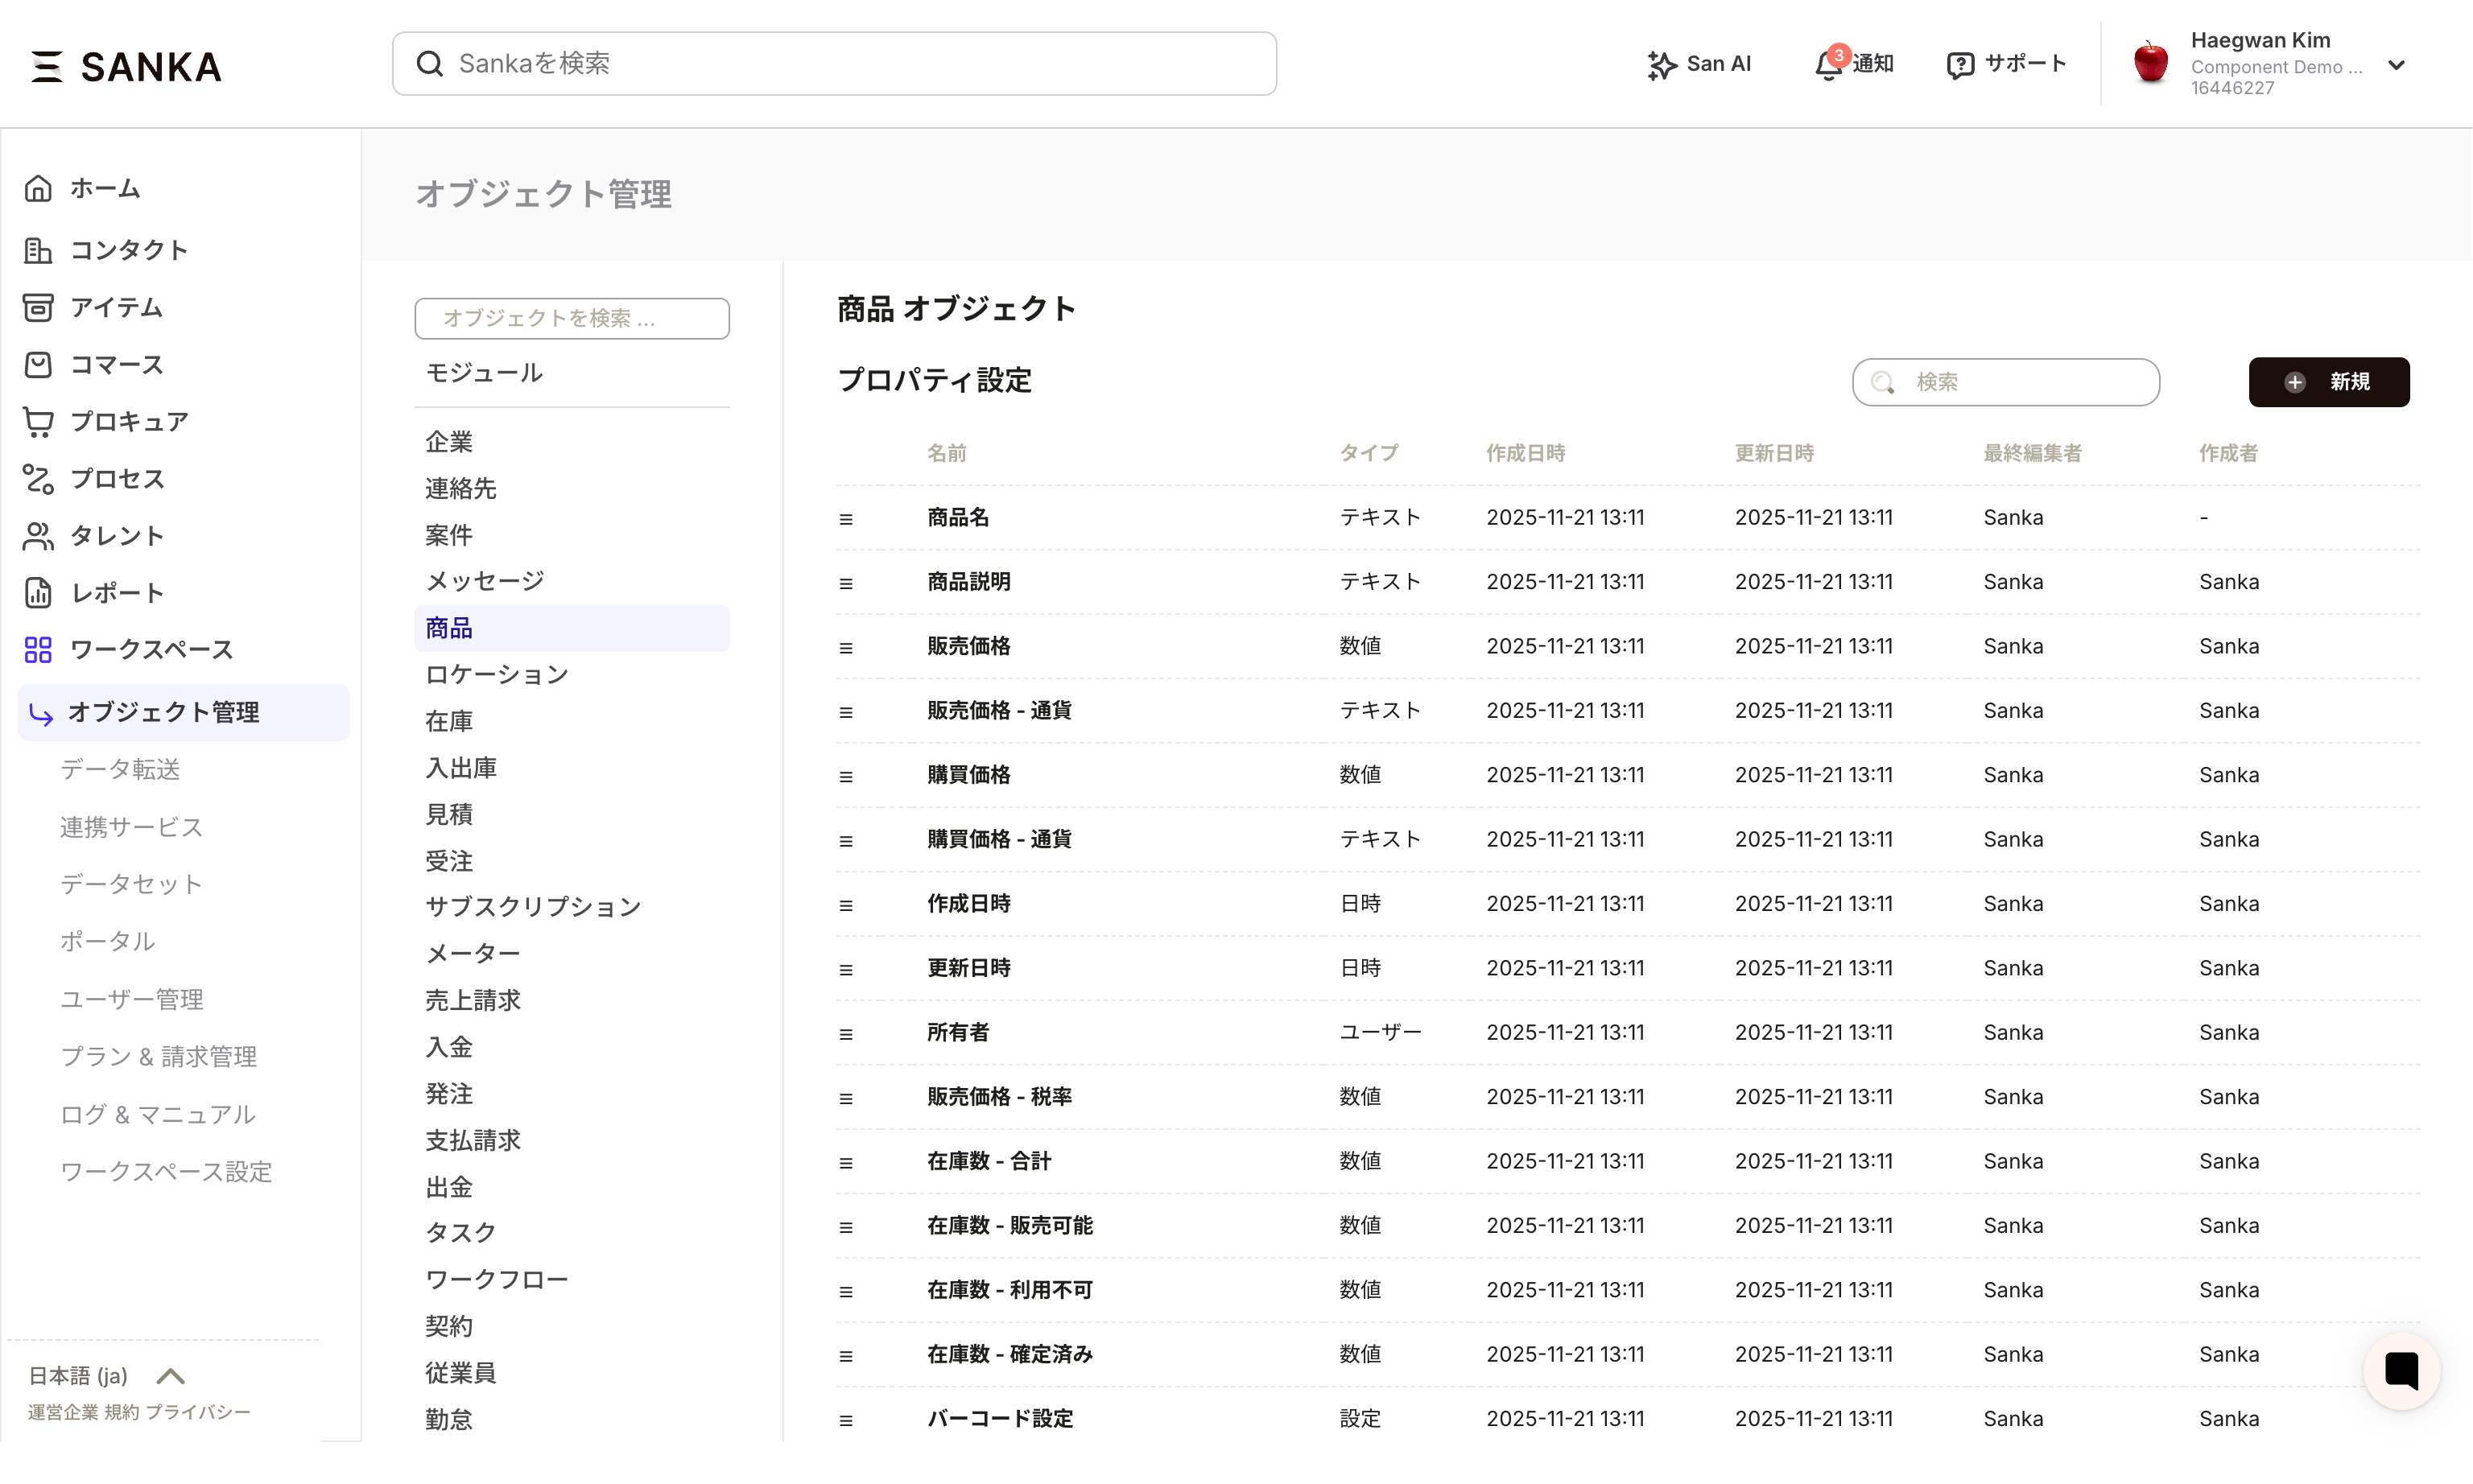
If you want to link information about the parts and materials that make up a product, you need to create product configuration properties. This guide will show you how to create product configuration properties. *For confirmation of basic concepts such as "objects" and "modules", please see "Basics of Sanka". How to create product configuration properties The "Create Product Record" menu screen does not have product configuration properties at the time of default settings. Therefore, it is necessary to create a "Product configuration property" and add it to the form (record creation screen). First, we will introduce how to create properties. ① First, select "Workspace" from the menu at the bottom left of the Sanka screen and click "Object Management".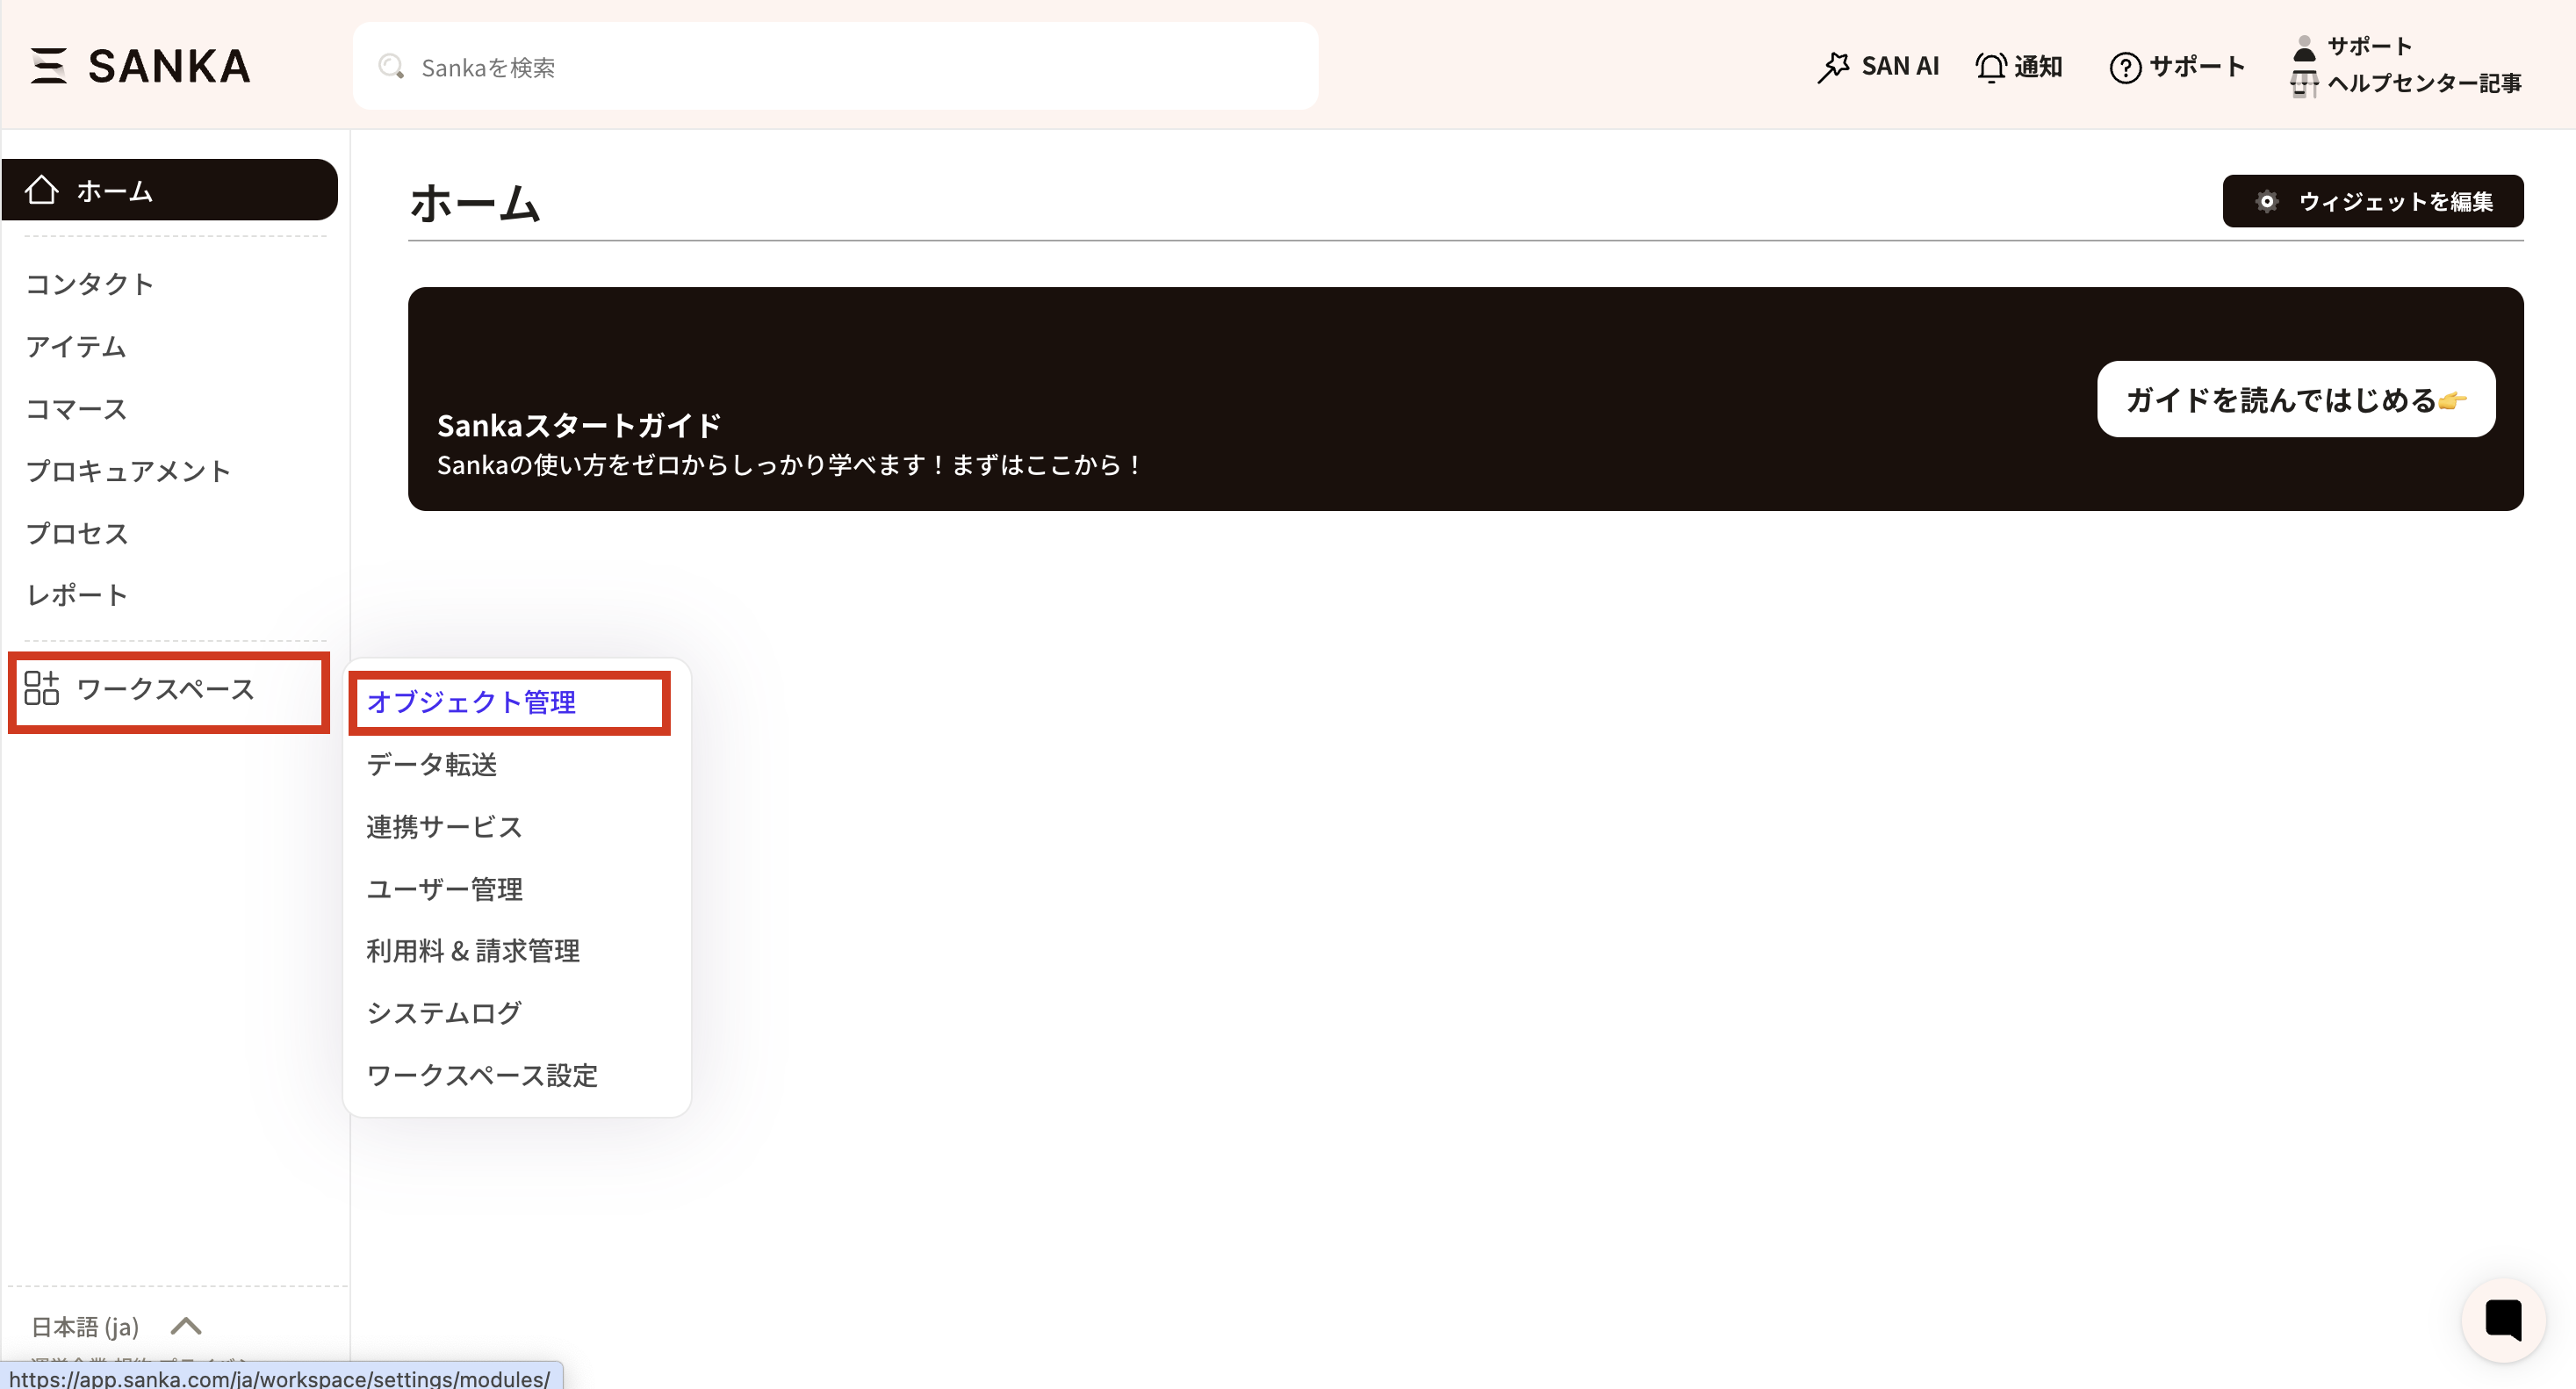 ② Select "Product" from the "Object Management" menu to display the properties (management items) currently set for the product object.
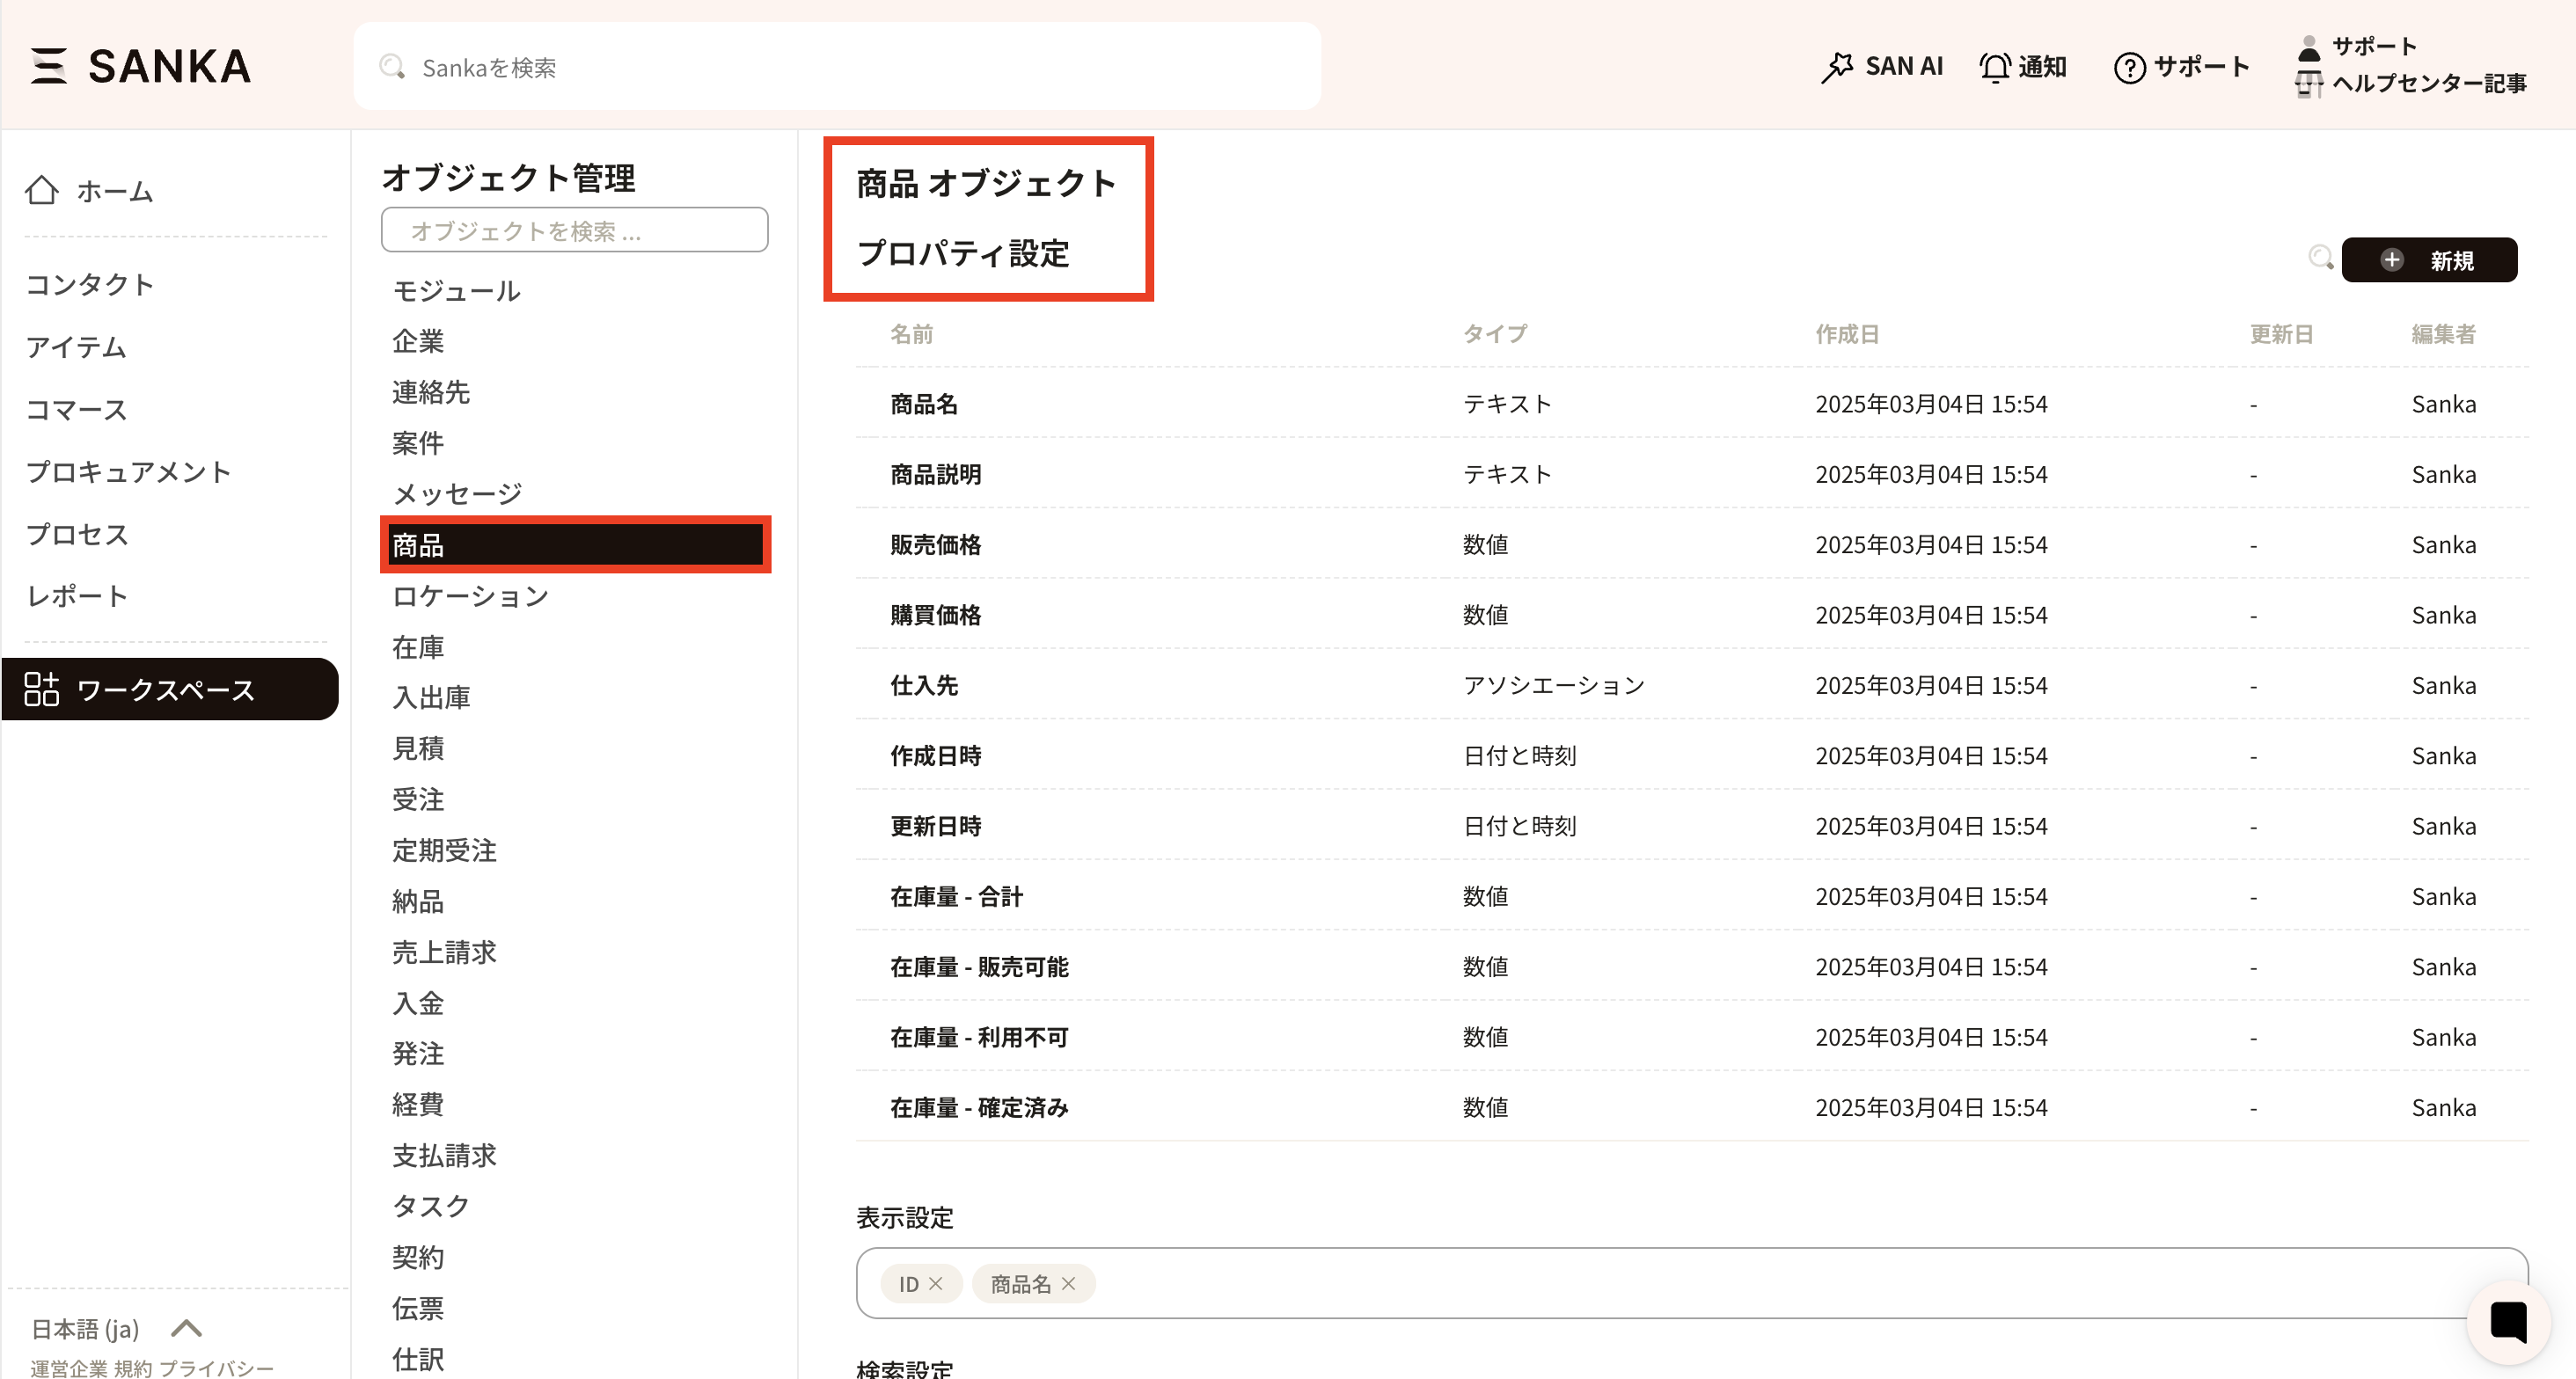
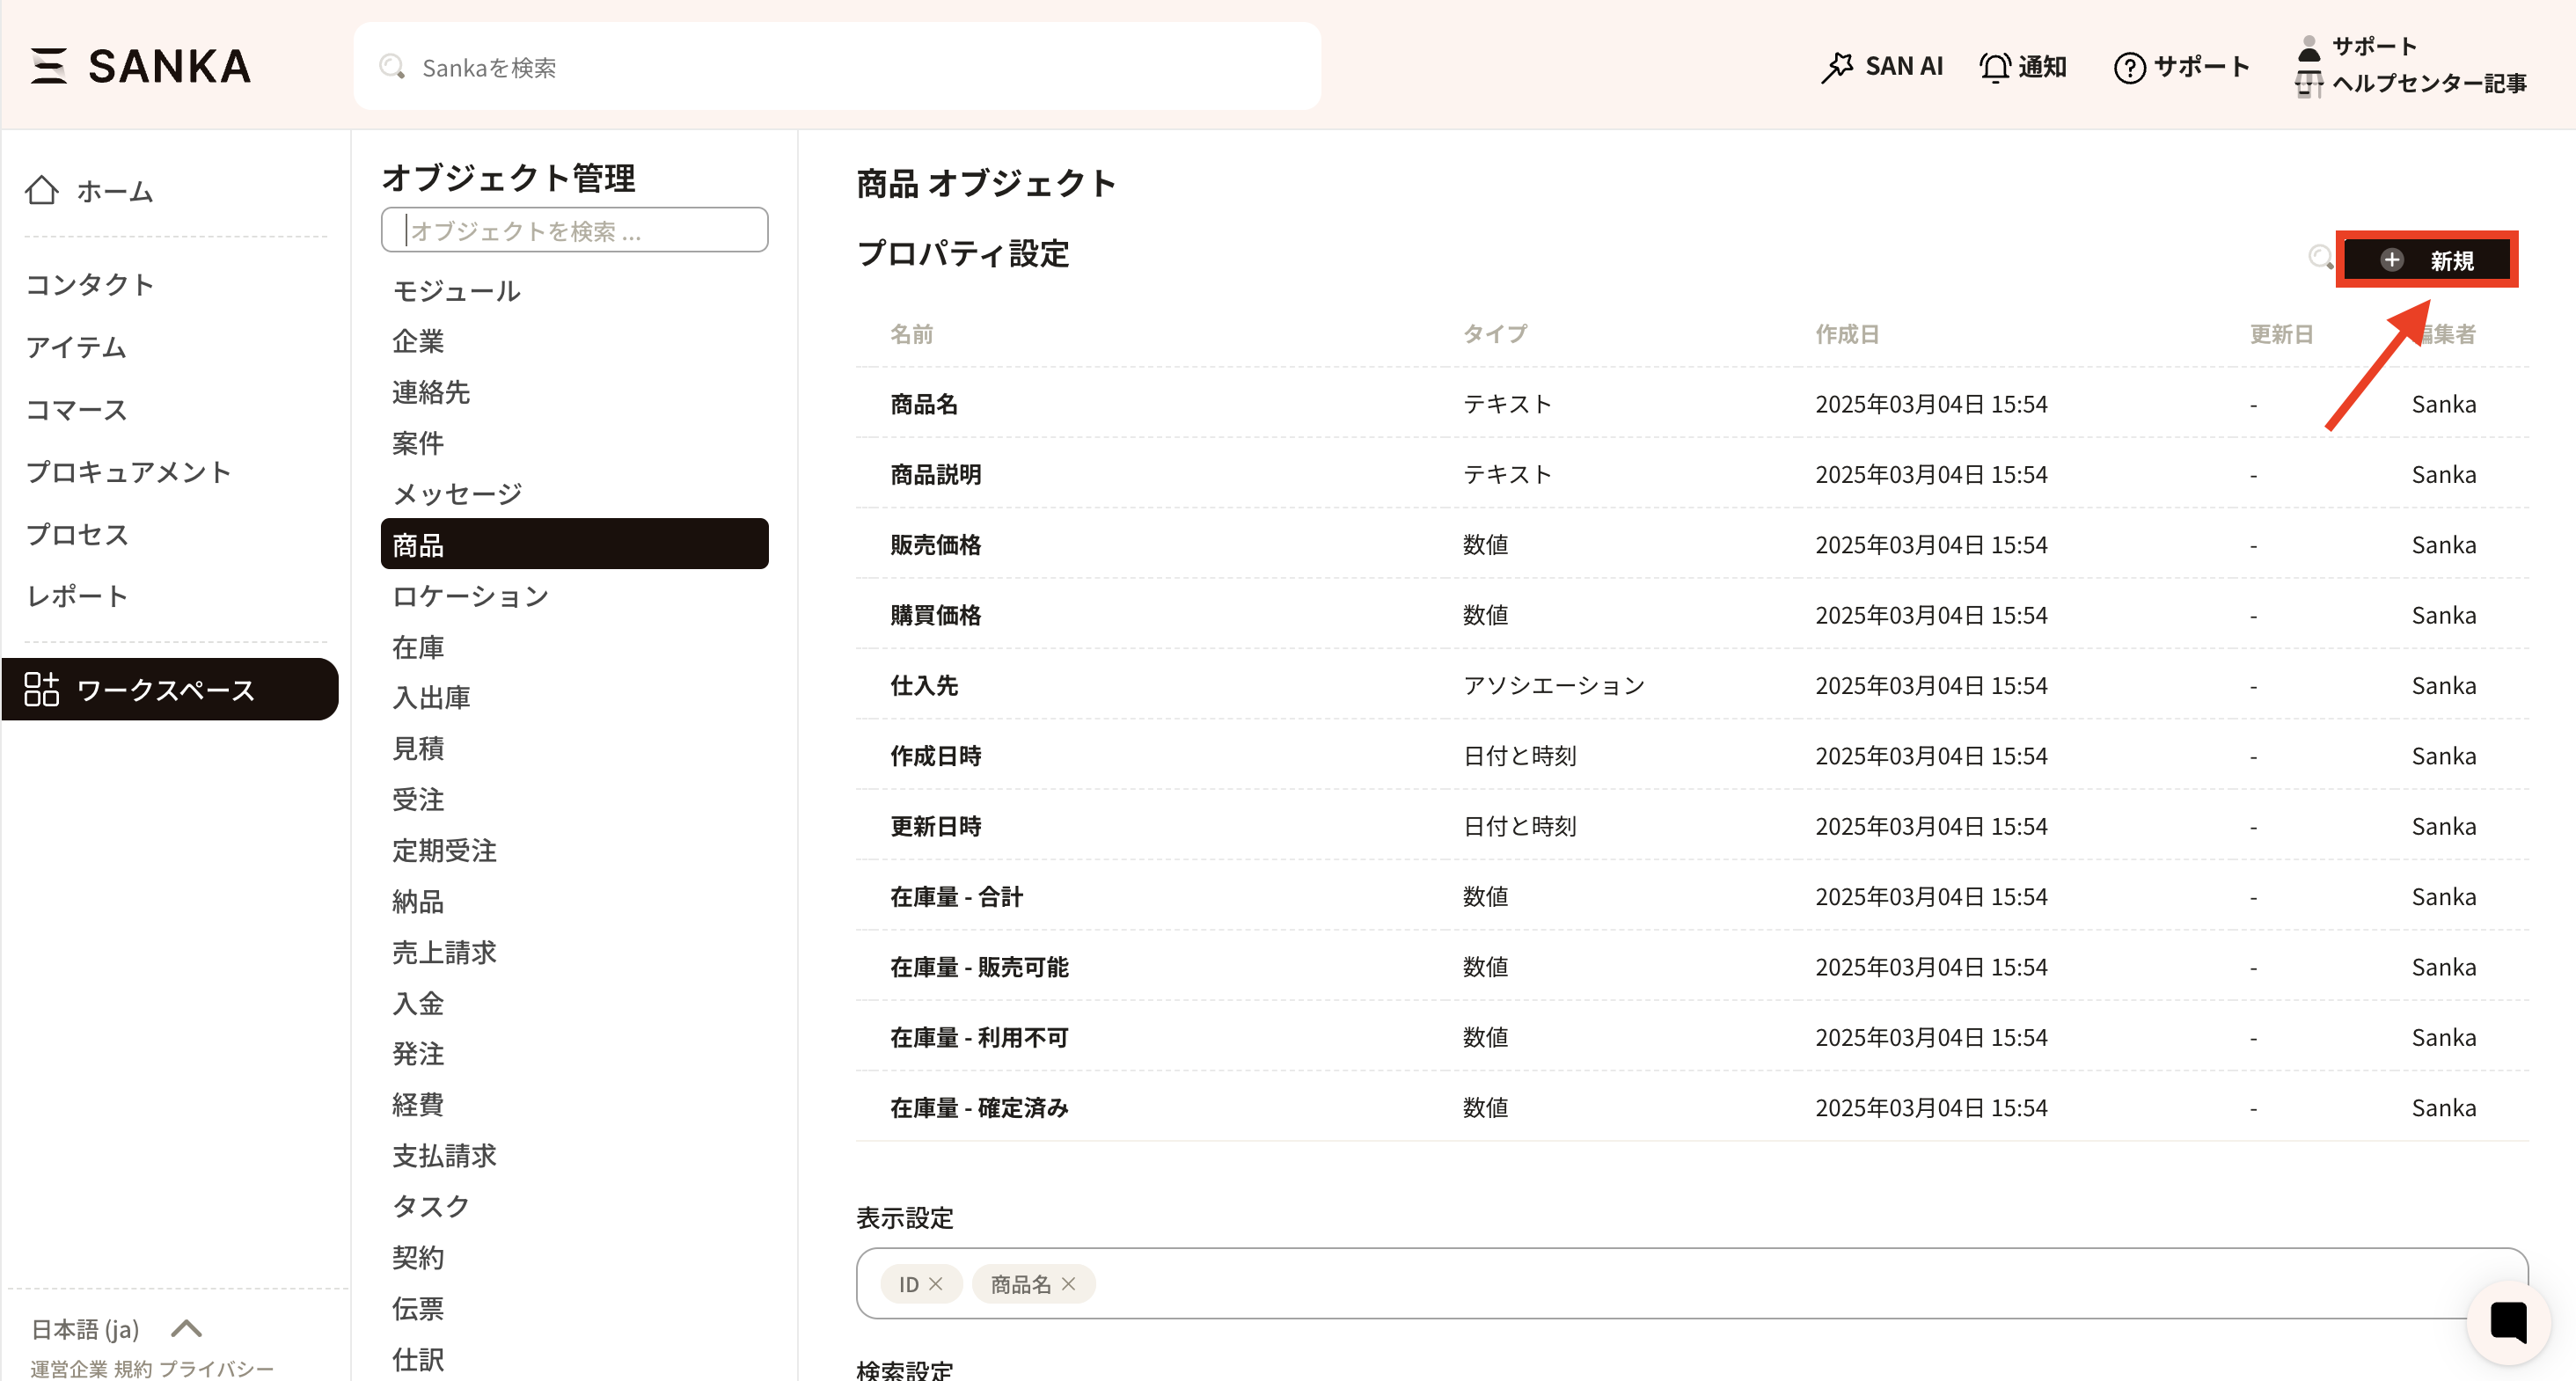
 ③Click "New" in the upper right corner.
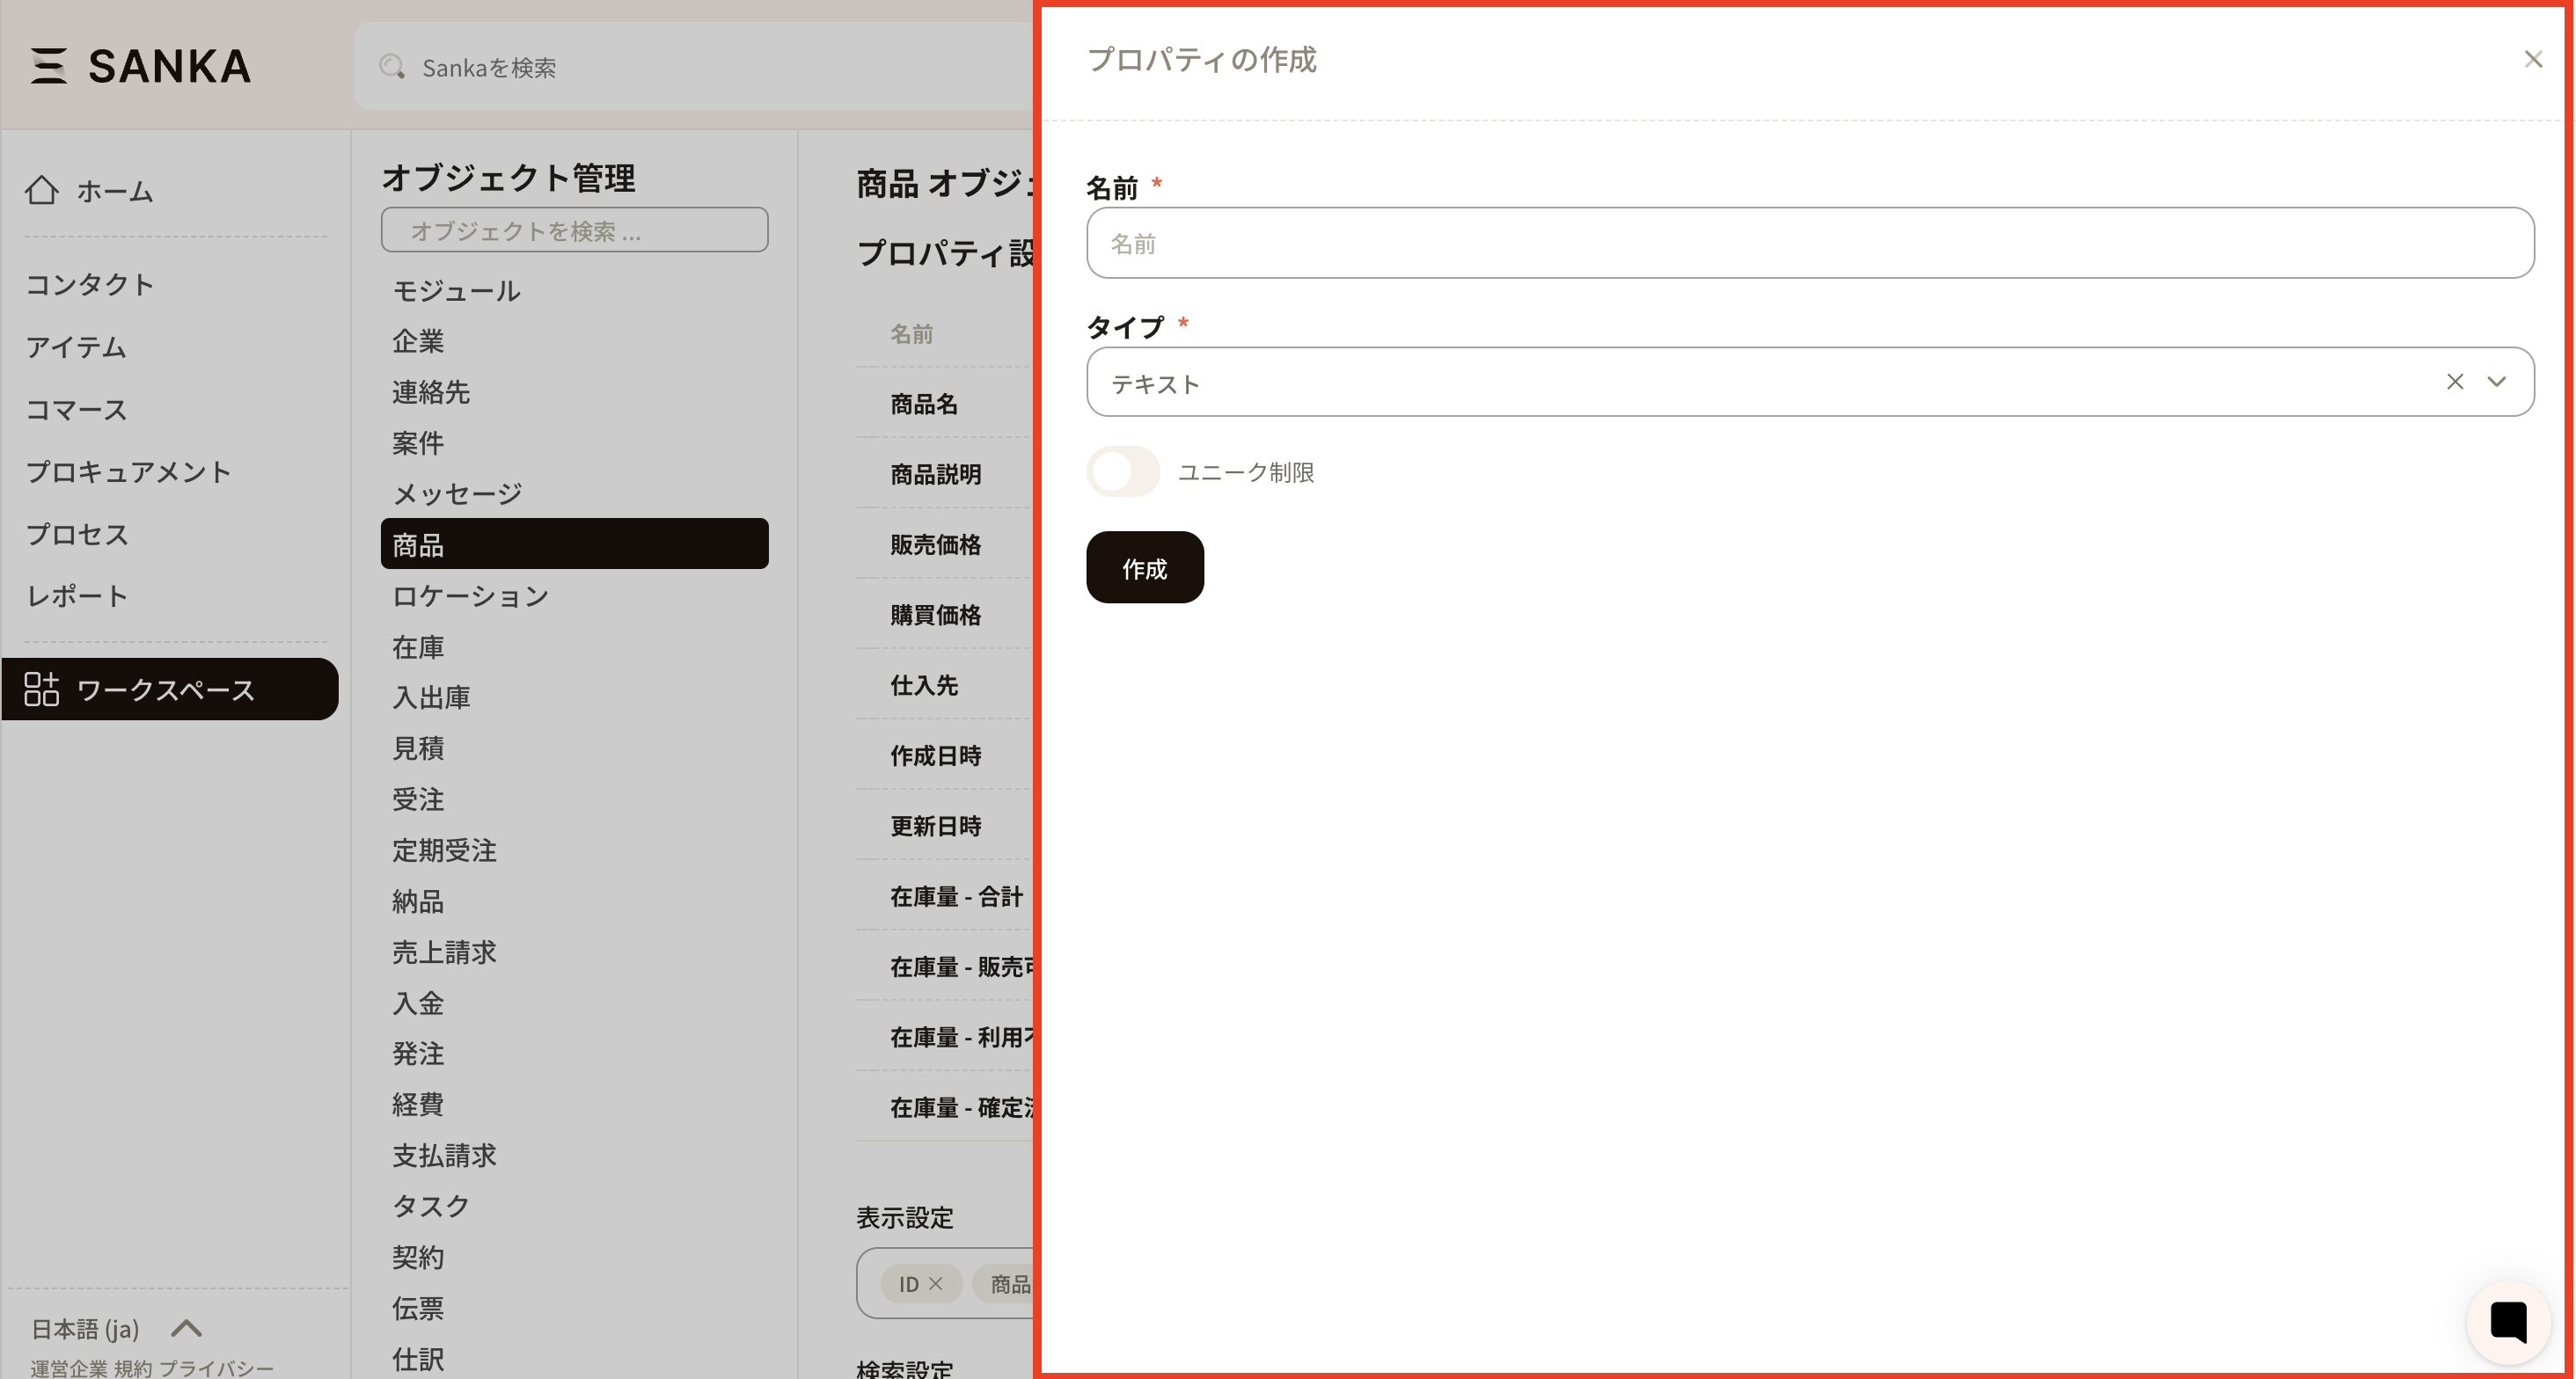
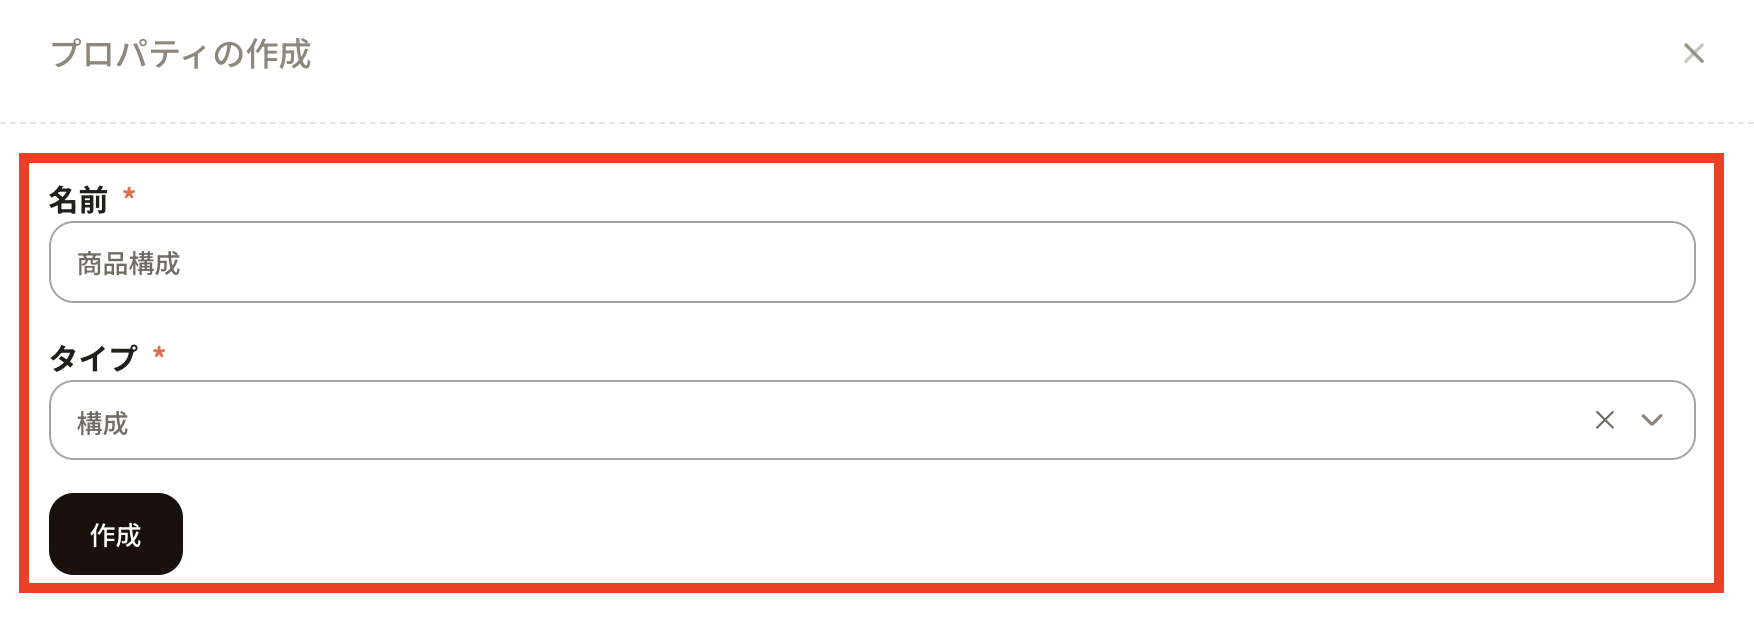
 ④The "Create property" menu will appear, so enter the necessary information.
 ⑤Set the necessary items.
- Name: Enter "Product configuration". You can name it freely.
- Type: Select "Configuration" from the options. "Configuration" is a selection for product configuration. When you have finished entering your information, click "Create".
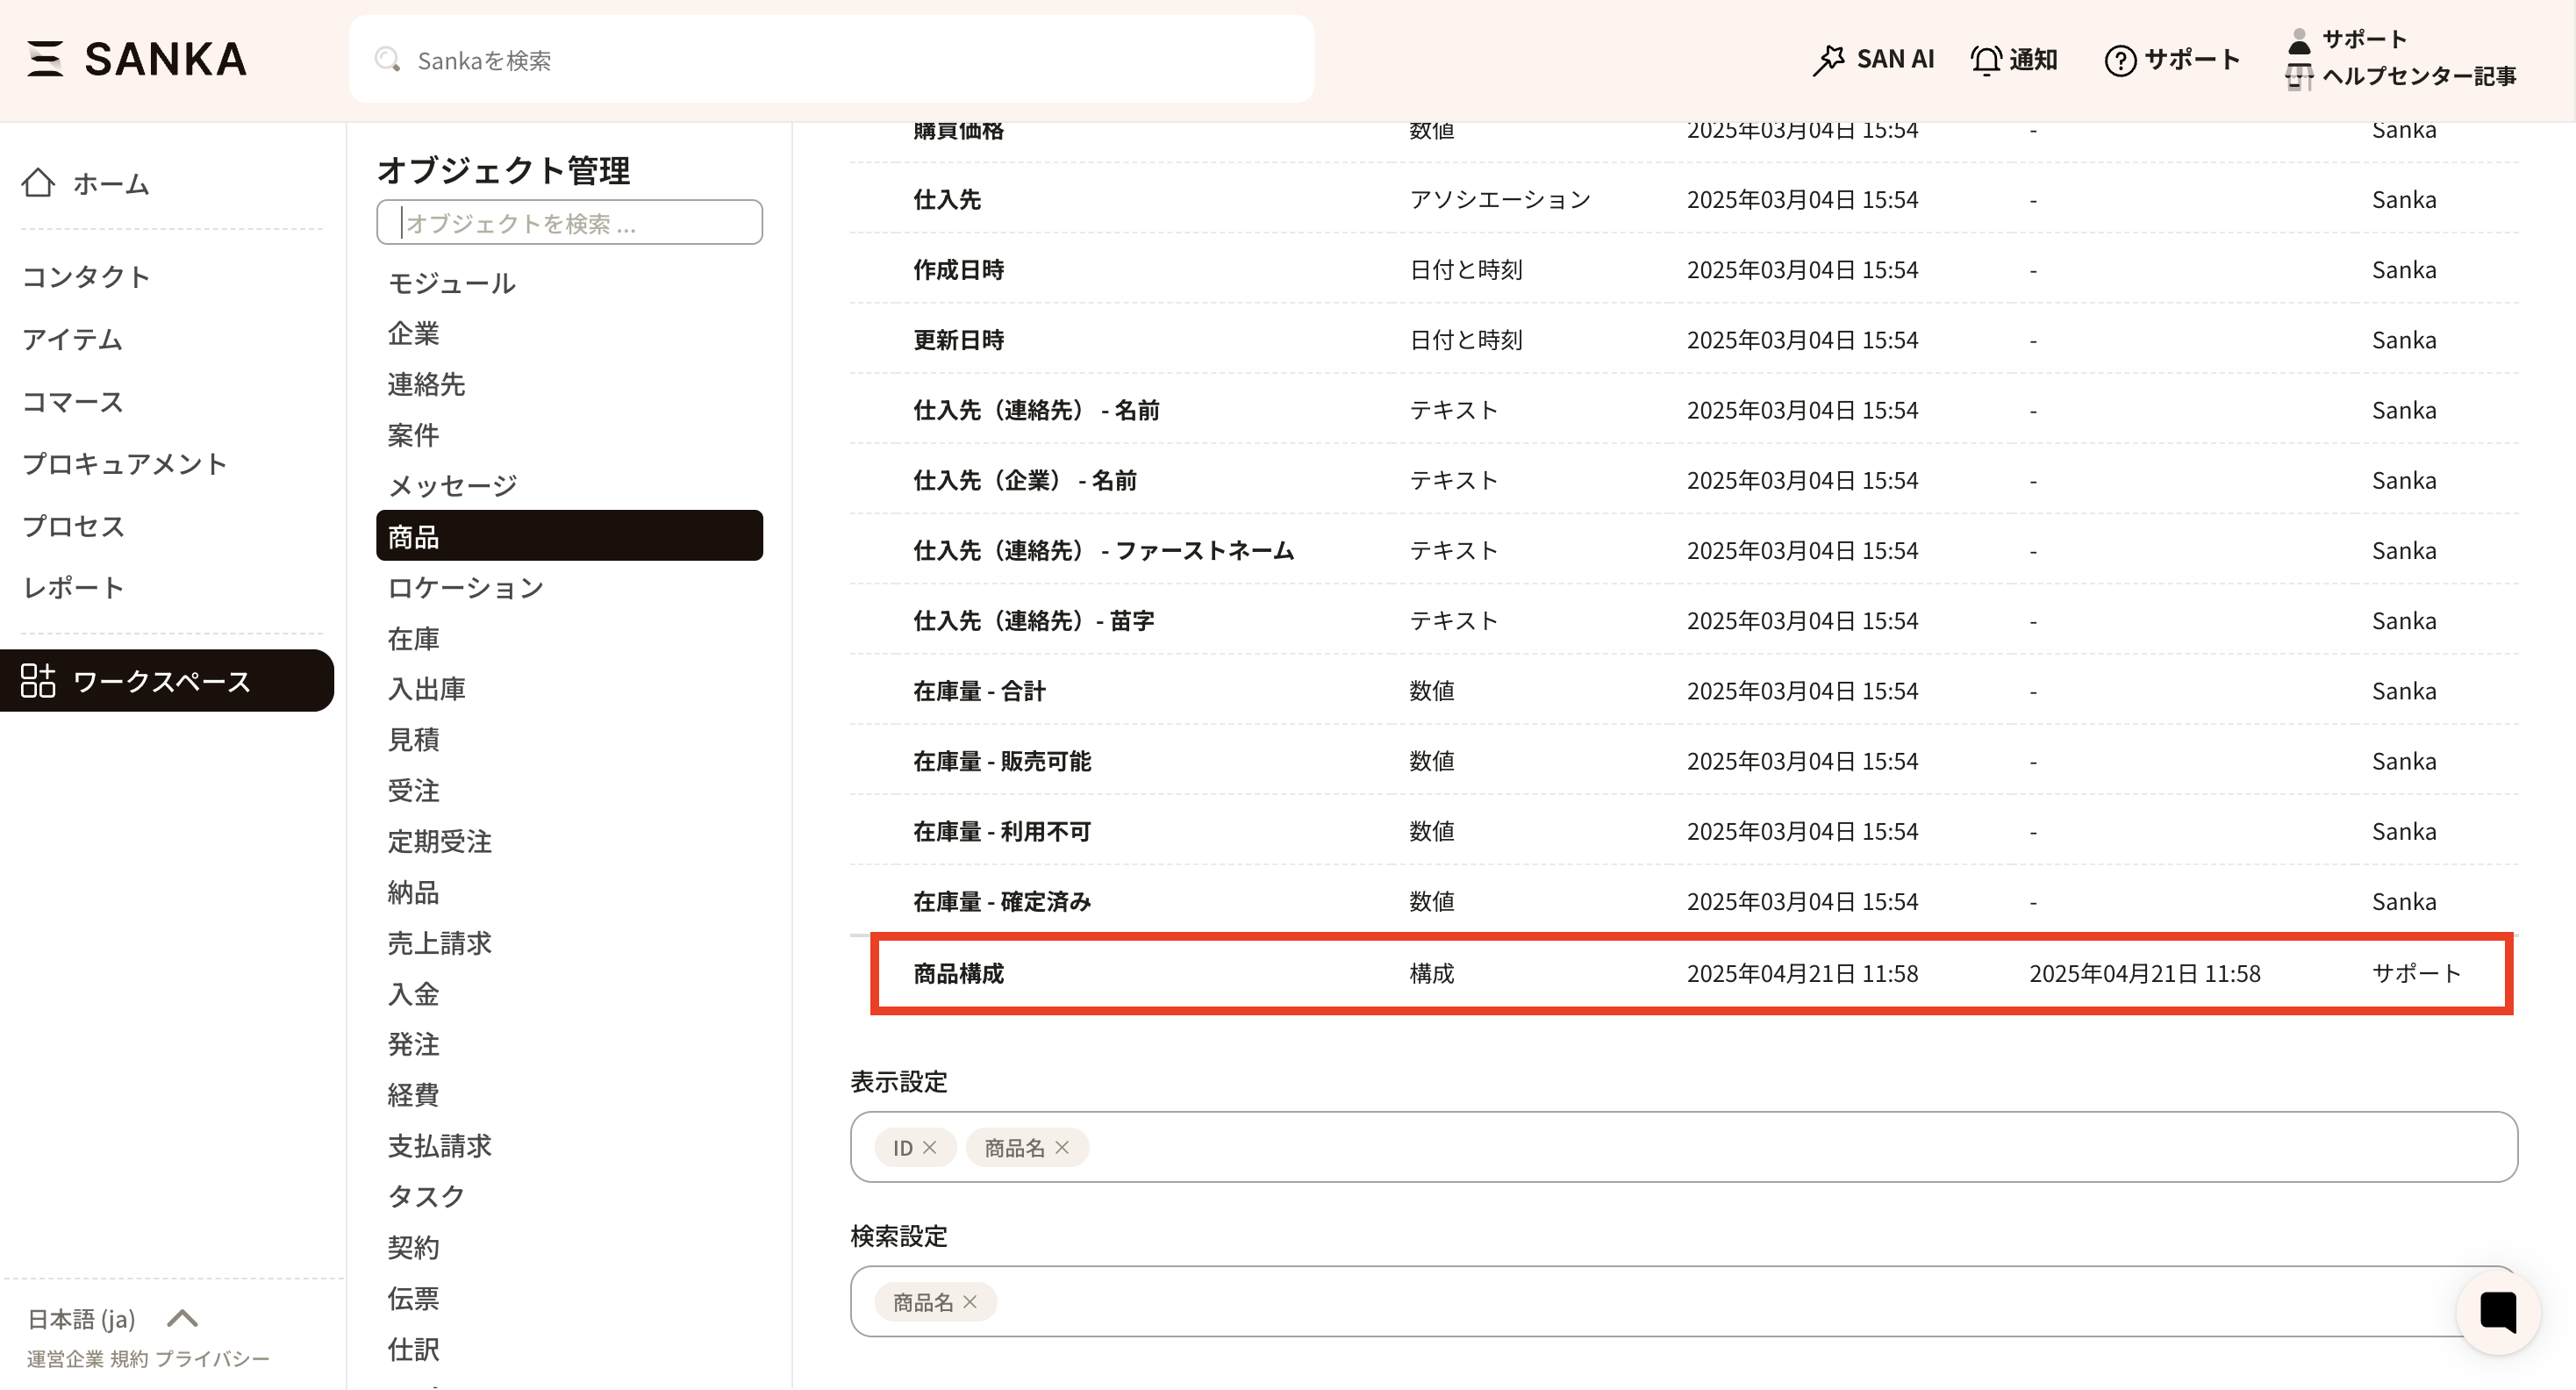
 ⑥The "Product configuration" property has been added to the bottom of the property settings.
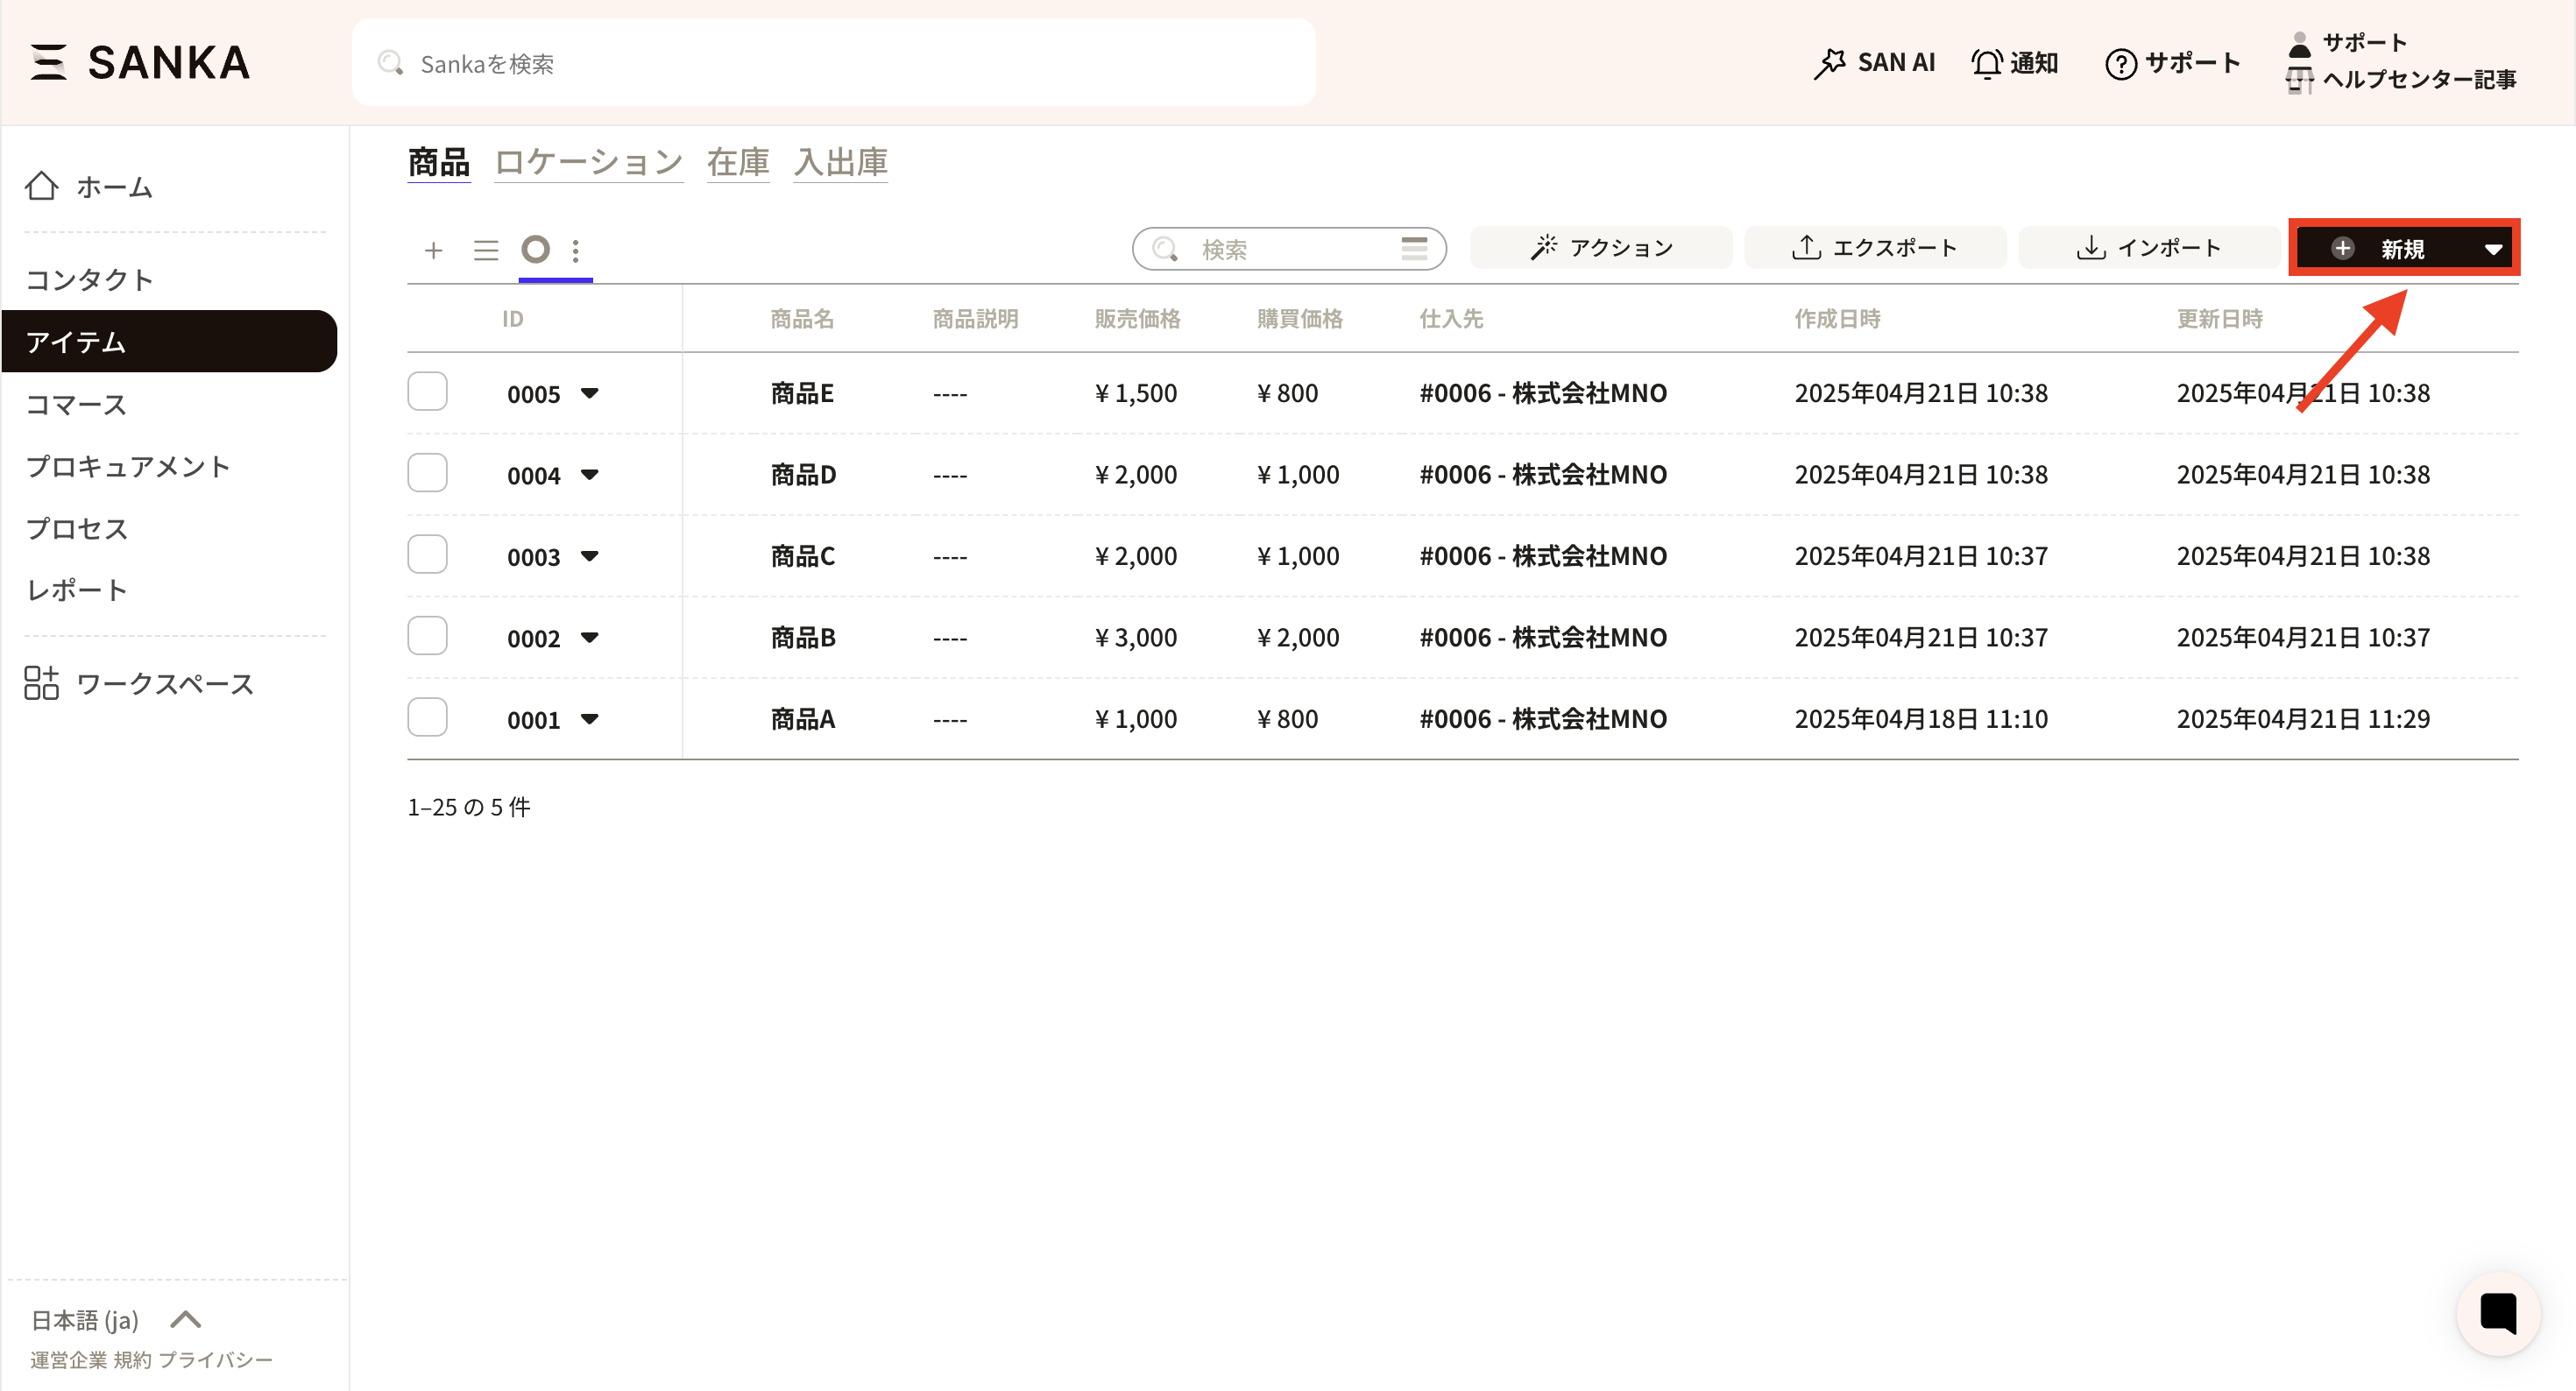
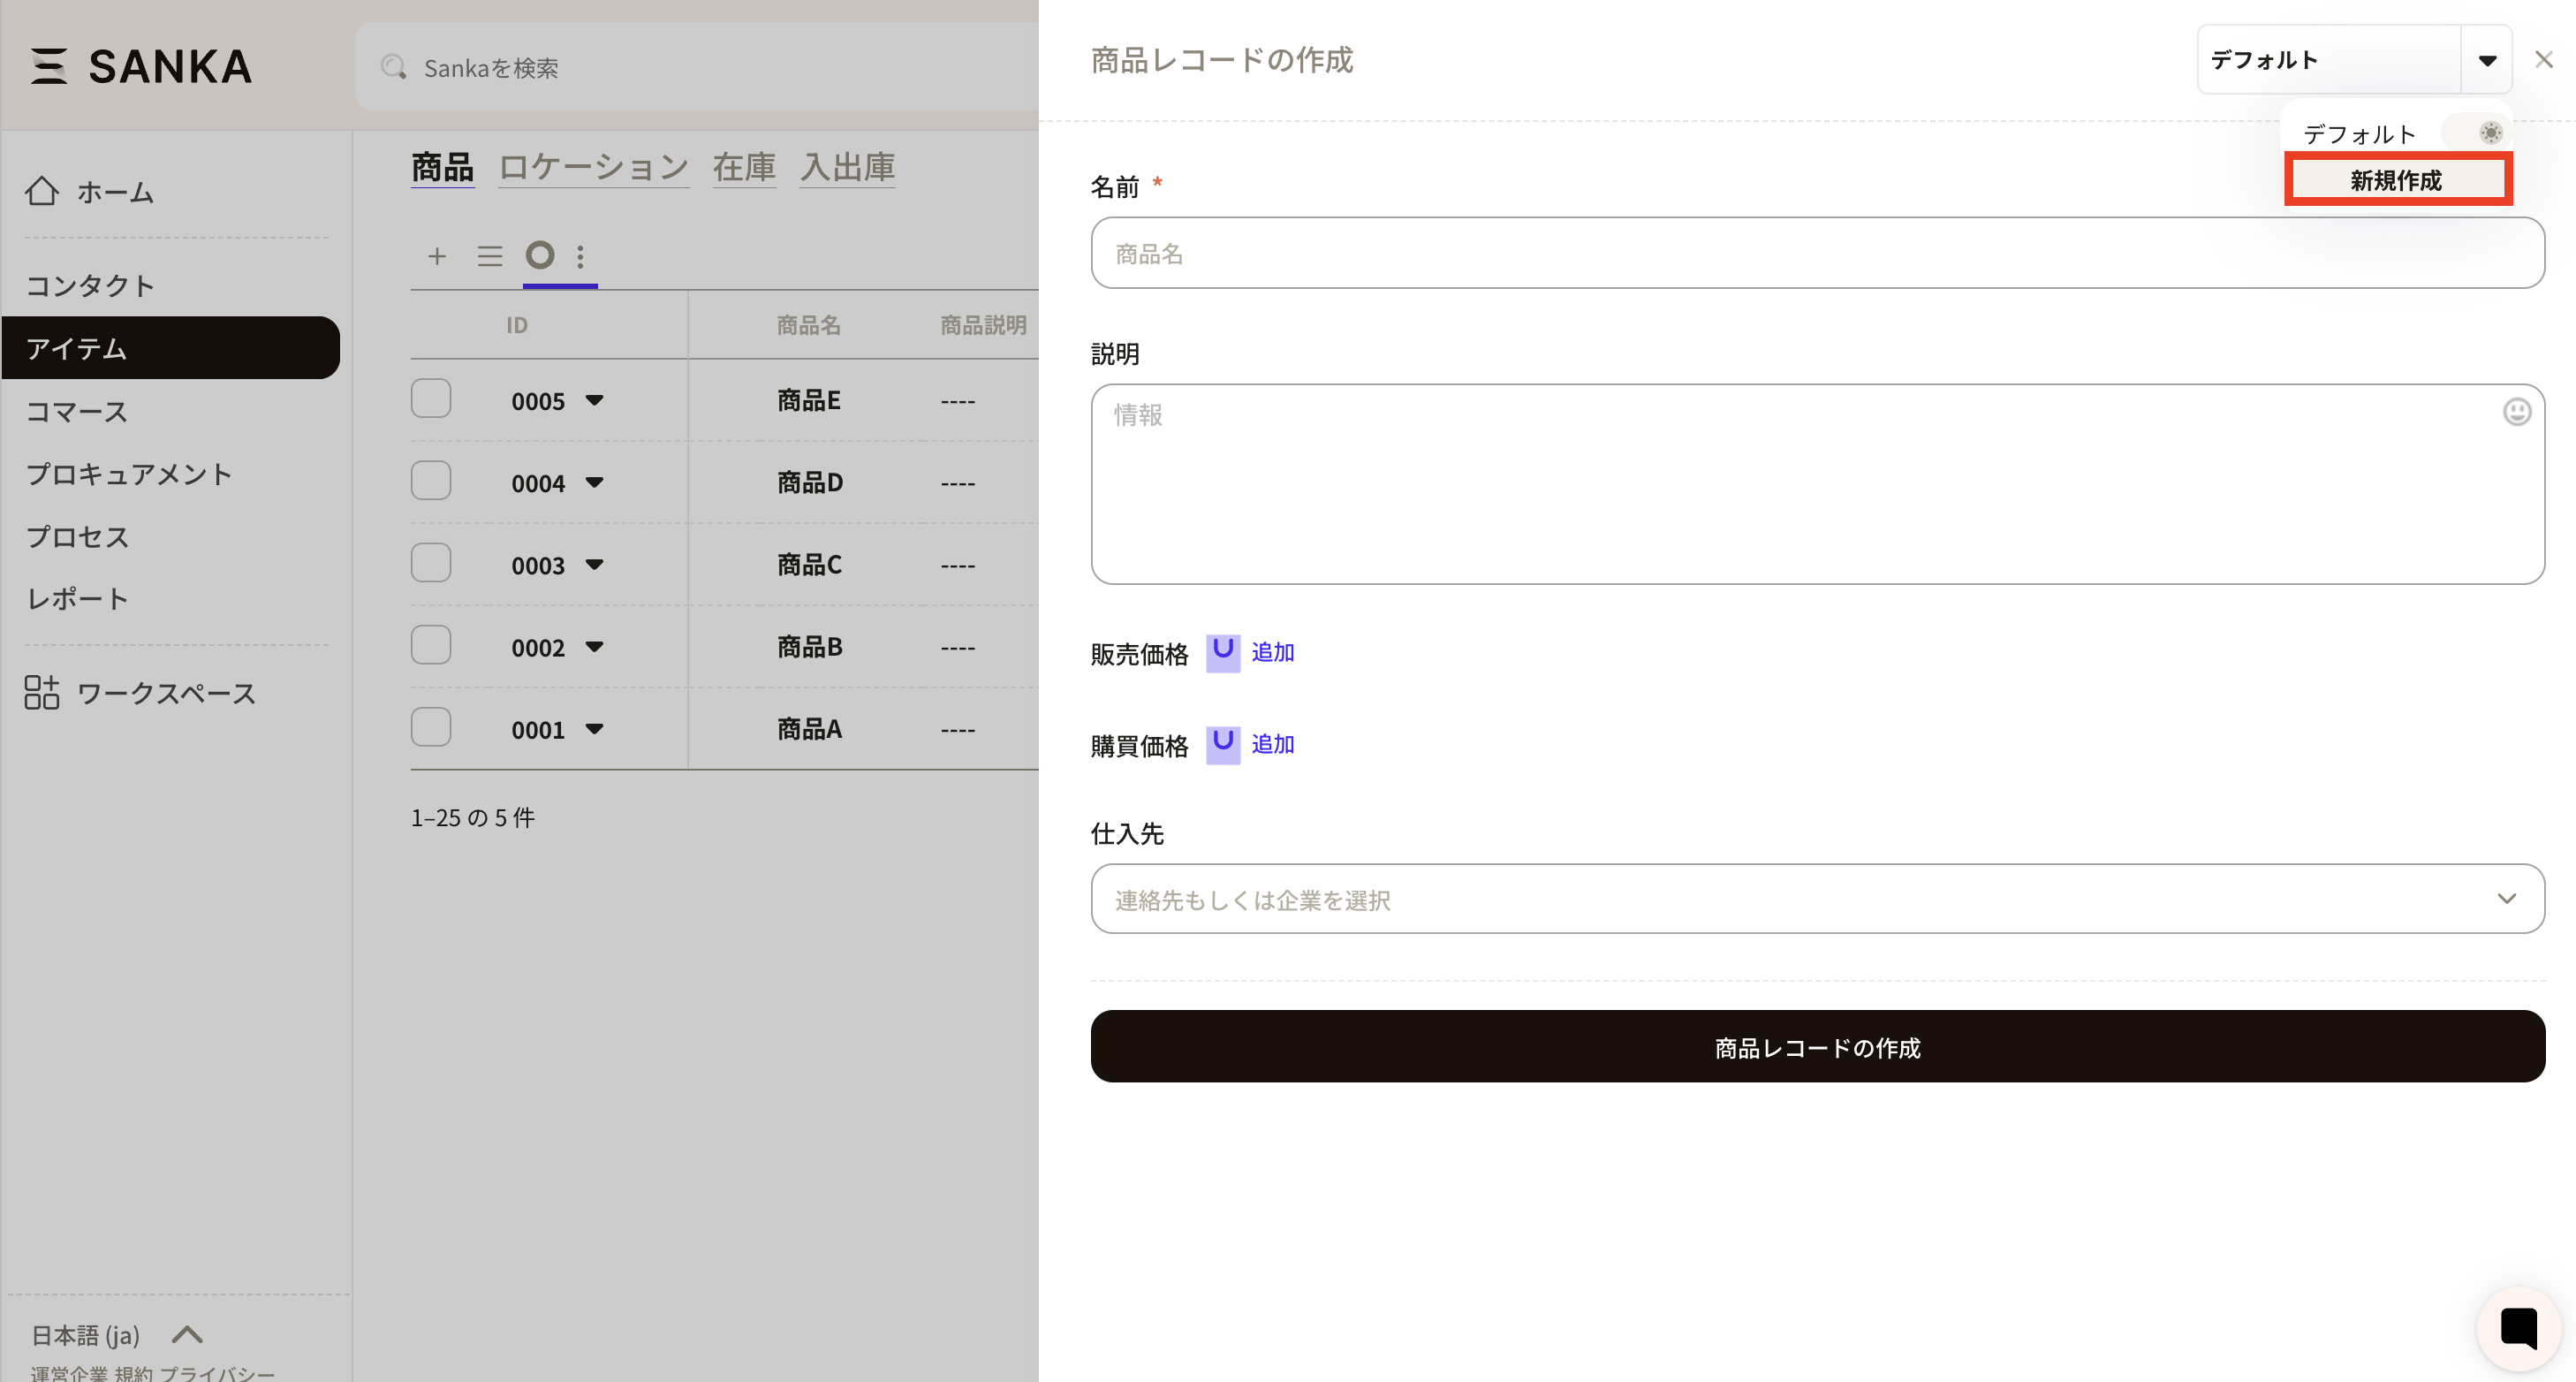
 ⑥Next, reflect the created product configuration properties on the form (record creation screen). Open "New" for the product object.
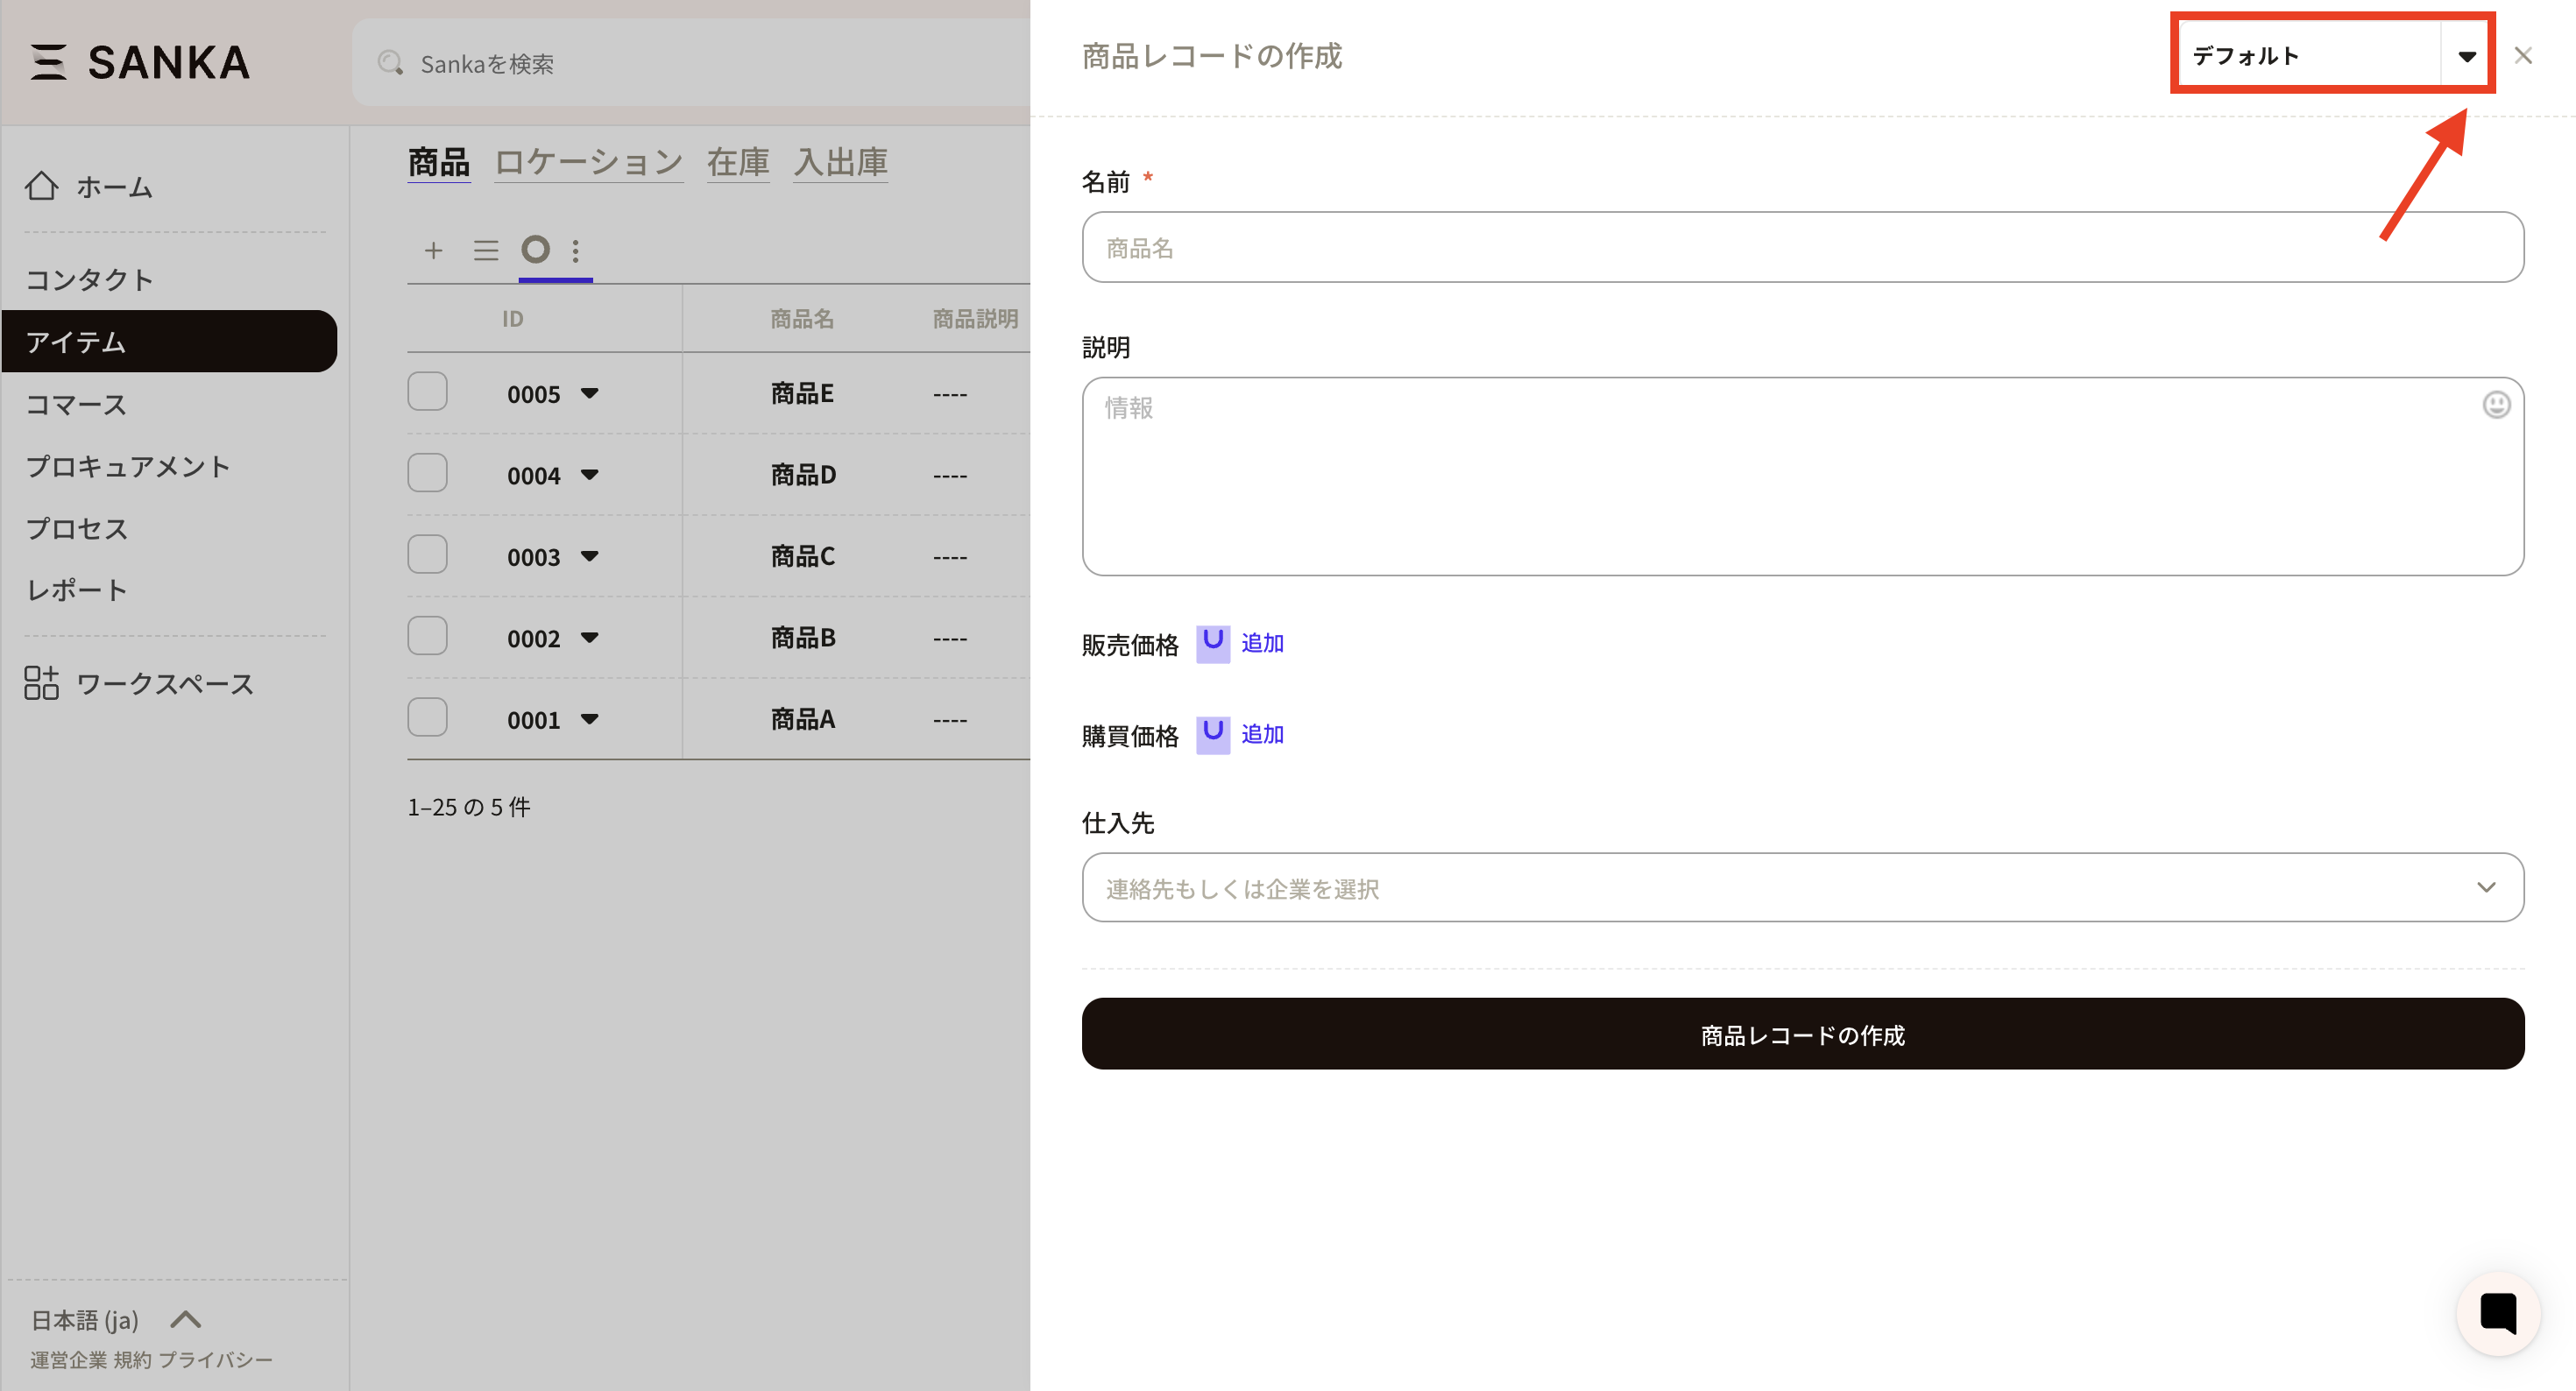
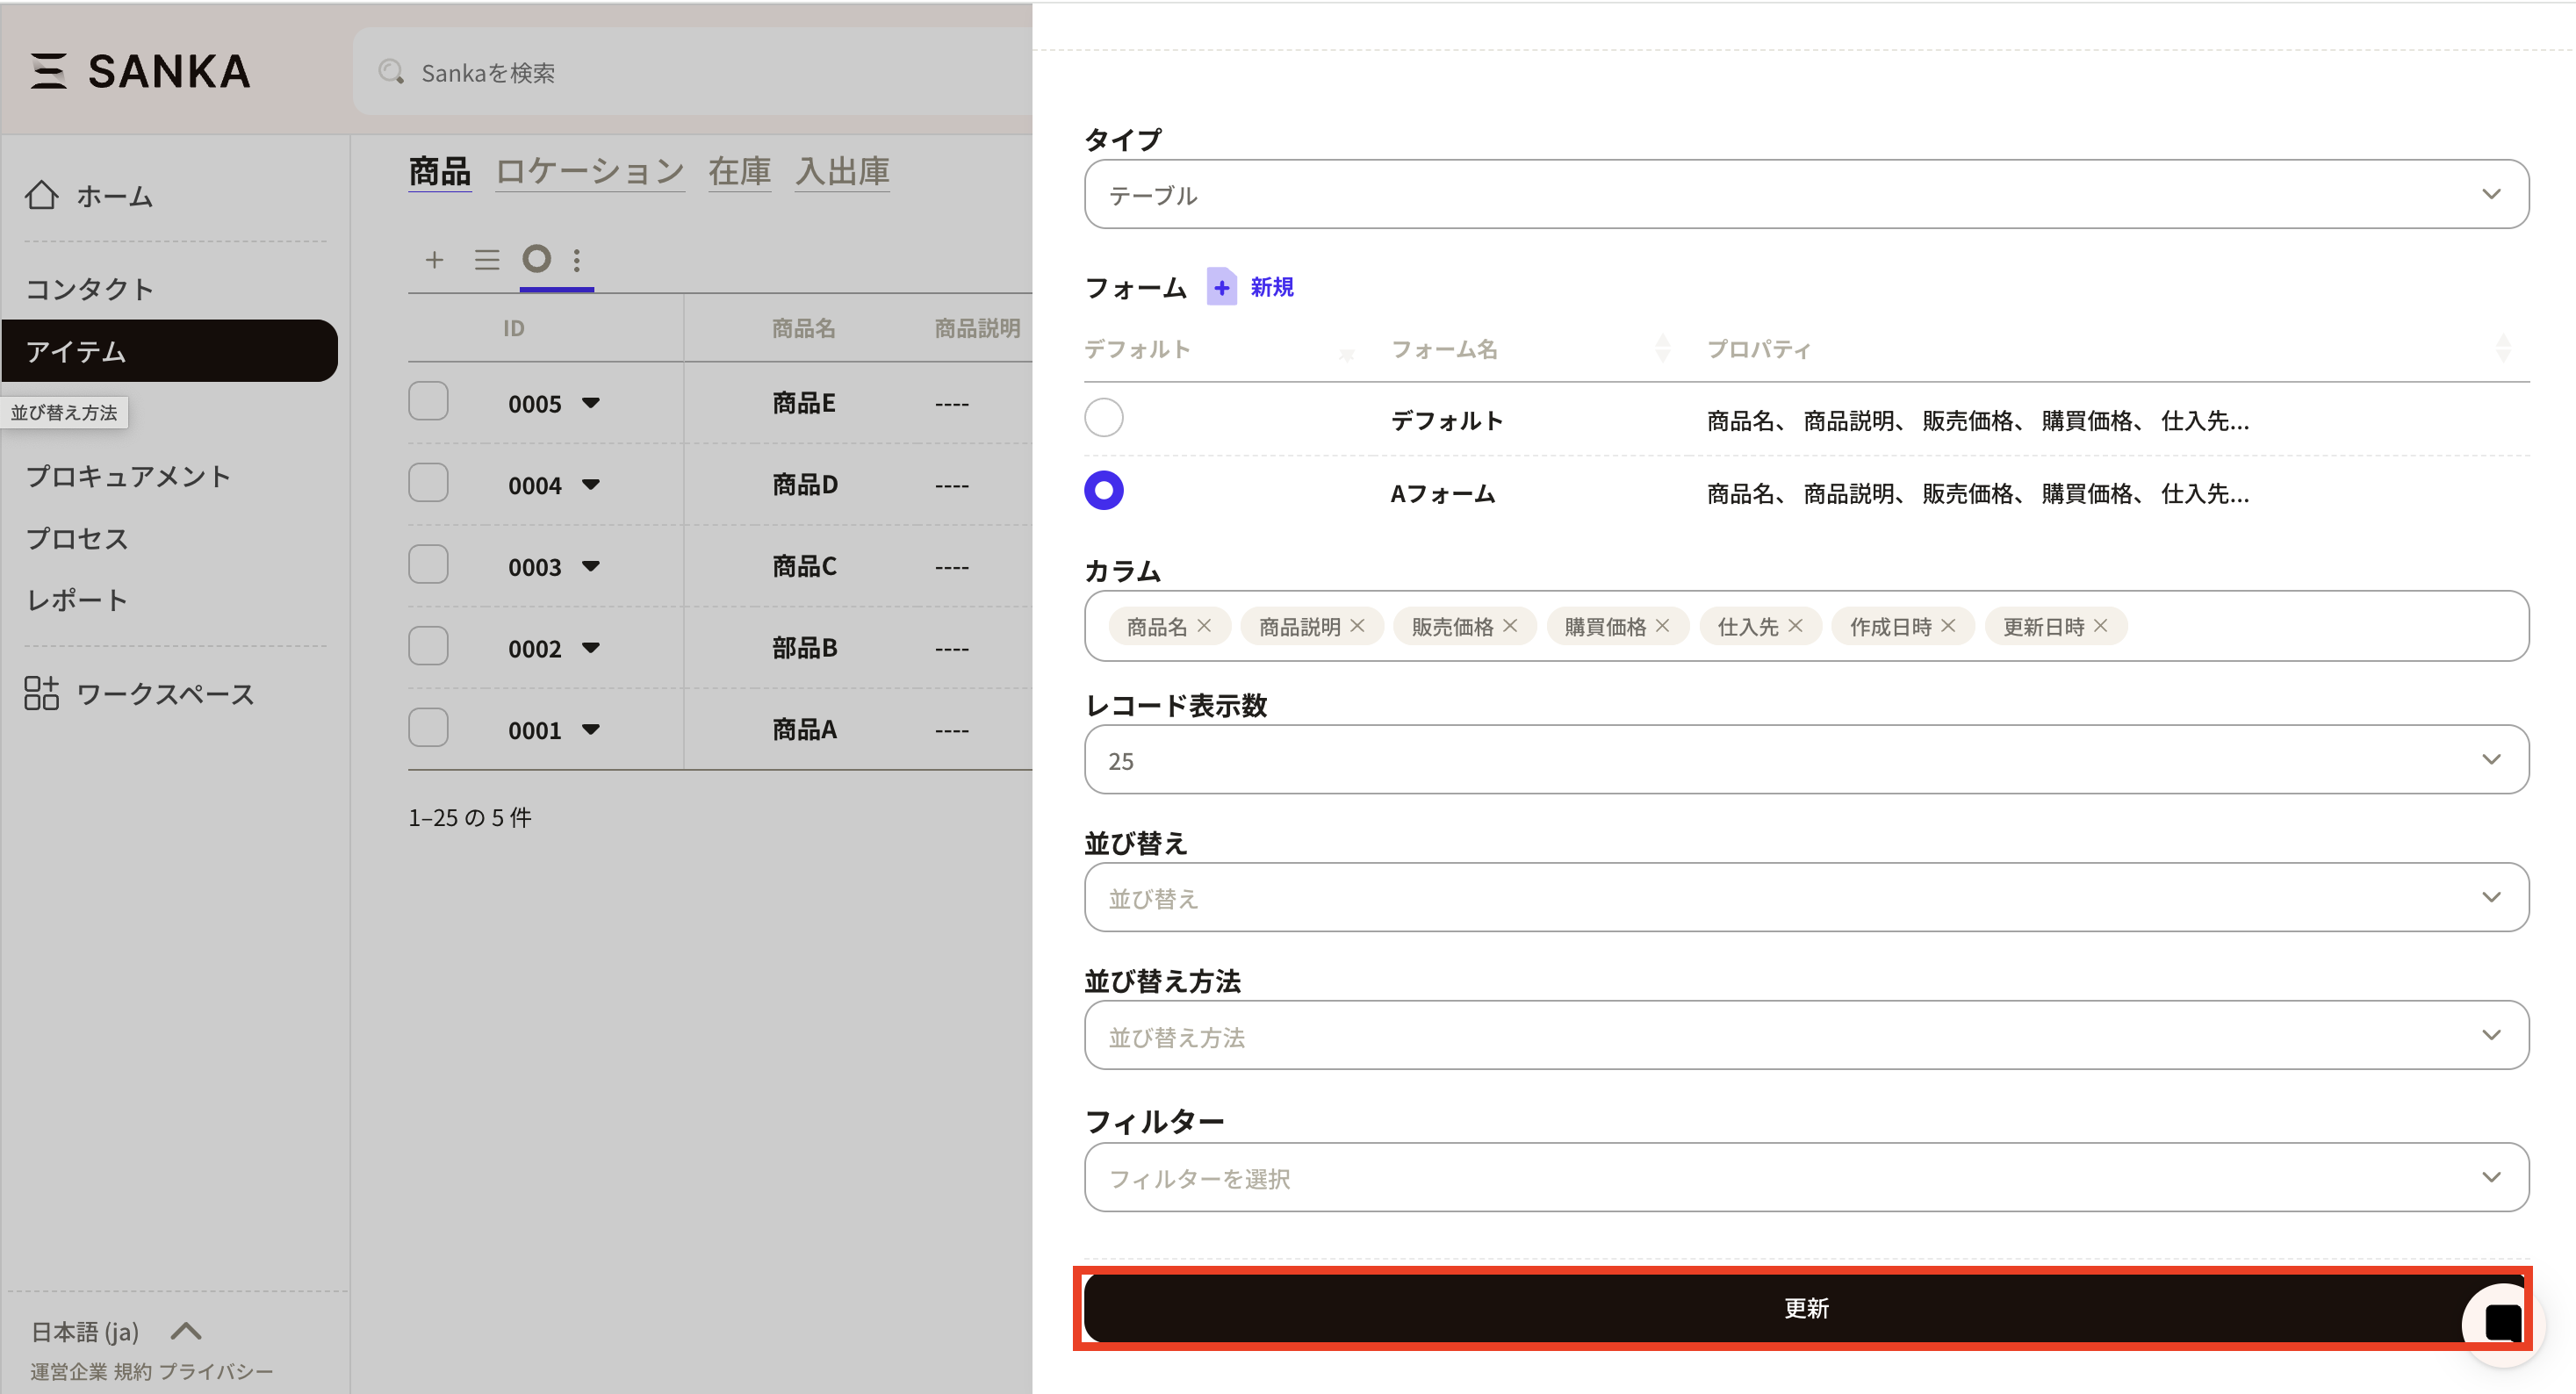
 ⑦Press the triangle button next to Default at the top right of the "Create Product Record Screen". Initially, the default settings are set.
 ⑧ Select “Create new”.
 ⑨The “Create Form” screen will appear.
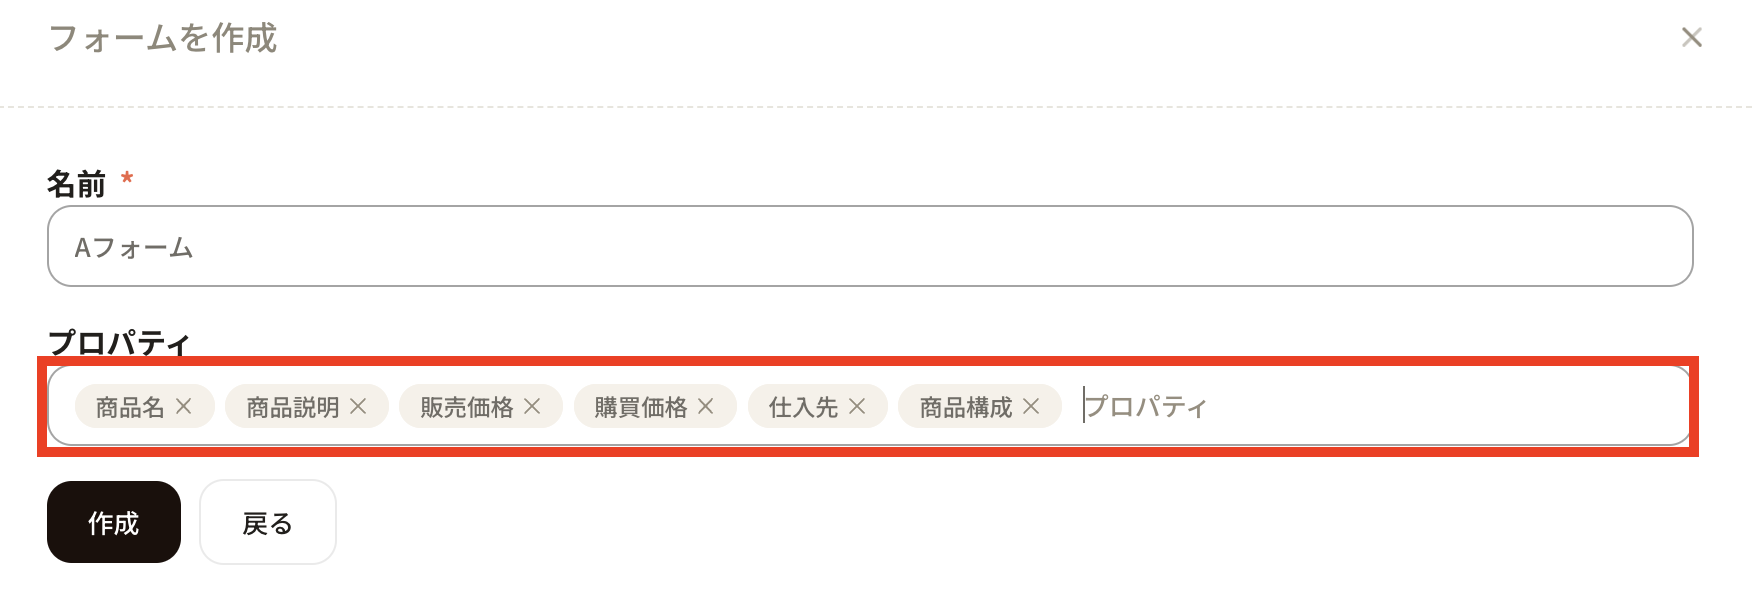
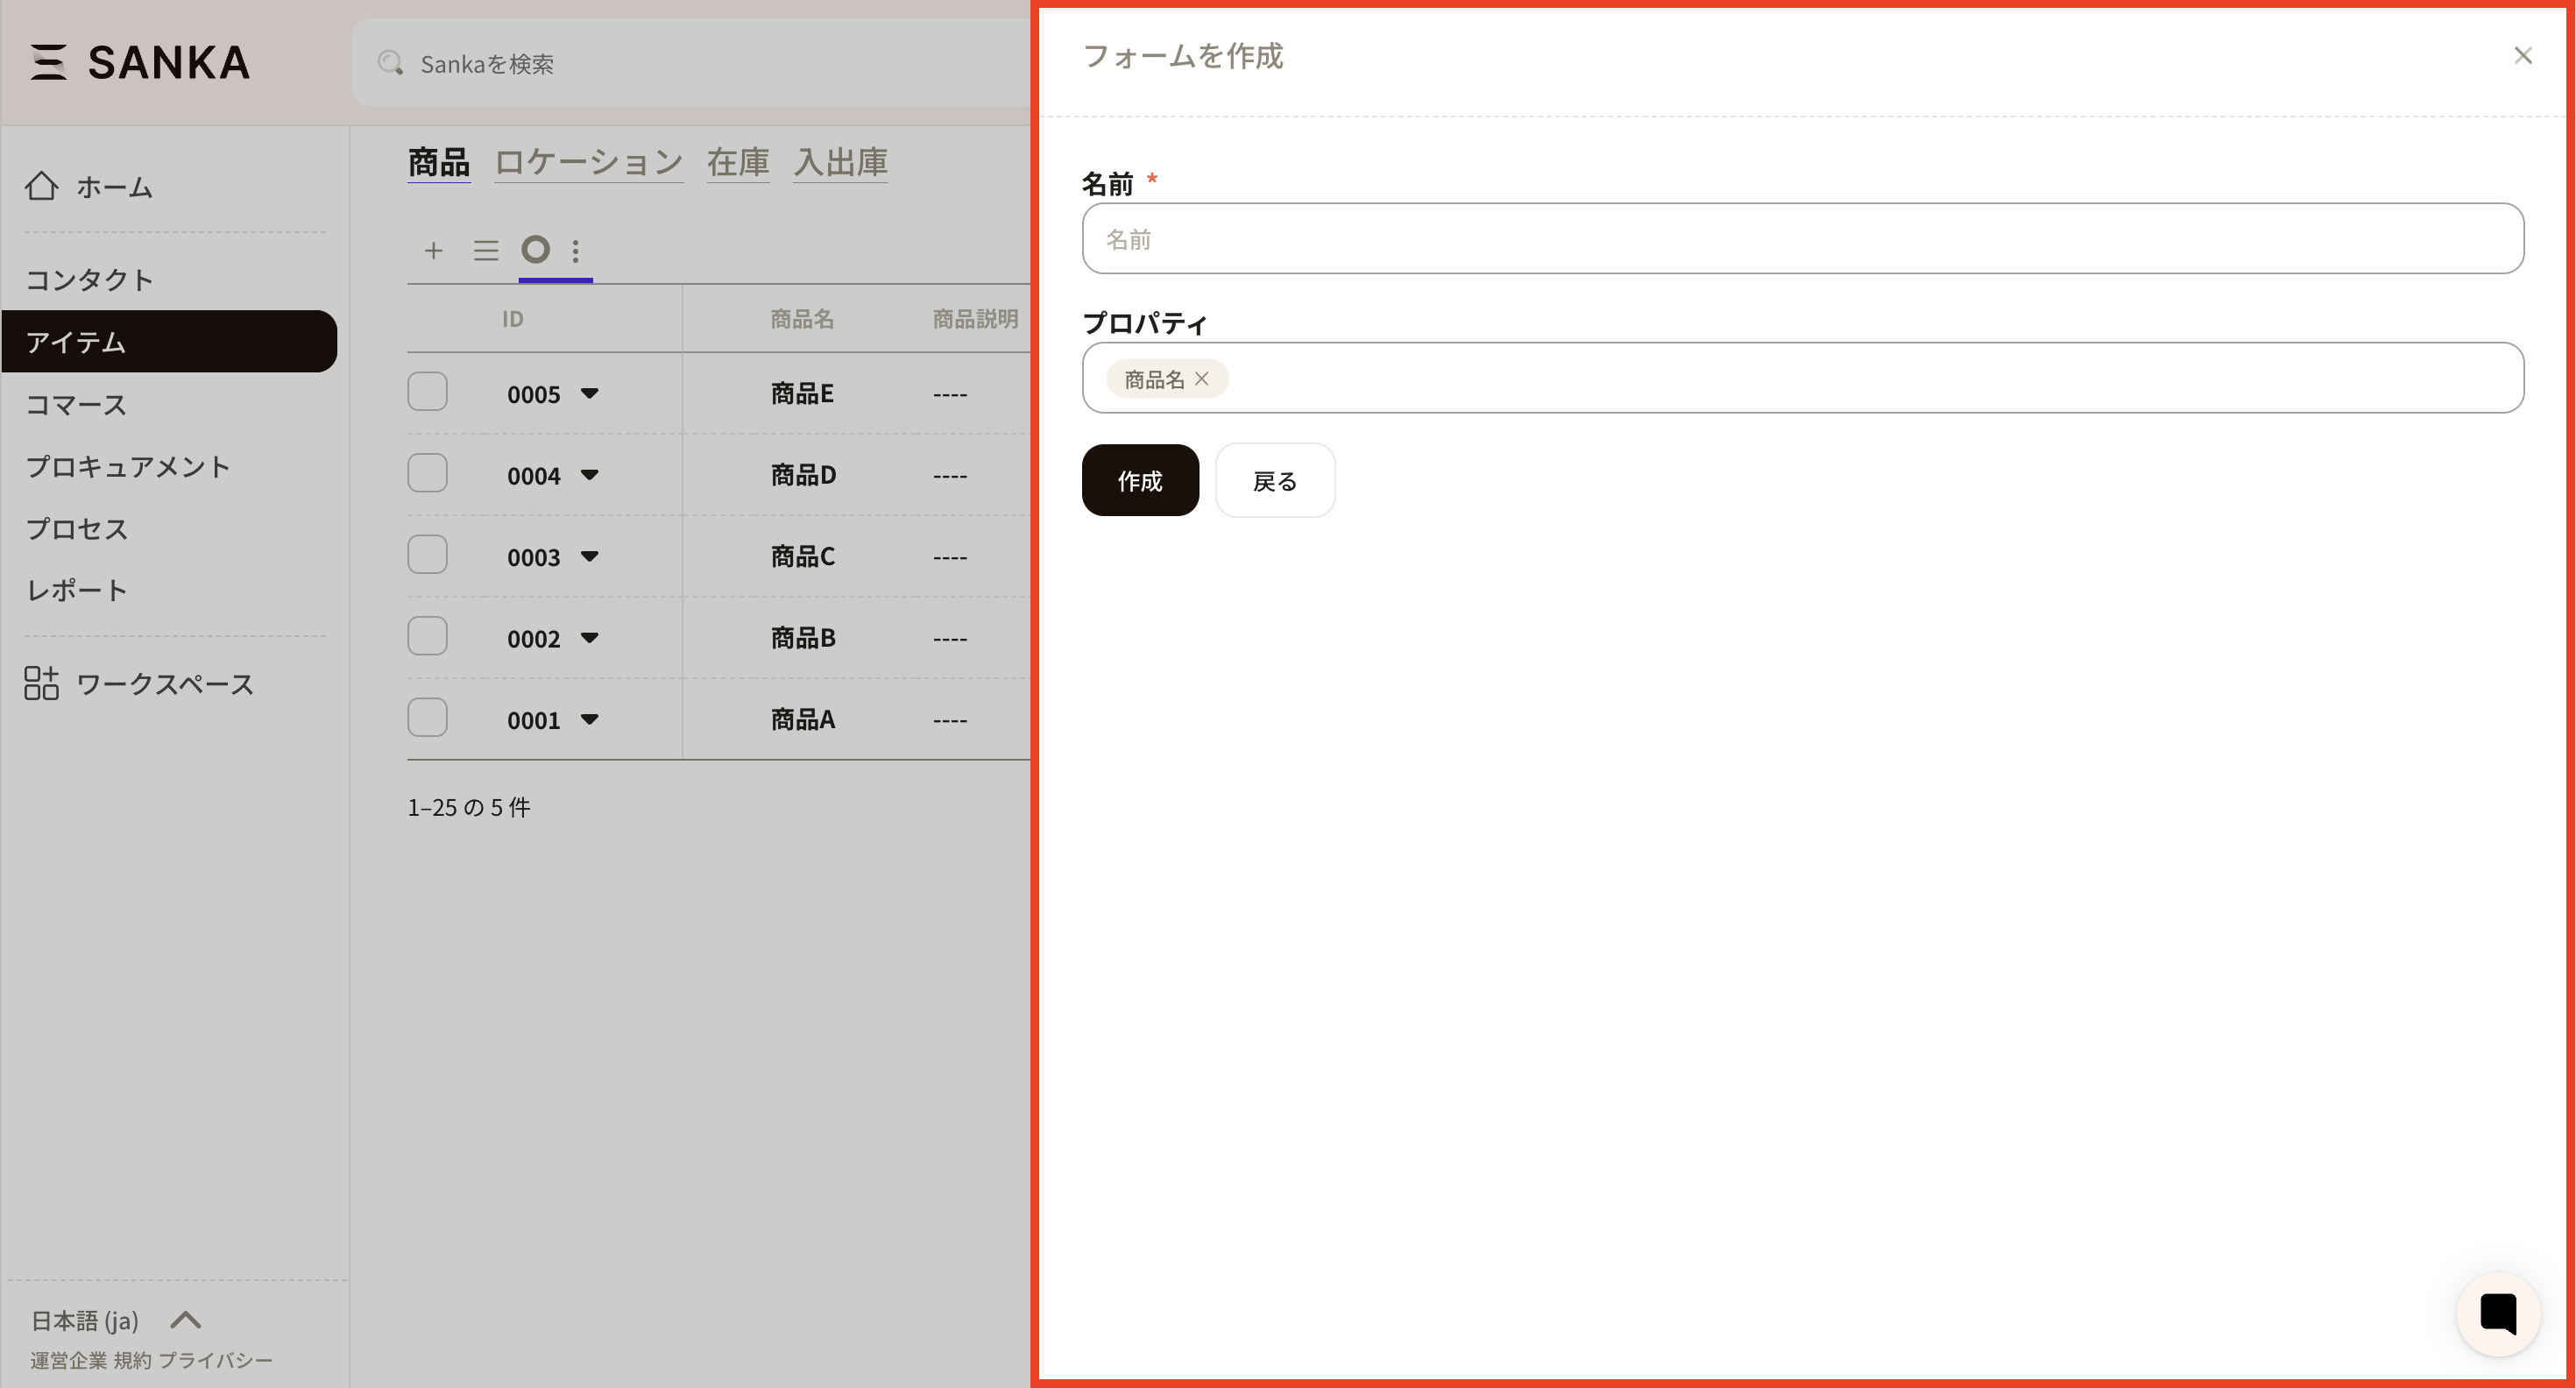 ⑩Enter the name of the form. Properties that have been added so far are displayed. Let's select the appropriate one.
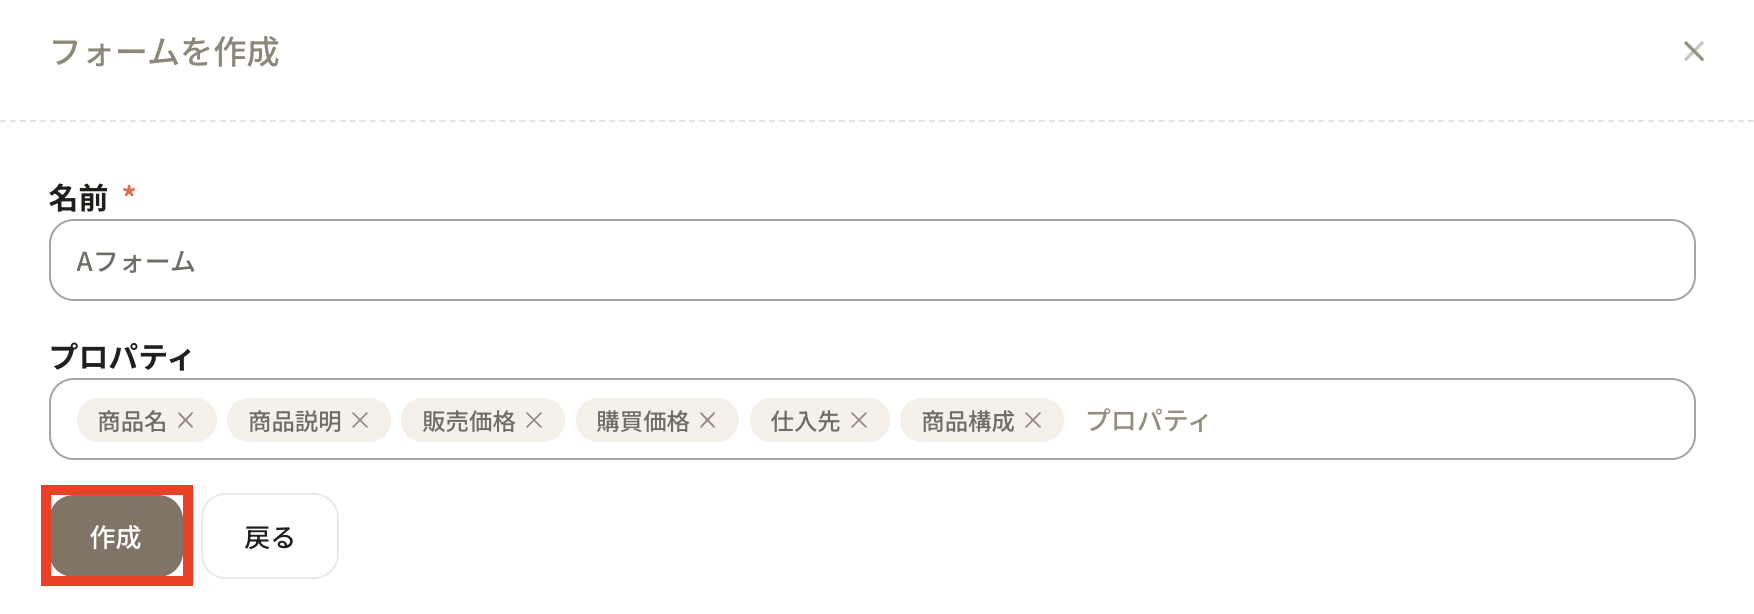
 ⑪Press the Create button.
 ⑫ Click the new registration button from the product object and click the form name you just created to confirm that the product configuration property has been added.
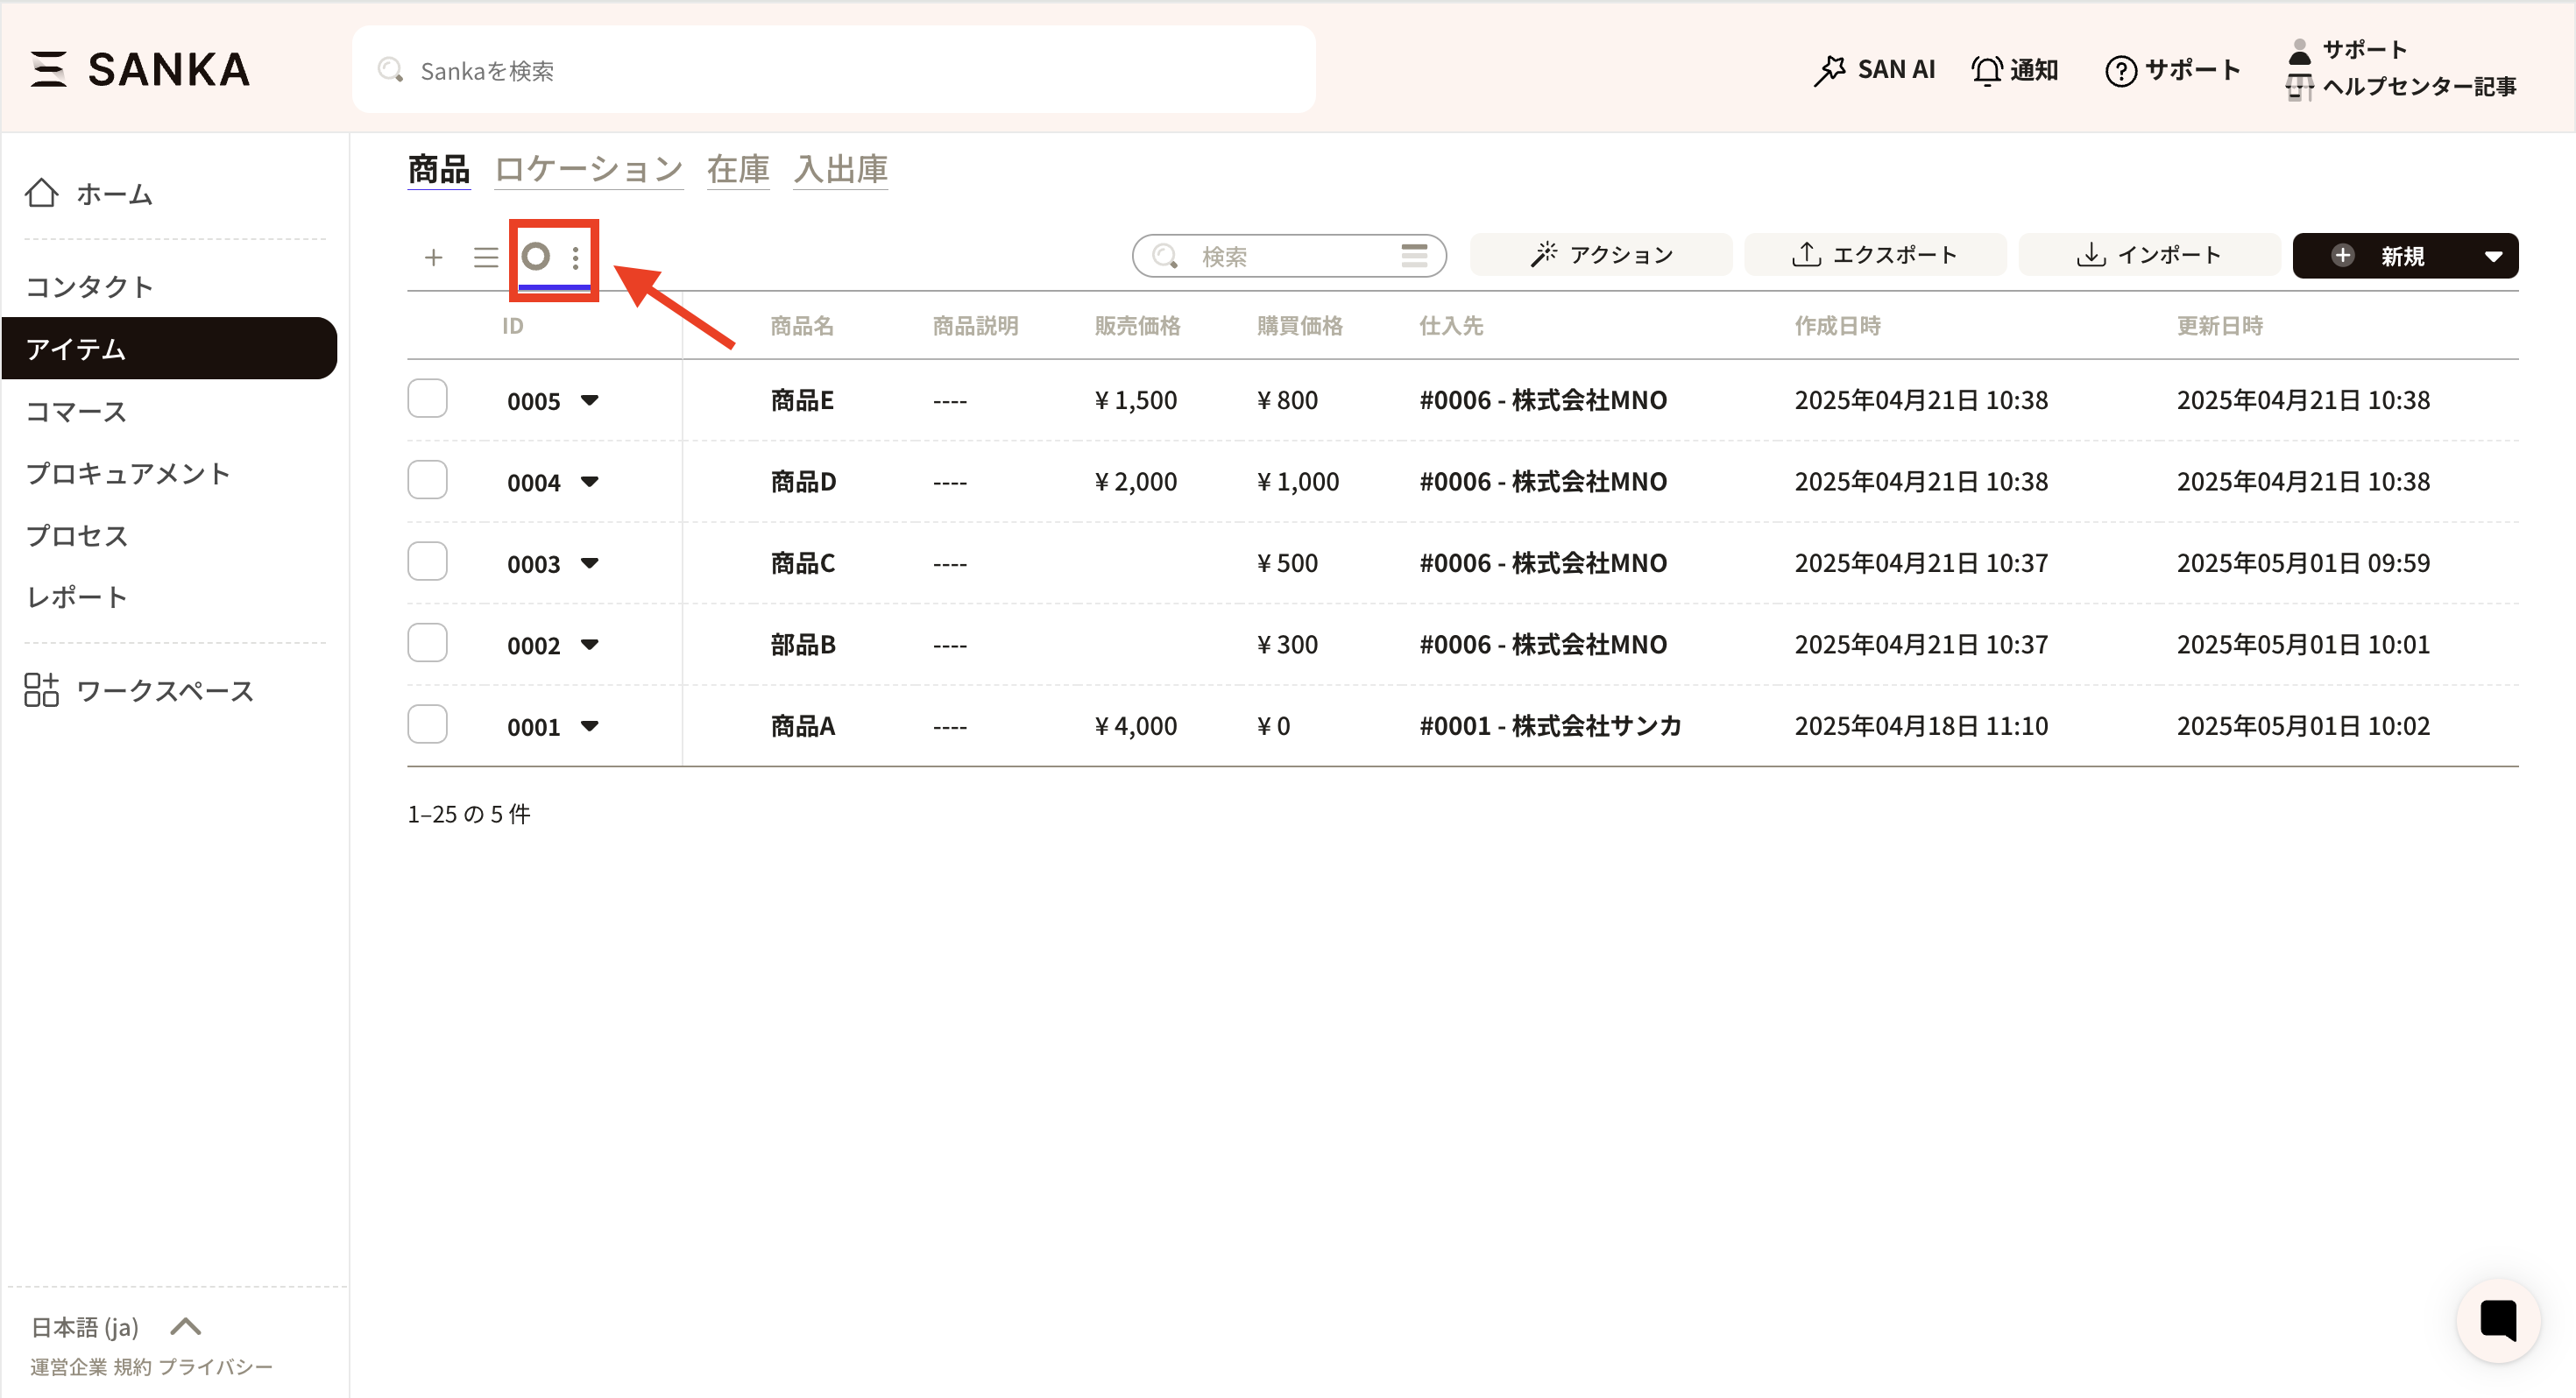
 ⑬ Set the form you created here to always be displayed. First, press the view settings (three vertical dots button) at the top left of the record list.
 ⑭The “View management screen” will be displayed.
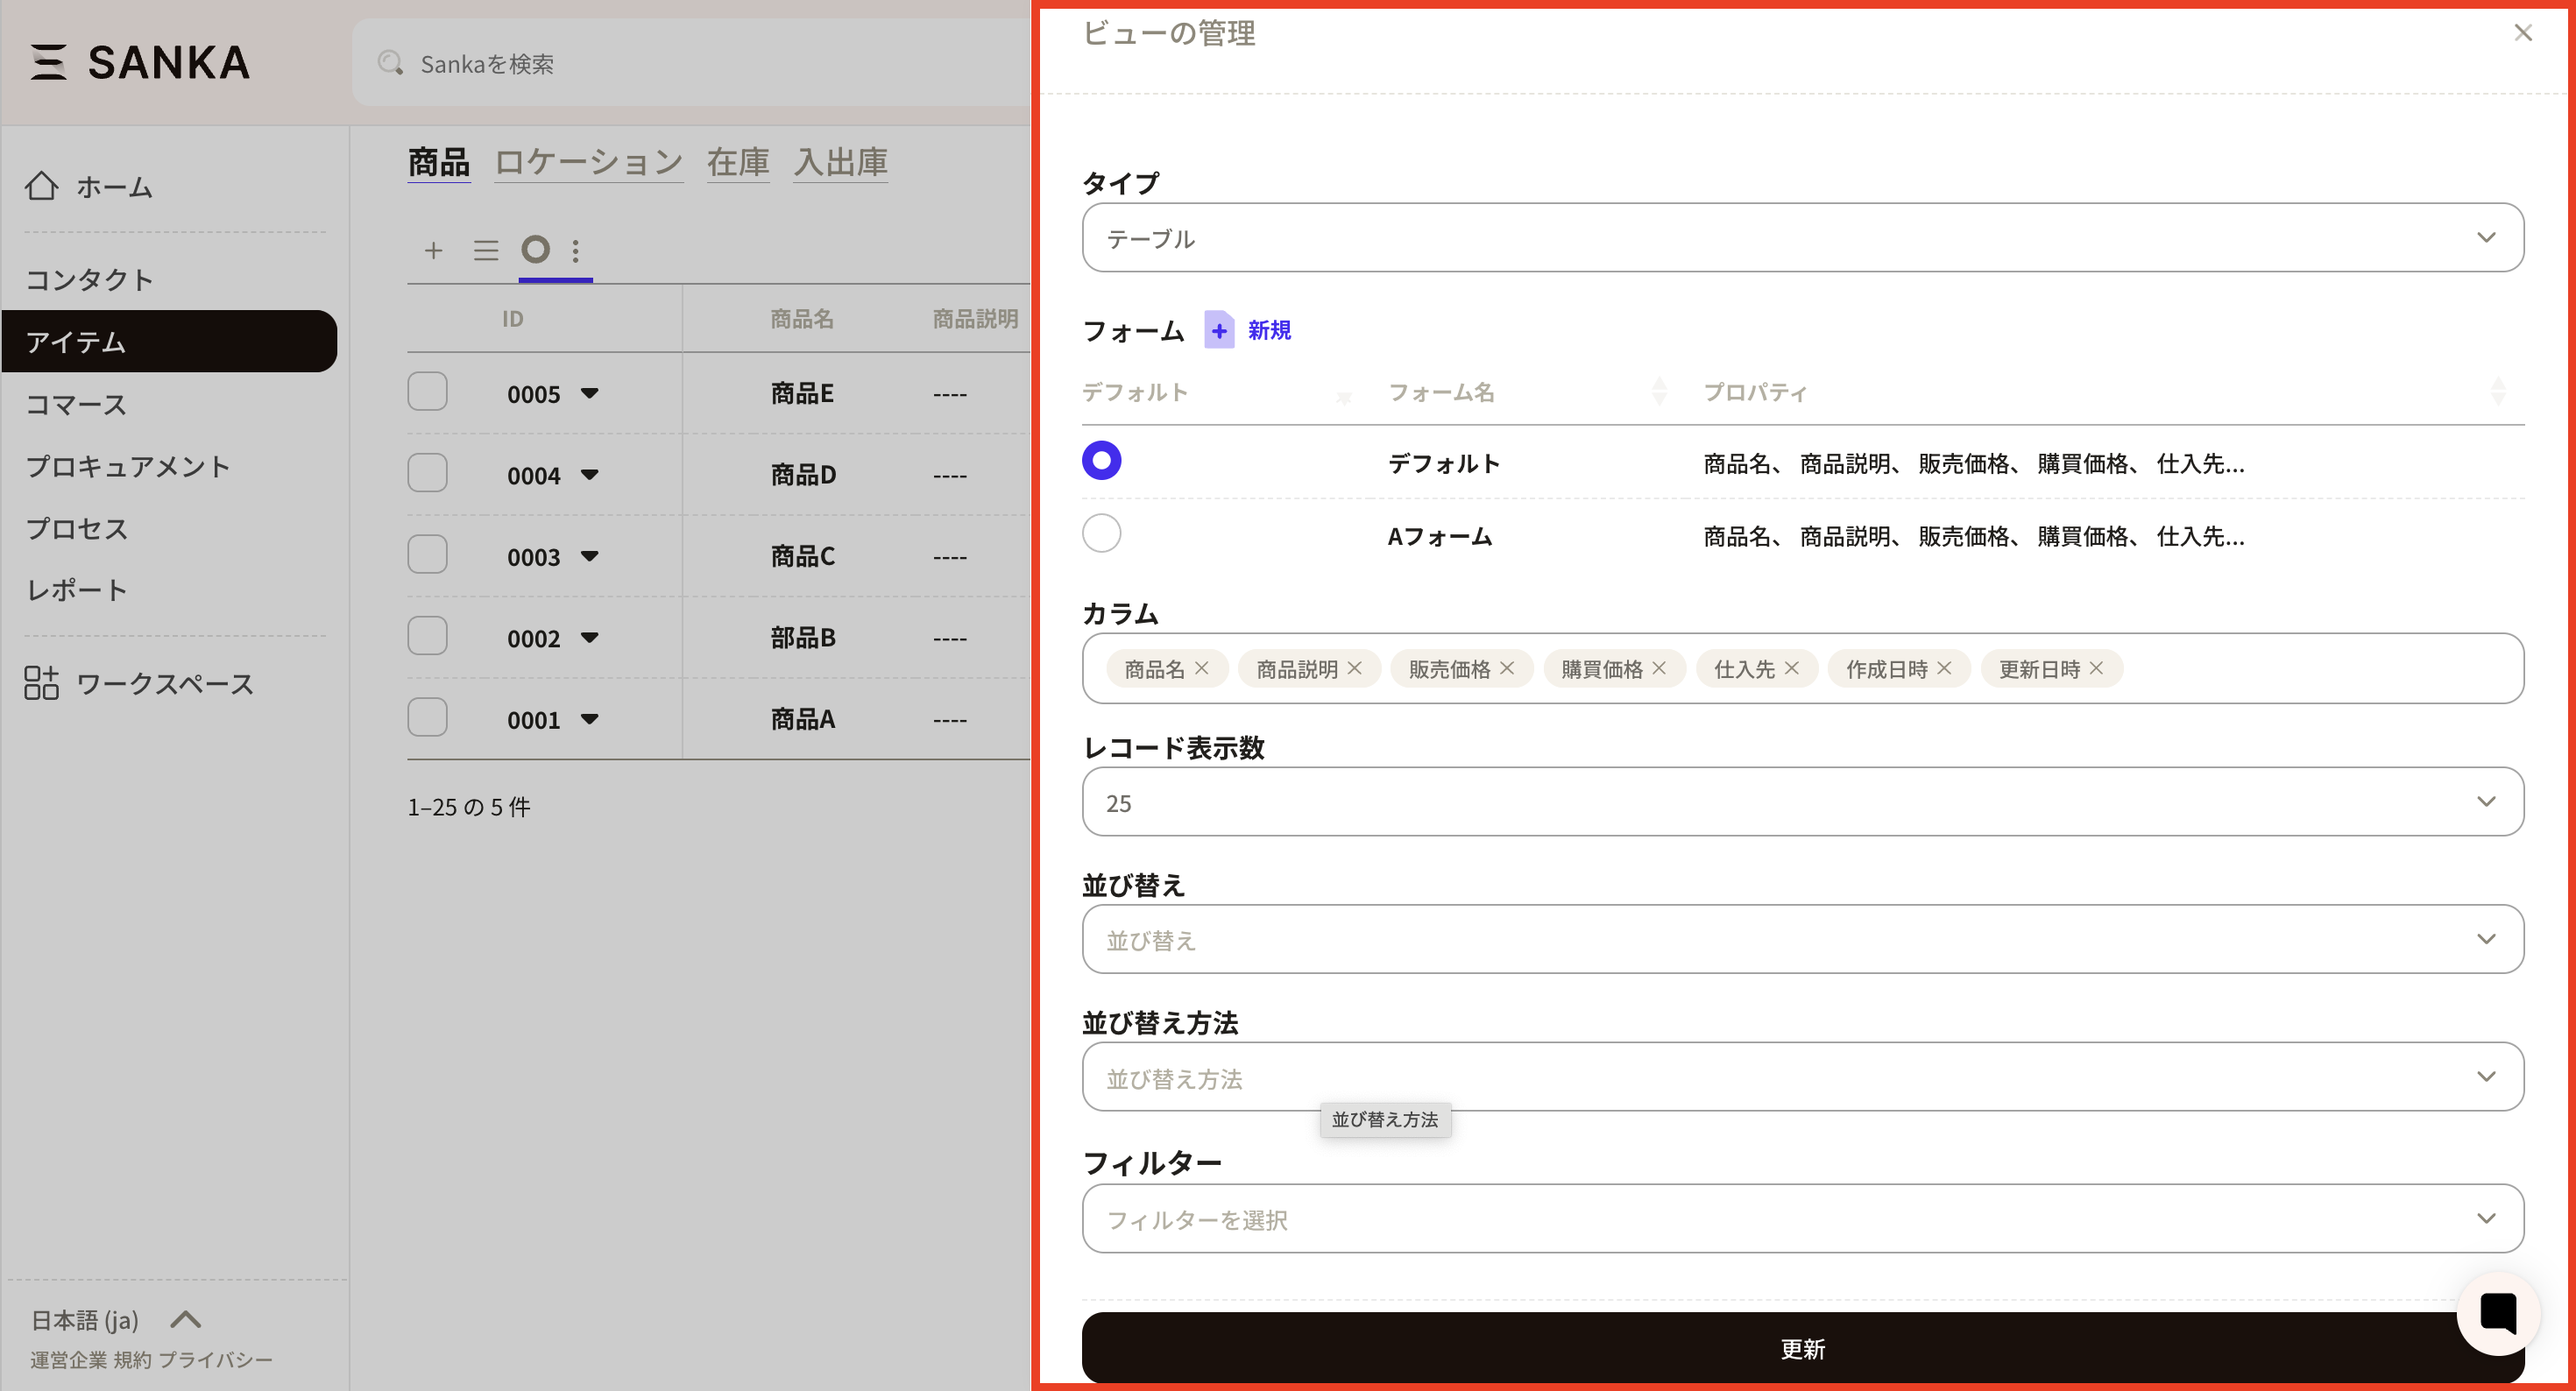 ⑮The form settings are the default, so set up the form with the product configuration added. Press the circle button to set.
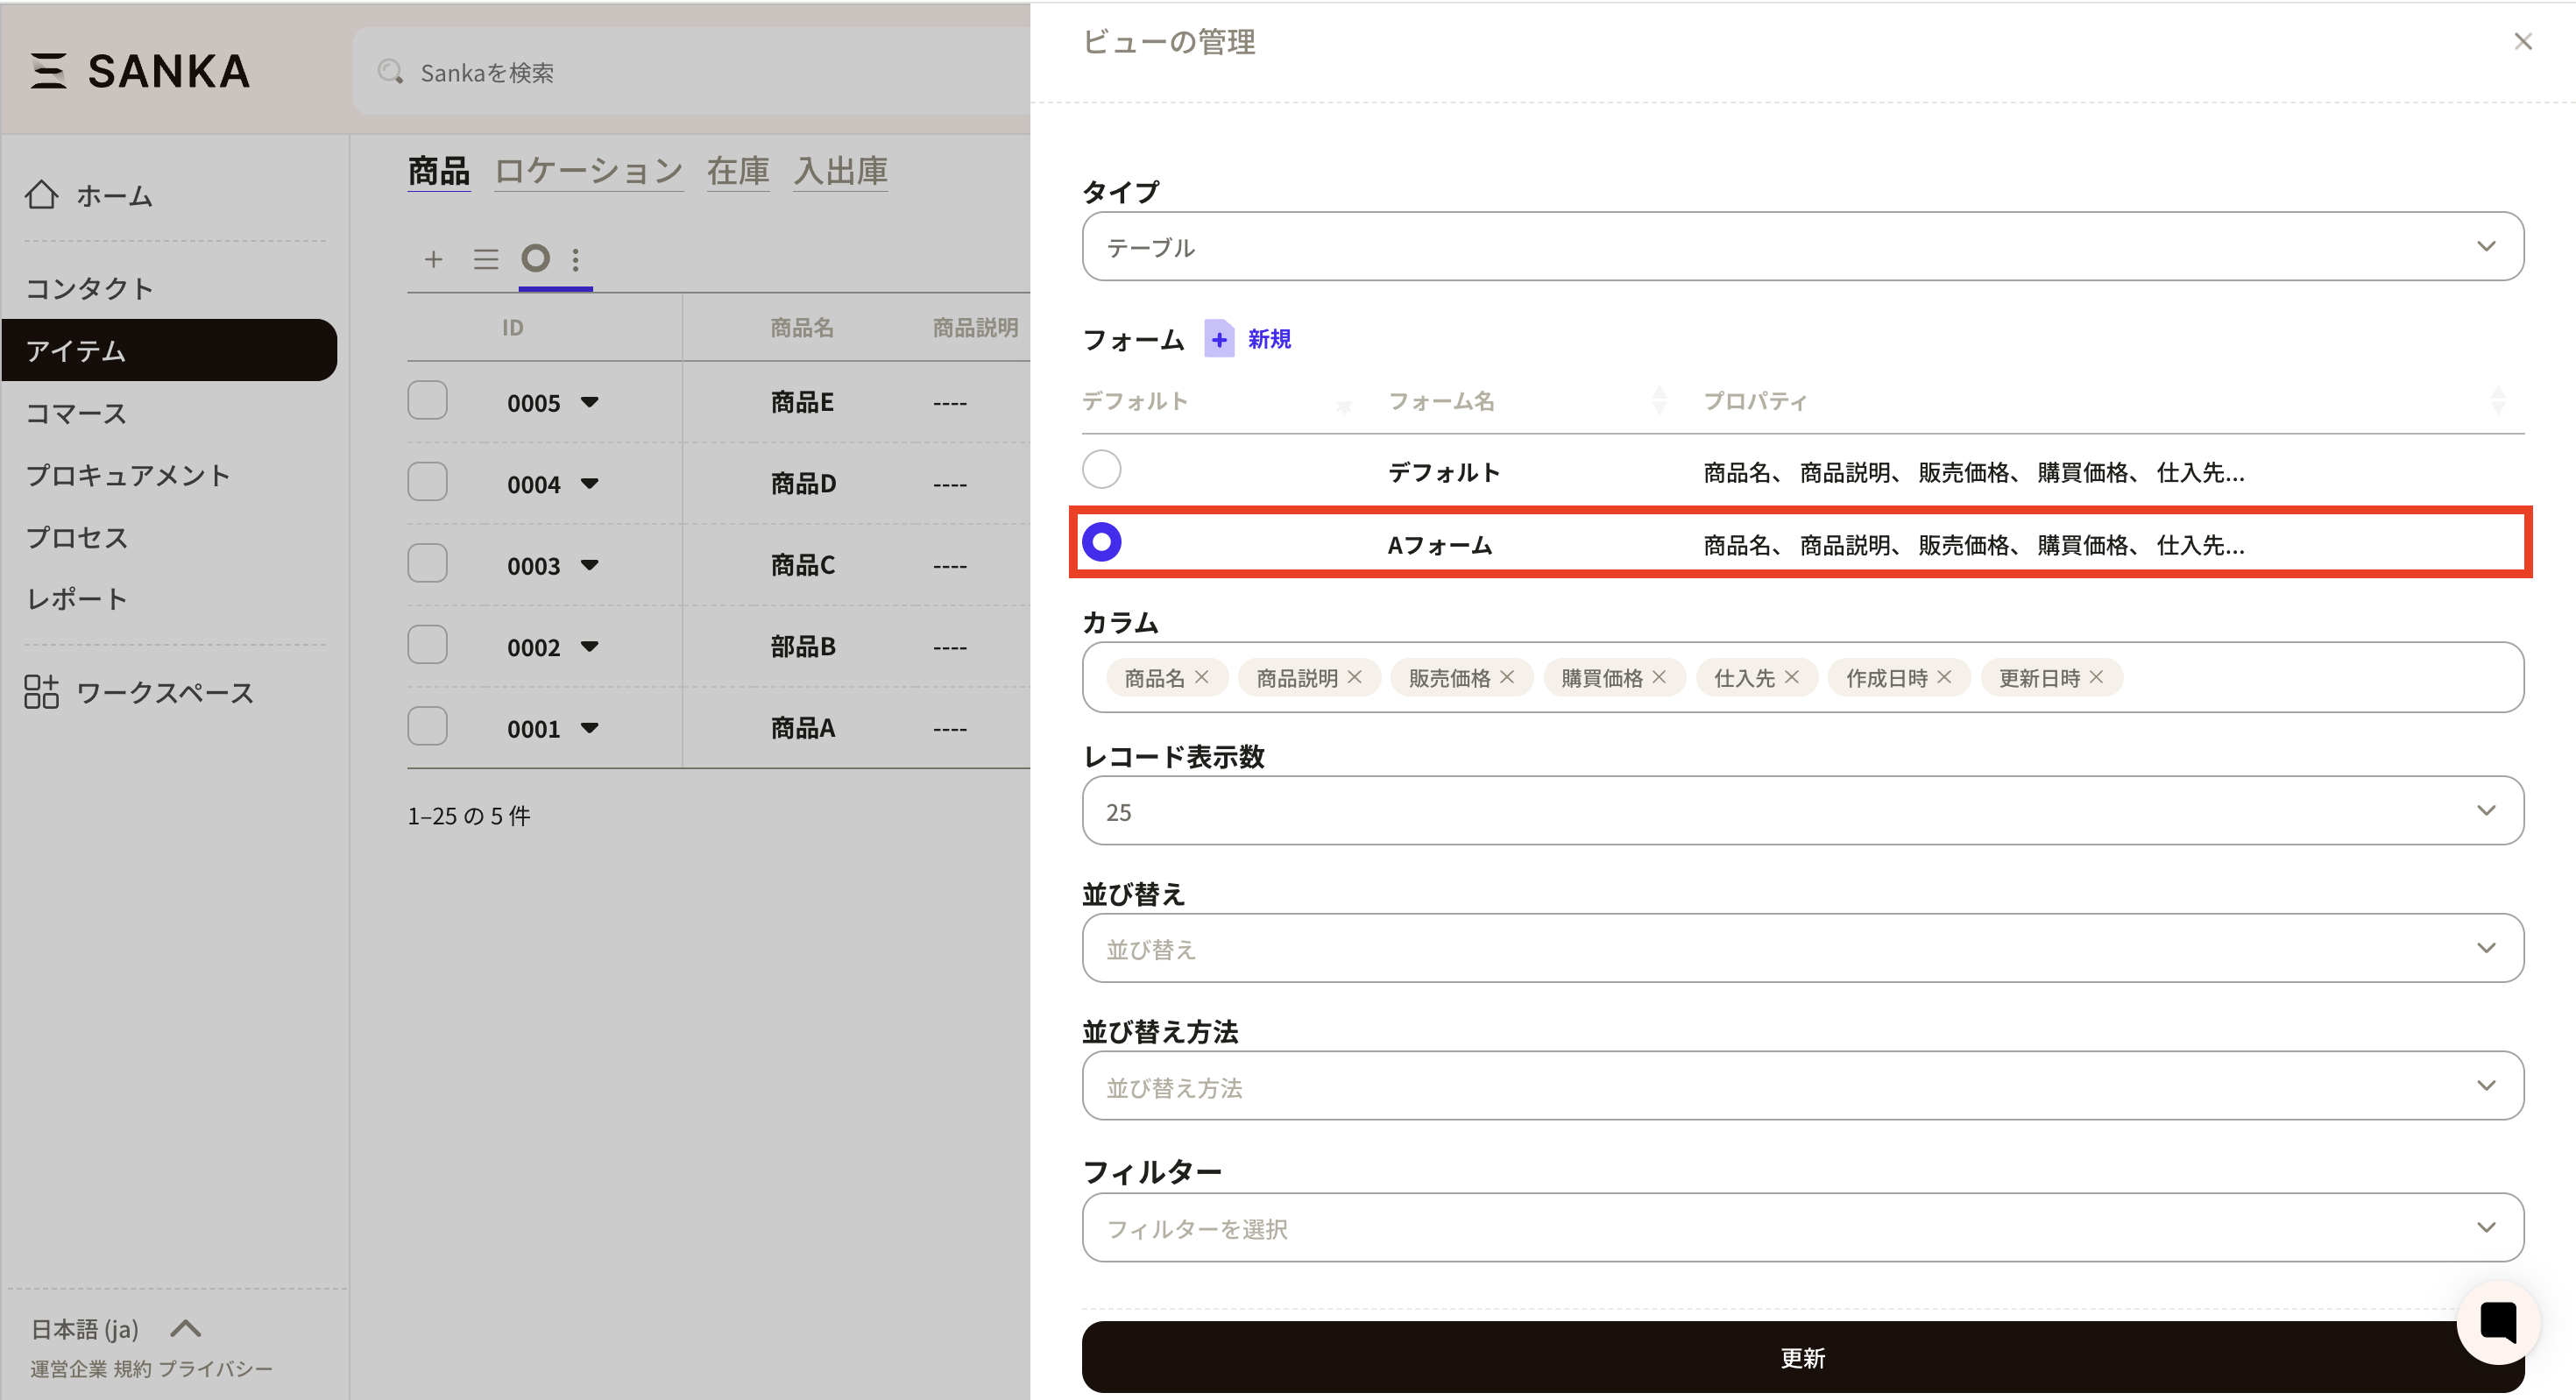 ⑯Finally, press the update button, and the form with the product configuration added will always be displayed.
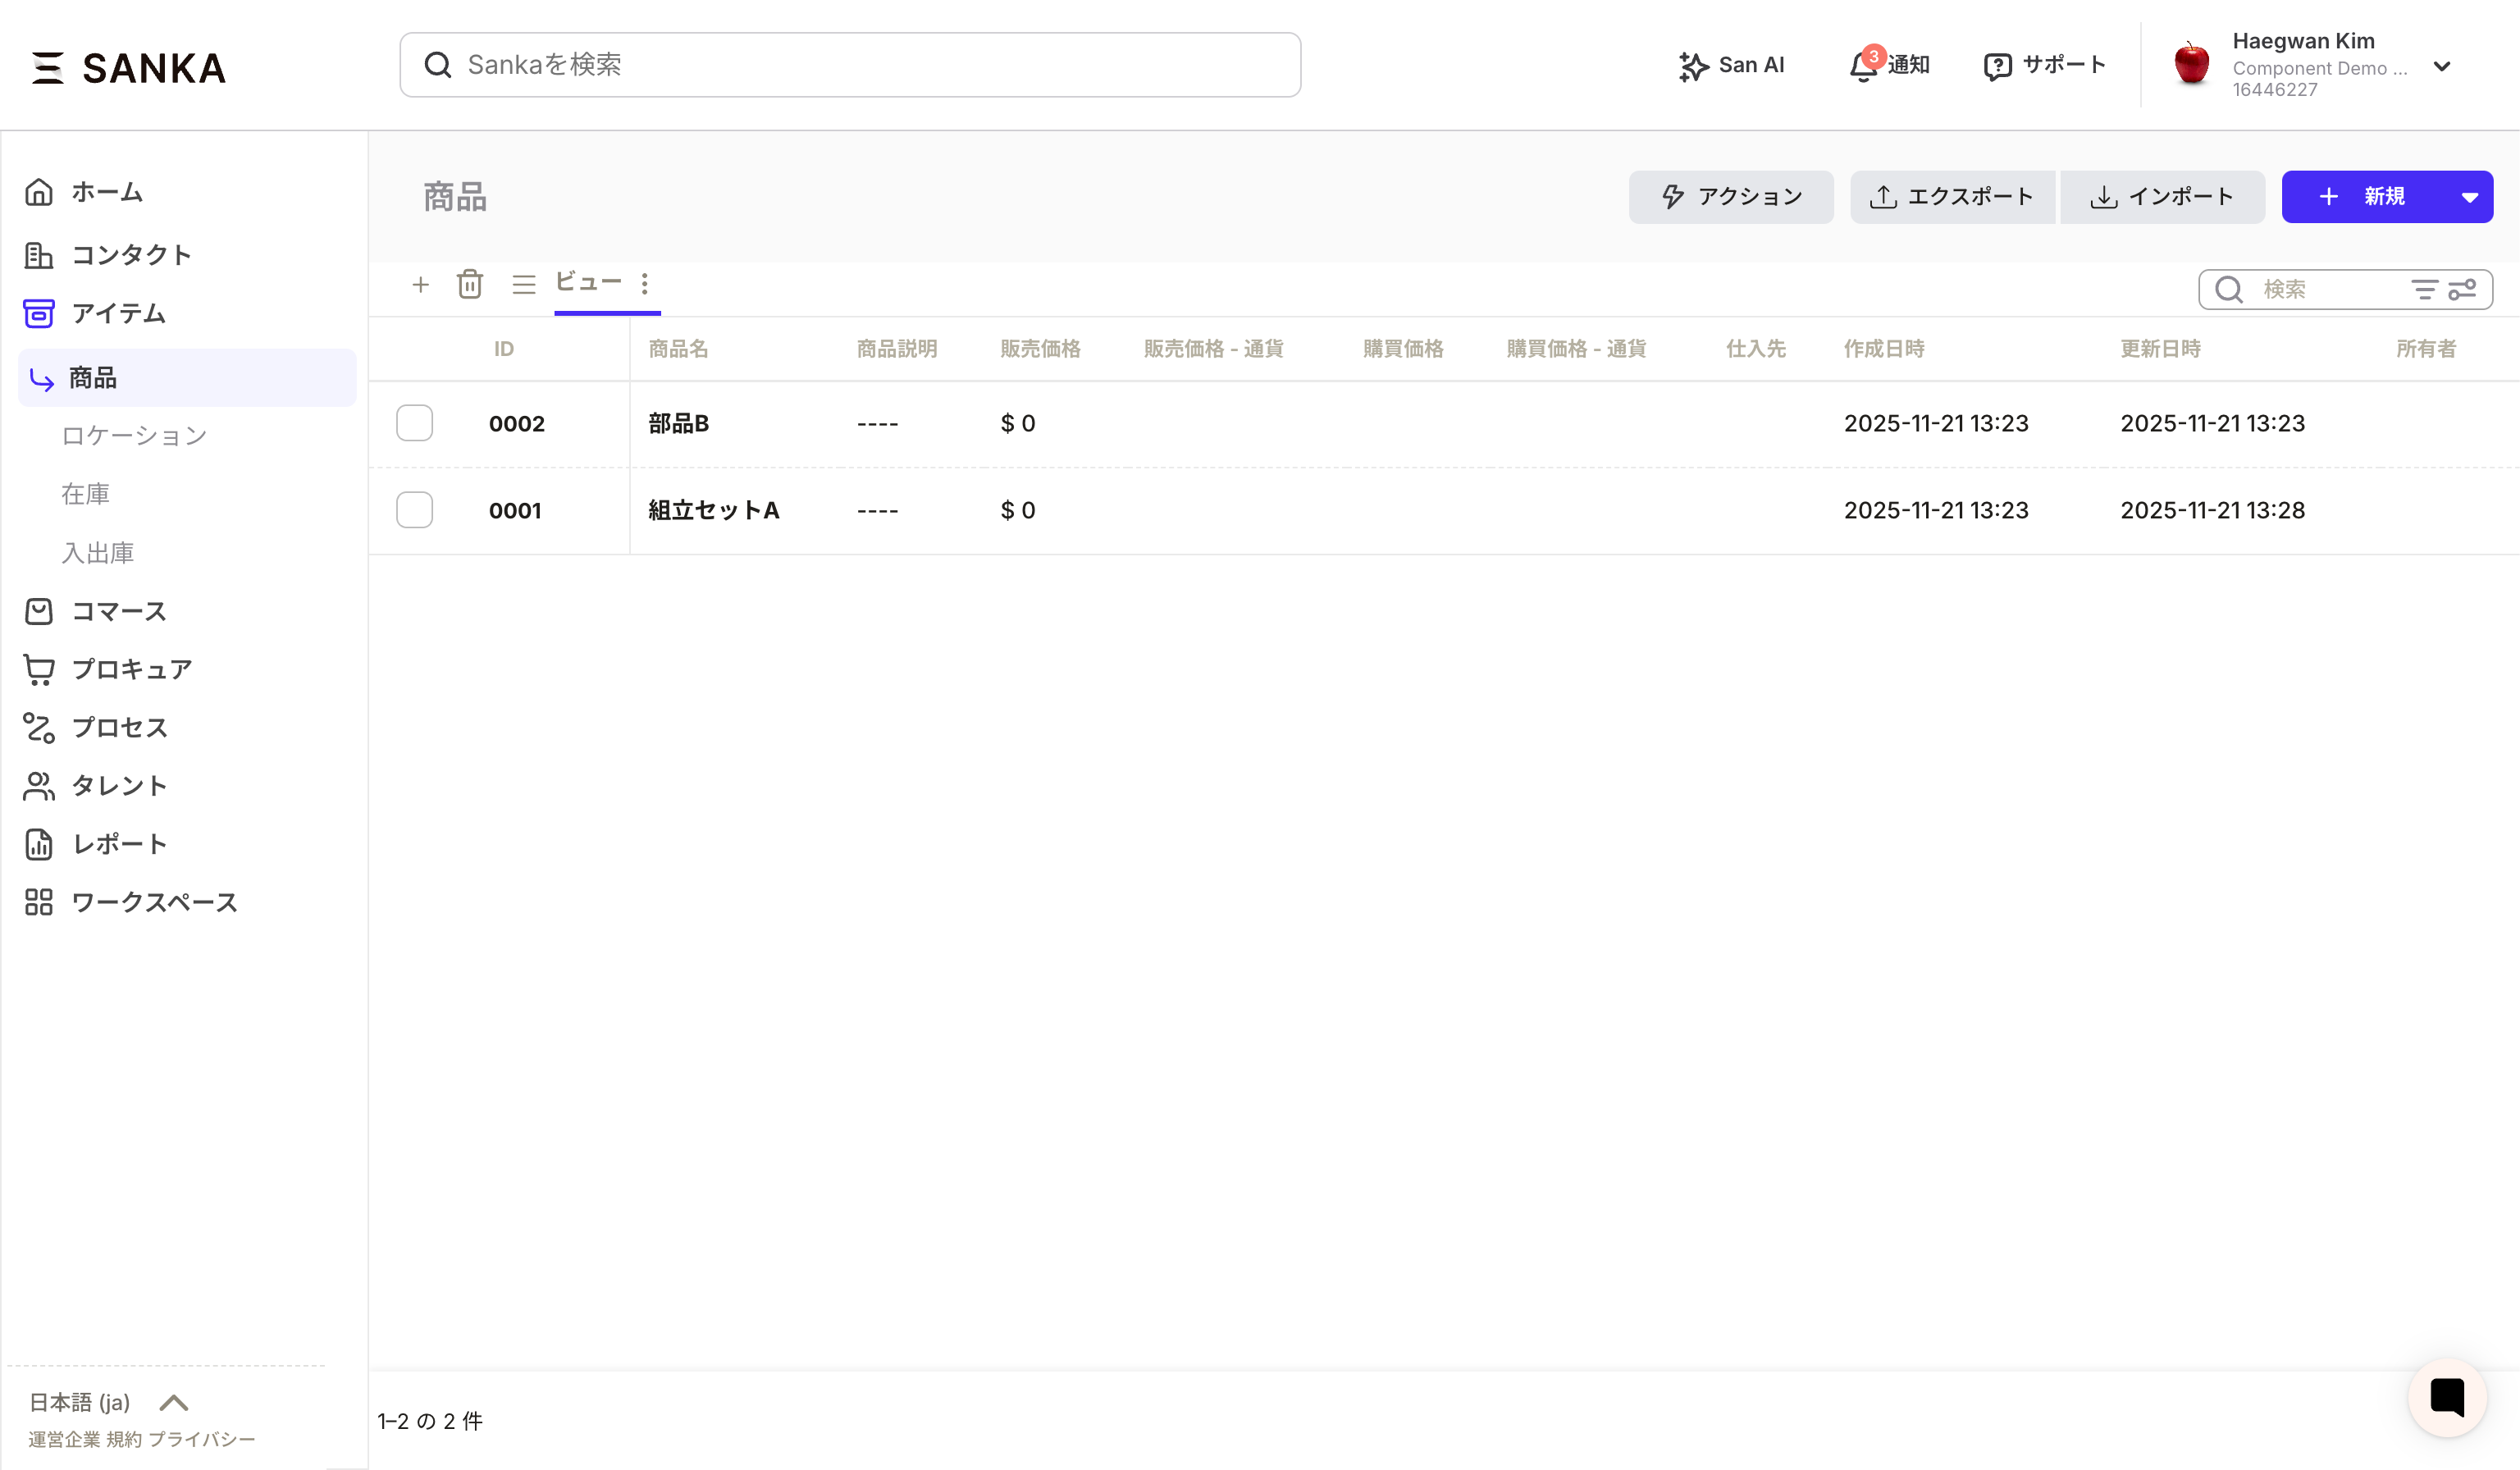
How to register product configurations individually
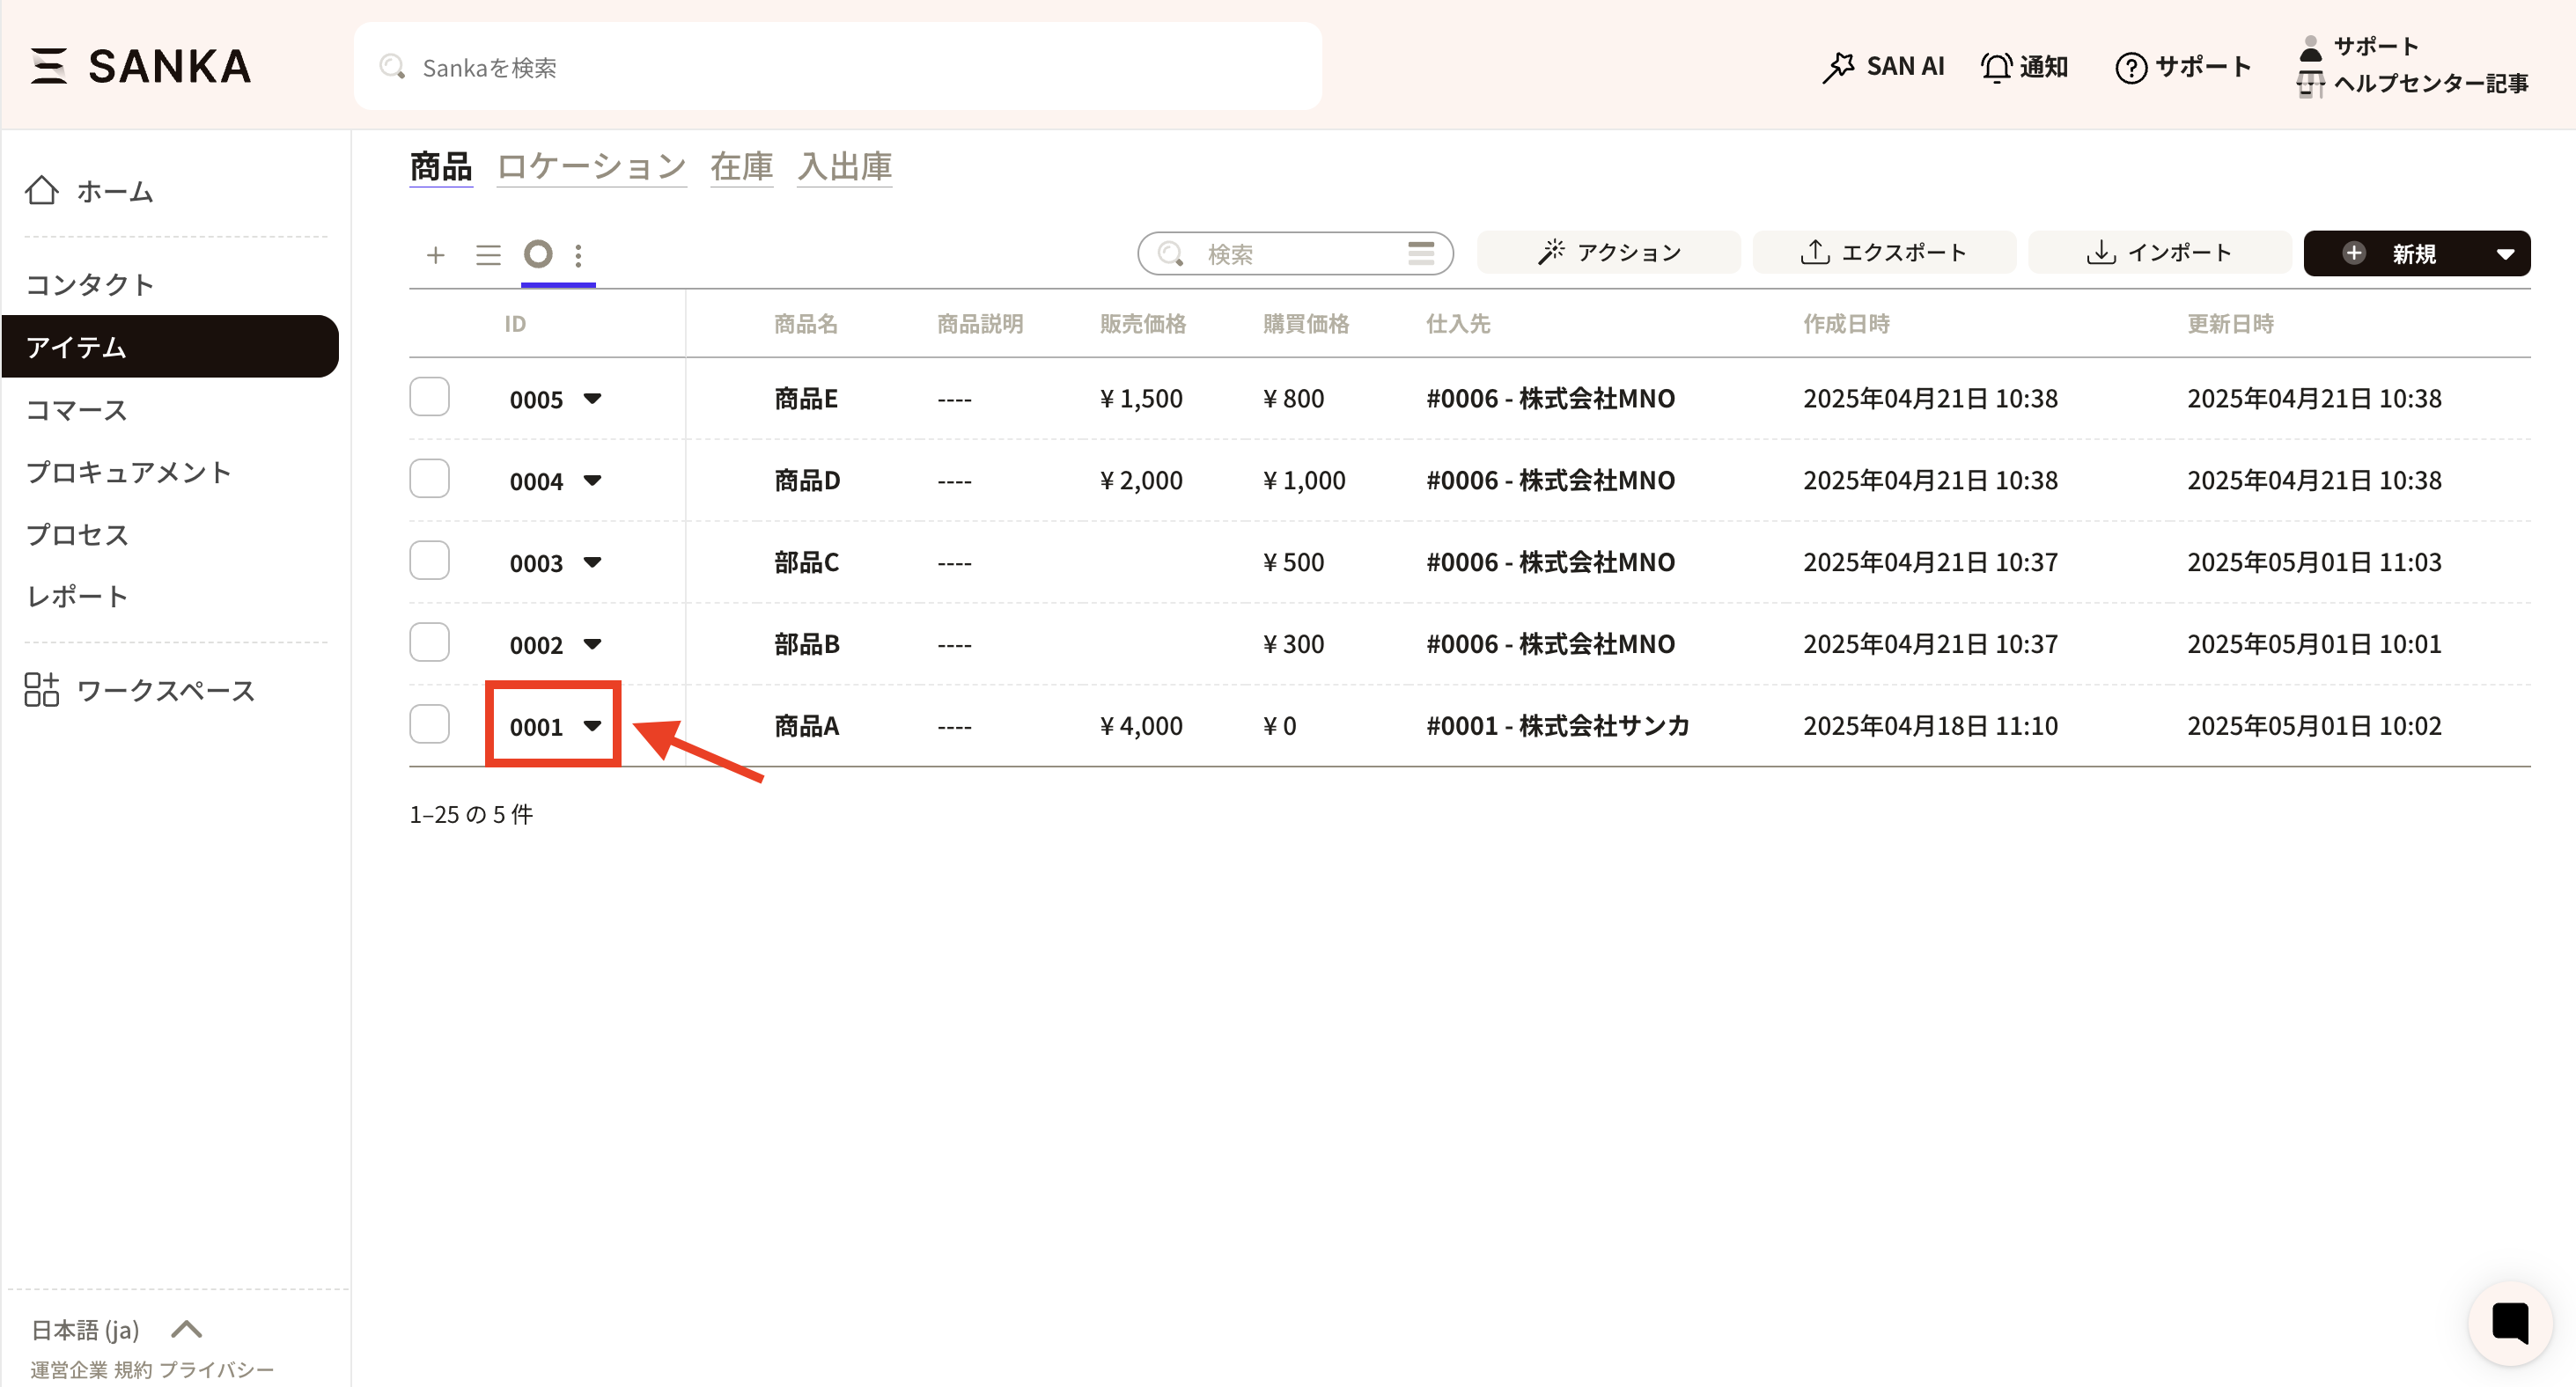
We will introduce how to create a product configuration. Here, as an example, we will link product A to parts B and C. You need to create a record for each product in advance.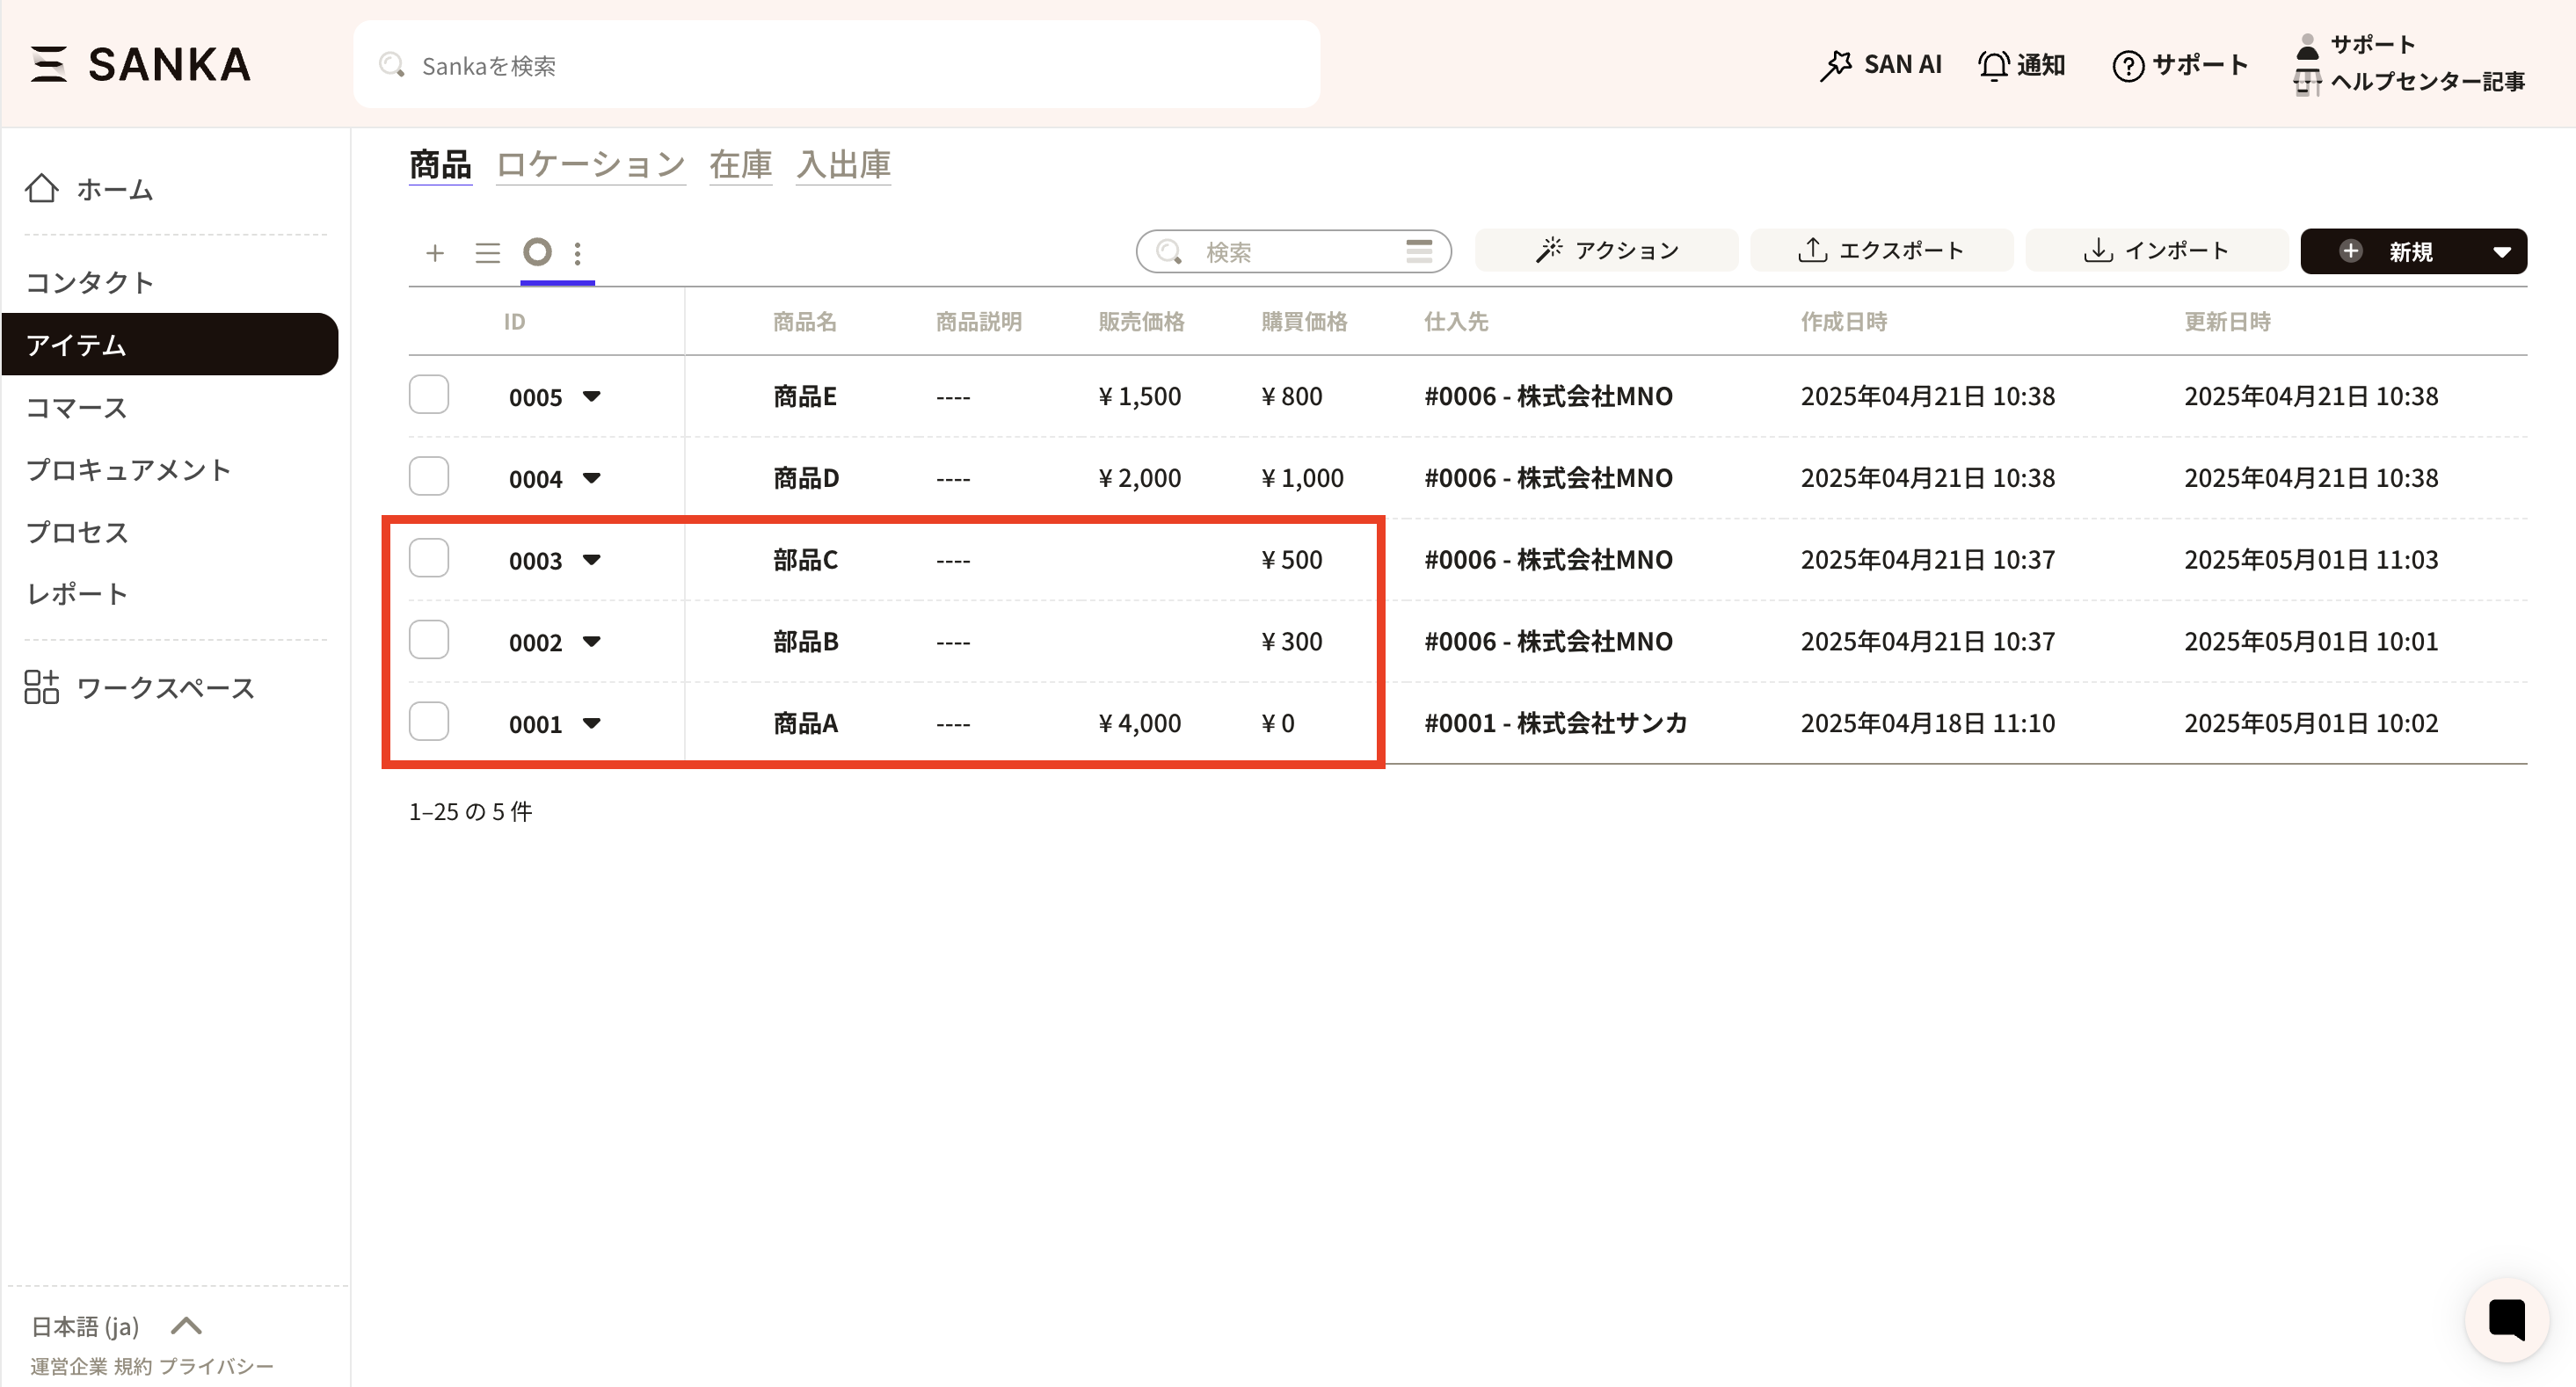 ① First, select the product ID of product A.
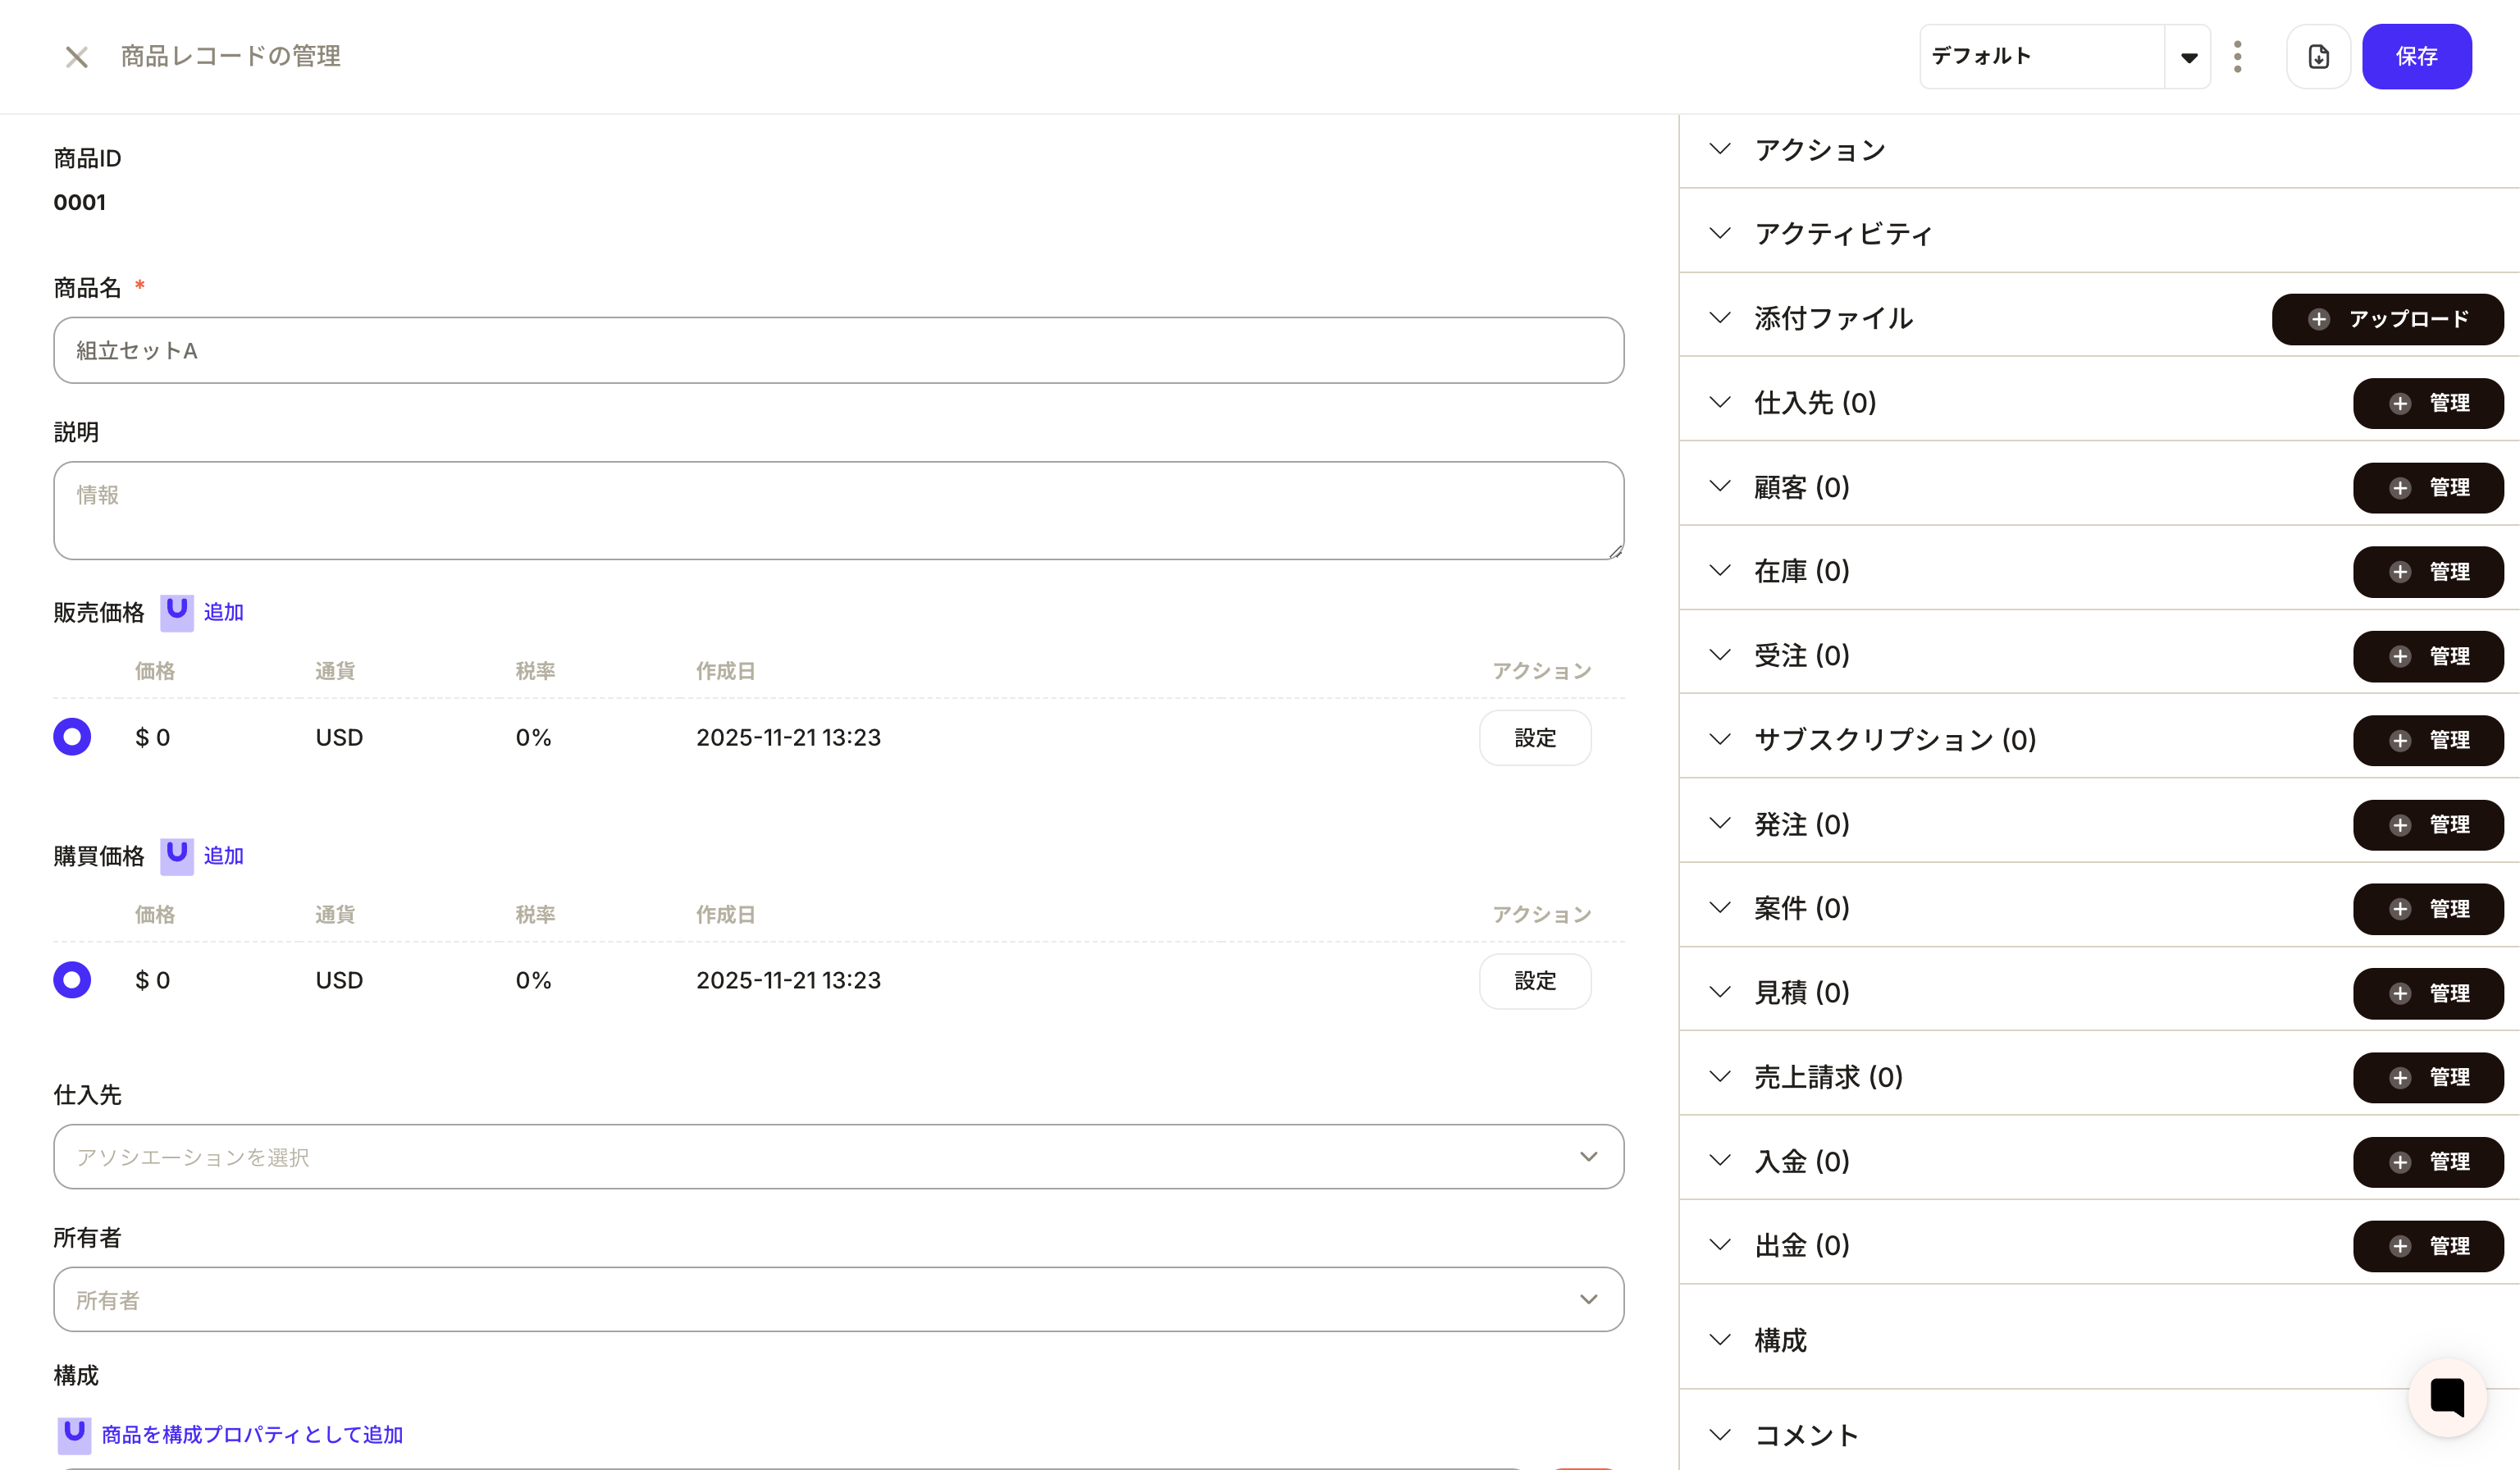
 ②The “Product Record Management” screen will be displayed.
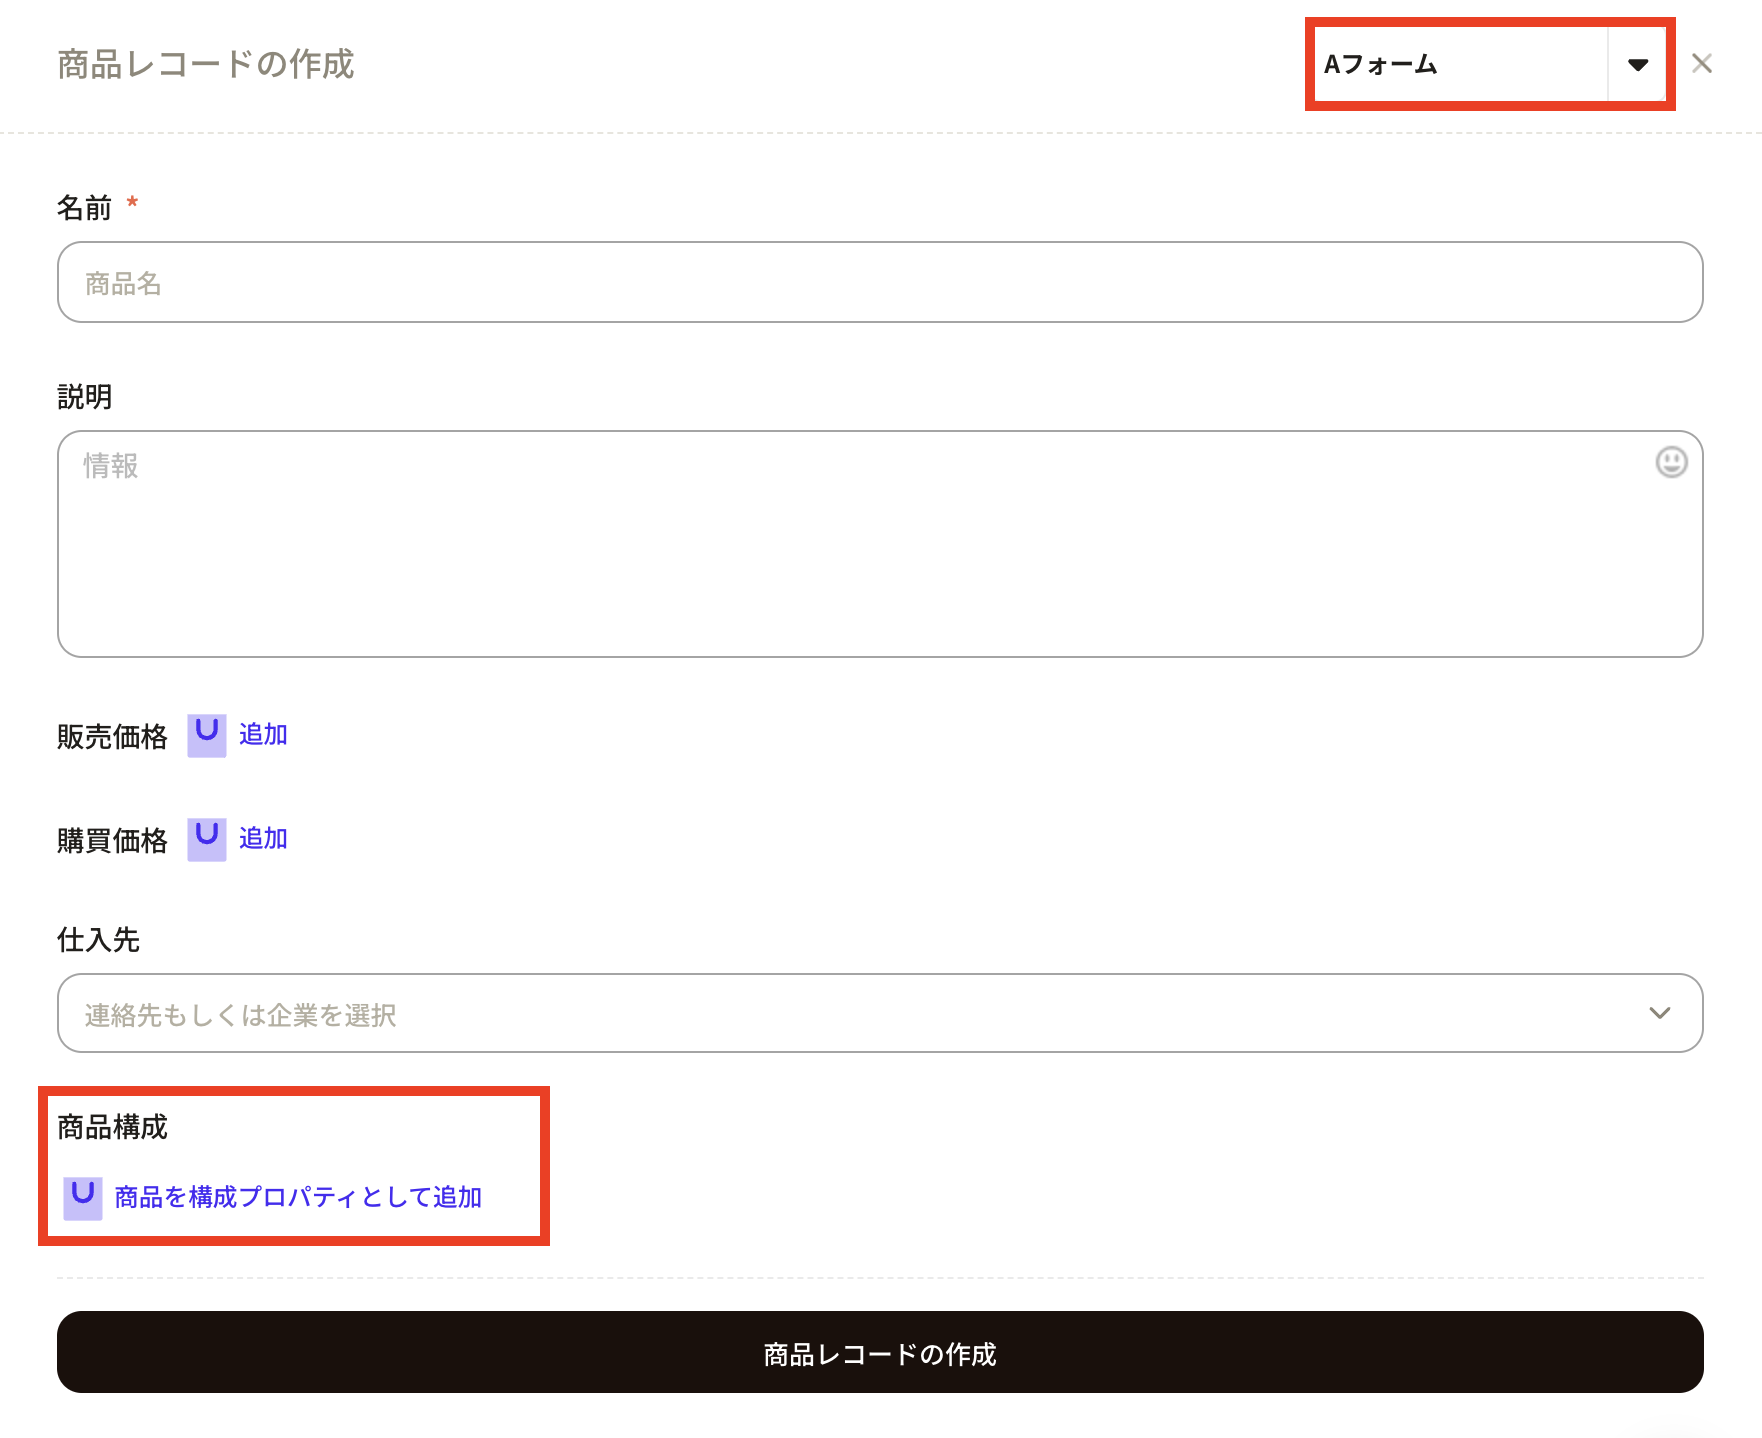
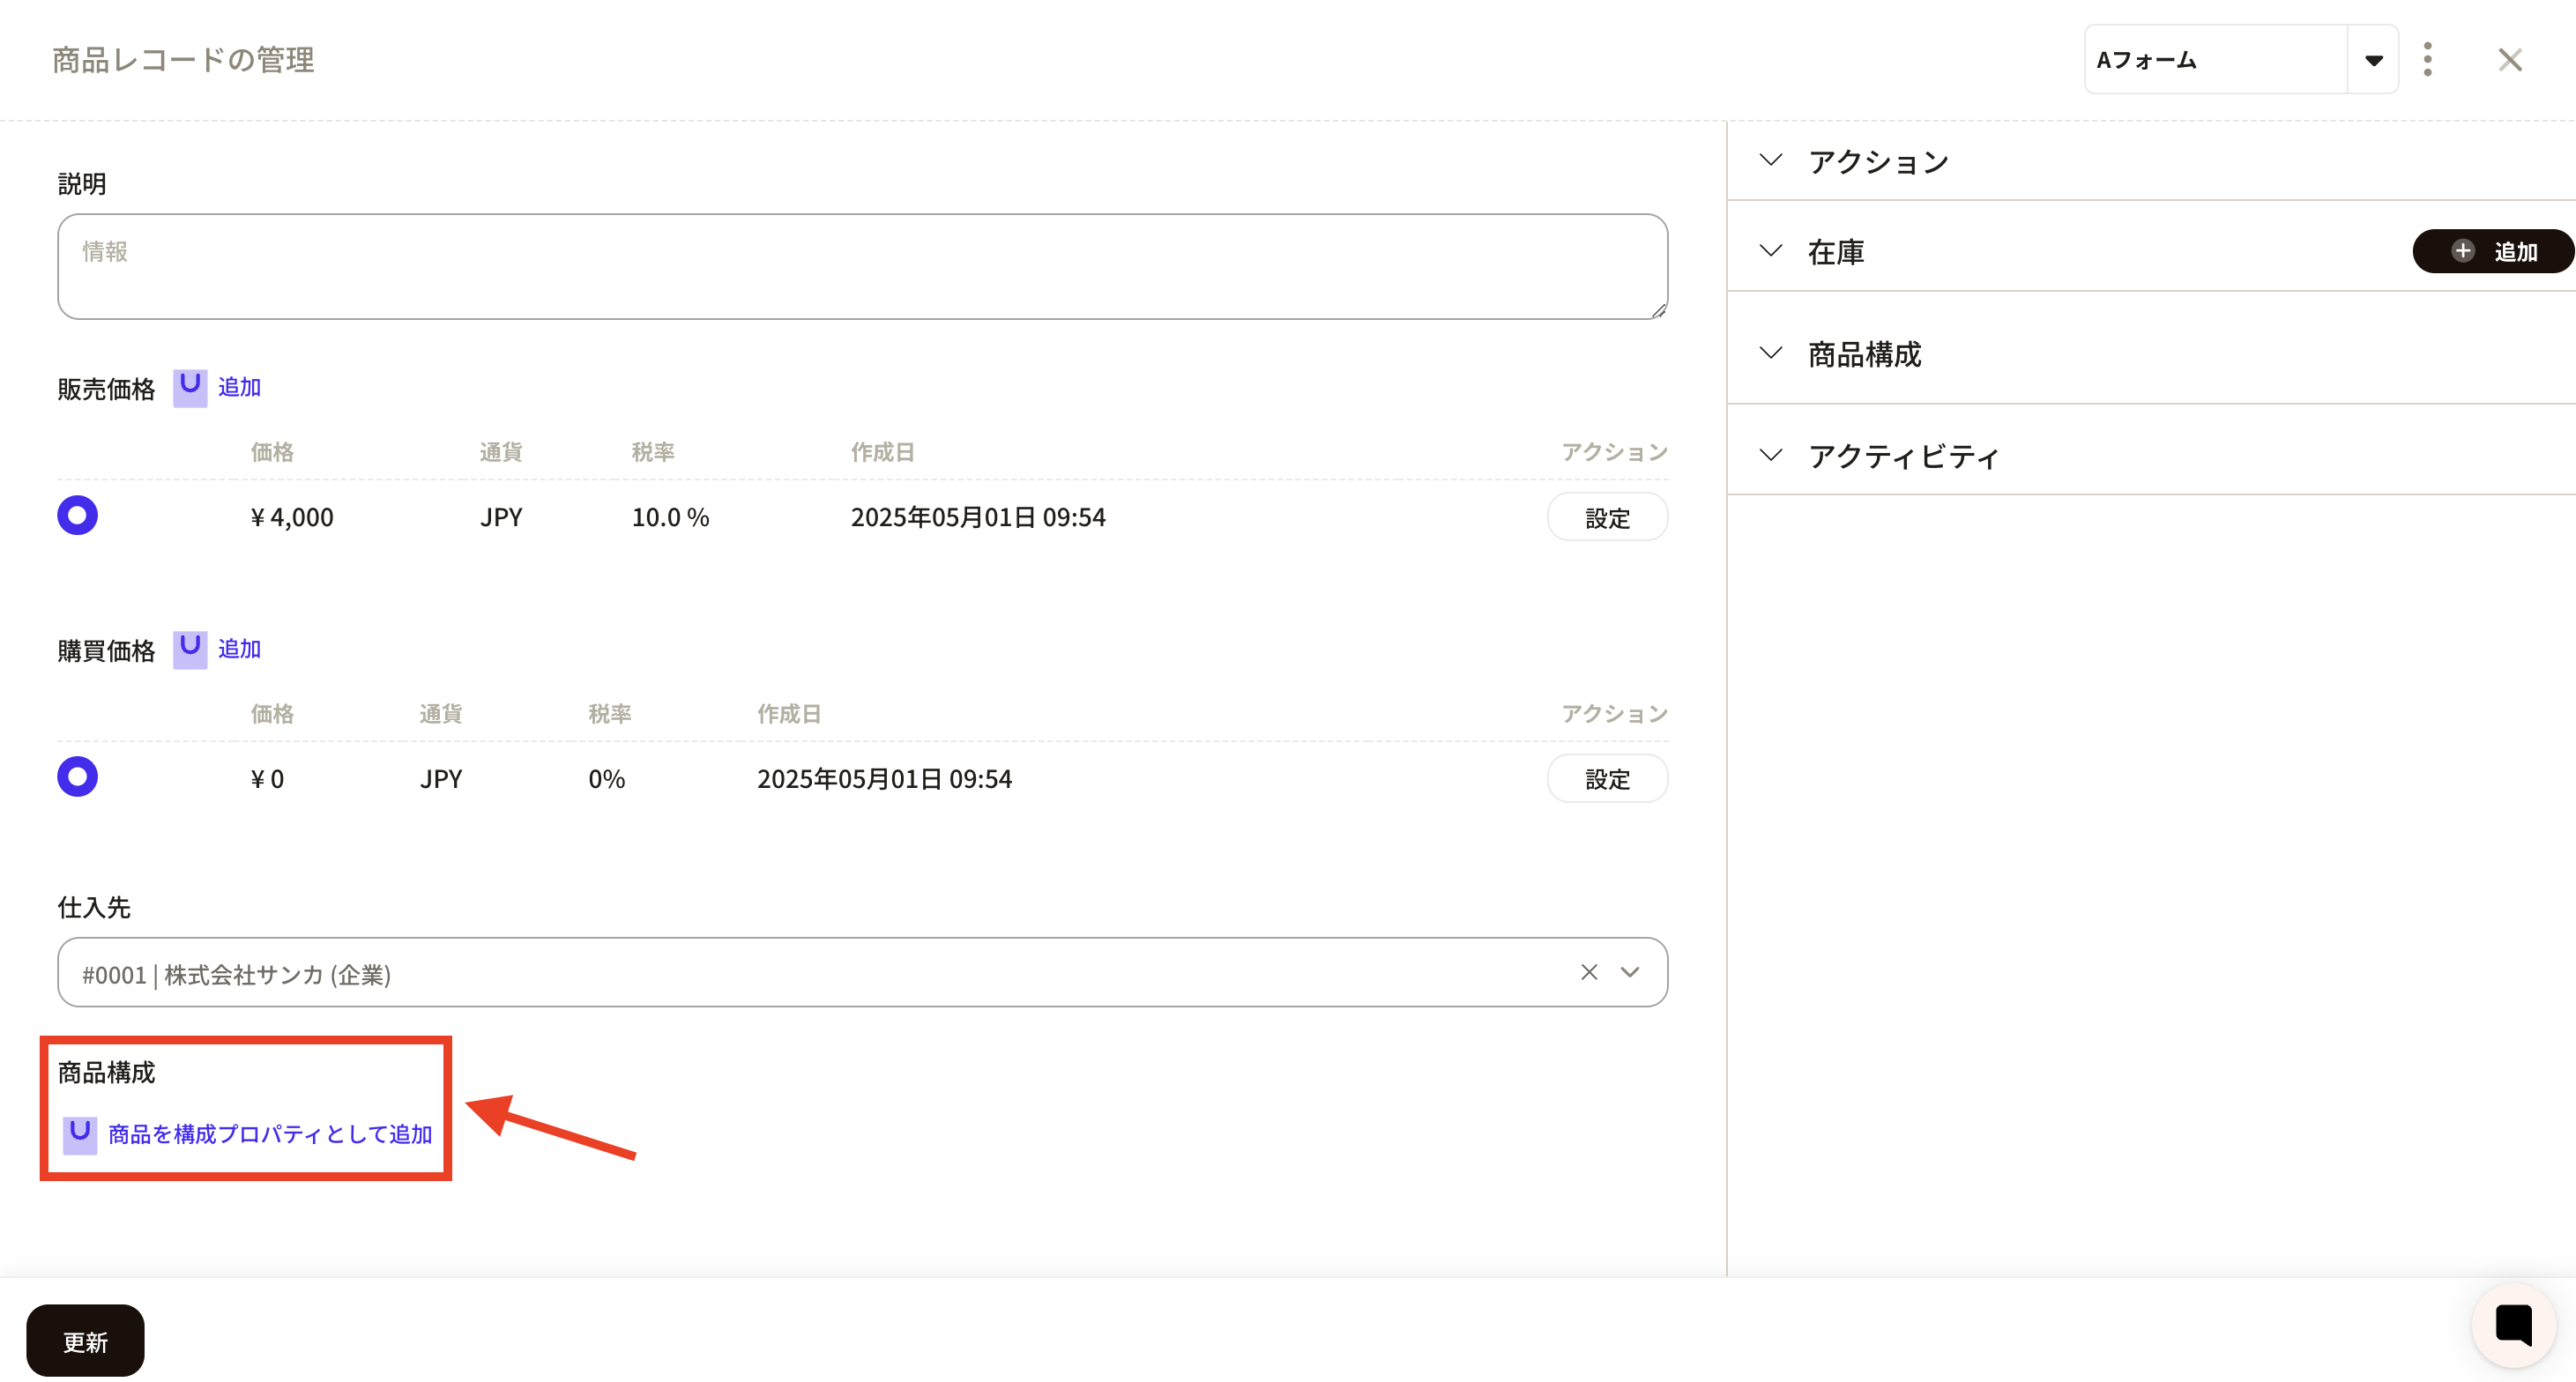
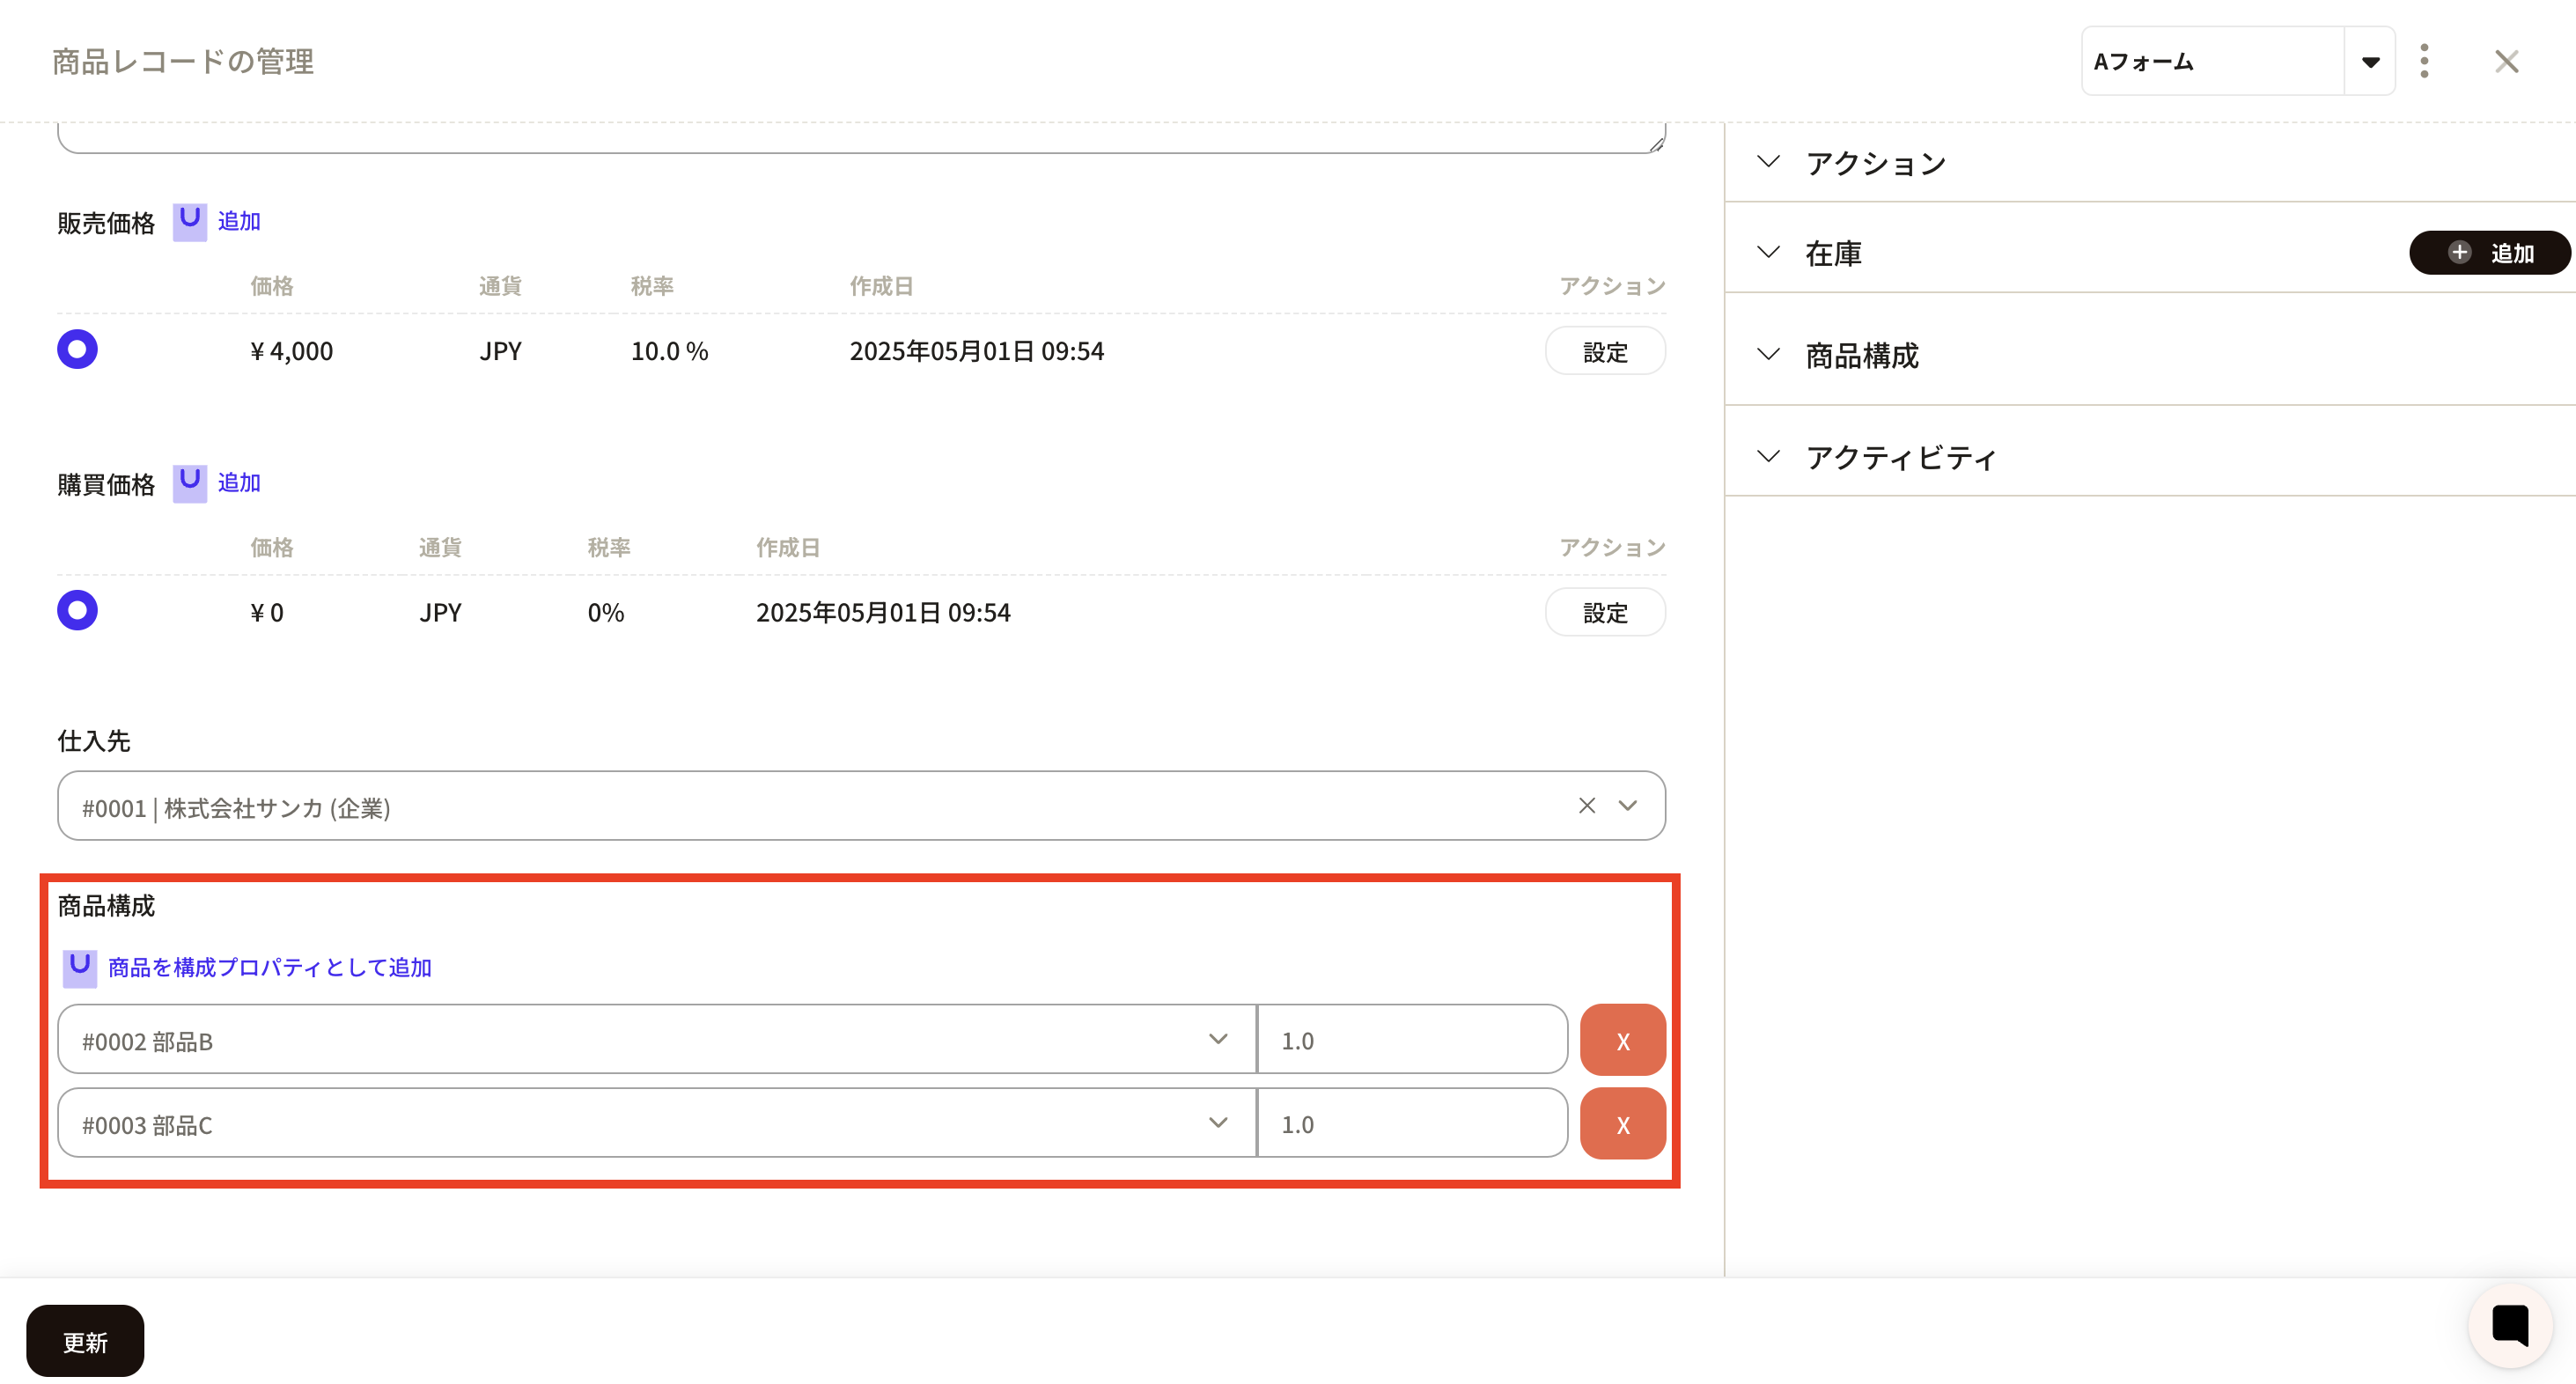
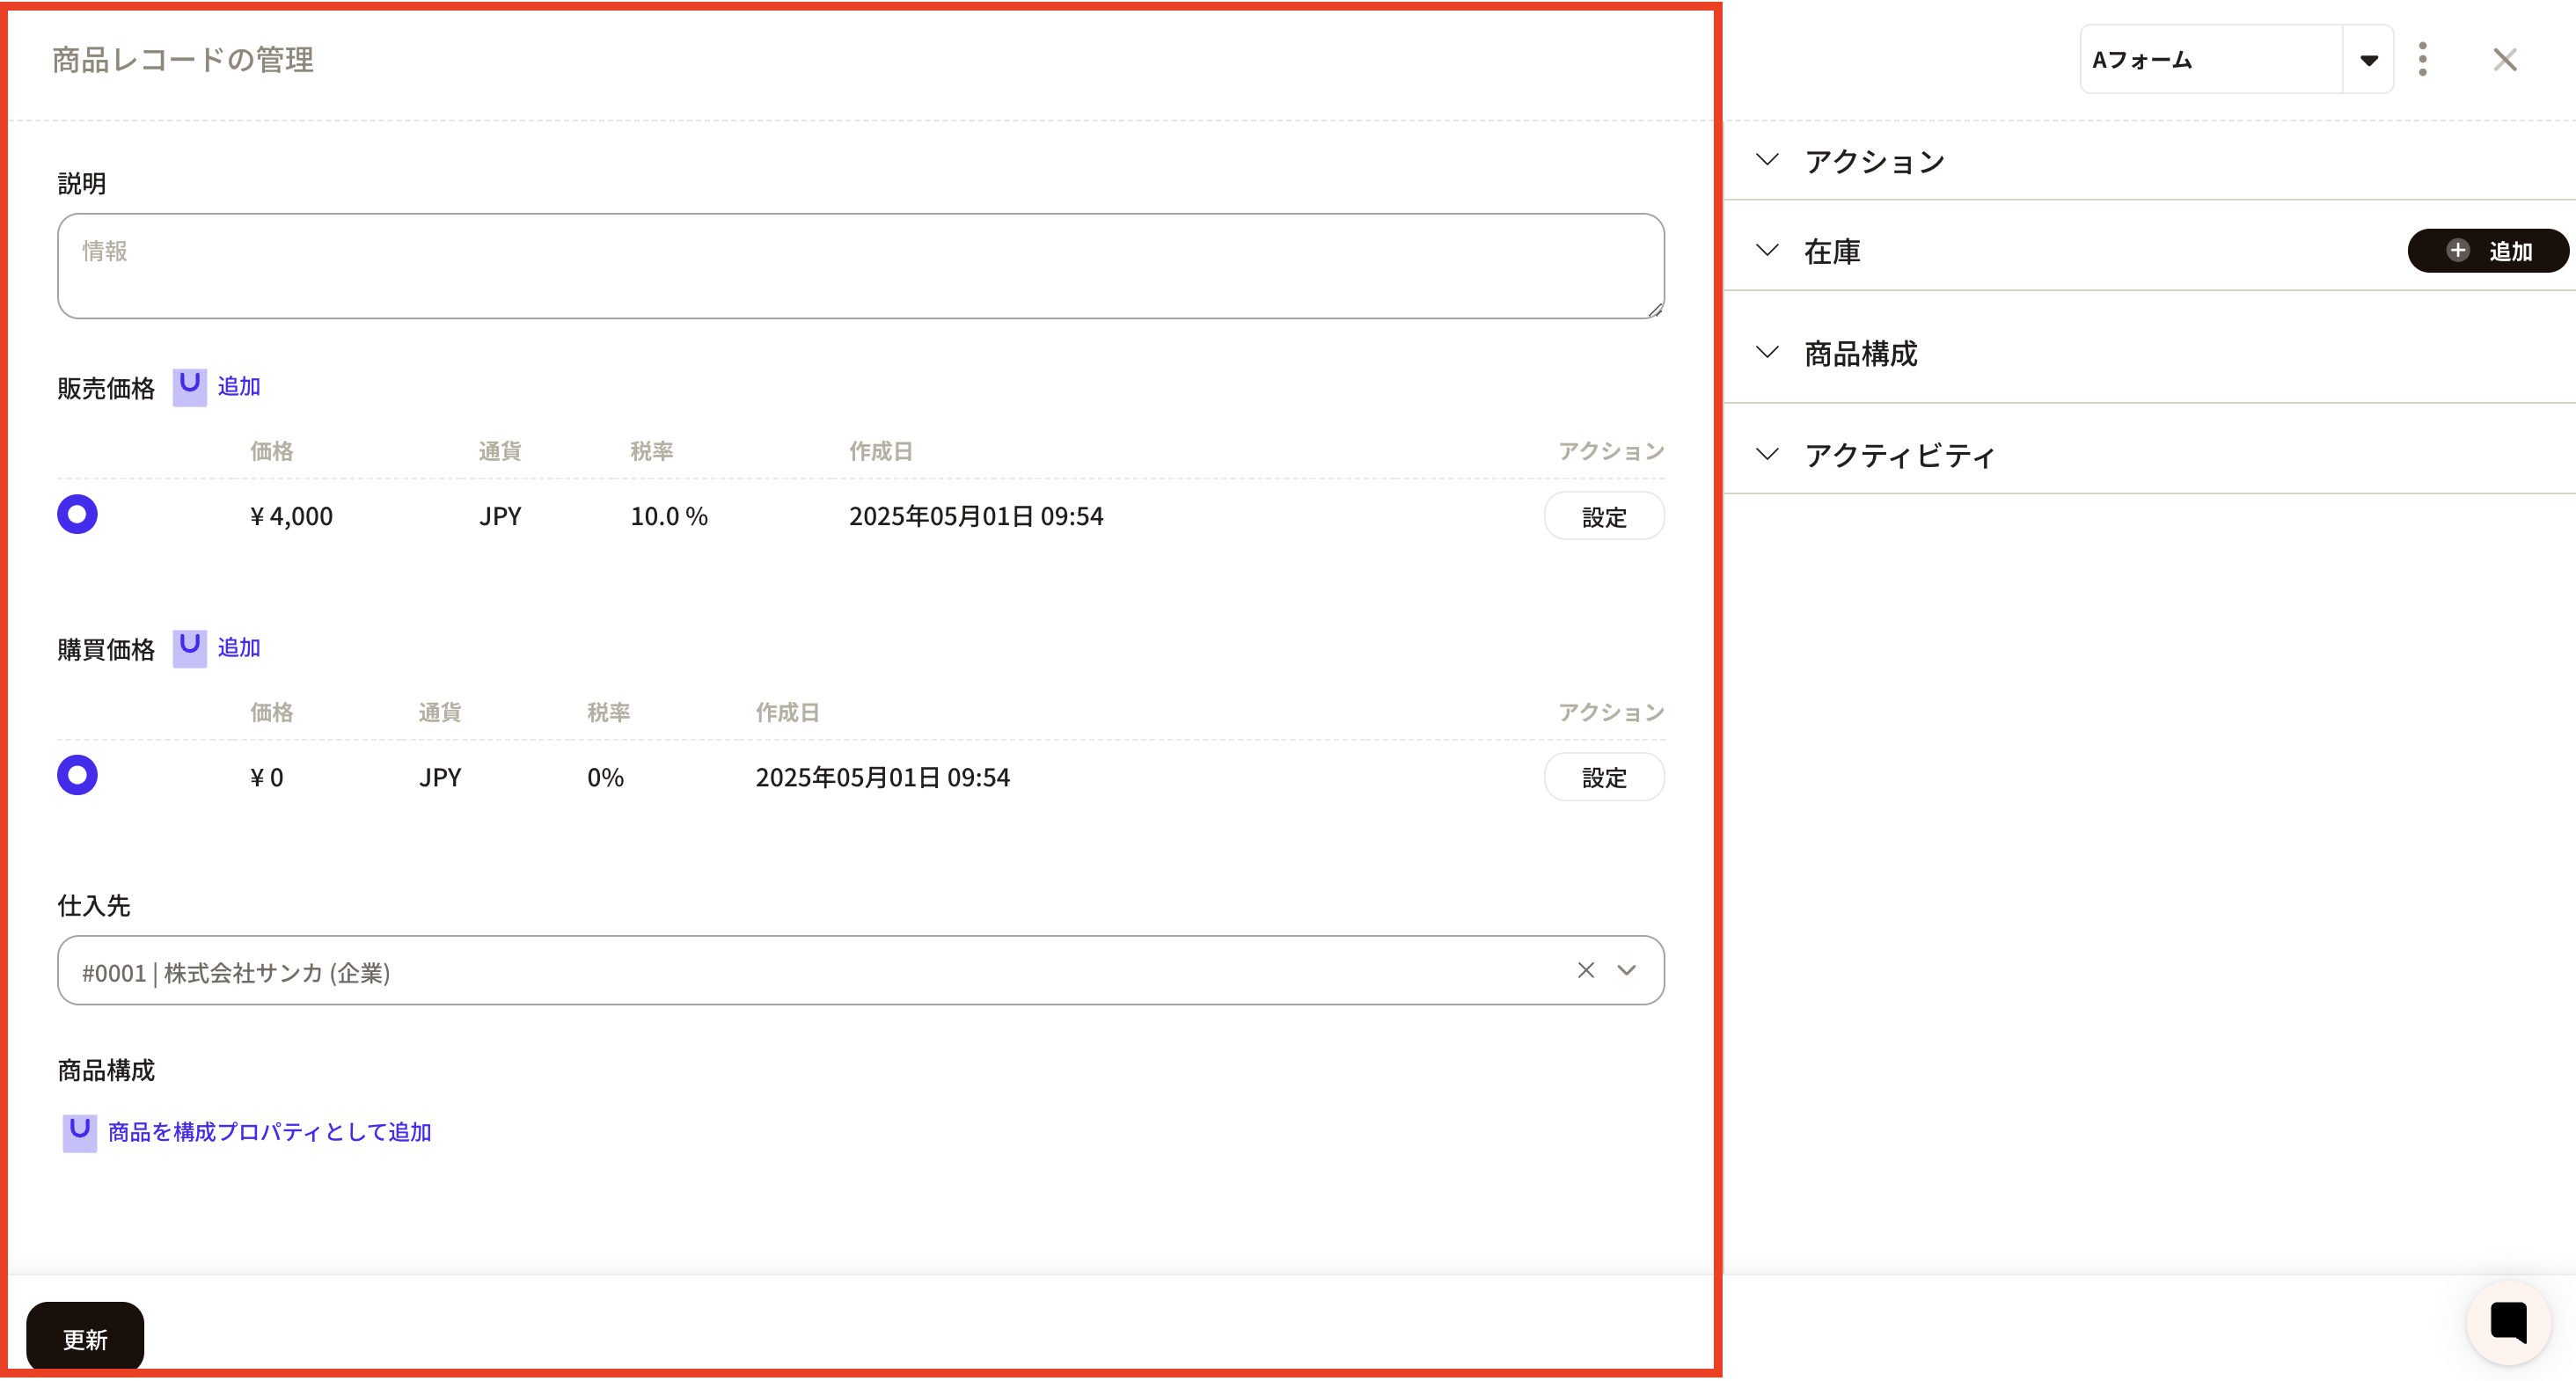 ③Click “Add product as configuration property”. ** **
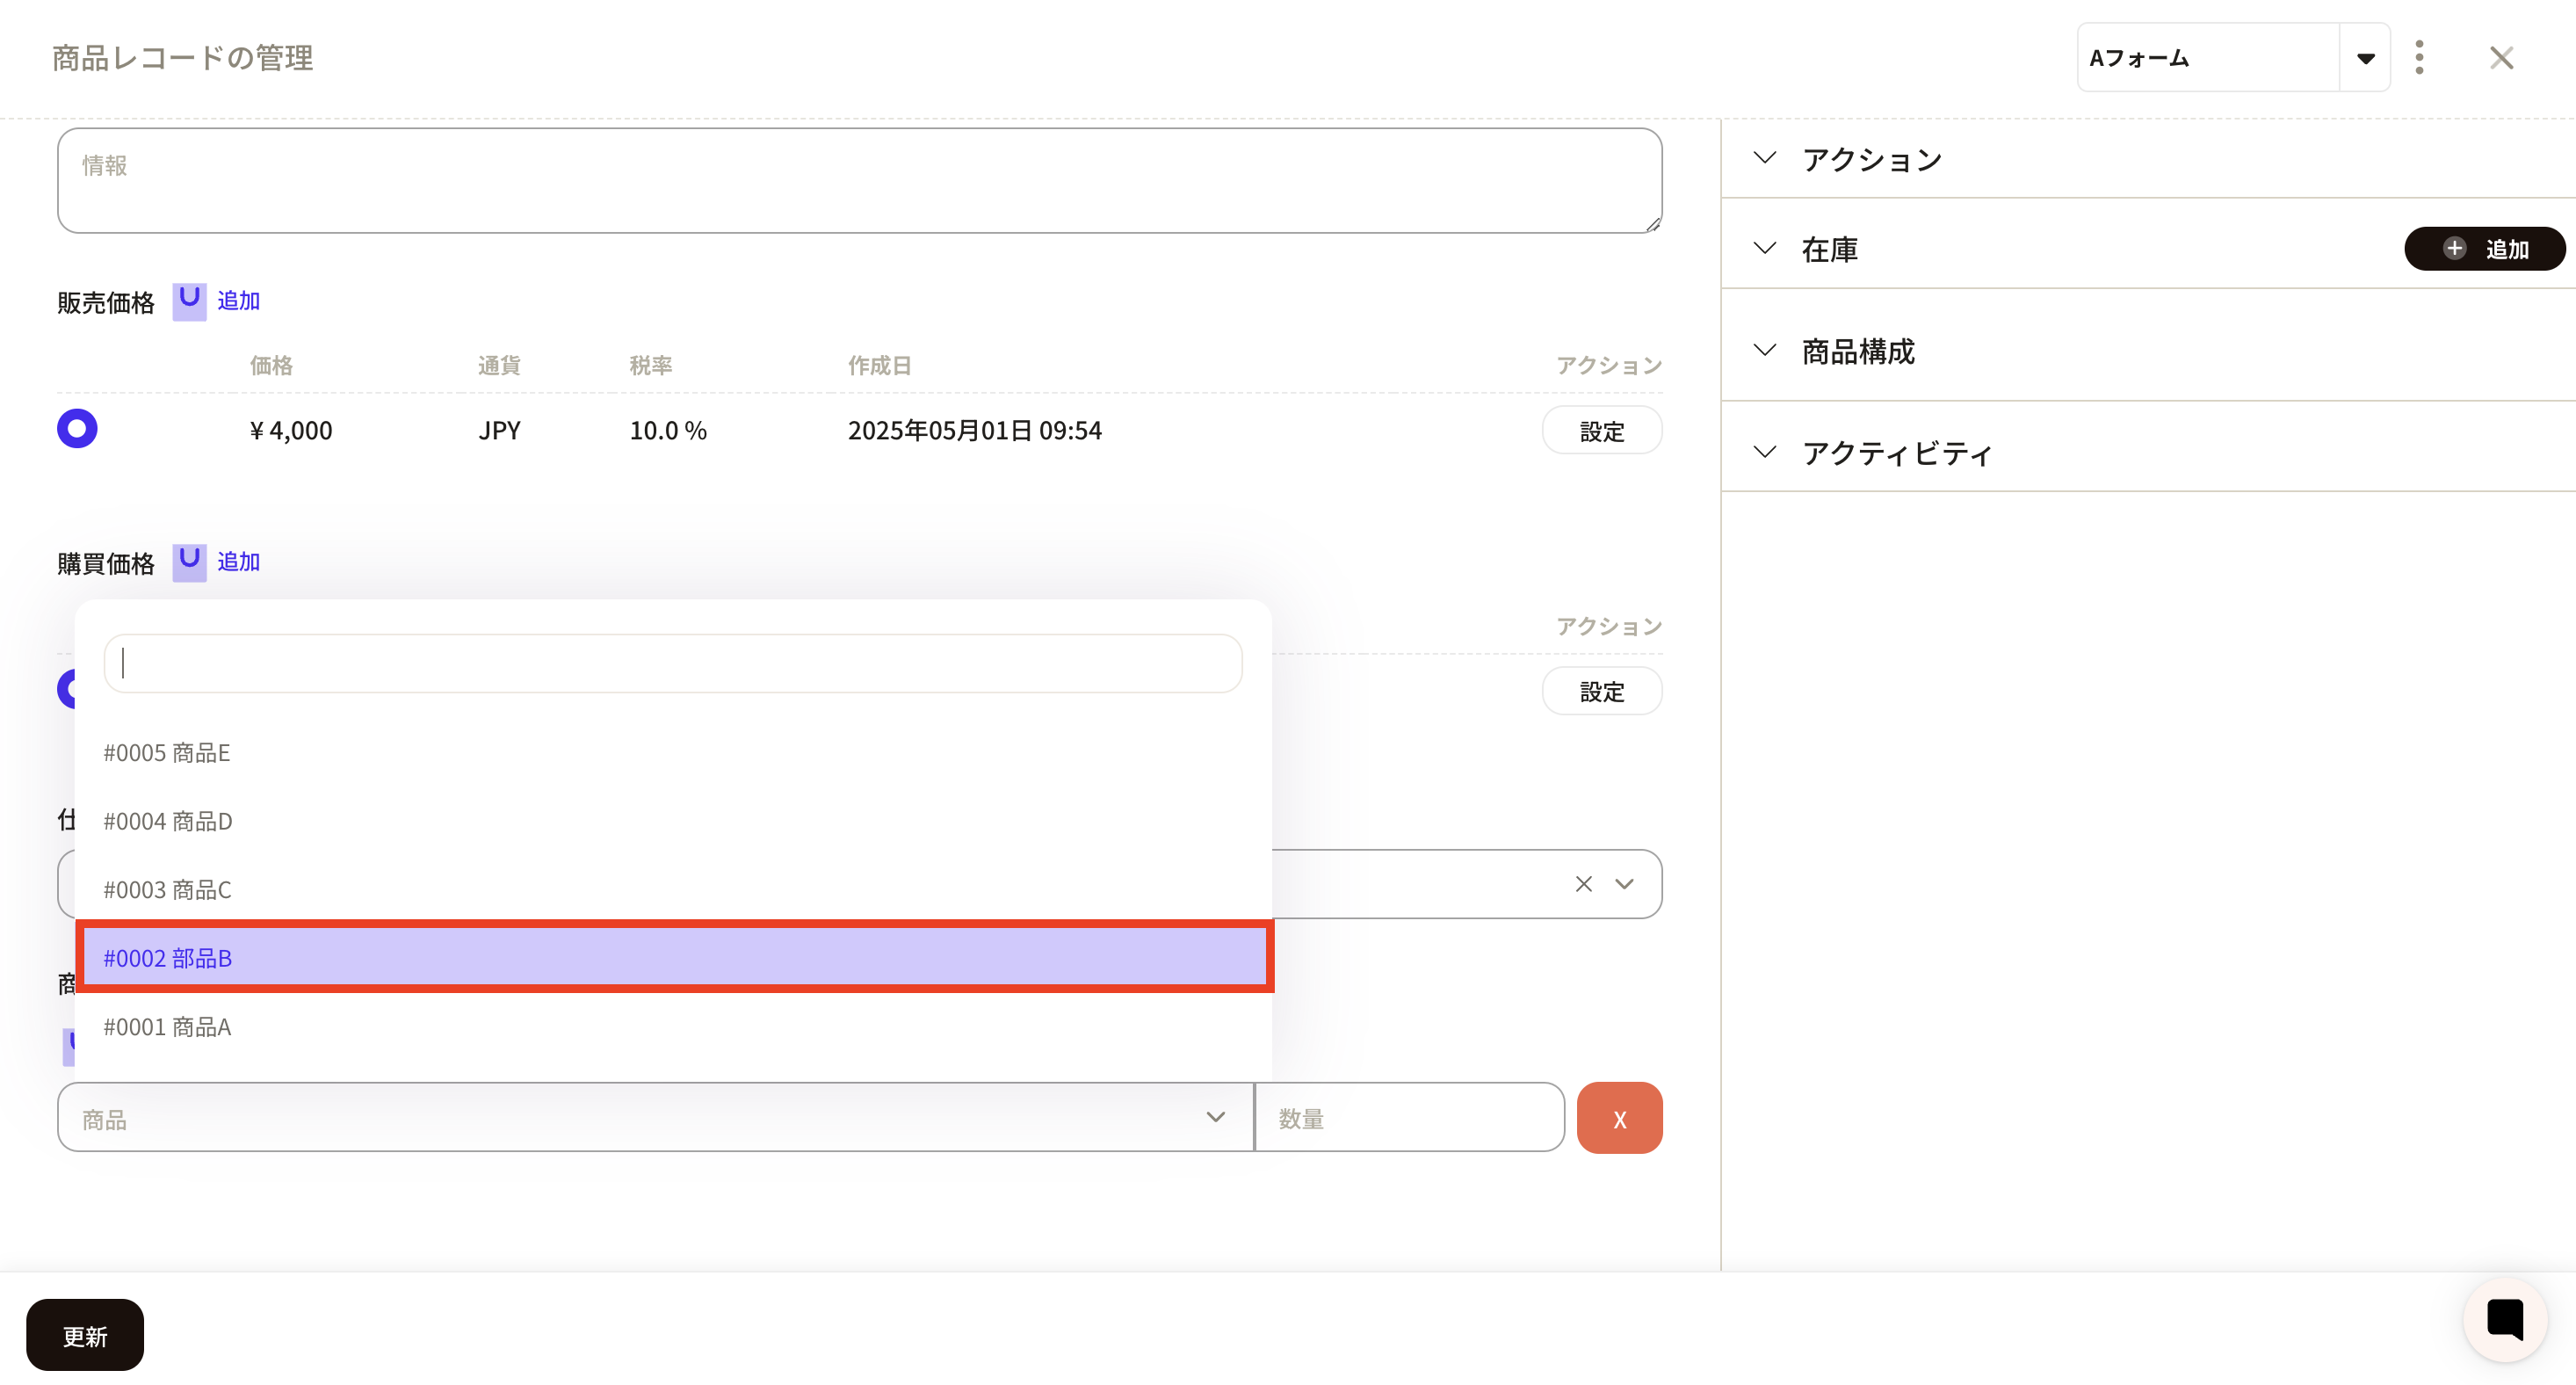
 ④ A frame for linking product configurations will appear, so enter the product and quantity to be linked. When you click on the product frame, already registered product records will be displayed and you can select the appropriate product. Here we selected part B.
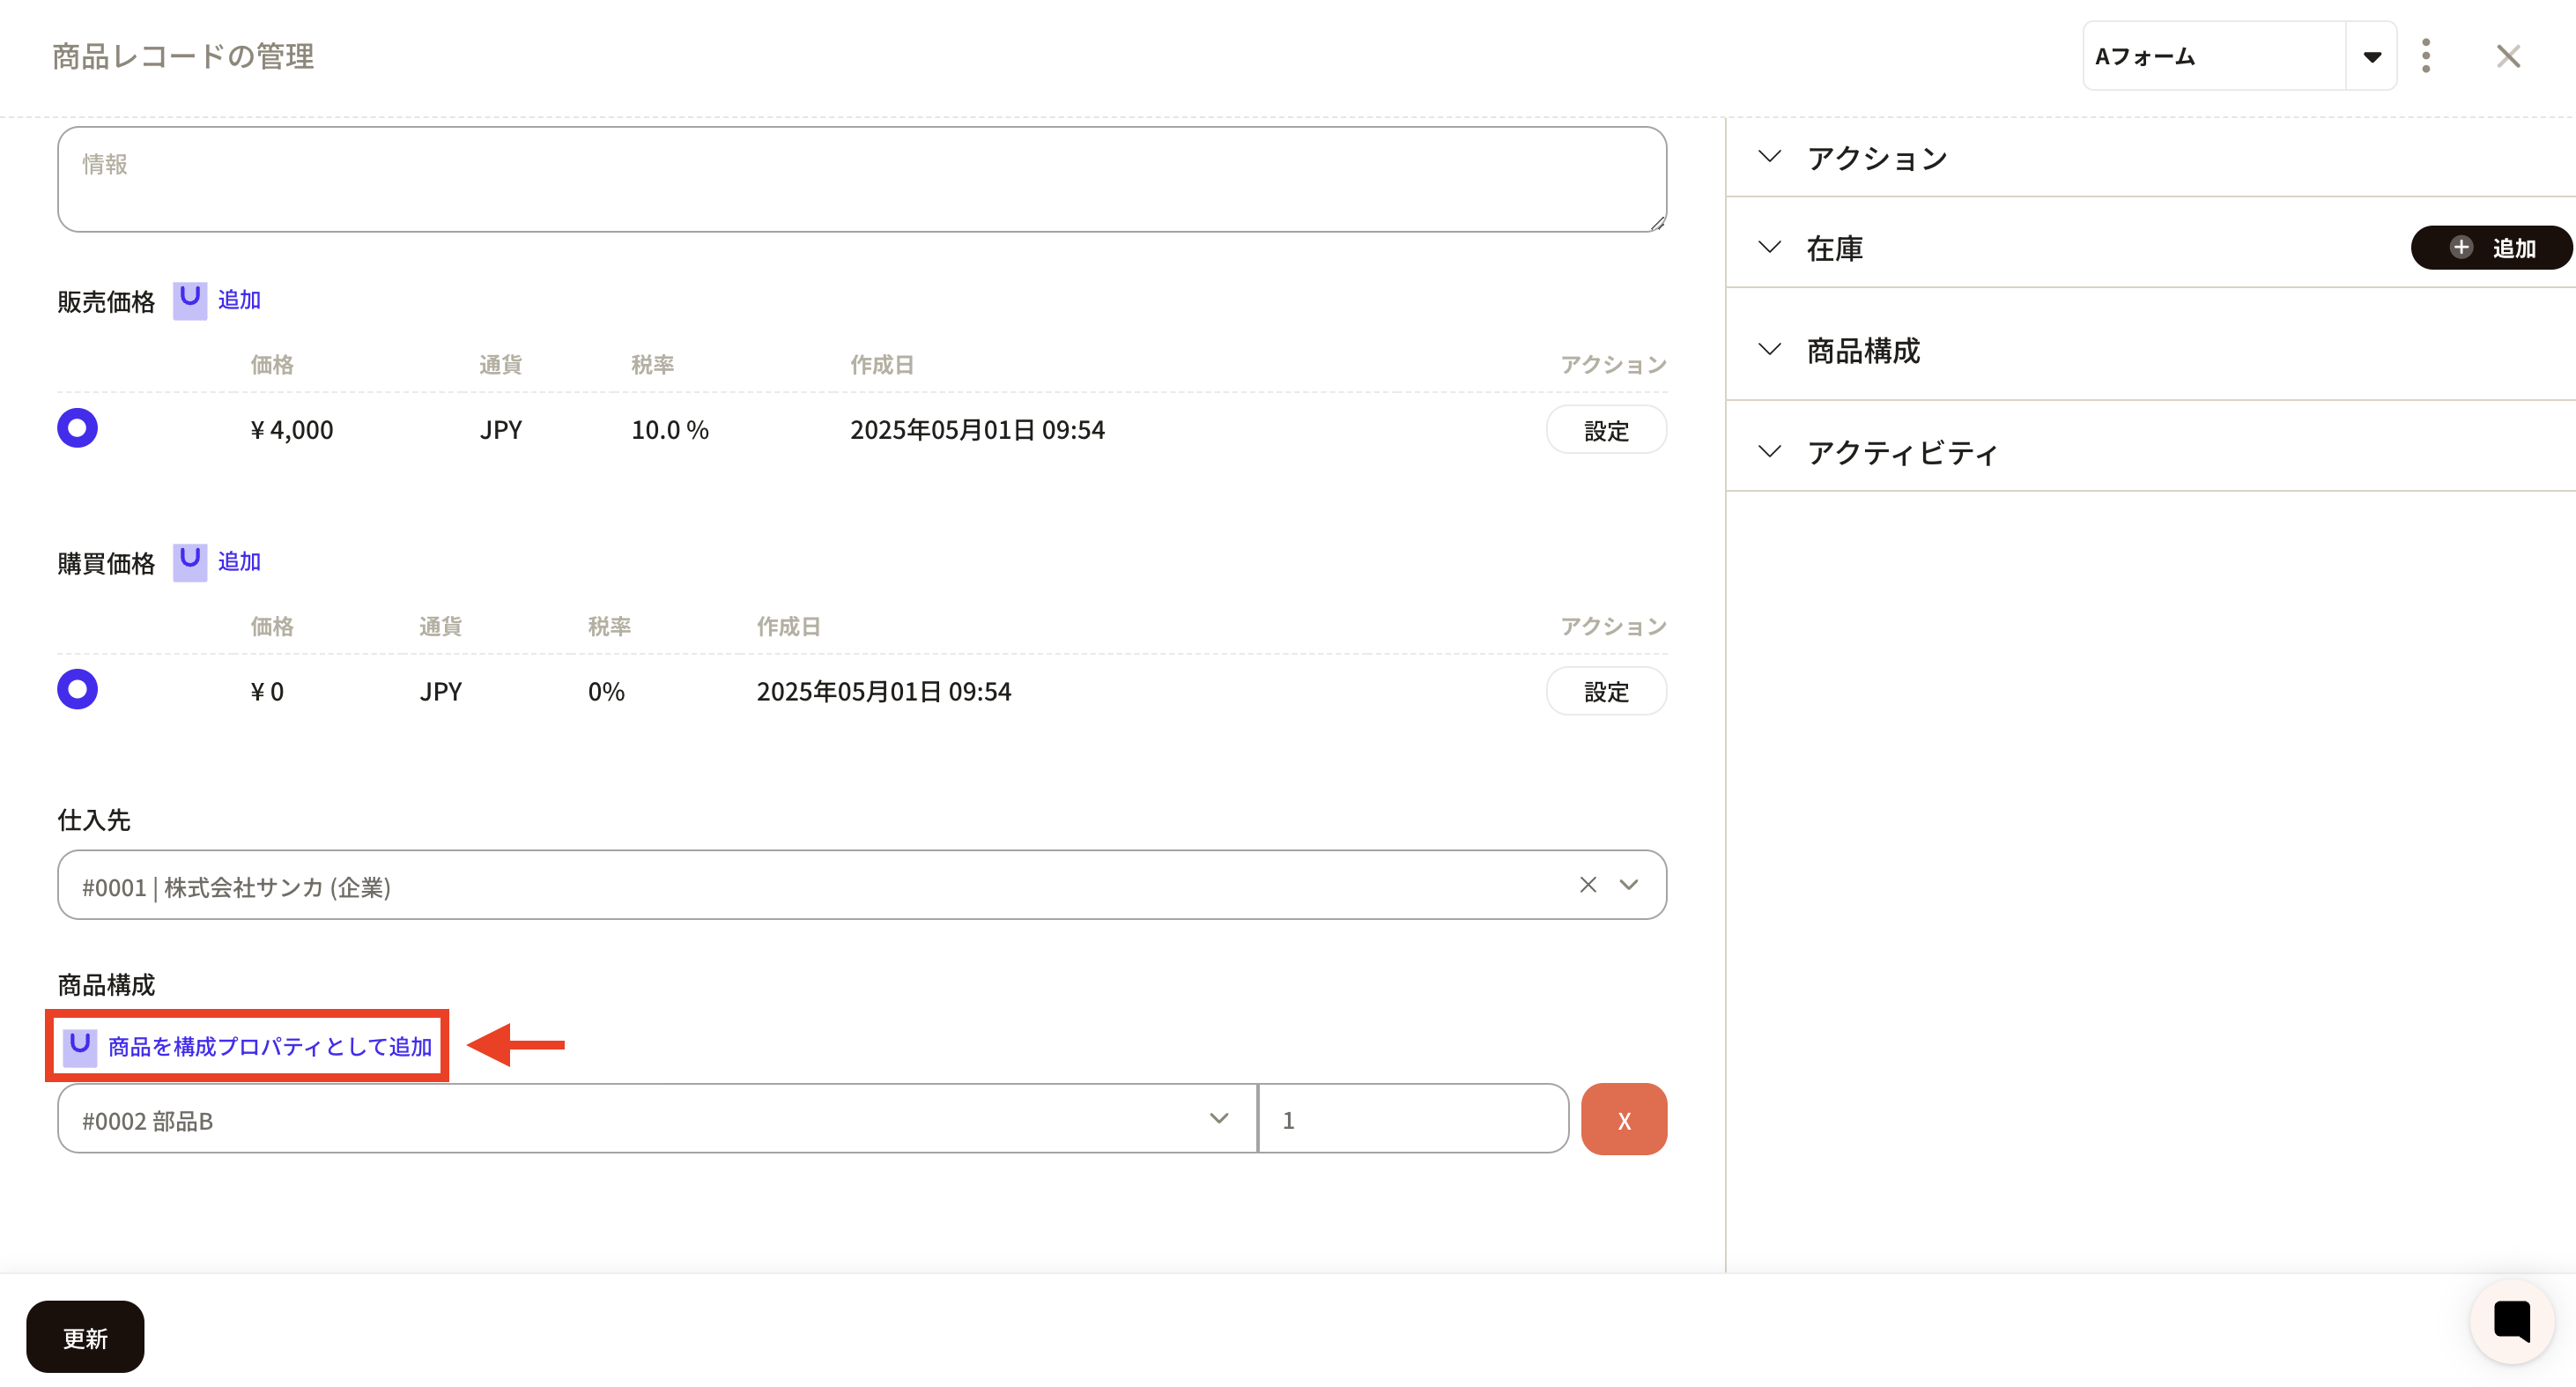
 ⑦ If you want to add a product to link, click "Add product as configuration property" again. A frame will be added, so add the appropriate items. Here we selected part C.
 ⑧ After registering all parts, click "Update".
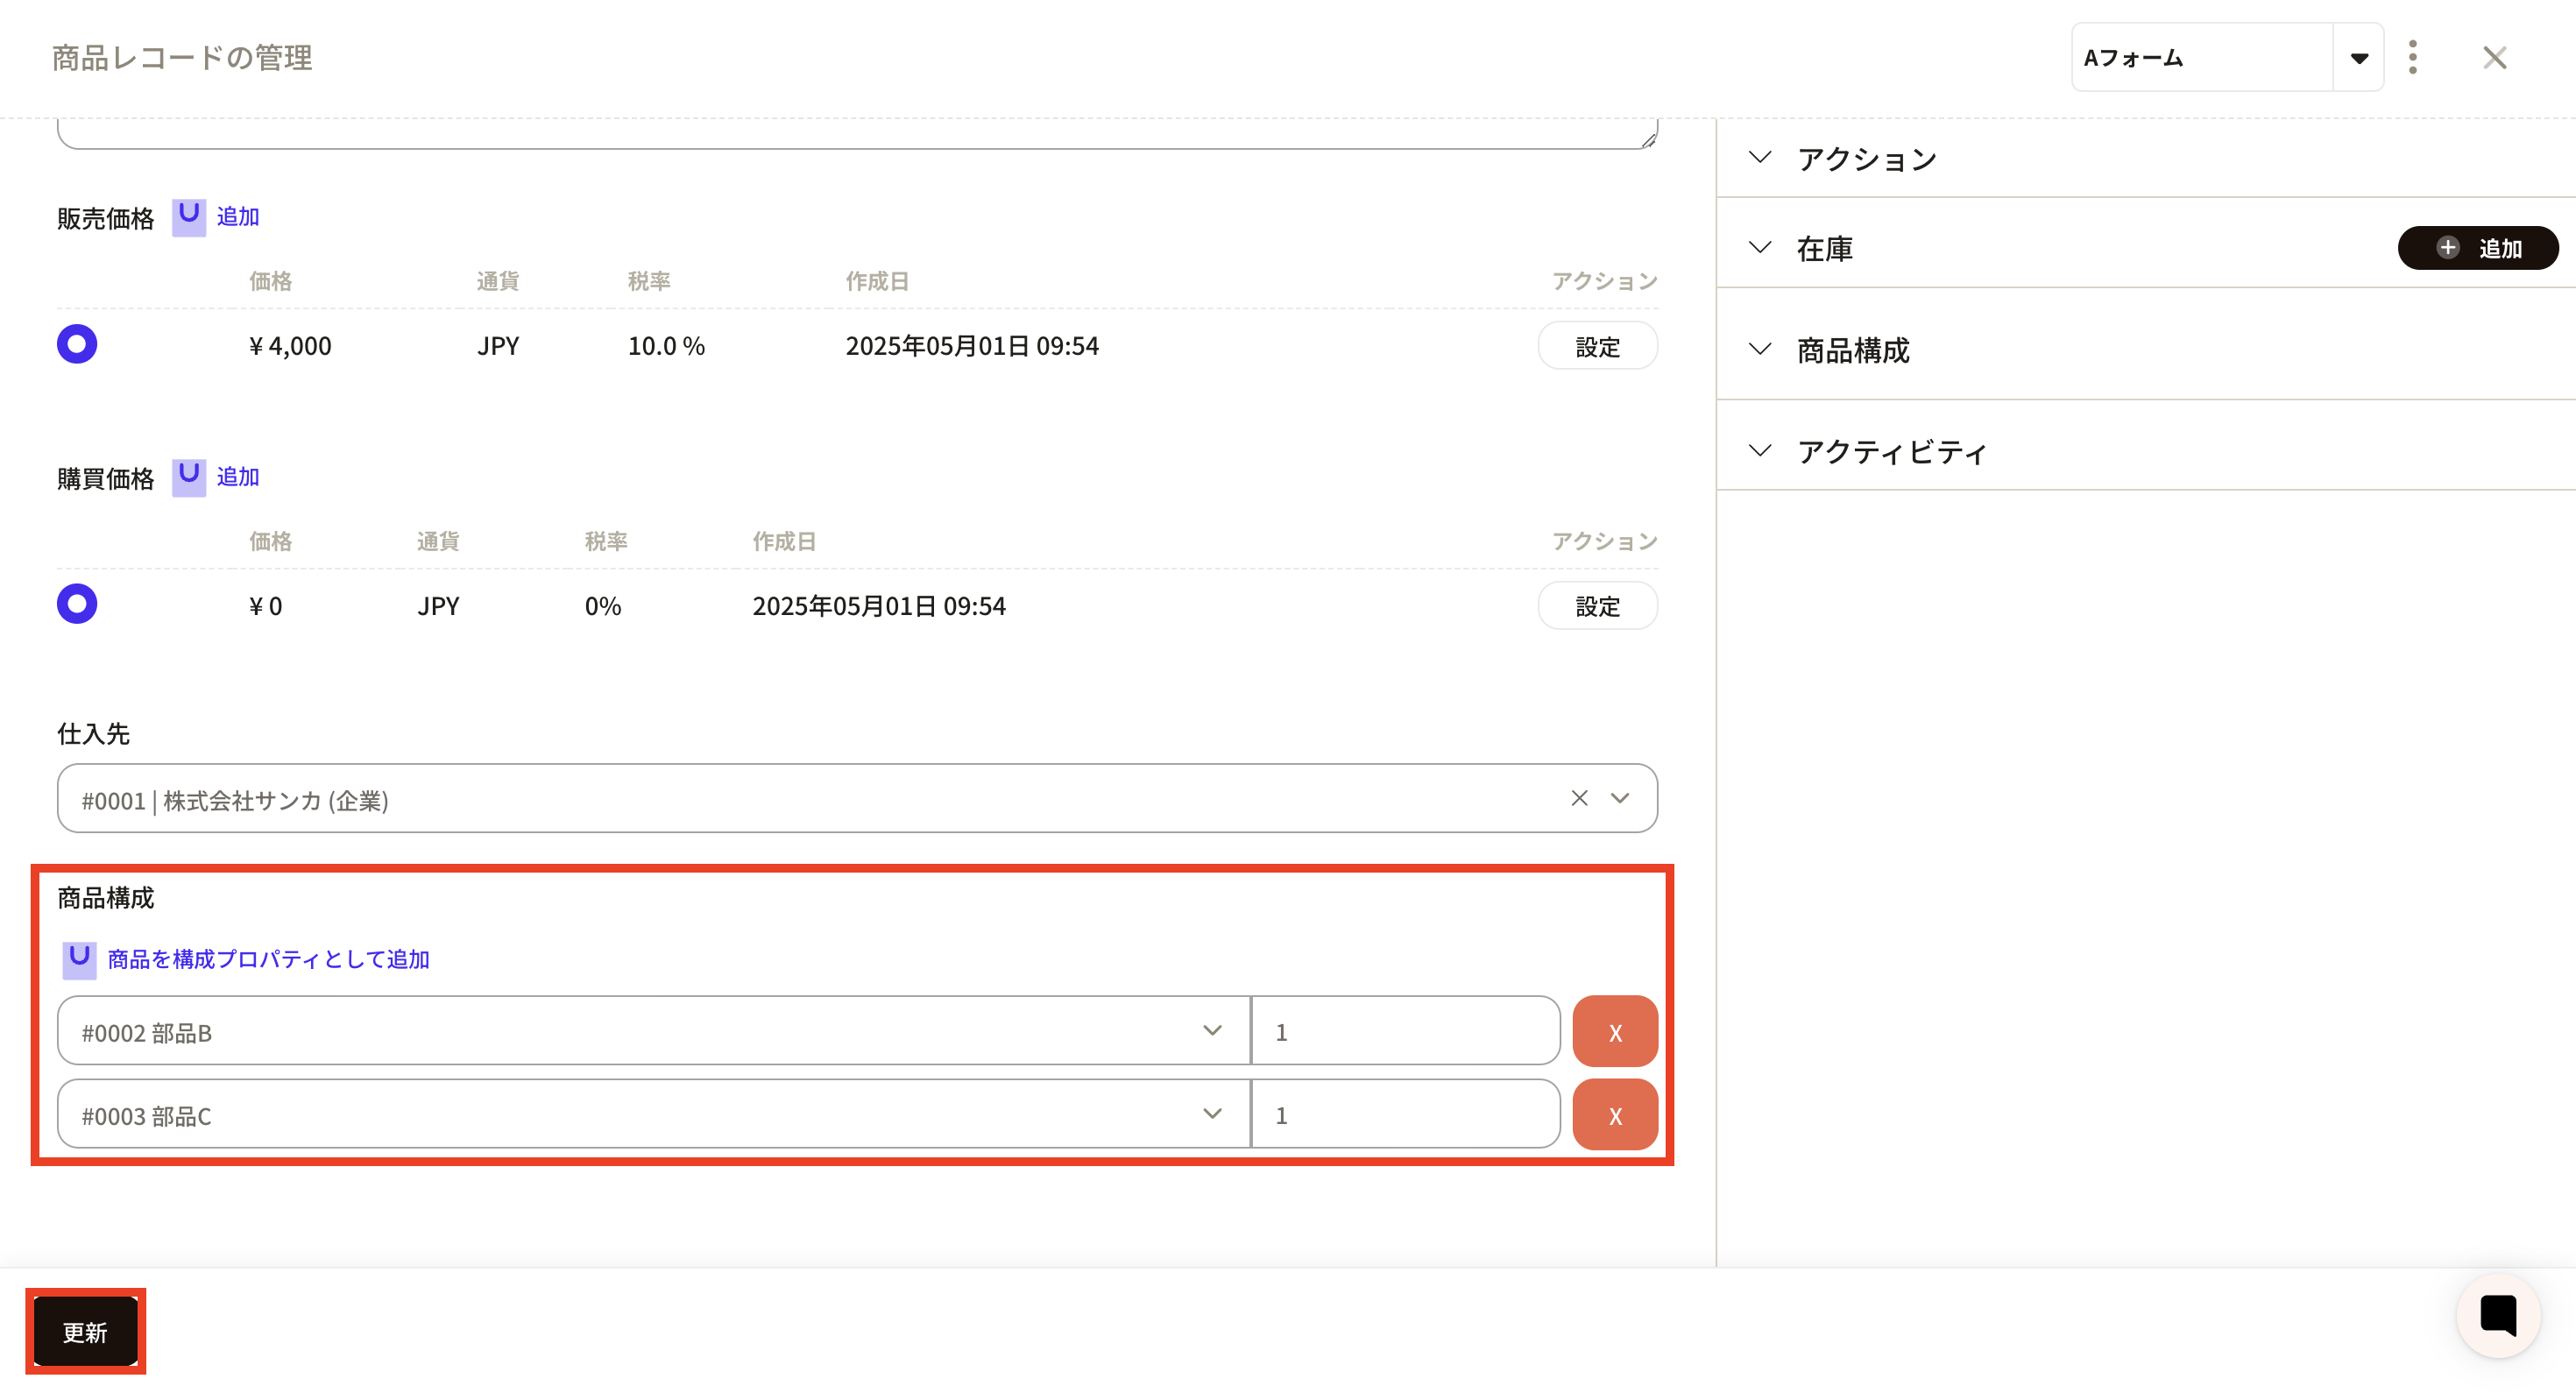 ⑨ Parts B and C are linked to product A as a product configuration.
How to register product configurations in bulk using a CSV file
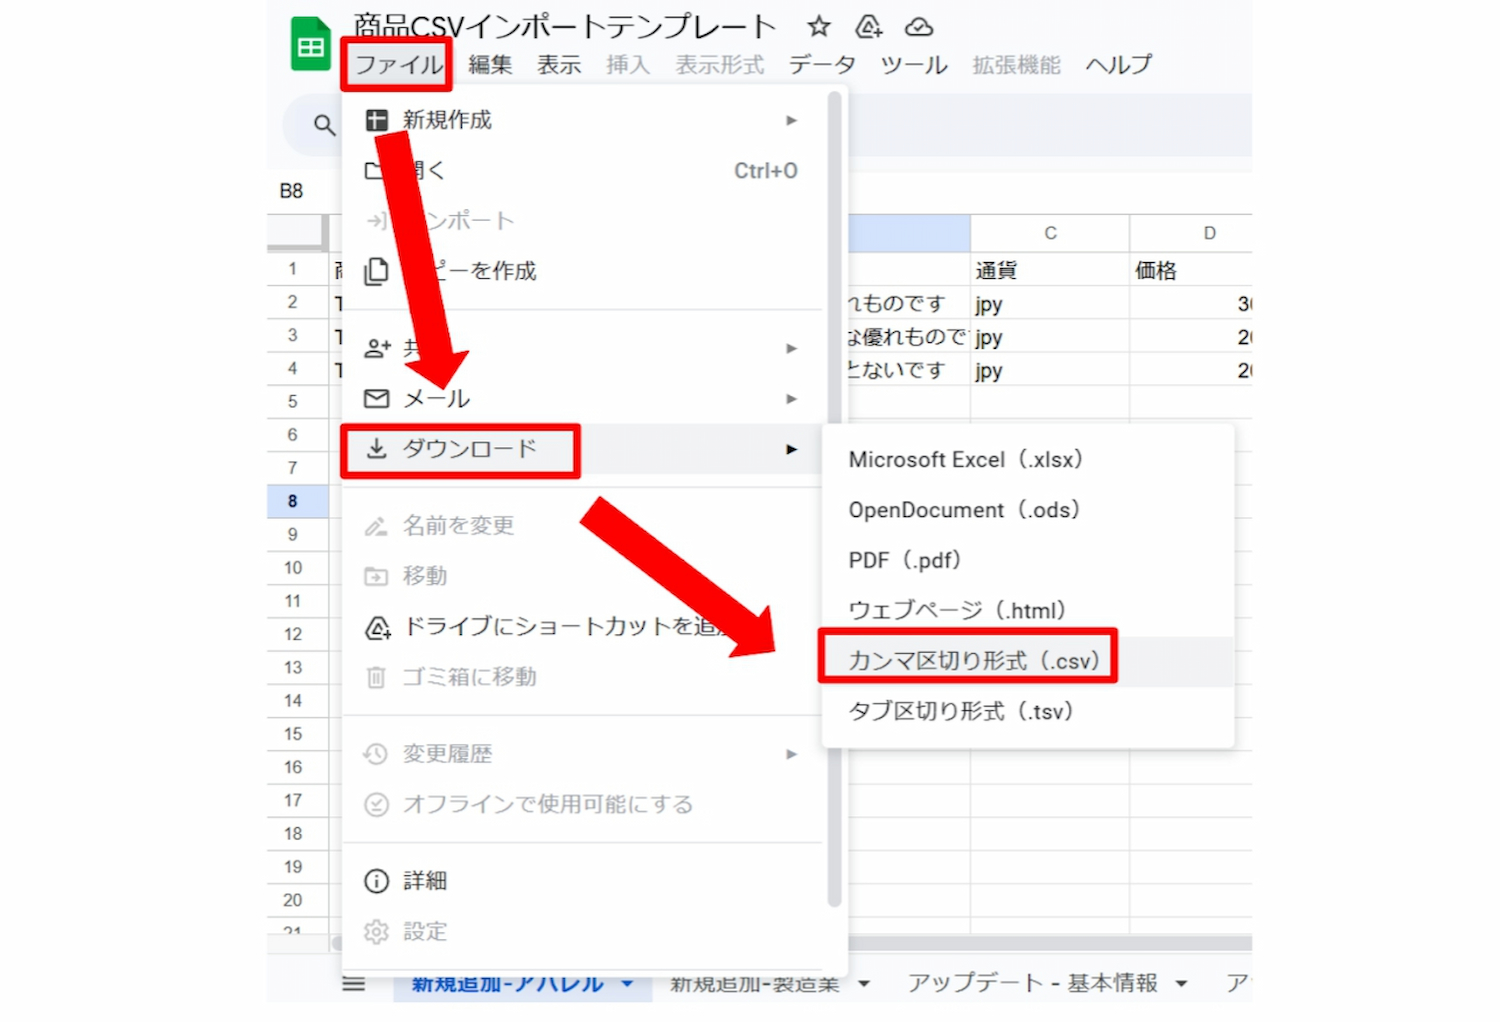
By using a CSV file, you can register product linking information all at once. Here we will introduce how to create a CSV file when registering product configurations in bulk in a CSV file. Click here for information on how to register CSV. ① Open the "Product CSV import template" prepared by Sanka.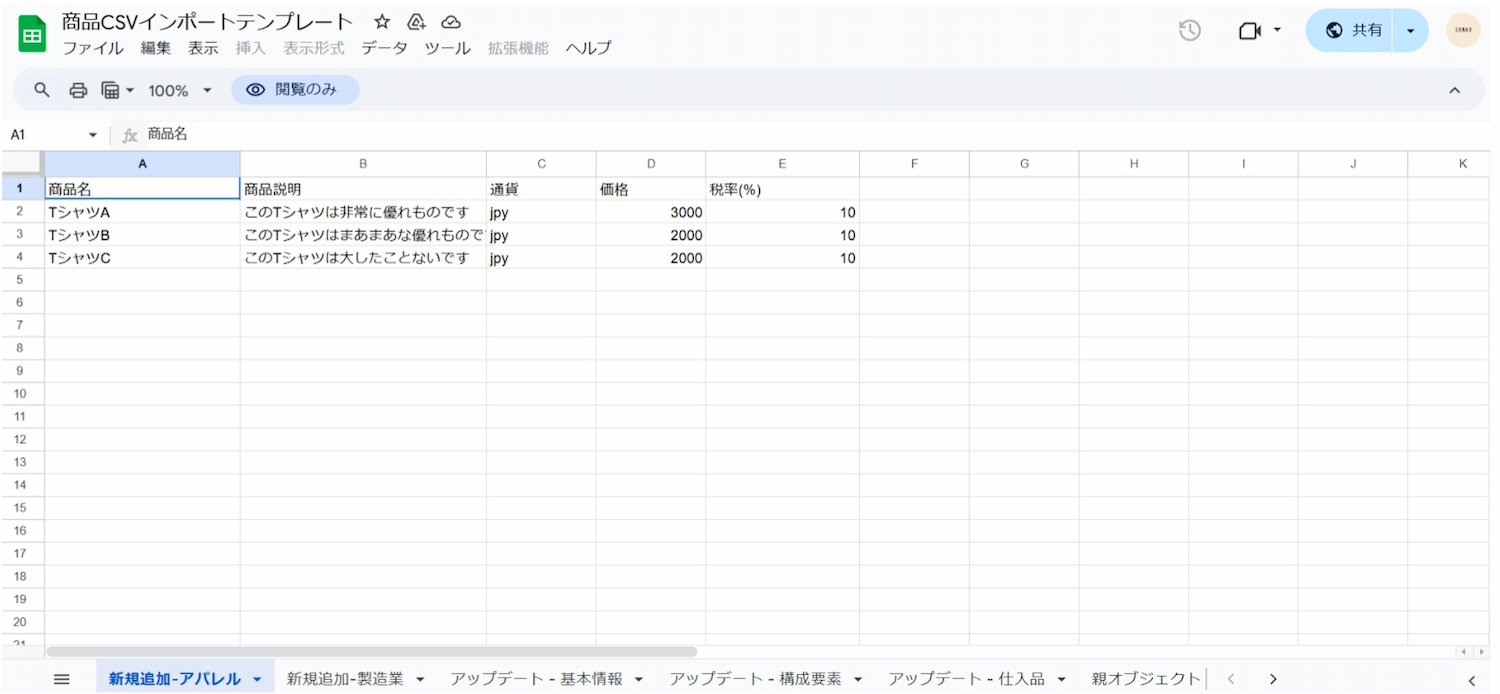 **② Download “Product CSV import template”. **
**Select "File" → select "Download" → select "Comma delimited format (.csv)" and download to your desired location. **
**② Download “Product CSV import template”. **
**Select "File" → select "Download" → select "Comma delimited format (.csv)" and download to your desired location. **
 ③Enter the necessary information in the downloaded template.
- Column A: Enter the ID of product A as the parent information.
- Column B: Enter the IDs of parts A, B, and C that you want to link to product A.
- Column C: Enter the quantity of parts A, B, and C.
How to display linked products together (View settings: How to create a group table)
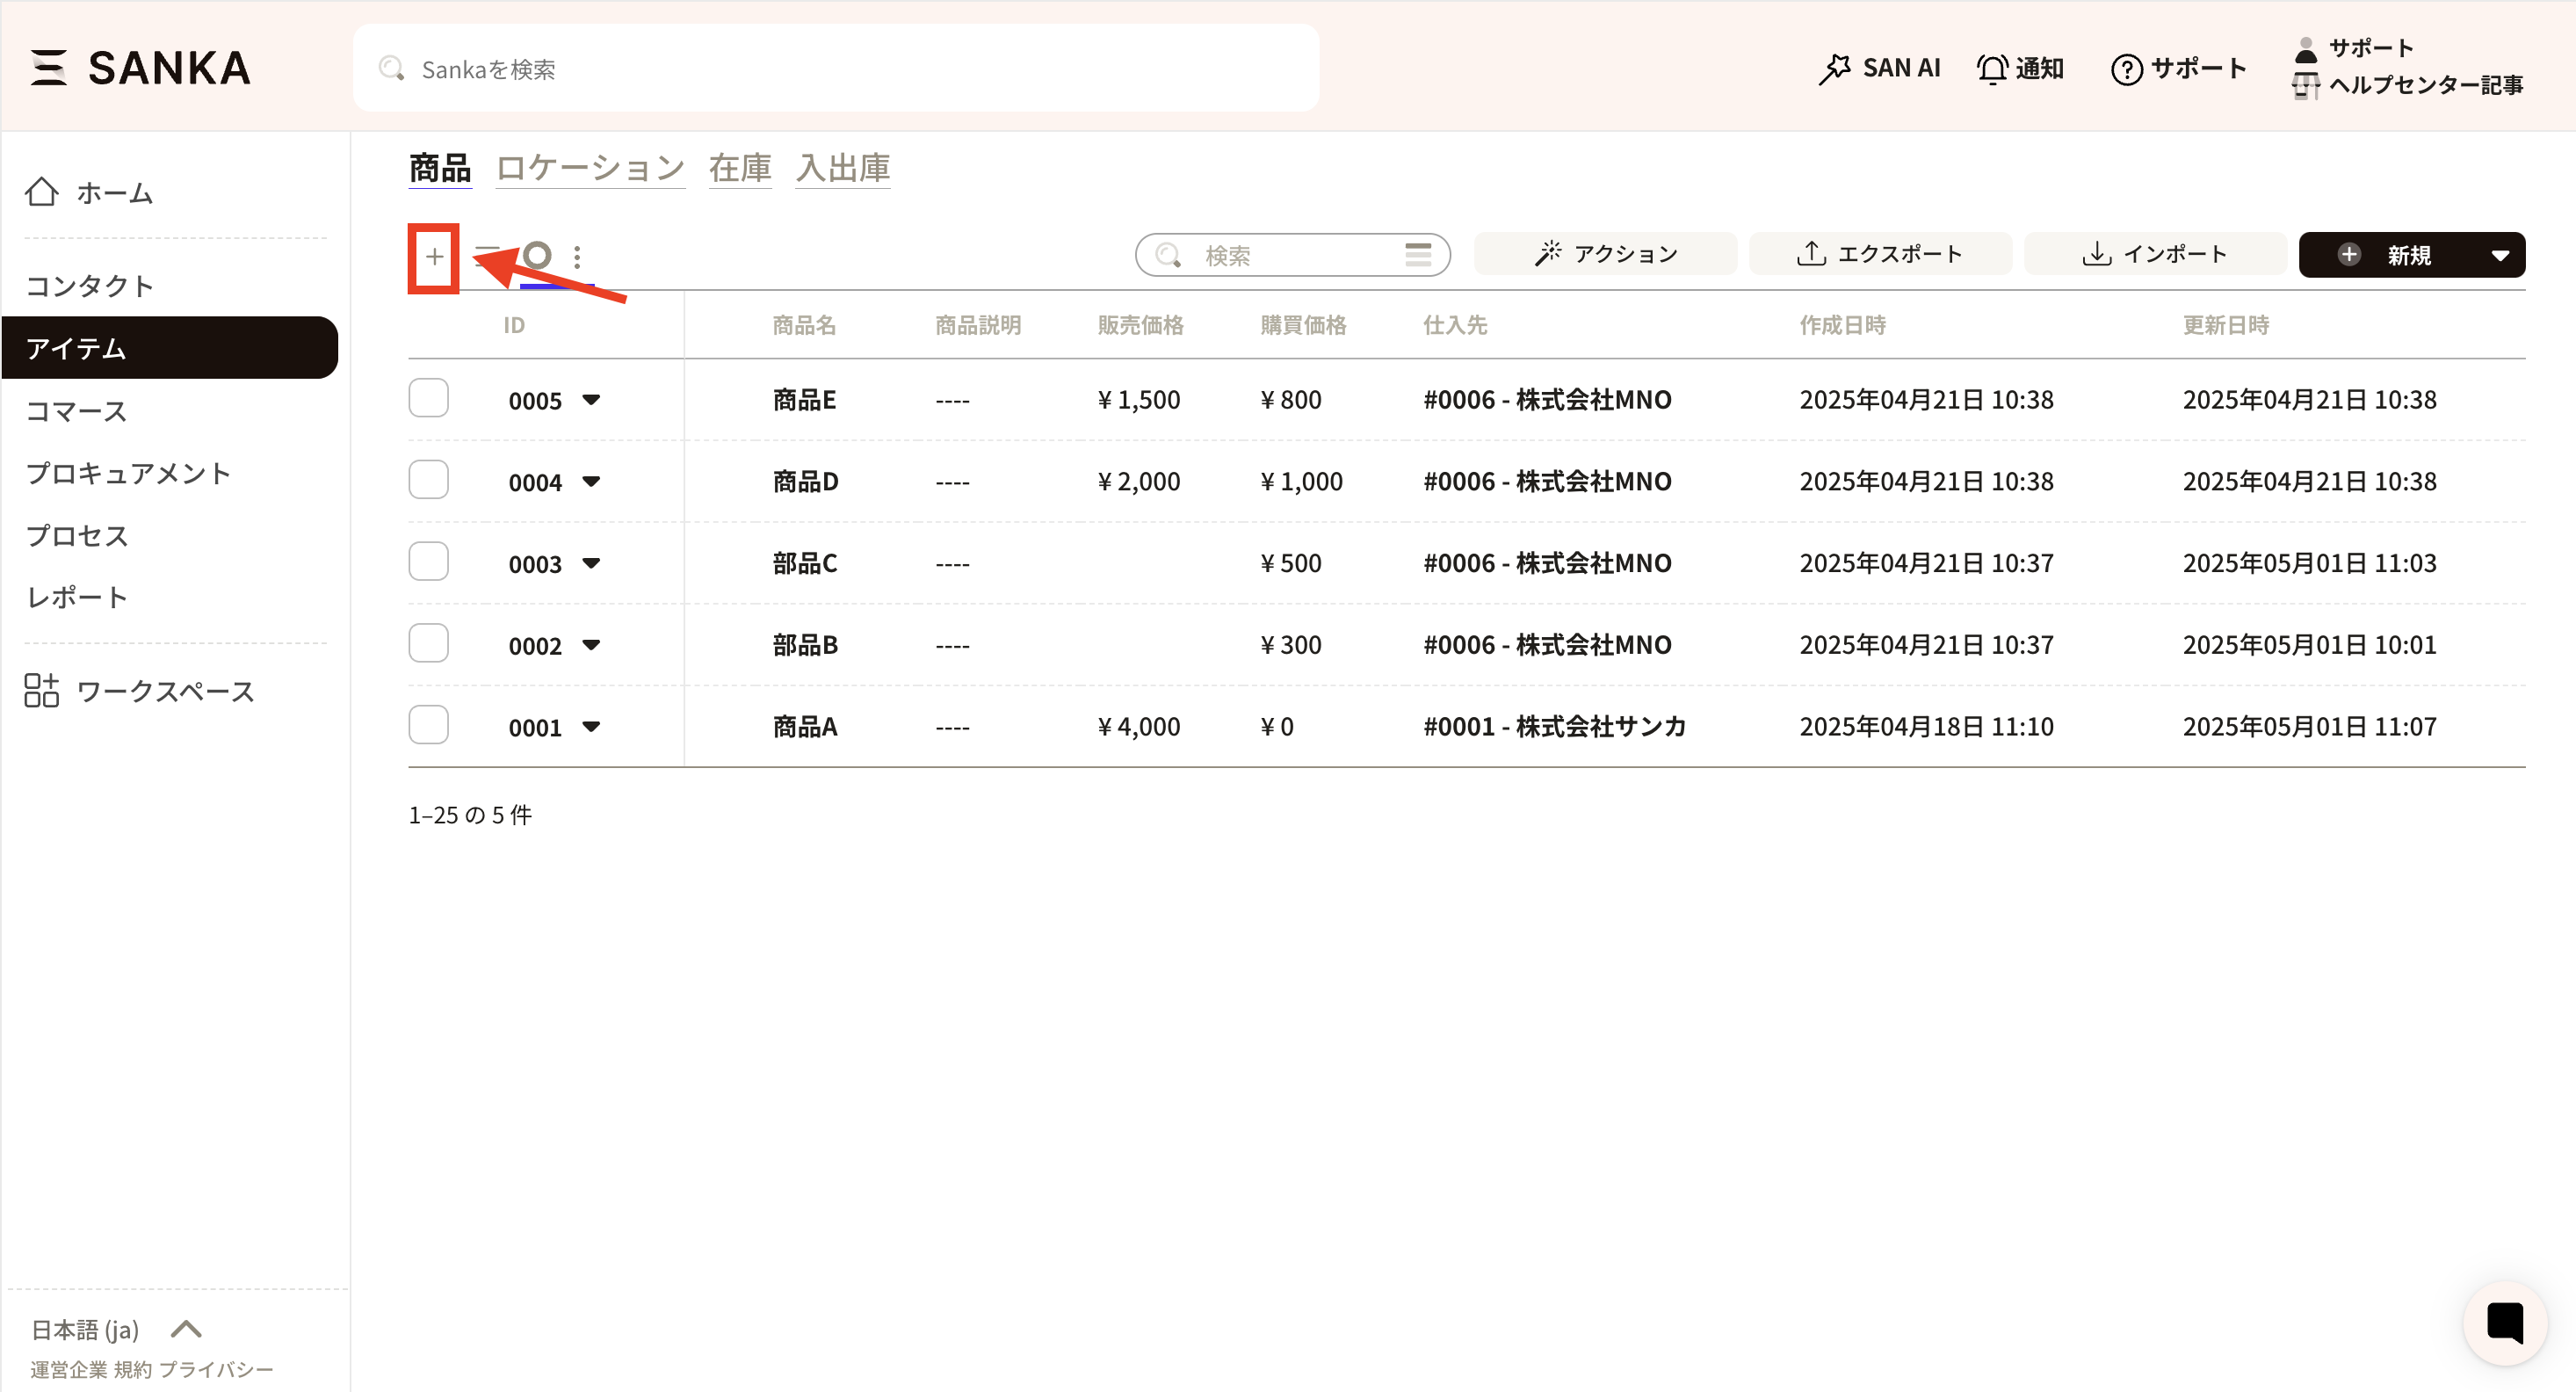
On the "Product" object screen, you can create a group table and display linked products together. This is done in the view settings that manage how the screen looks.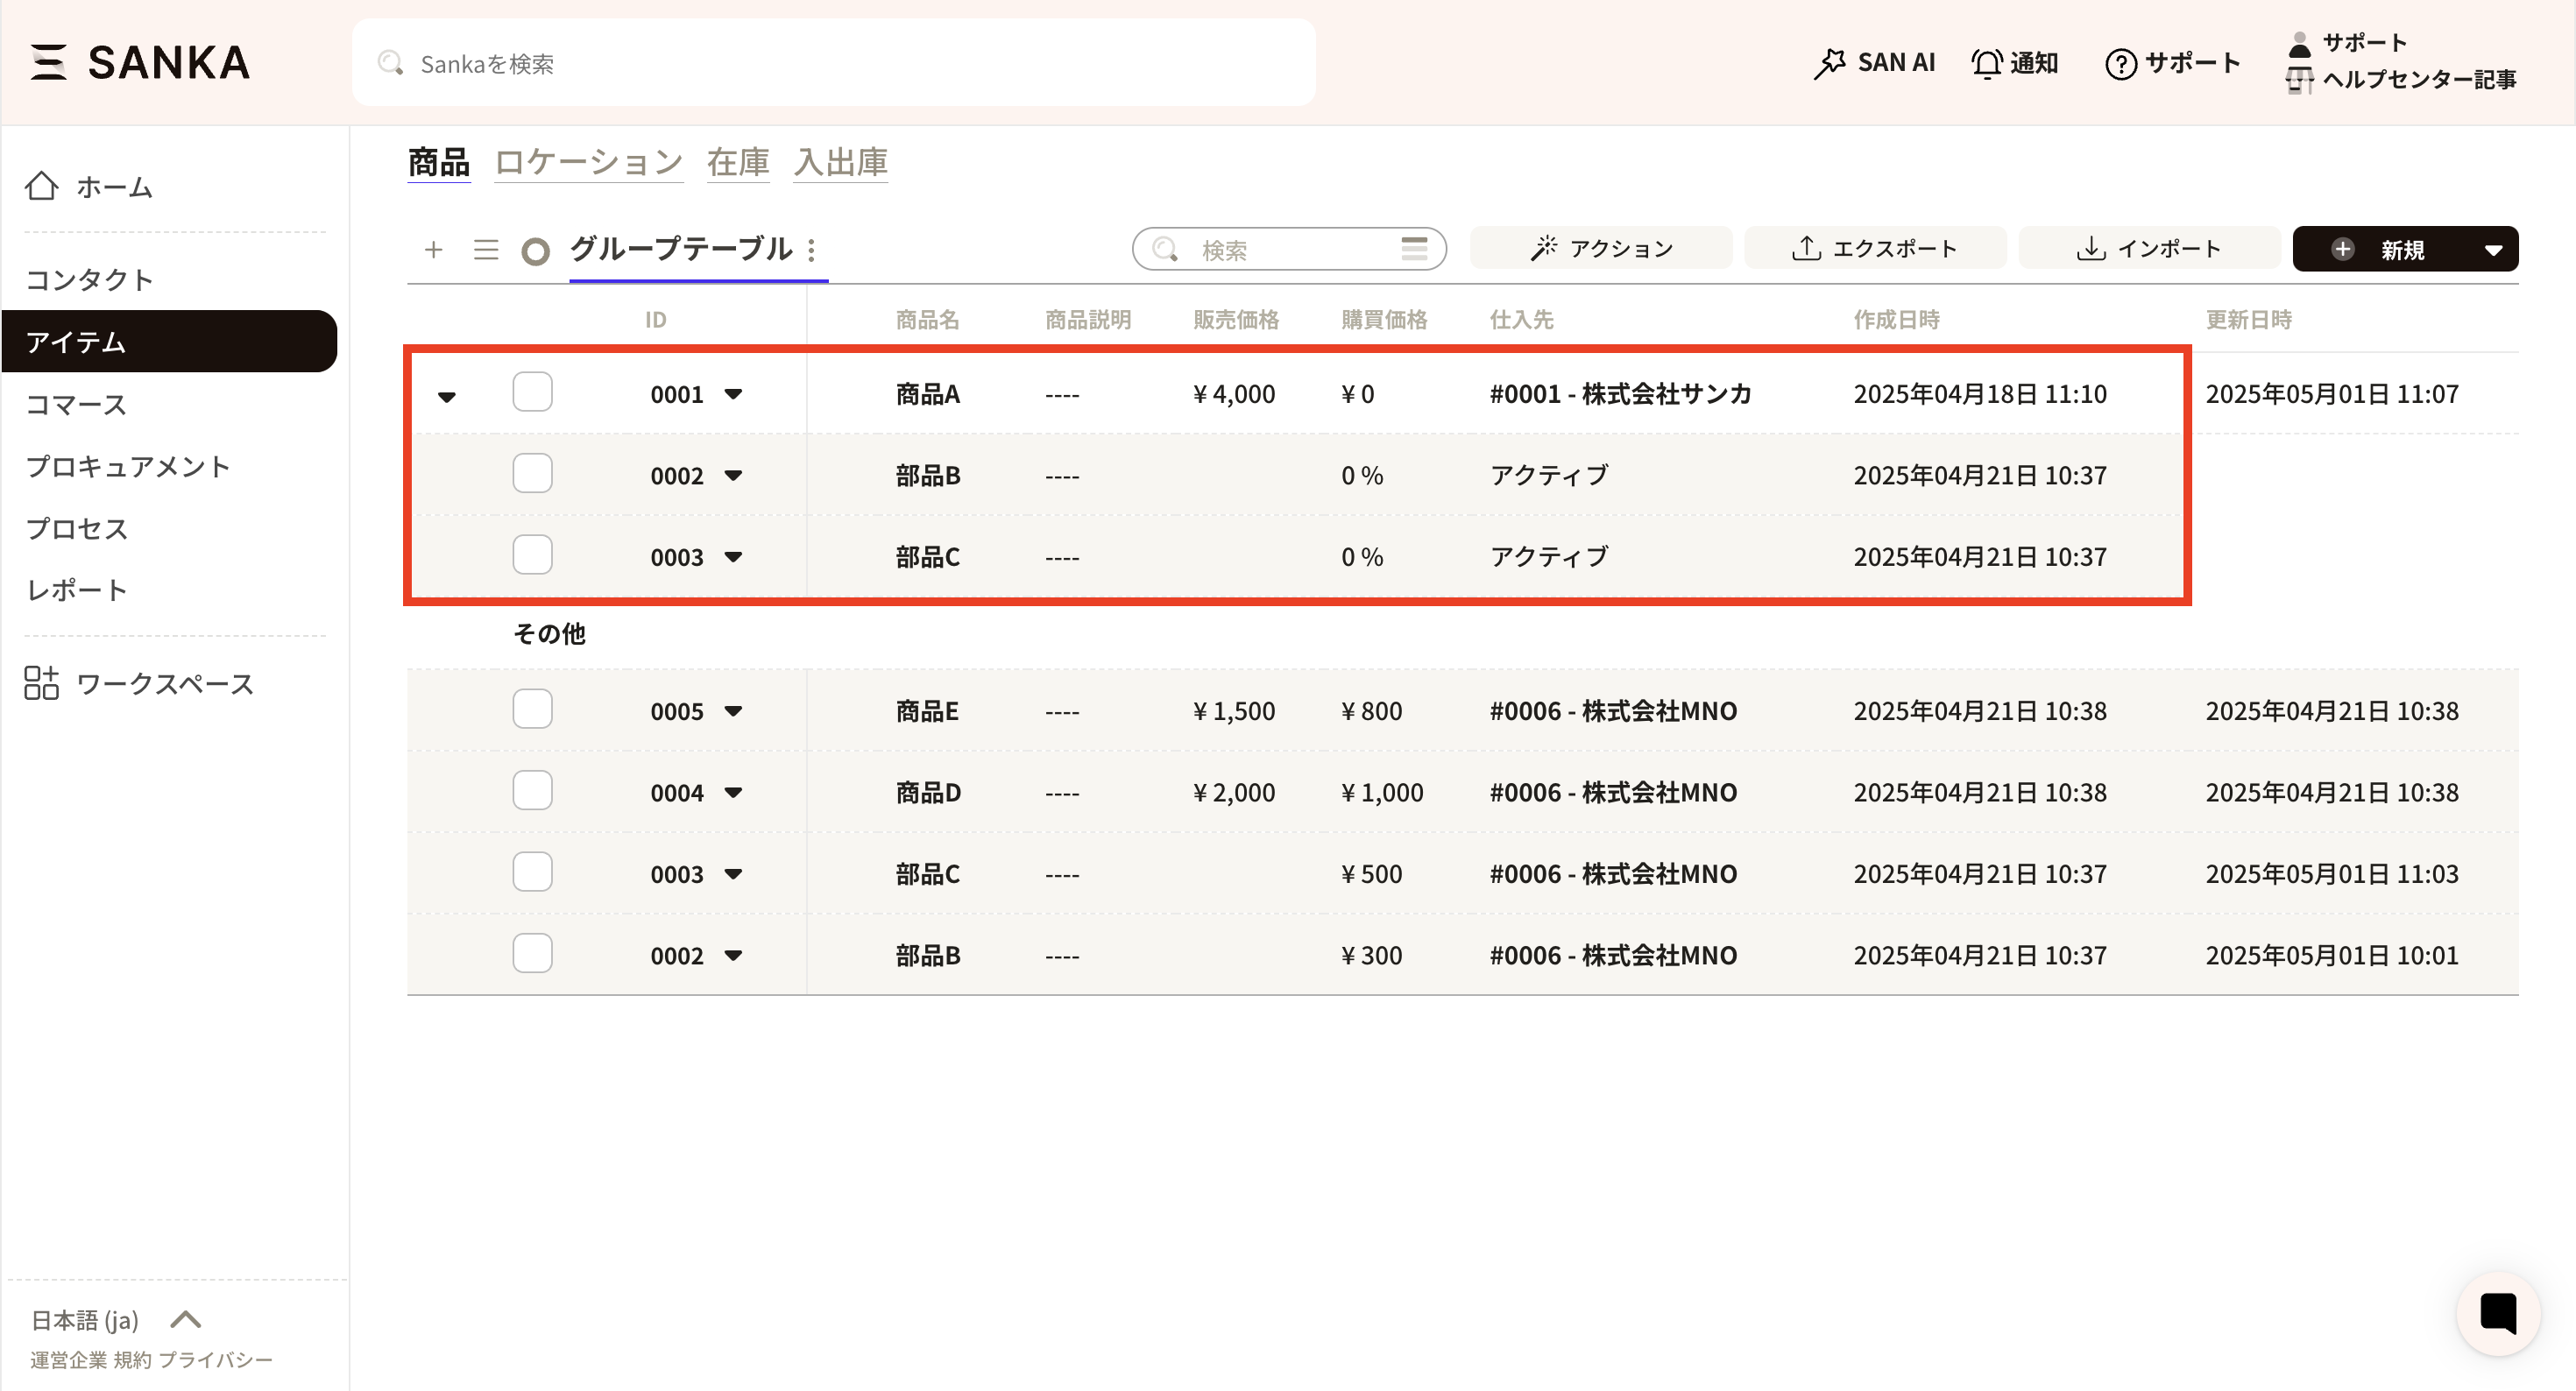 ① Select the "Product" object. Click "+" on the top left of the table list to display the "Create View" menu.
 ②The “Create View” screen will be displayed, so make the necessary settings.
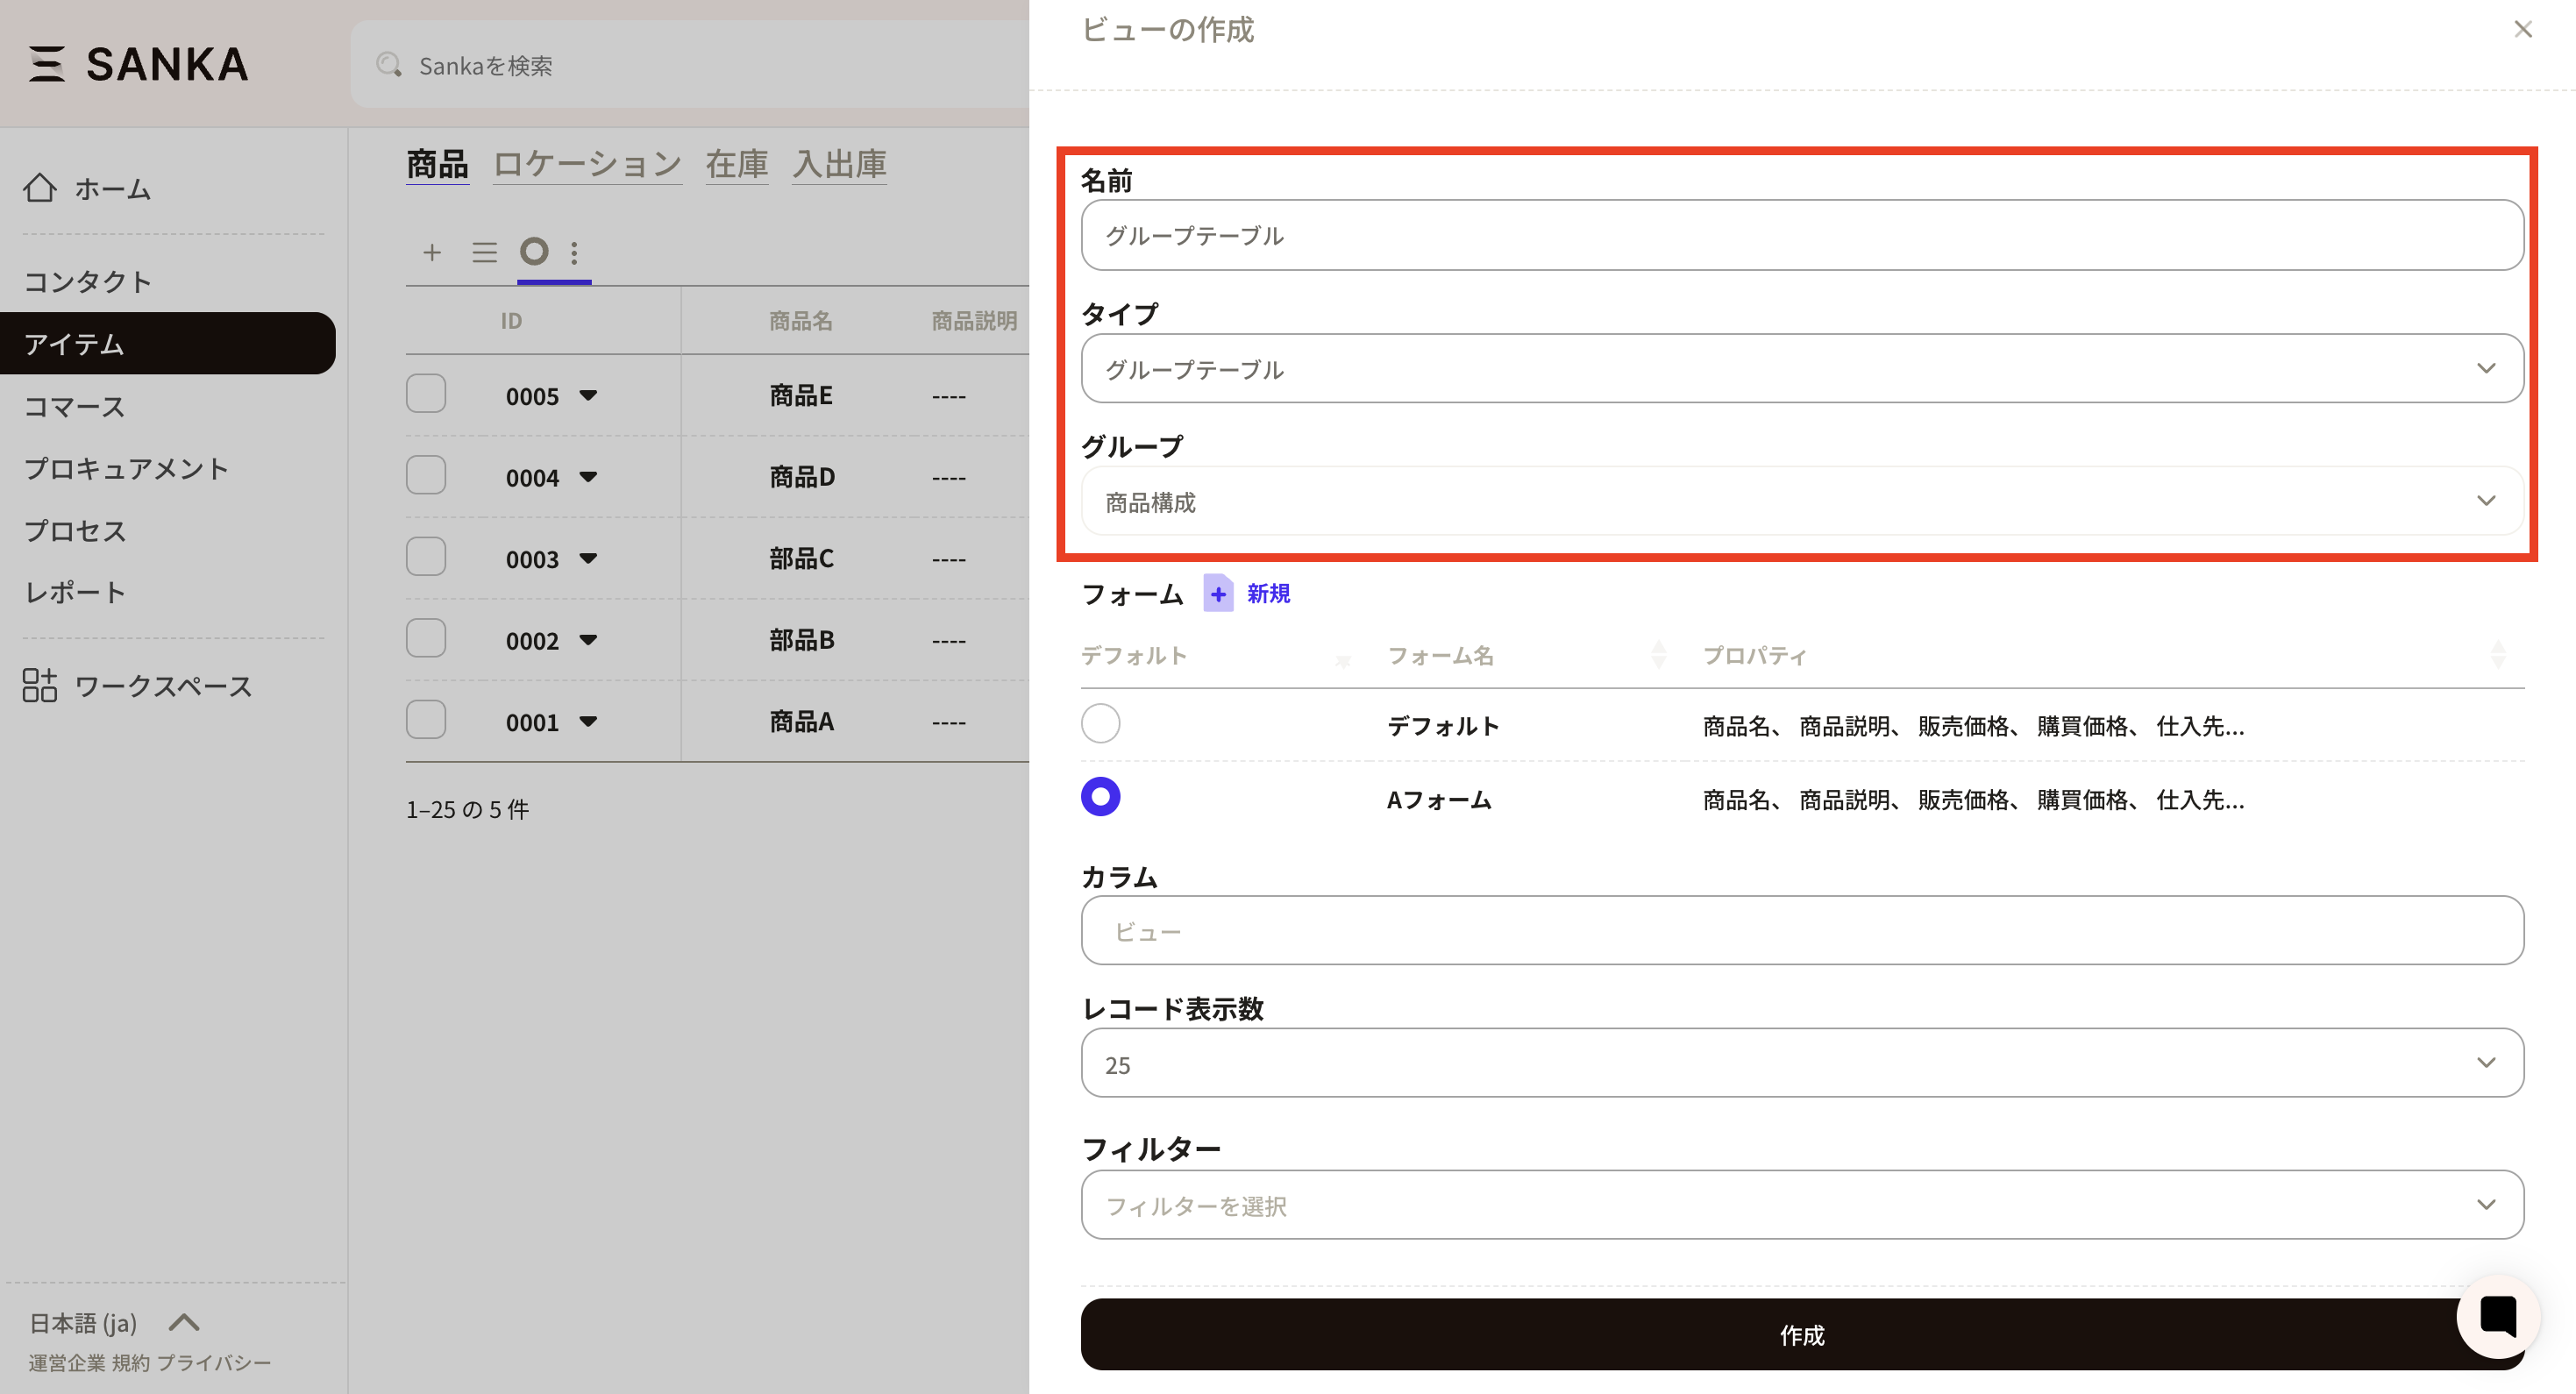
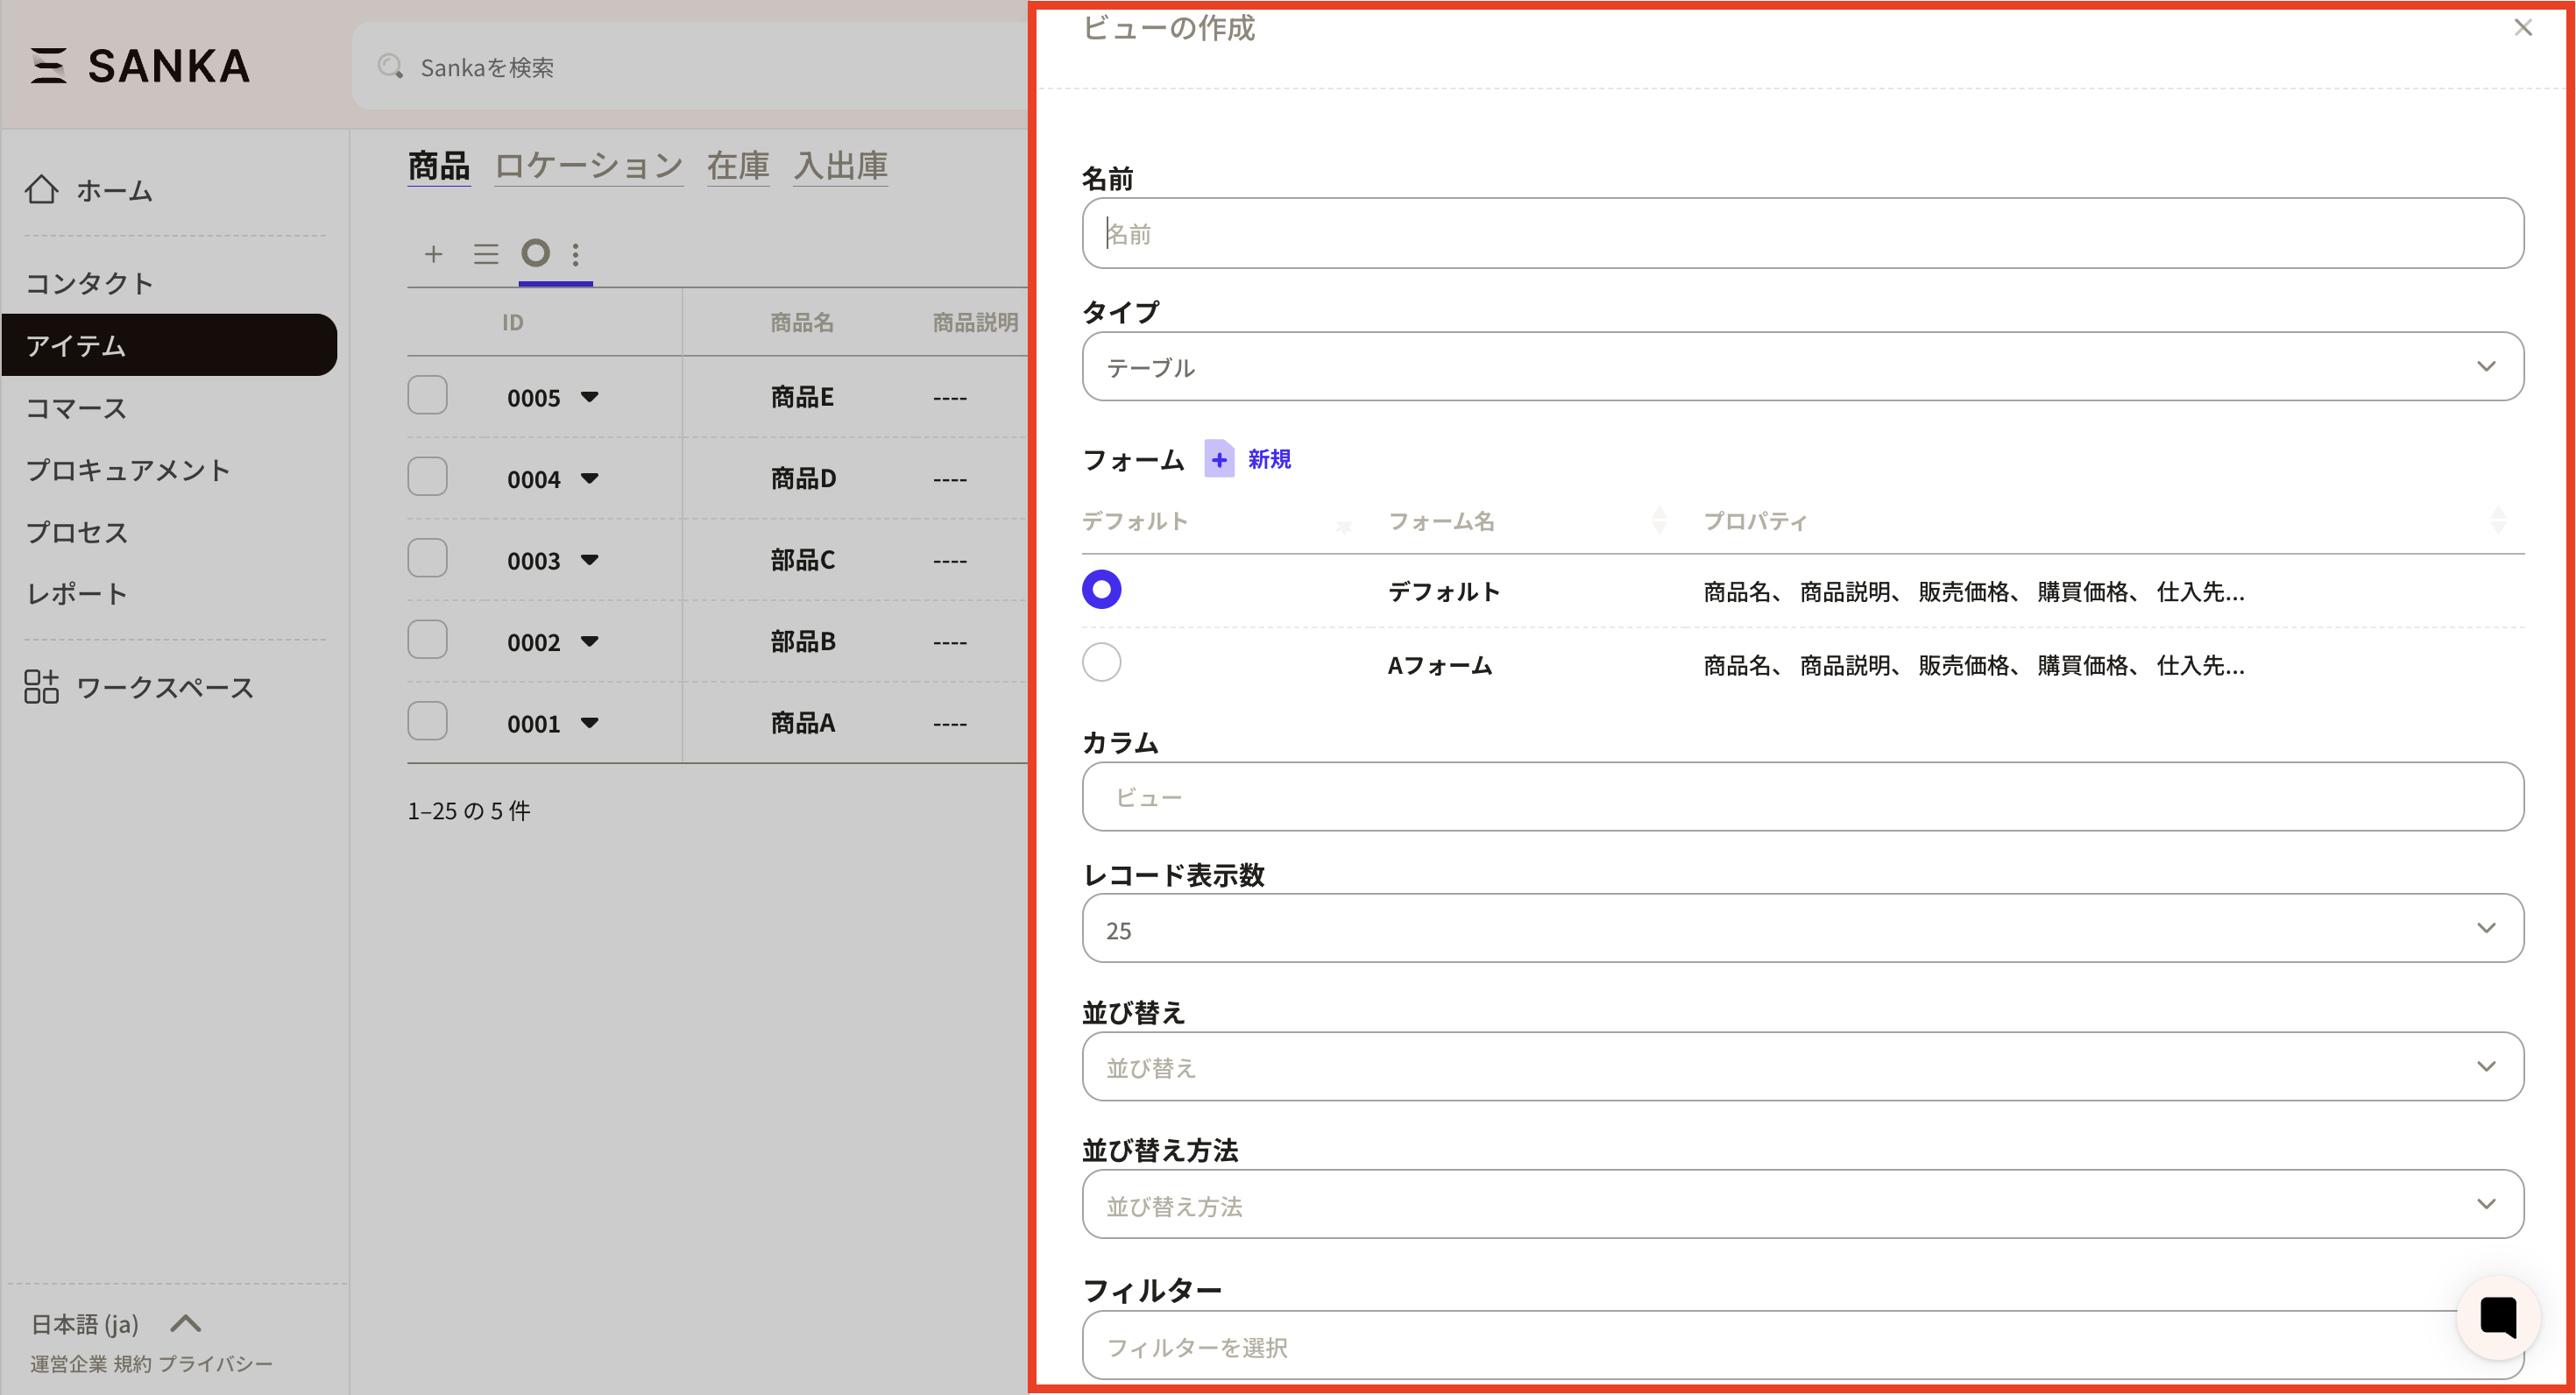 ③Enter the information as shown below.
- Name: Enter "Group Table". We recommend a name that makes sense to you.
- Type: Select "Group Table".
- Group: Select "Product composition". Once entered, click "Create".
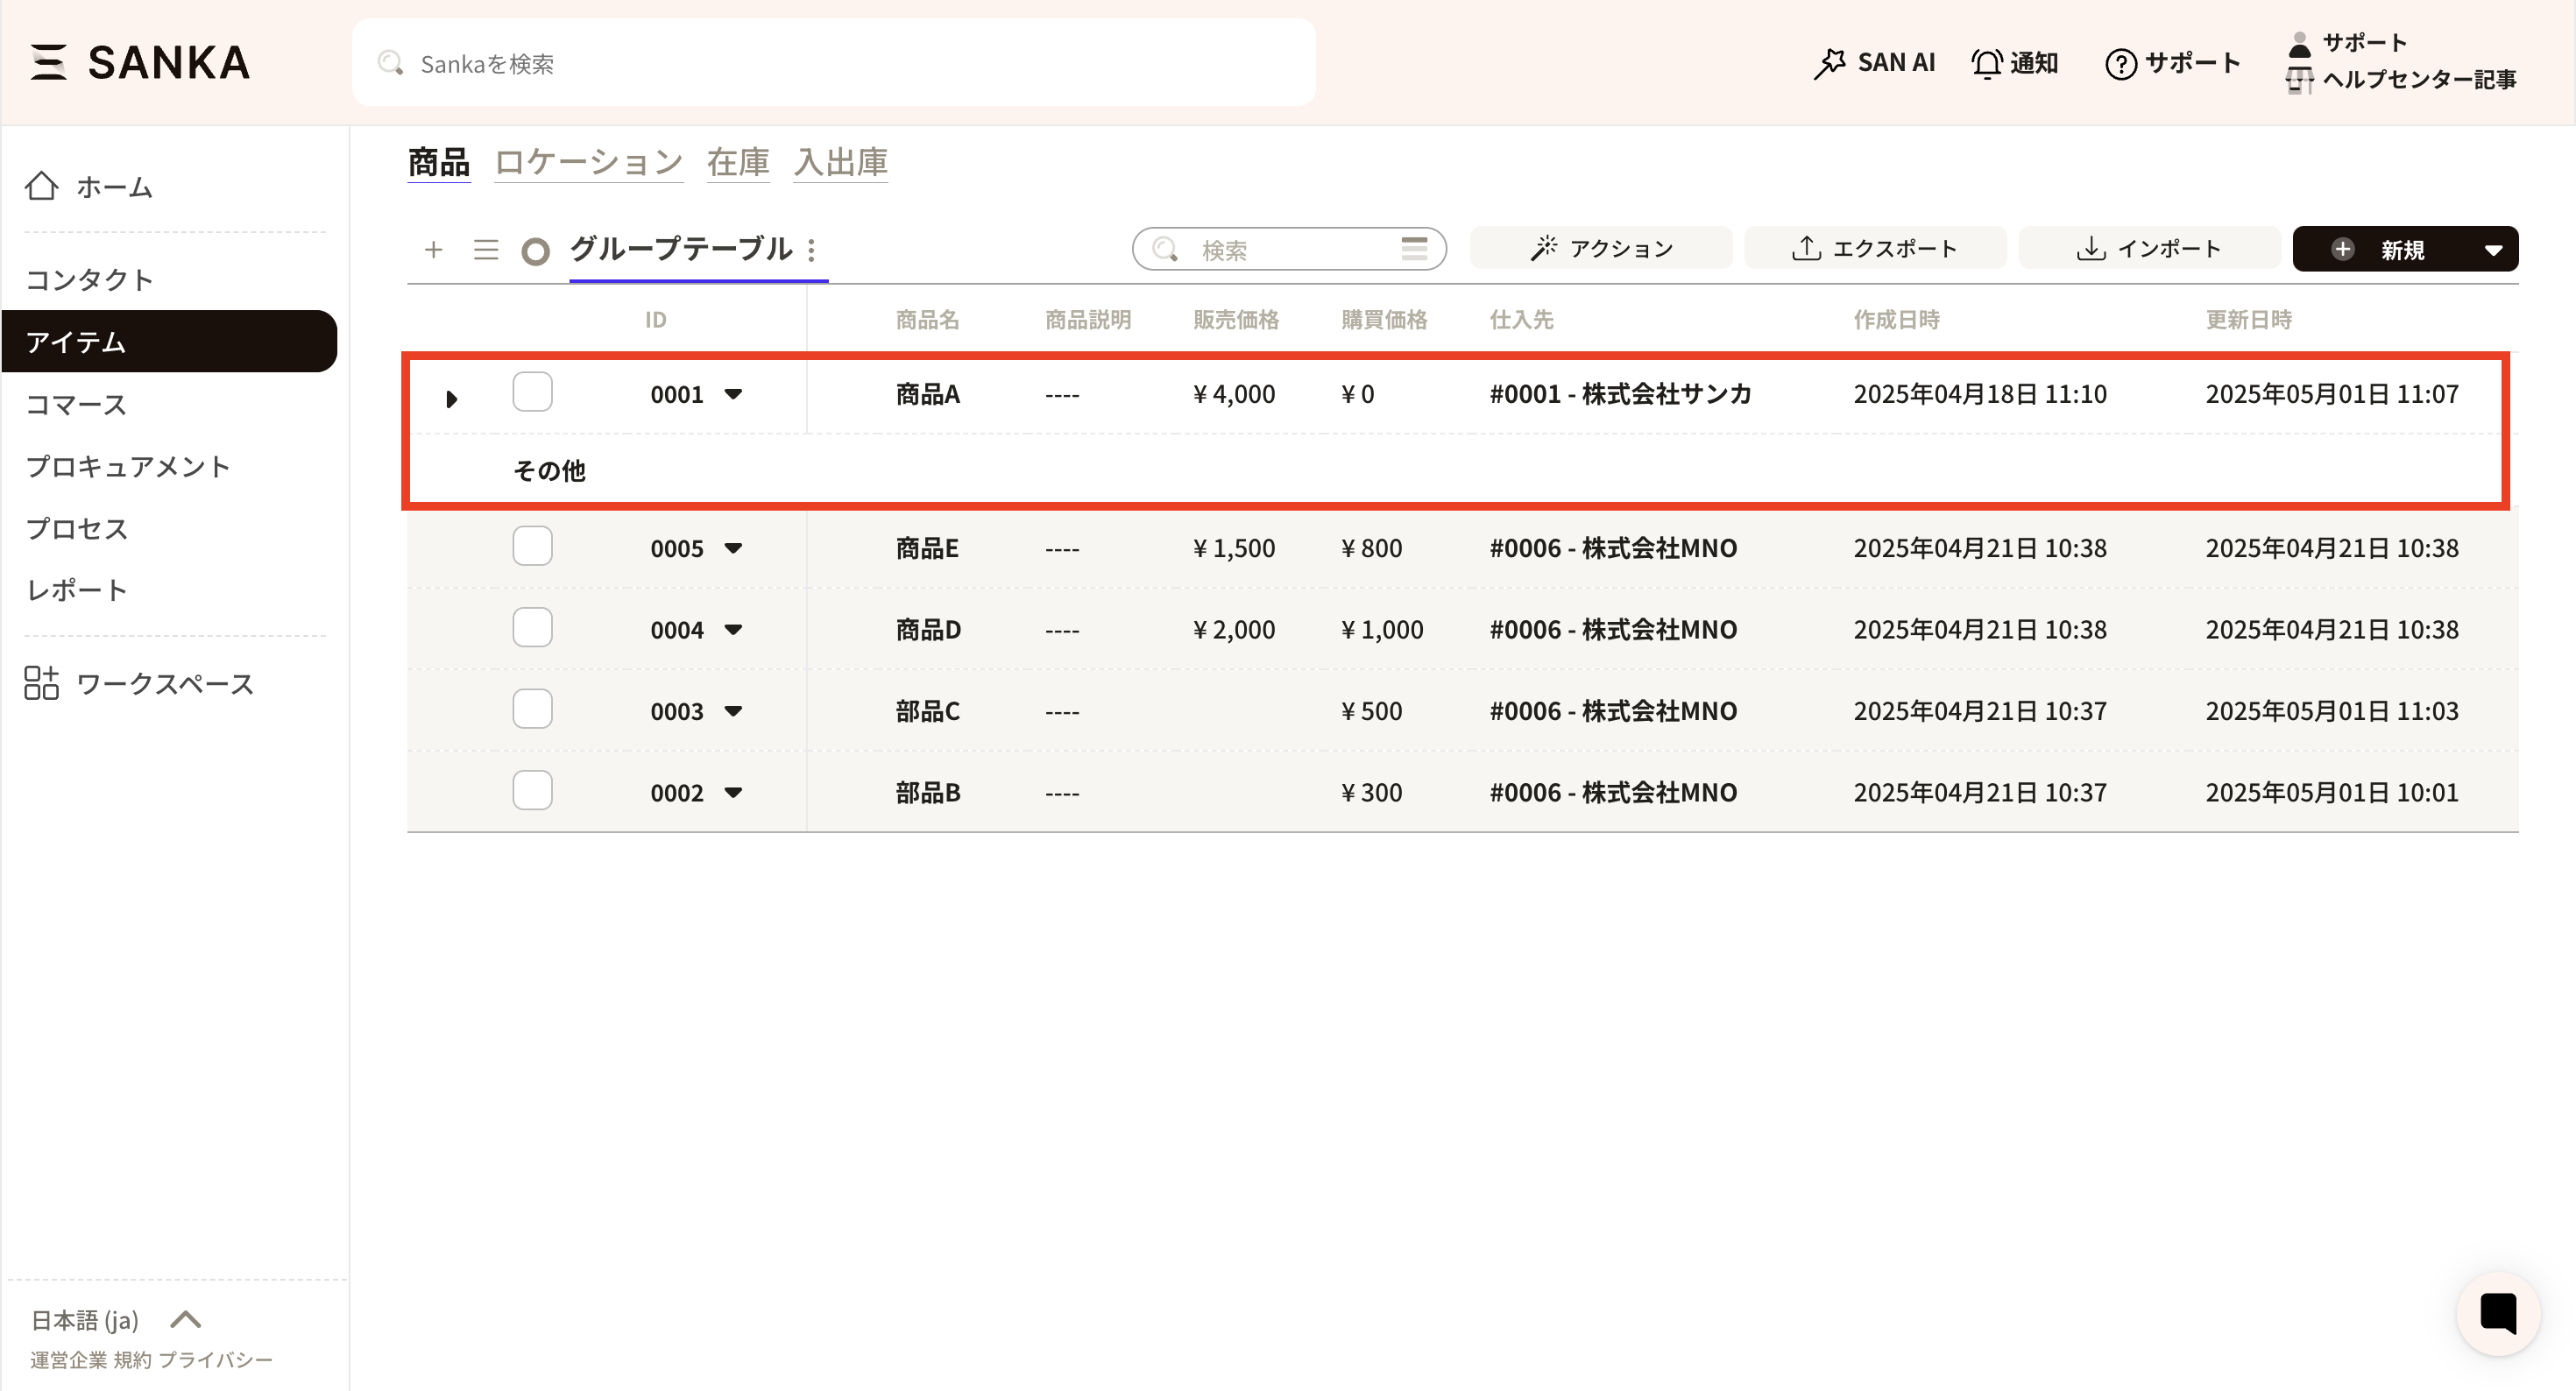
 **④ **The information on parts B and C linked to product A has been grouped. You can close and open groups using the triangle buttons.

Setup (one time only)
Create configuration properties and put them in forms
- Open "Workspace Settings > Product" and create a property from "New".
- Select
Configuration'' forName'' and ``Configuration'' for Type. - Go to the product page, open "Form management (default)", add "Configuration" to the properties and press "Update".
Procedure: Register components
This section explains the procedure for registering a parent product and child parts as a set product or assembly, and adding child parts to the structure of the parent product.1. Create parent product and child parts
- Click "New" in "Item > Product" and create a parent product (e.g. assembly set A).
- Create a child part (e.g. part B) using the same procedure.
2. Add child parts to the structure of the parent product
- Open the parent product record and press "Add product as configuration property" in the "Configuration" section of the form.
- Select the child part (#0002 part B) and enter the quantity (example: 1).
- Press “Save” at the top right of the screen to confirm.
Key points for completion and utilization
- After saving, the configuration of child parts will be saved in the parent product, and you can change the quantity or add parts in the same "Configuration" section.
- By registering multiple parts and keeping a set breakdown, you can use it to improve the accuracy of cost accumulation and inventory management.