Billing object overview
Introducing an overview of the sales billing object and how to register records.
About Sanka's billing object
Sales invoices (Invoices) objects are payment requests issued after goods are delivered or services are provided. This provides a clear summary of what has been purchased and the total amount due. Sanka's Billing Object streamlines the billing process and allows businesses to smoothly manage billing workflows, managing customer payments while maintaining accurate financial records. Sanka's Billing Object simplifies the process from invoicing to payment collection, making it easier for businesses to understand their revenue streams.Sales Billing Object Overview
Sanka's sales invoice object enables businesses to create detailed invoices with all the information needed to facilitate the payment process. Each invoice includes the following main elements:- **Sales Invoice ID: **A unique identifier given to each invoice for easy tracking and reference by businesses and customers.
- **Customer Information: **Contains the customer's name, contact information, and company information, making it clear to whom the invoice was issued.
- **Product list: **Contains the breakdown, description, quantity, unit price, applicable taxes, etc. of the products and services provided.
- **Billing Date: **The date the invoice was issued to clarify the timeline for payment.
- **Payment Due Date: **Specify the deadline by which customers should settle their invoices to encourage timely payments.
- **Total Amount: **Displays the total amount paid, including product price, taxes, discounts, and other adjustments.
- **Invoice status: **Track the current progress of your invoice, including draft, sent, paid, overdue, etc.
How to use the sales billing object
Sanka's Billing Object offers several key features to simplify billing operations and revenue management.- **Invoice Creation and Customization: **Sanka's easy-to-use interface allows businesses to quickly create professional invoices. You can customize it to suit your needs, including adding your logo, adjusting payment terms, and applying discounts and taxes.
- **Payment Status Tracking: **Track the status of each invoice from creation to payment and follow up on unpaid invoices.
- **Seamless Integration with Orders and Receipts: **The Billing object seamlessly integrates with Sanka's other key features (Orders and Receipts objects) to ensure data consistency across all transactions. After completing your order, you can easily convert it to an invoice.
- **Payment Processing: **Use Sanka to track payment methods such as bank transfers and credit cards. This ensures smooth payment collection and reduces administrative effort.
- **Invoice Templates: **Predefined templates can be used to standardize your sales invoice process and provide a consistent design for every invoice you send to your customers.
- **Multi-currency support: **For companies operating globally, we support multiple currencies, making it easy to bill international clients and manage exchange rates.
- **Record Keeping for Tax Compliance: **All invoices are centrally stored and easily accessible for tax filings and audits. Detailed tracking of taxes applied to each invoice ensures accurate reporting and compliance.
Importance of Billing Objects
Billing objects play important roles for businesses, including: **- **Improved cash flow management: **By sending invoices quickly and tracking payments, businesses can maintain stable cash flow and avoid delays in revenue collection.
- **Streamline your billing process: **Save time and reduce the risk of human error by automating parts of your billing process, such as automatically generating recurring invoices and sending payment reminders.
- **Improved Financial Transparency: **The Billing object provides businesses with a complete picture of their outstanding invoices and revenue. This is very important in budgeting, financial forecasting, and decision making.
- **Improve customer relations: **Clear and professional invoices improve customer communication and reduce payment misunderstandings and hassles.
- **Seamless integration with other financial tools: **Sanka invoices are tightly integrated with other financial objects such as quotes, orders, and inventory. This reduces data duplication and increases efficiency.
- **Audit Trail and Transparency: **Sanka's Sales Invoice object creates a detailed audit trail that allows you to track all actions related to invoices. This ensures transparency in internal reporting and external audits.
Conclusion
Sanka's Billing Object is an essential tool for businesses looking to improve their billing and payment management. By providing a centralized, easy-to-use platform to create, track, and manage invoices, Sanka improves companies' financial workflows, ensures timely payments, and maintains accurate financial records. With features such as multi-currency support, payment tracking, and seamless integration with Sanka's other tools, the billing object is a key element for businesses to streamline operations, improve customer satisfaction, and achieve sustainable growth.How to register a new sales billing record
We will introduce how to register a new sales billing record. ① Select the “Sales Billing” object and click the “New” button at the top right of the screen.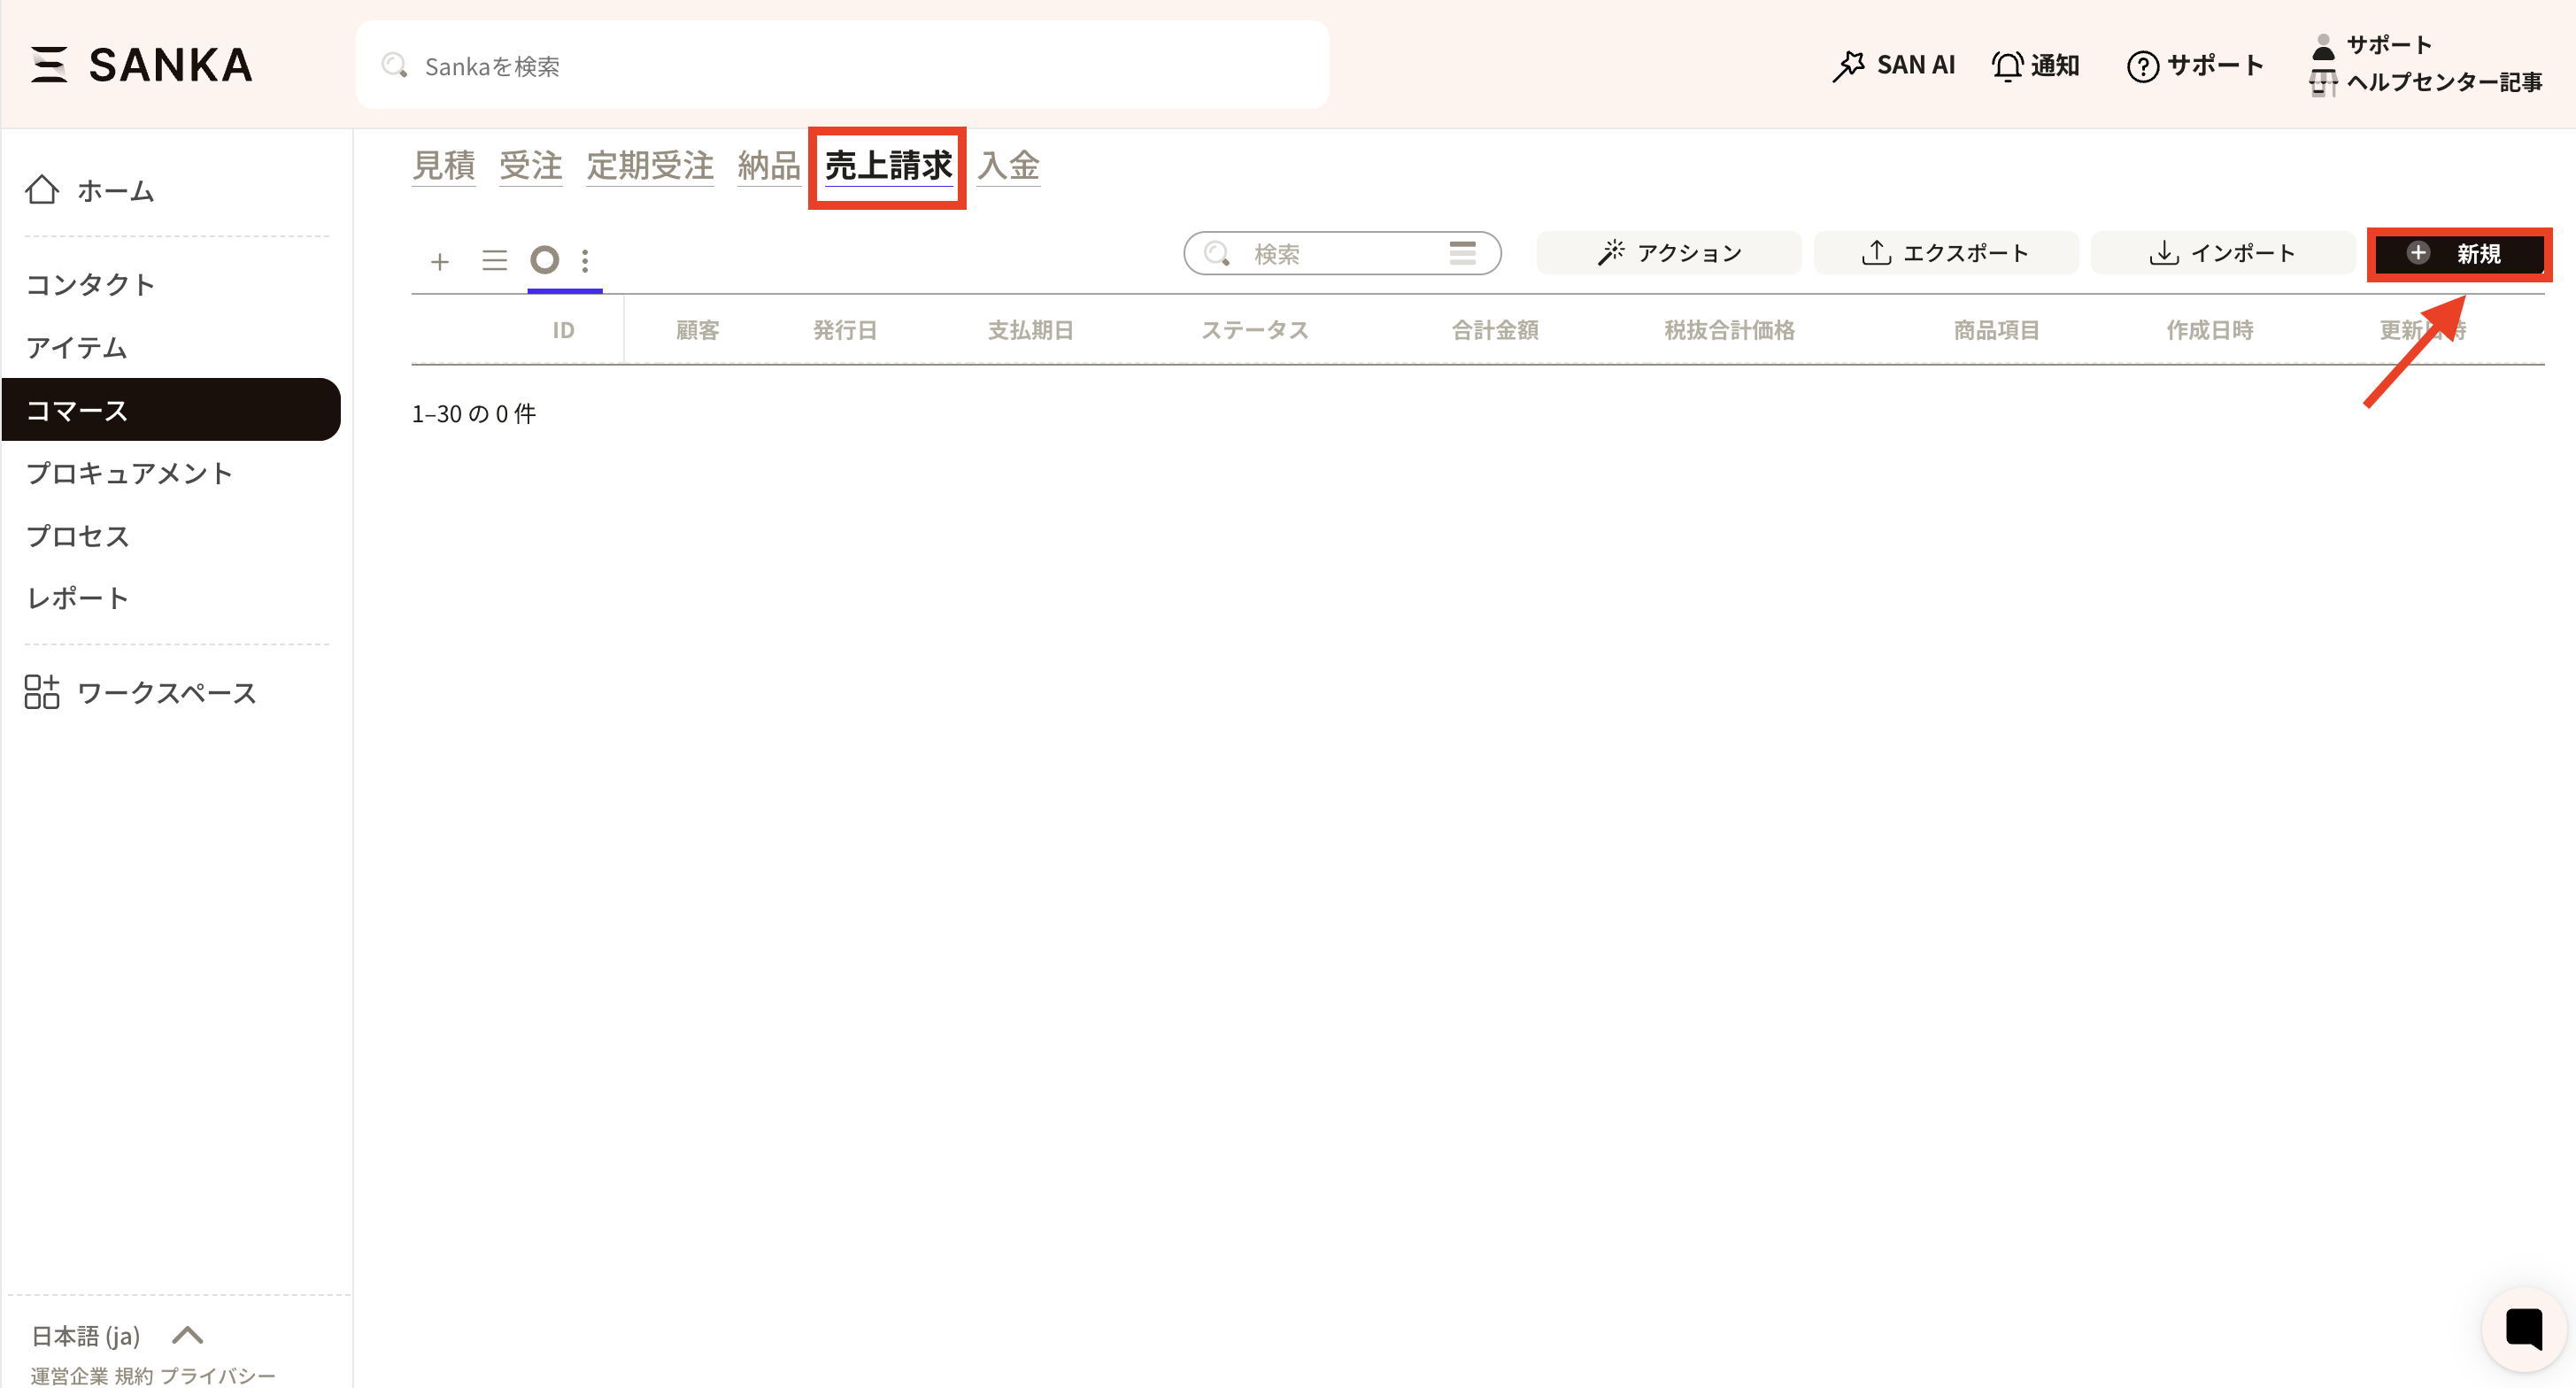 ②The "Create invoice" menu will be displayed, so enter the necessary information.
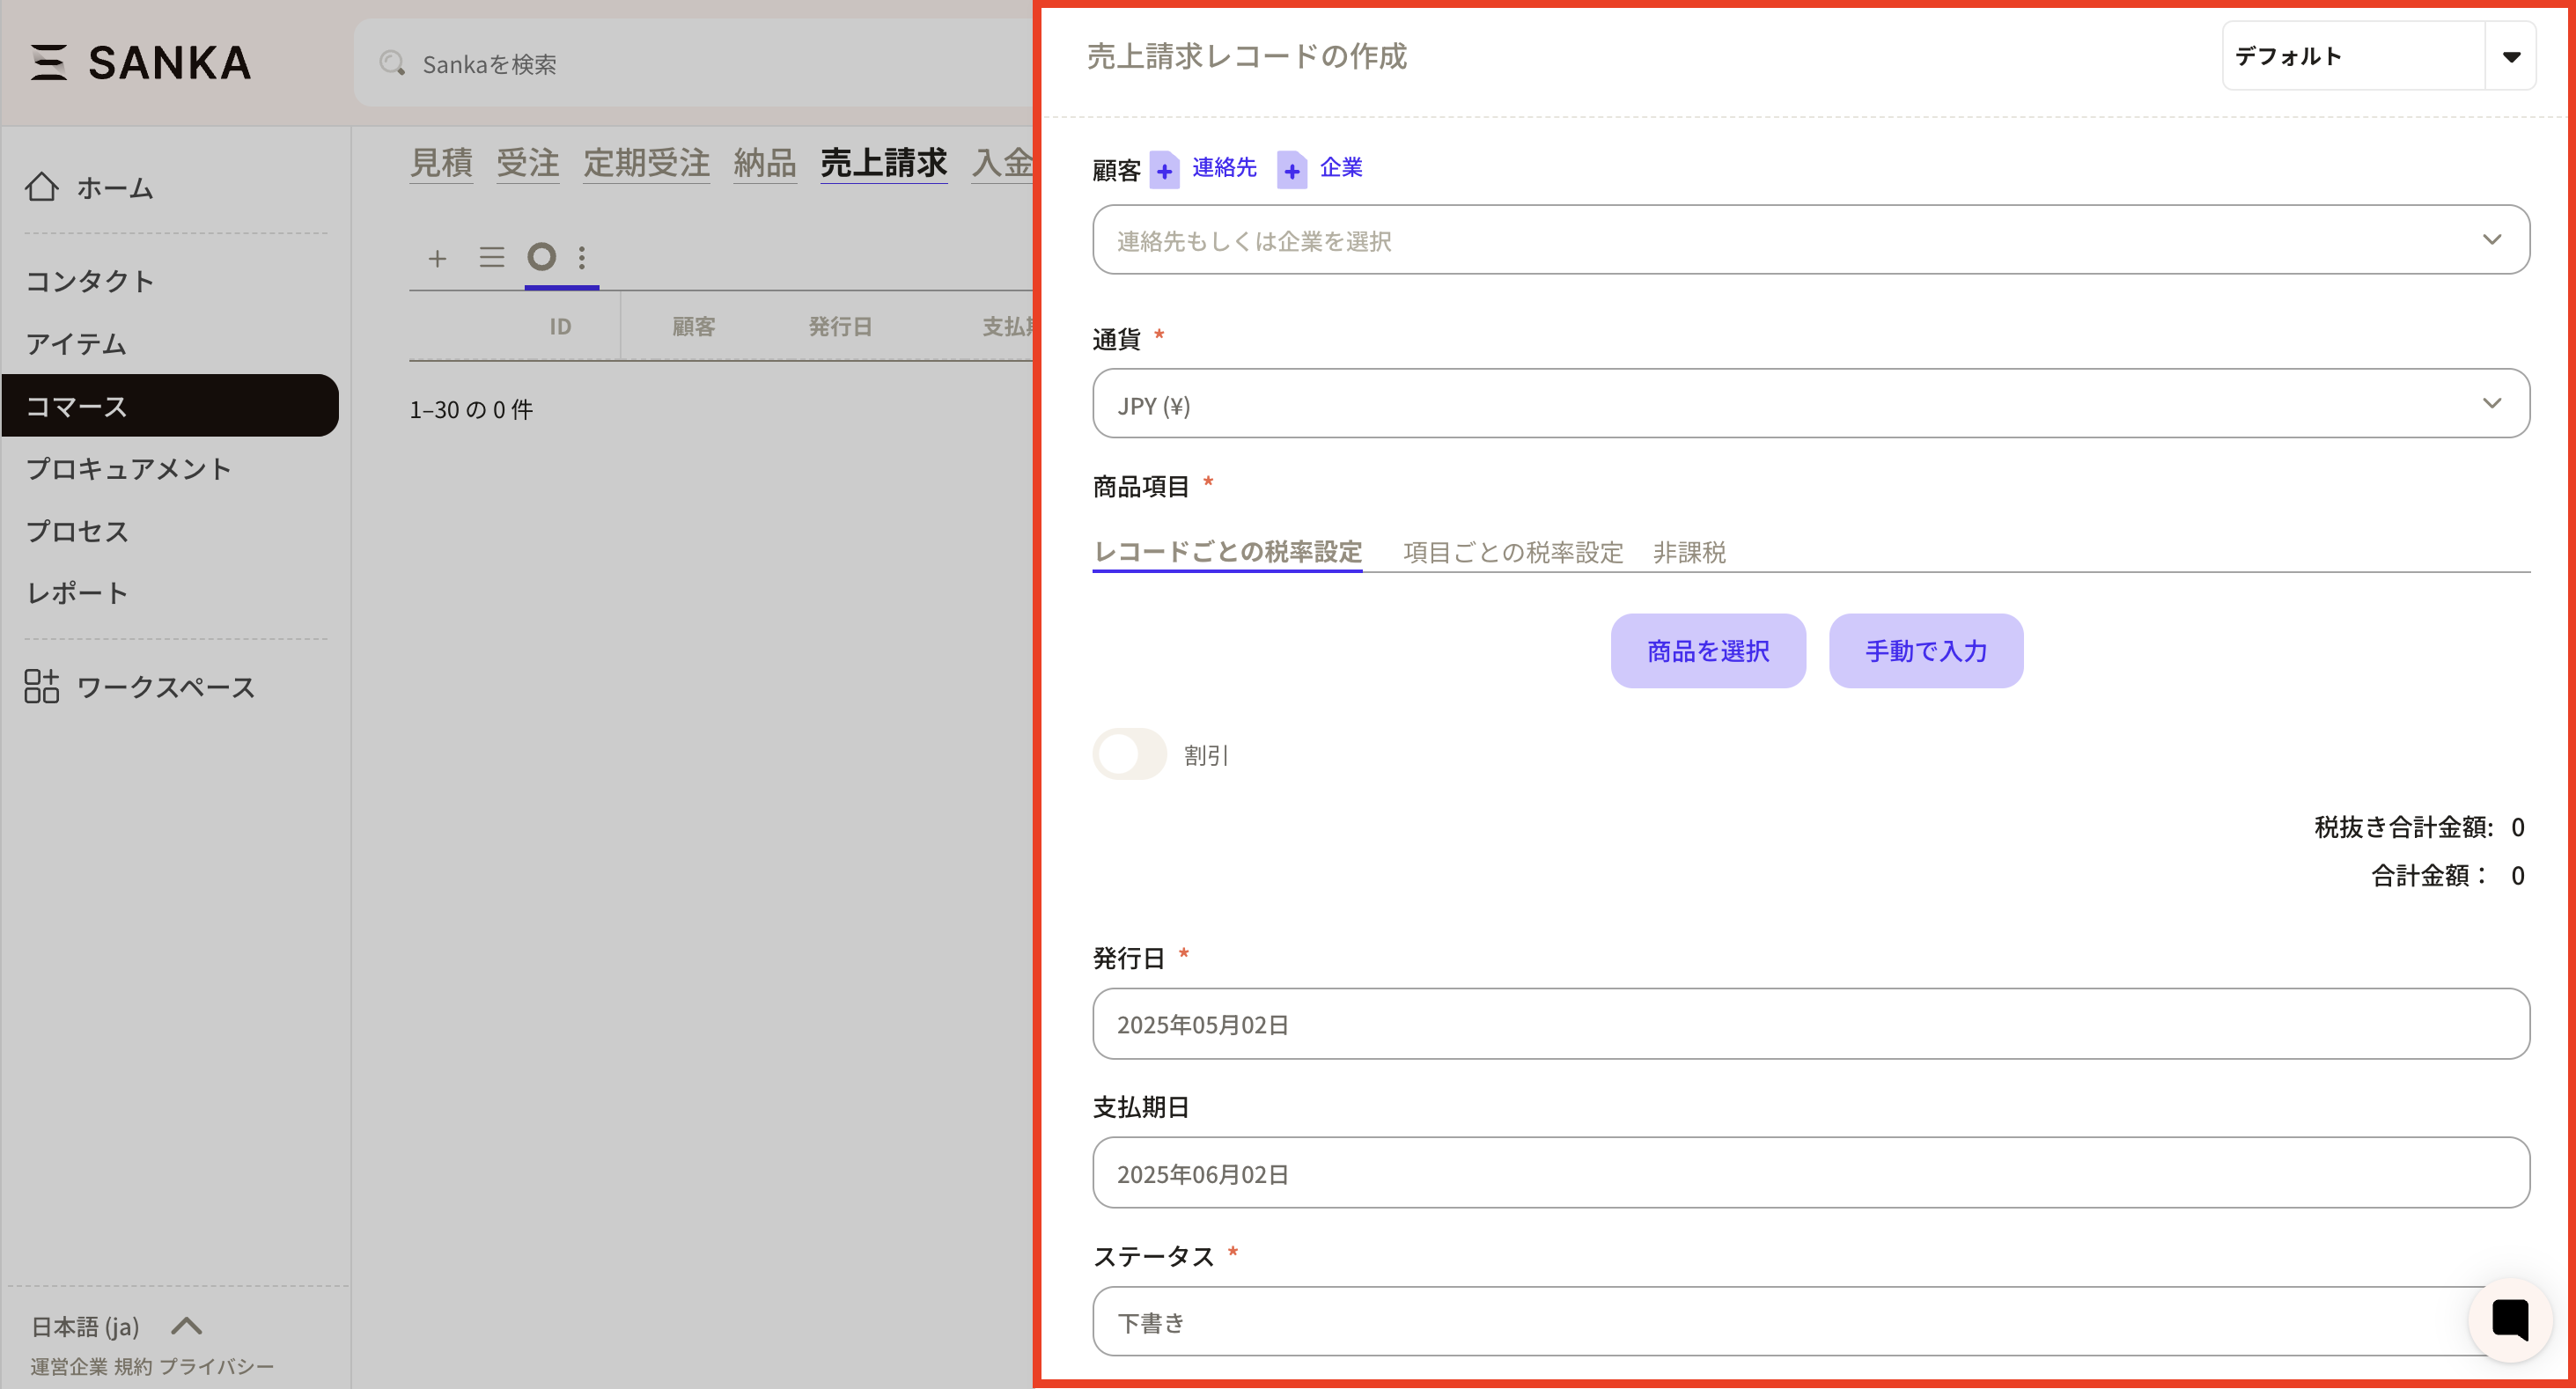
 ③ First, register your "customer information". Click the frame to display registered business partner information.
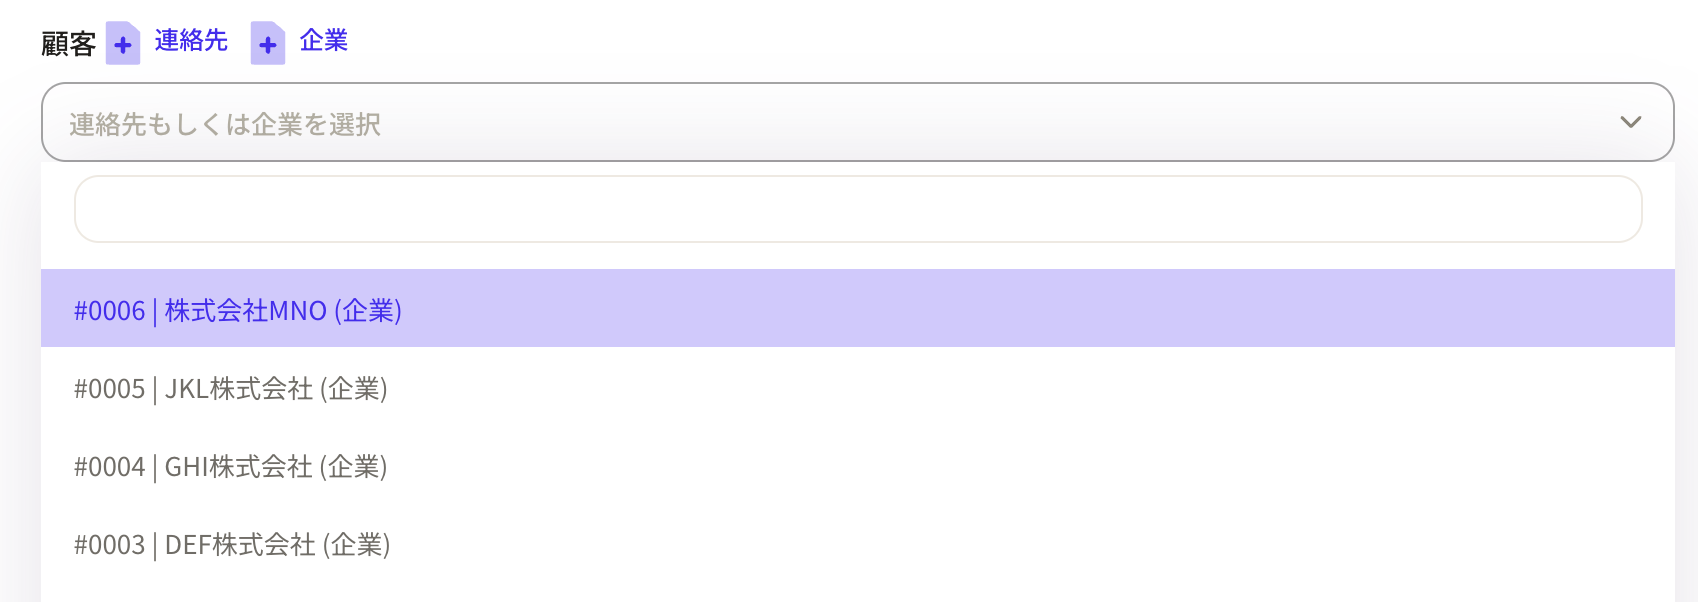 *If you do not have business partner information, you can add it directly from the "+Contact" and "+Company" buttons.
 ④Next, select “Currency”.
 ⑤Next, we register the product items. First, let's set the tax rate.
Tax rates can be set in three ways:
⑤Next, we register the product items. First, let's set the tax rate.
Tax rates can be set in three ways:
- Tax rate setting for each record: The same tax rate is set for all products in the sales invoice. -Setting tax rates for each item: You can set different tax rates for each product.
- Tax-free: No tax rate is set and it is not applied to sales invoices.
 ⑥ There are two ways to input products:
- Select product: This is a method to select the relevant product from the product master registered in Sanka.
- Manual input: This is a method of manually inputting product information.
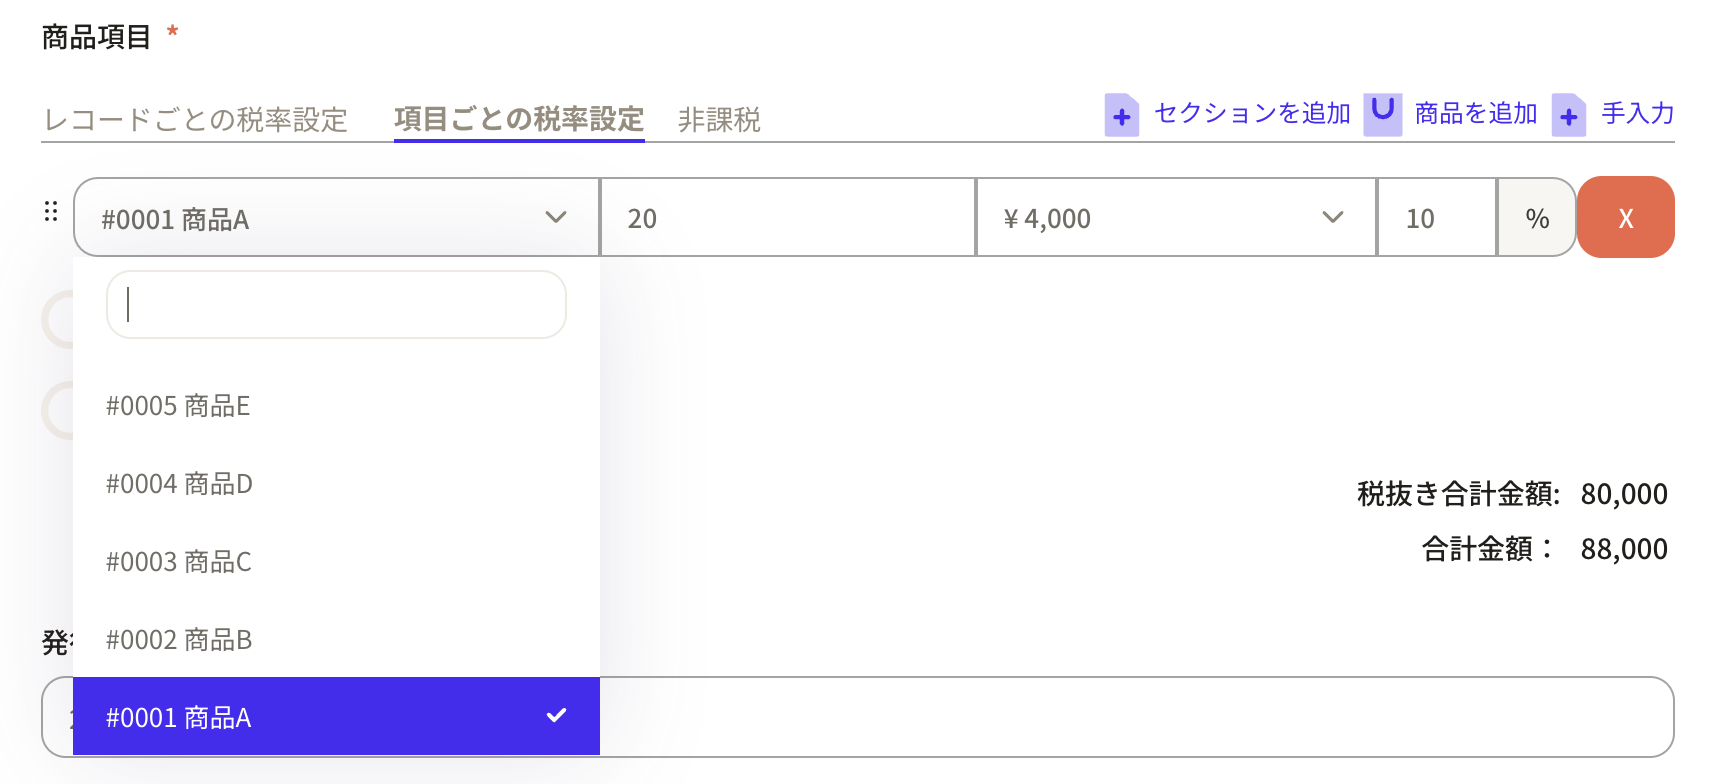
 ⑦ When you select a product, the products registered in the product master will be displayed.
As an example, we will create a sales billing record for 20 items of product A and 10 items of product B.
First, select part A and enter the quantity of 20 pieces.
Please note that the amount at the time of product record registration will be automatically added to the unit price.
⑦ When you select a product, the products registered in the product master will be displayed.
As an example, we will create a sales billing record for 20 items of product A and 10 items of product B.
First, select part A and enter the quantity of 20 pieces.
Please note that the amount at the time of product record registration will be automatically added to the unit price.
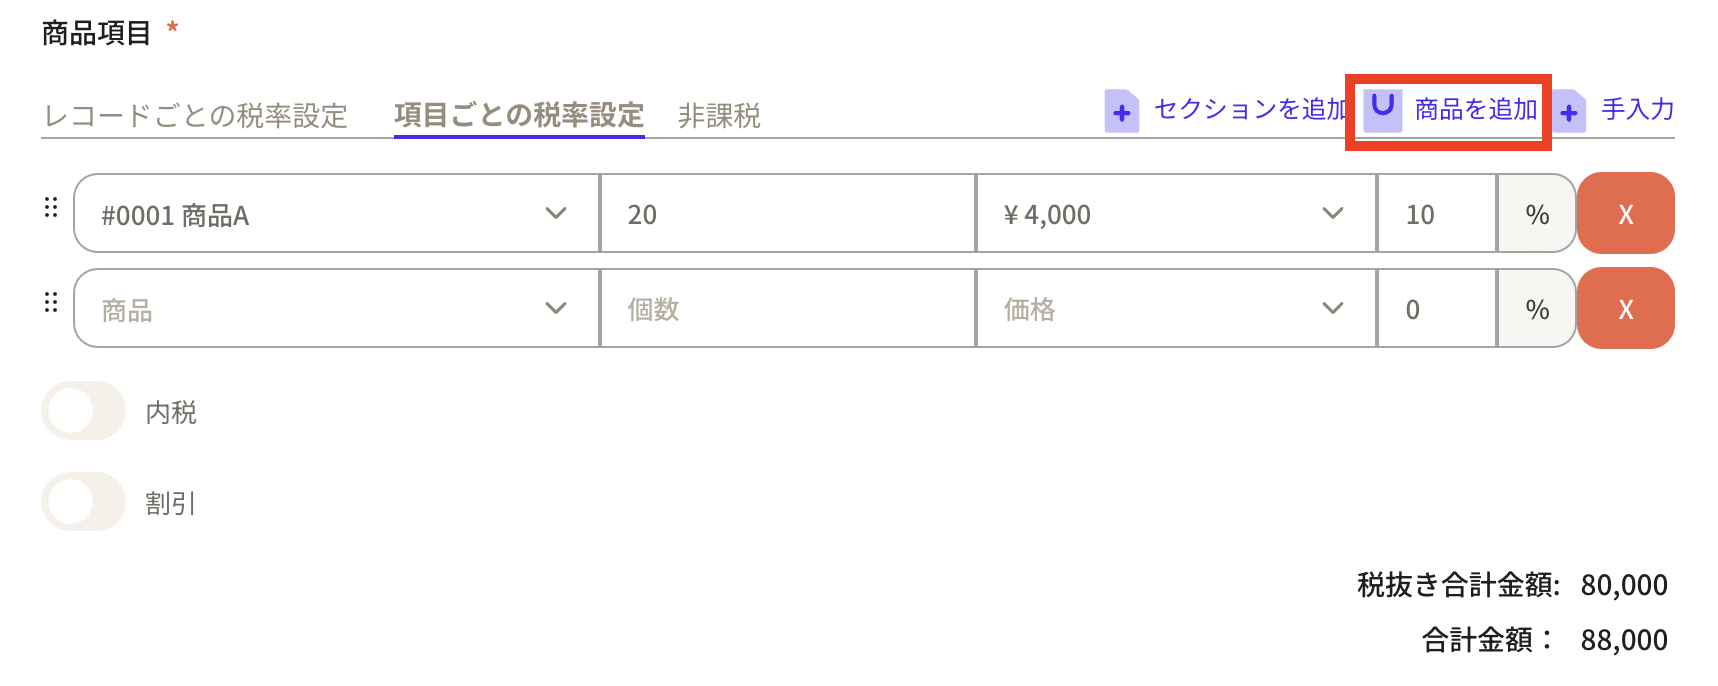
 ⑧ If you would like to increase the number of items listed on the sales invoice, click "Add item" in the upper right corner and additional blank fields will be displayed.
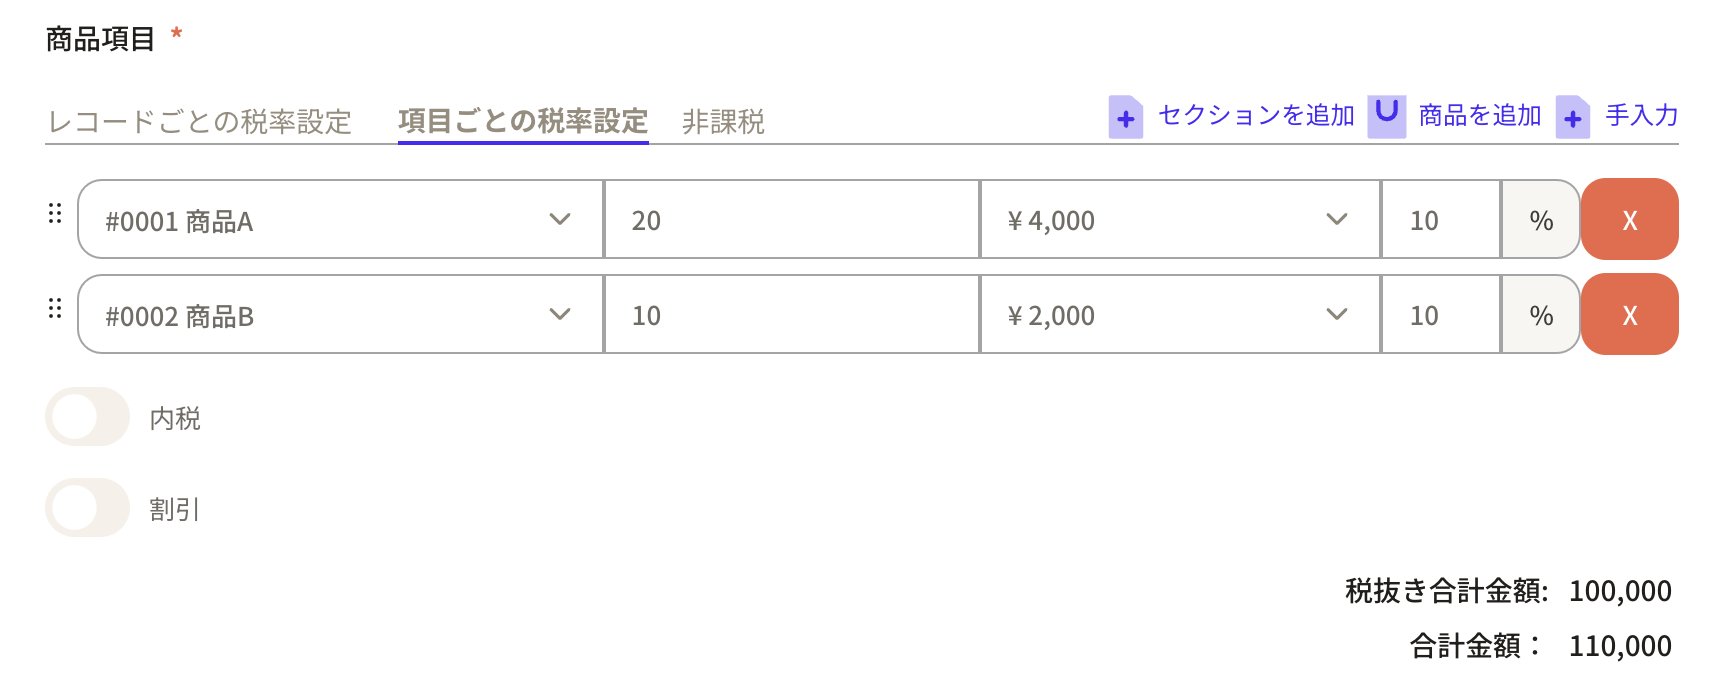
 Add 10 items of product B.
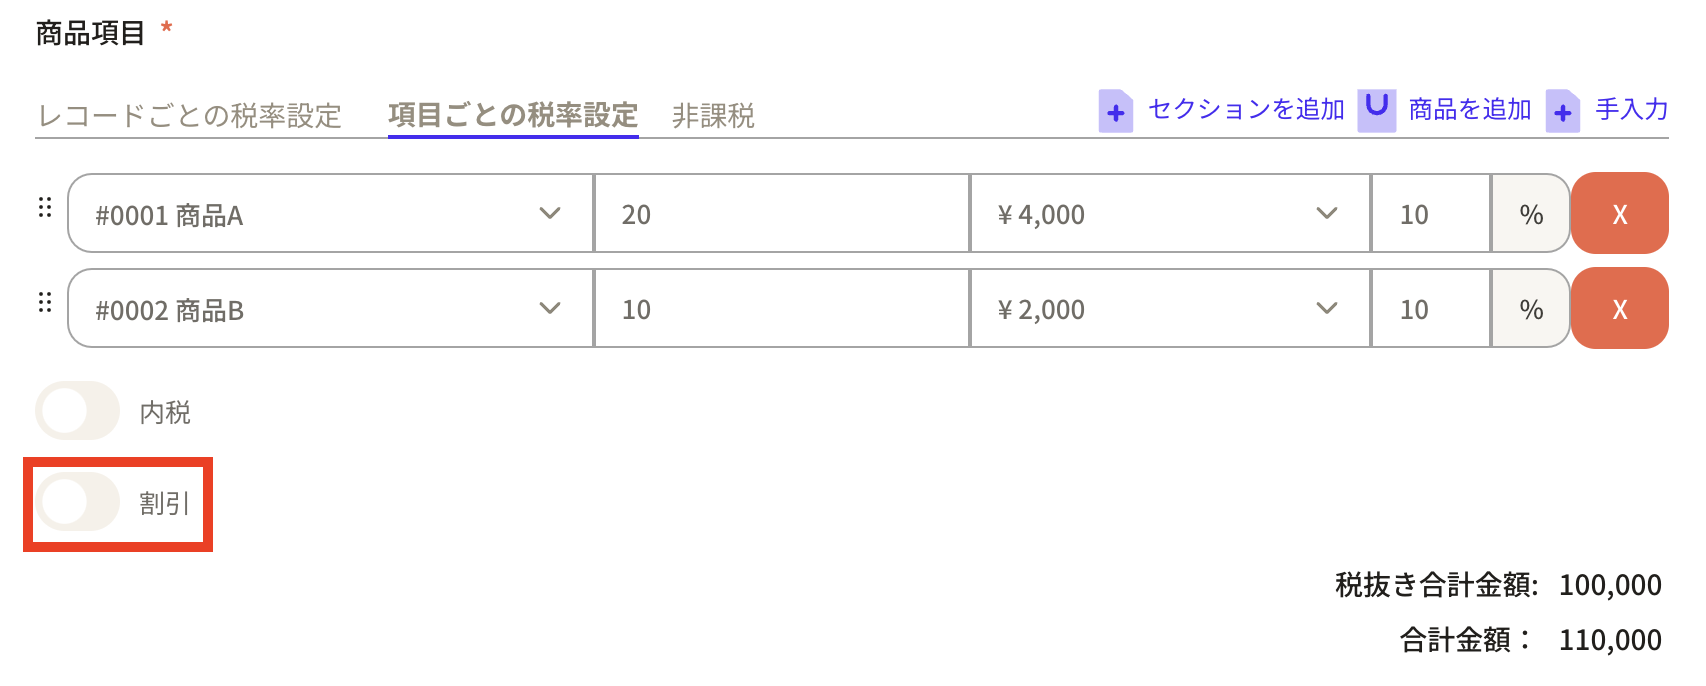
 ⑨If you want to apply a discount, you can set it by turning on "Discount".
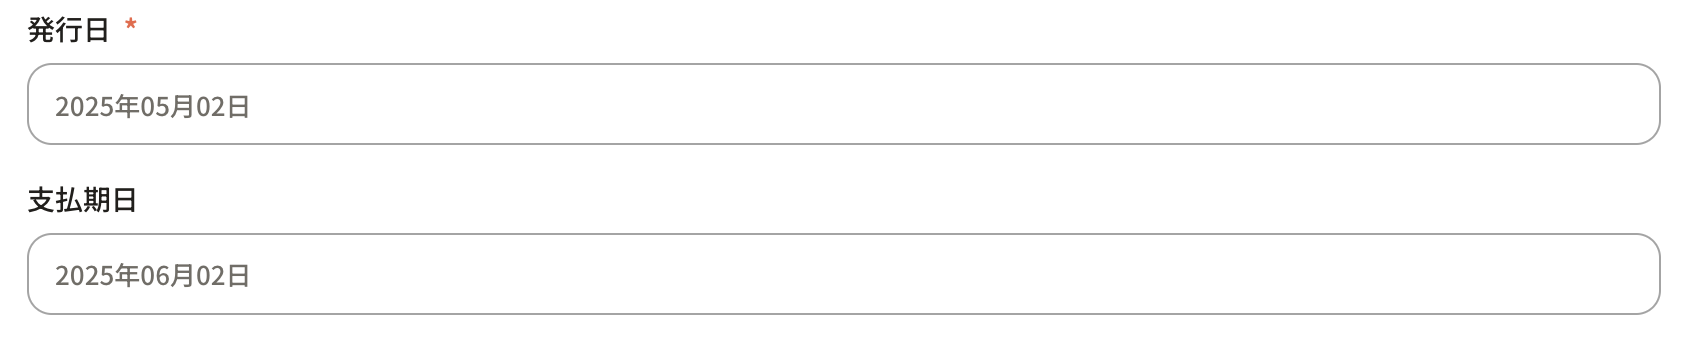
 ⑩ "Issuance date" and "Payment date" will default to the date when the record was created and the date one month after that, but if you click on the frame, a calendar will appear, so you can set it freely.
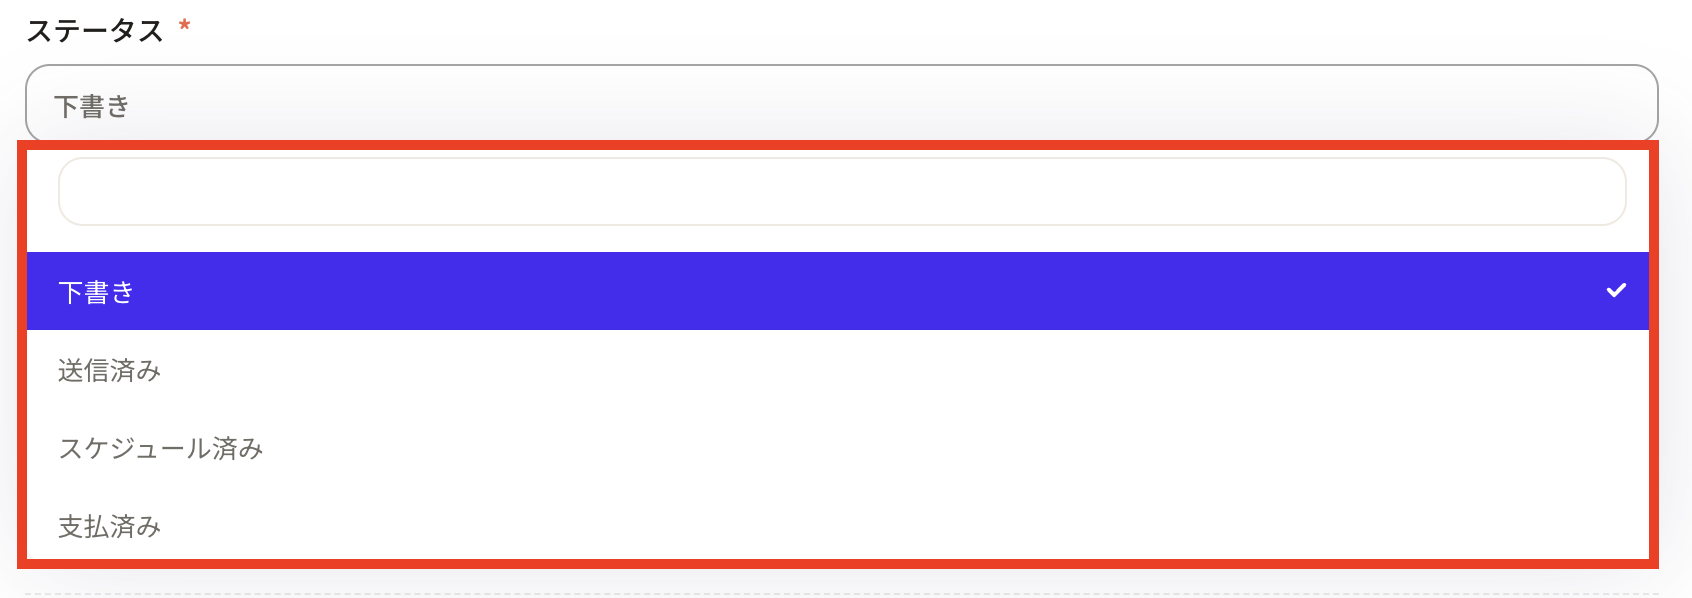
 ⑪ Select the sales invoice status in “Status”.
You can choose from Draft, Sent, Scheduled, and Paid. This status can be changed from the property settings. How to set properties
⑪ Select the sales invoice status in “Status”.
You can choose from Draft, Sent, Scheduled, and Paid. This status can be changed from the property settings. How to set properties
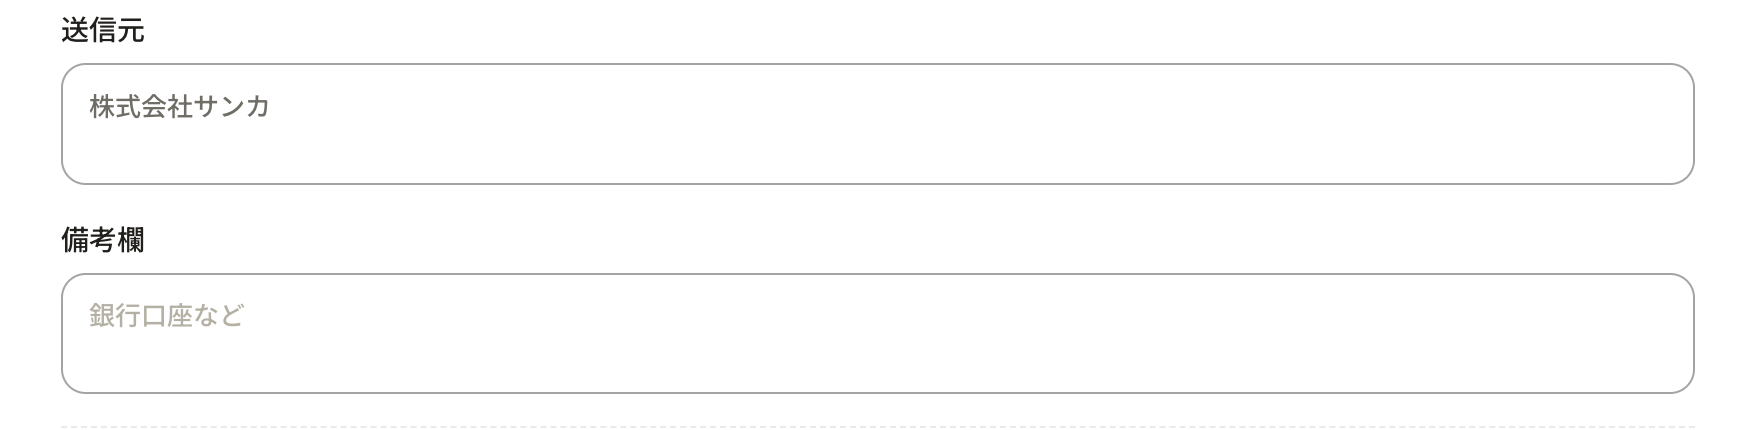
 ⑫Enter the necessary information in the sender and notes columns.
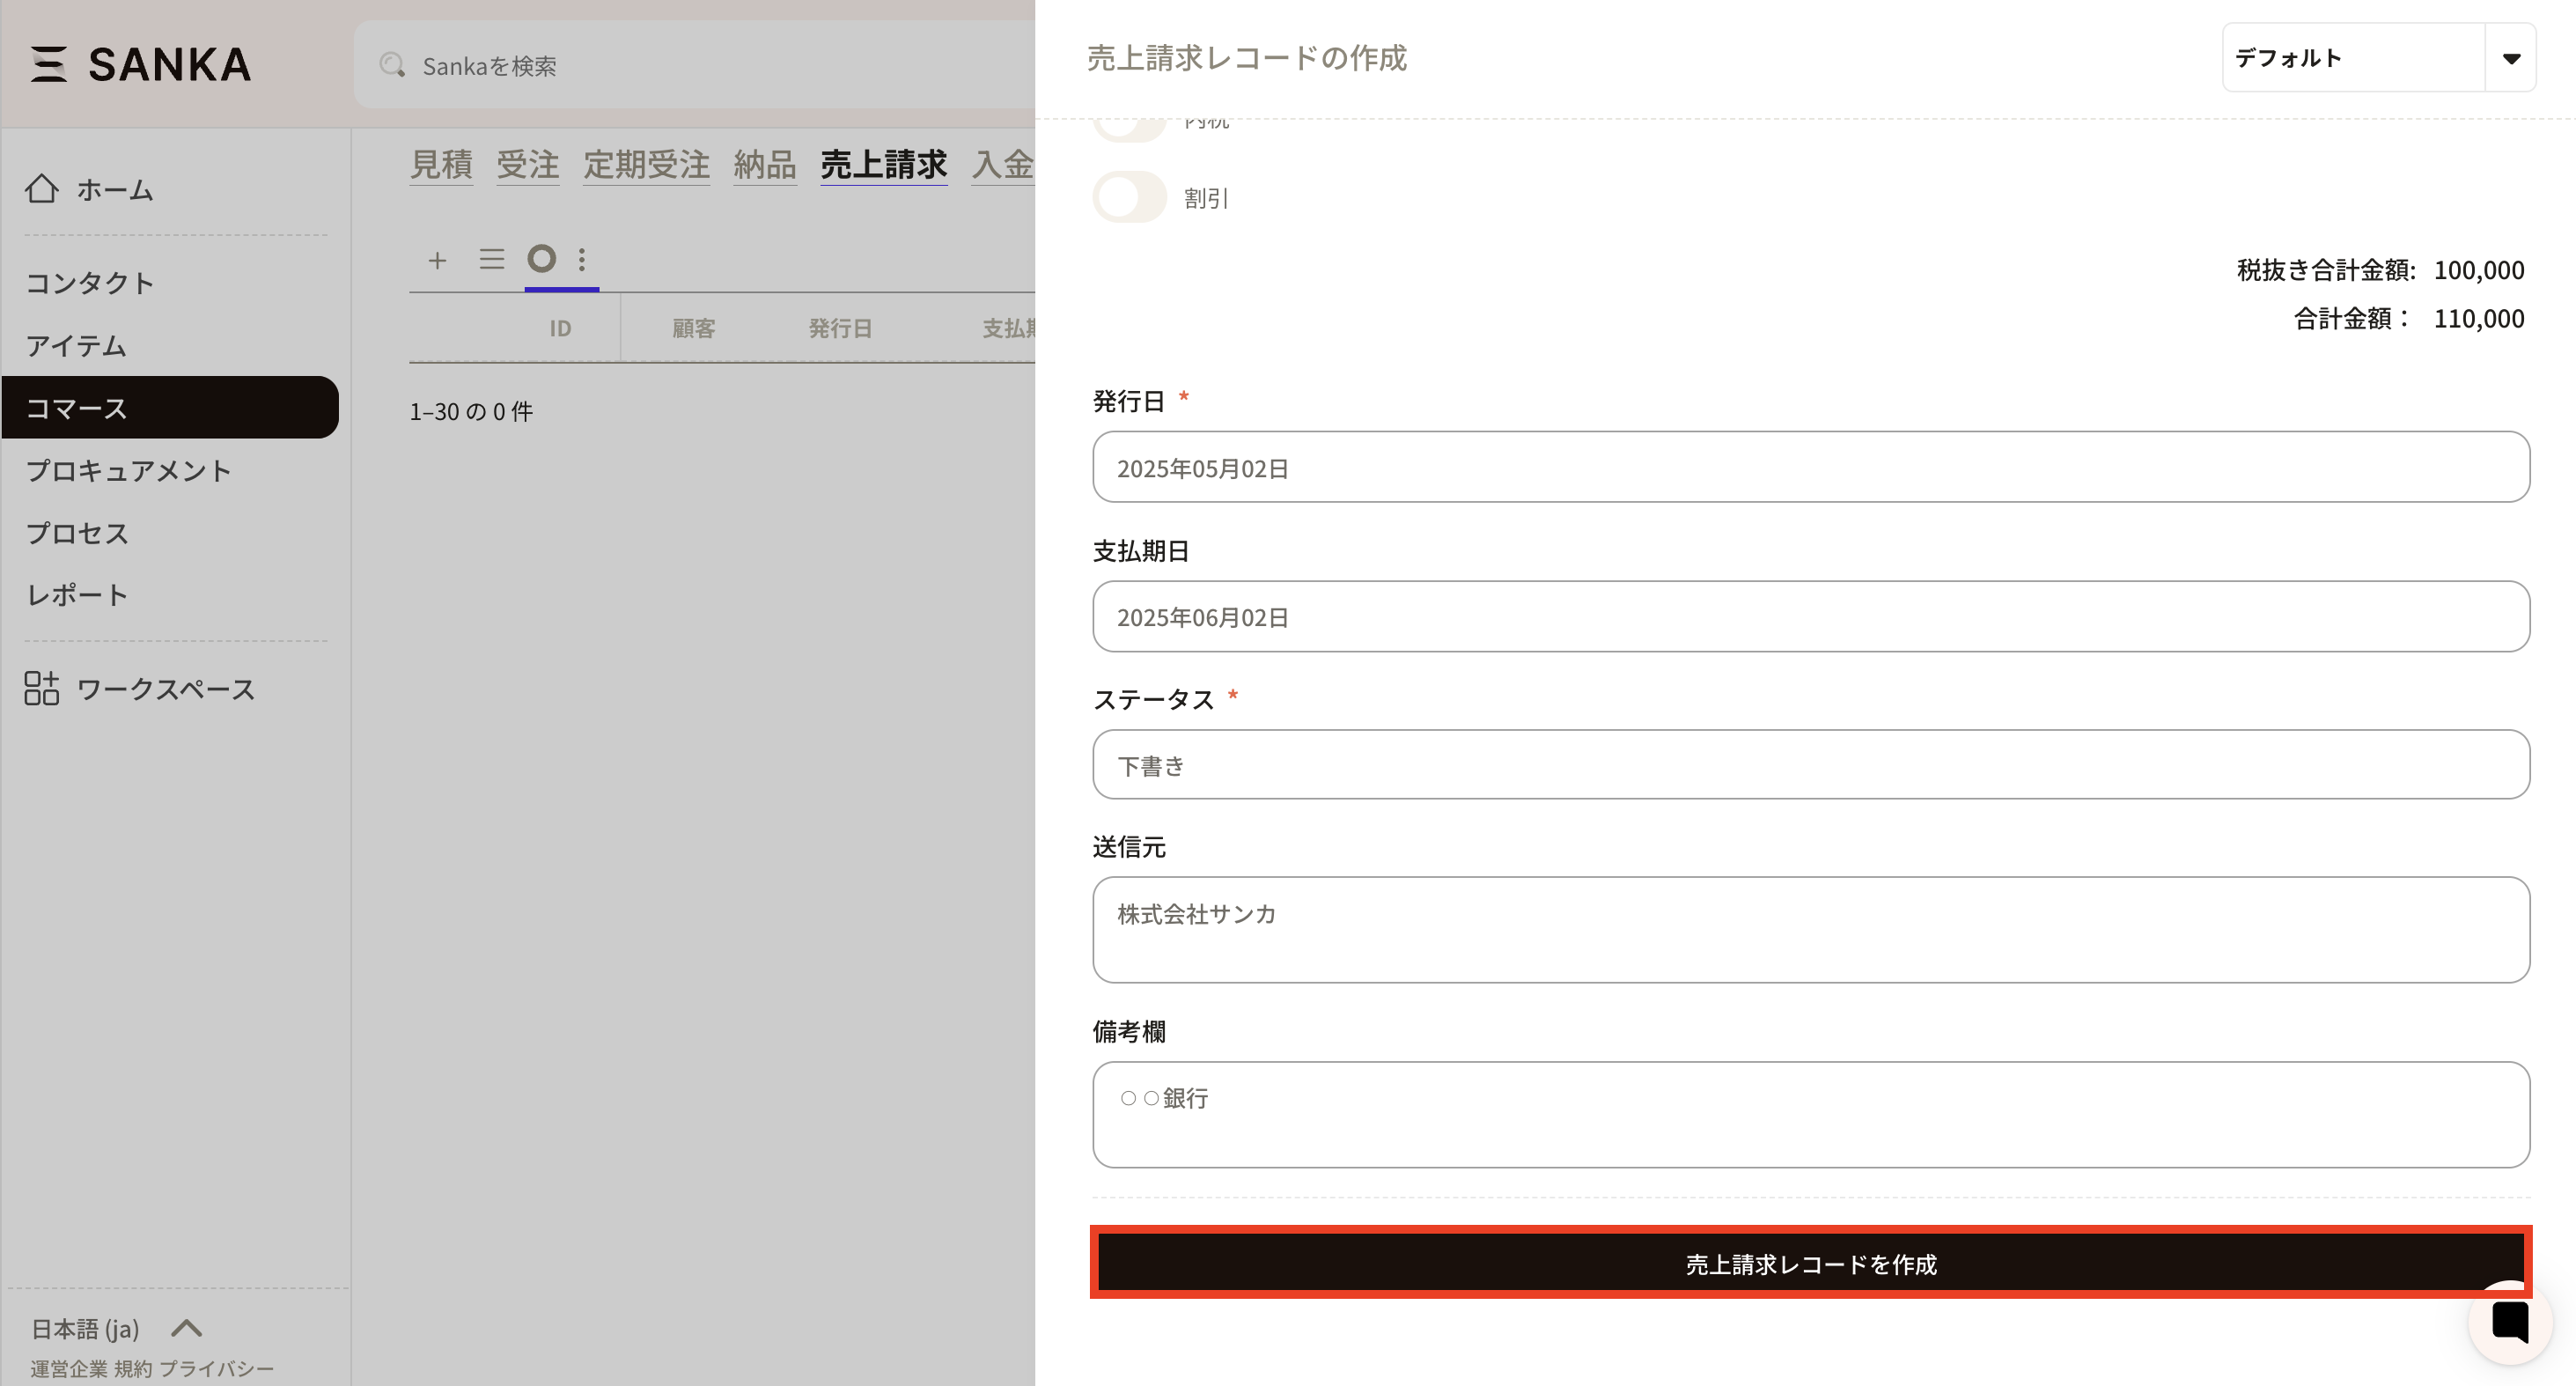
 ⑬After entering the required information, click "Create sales billing record".
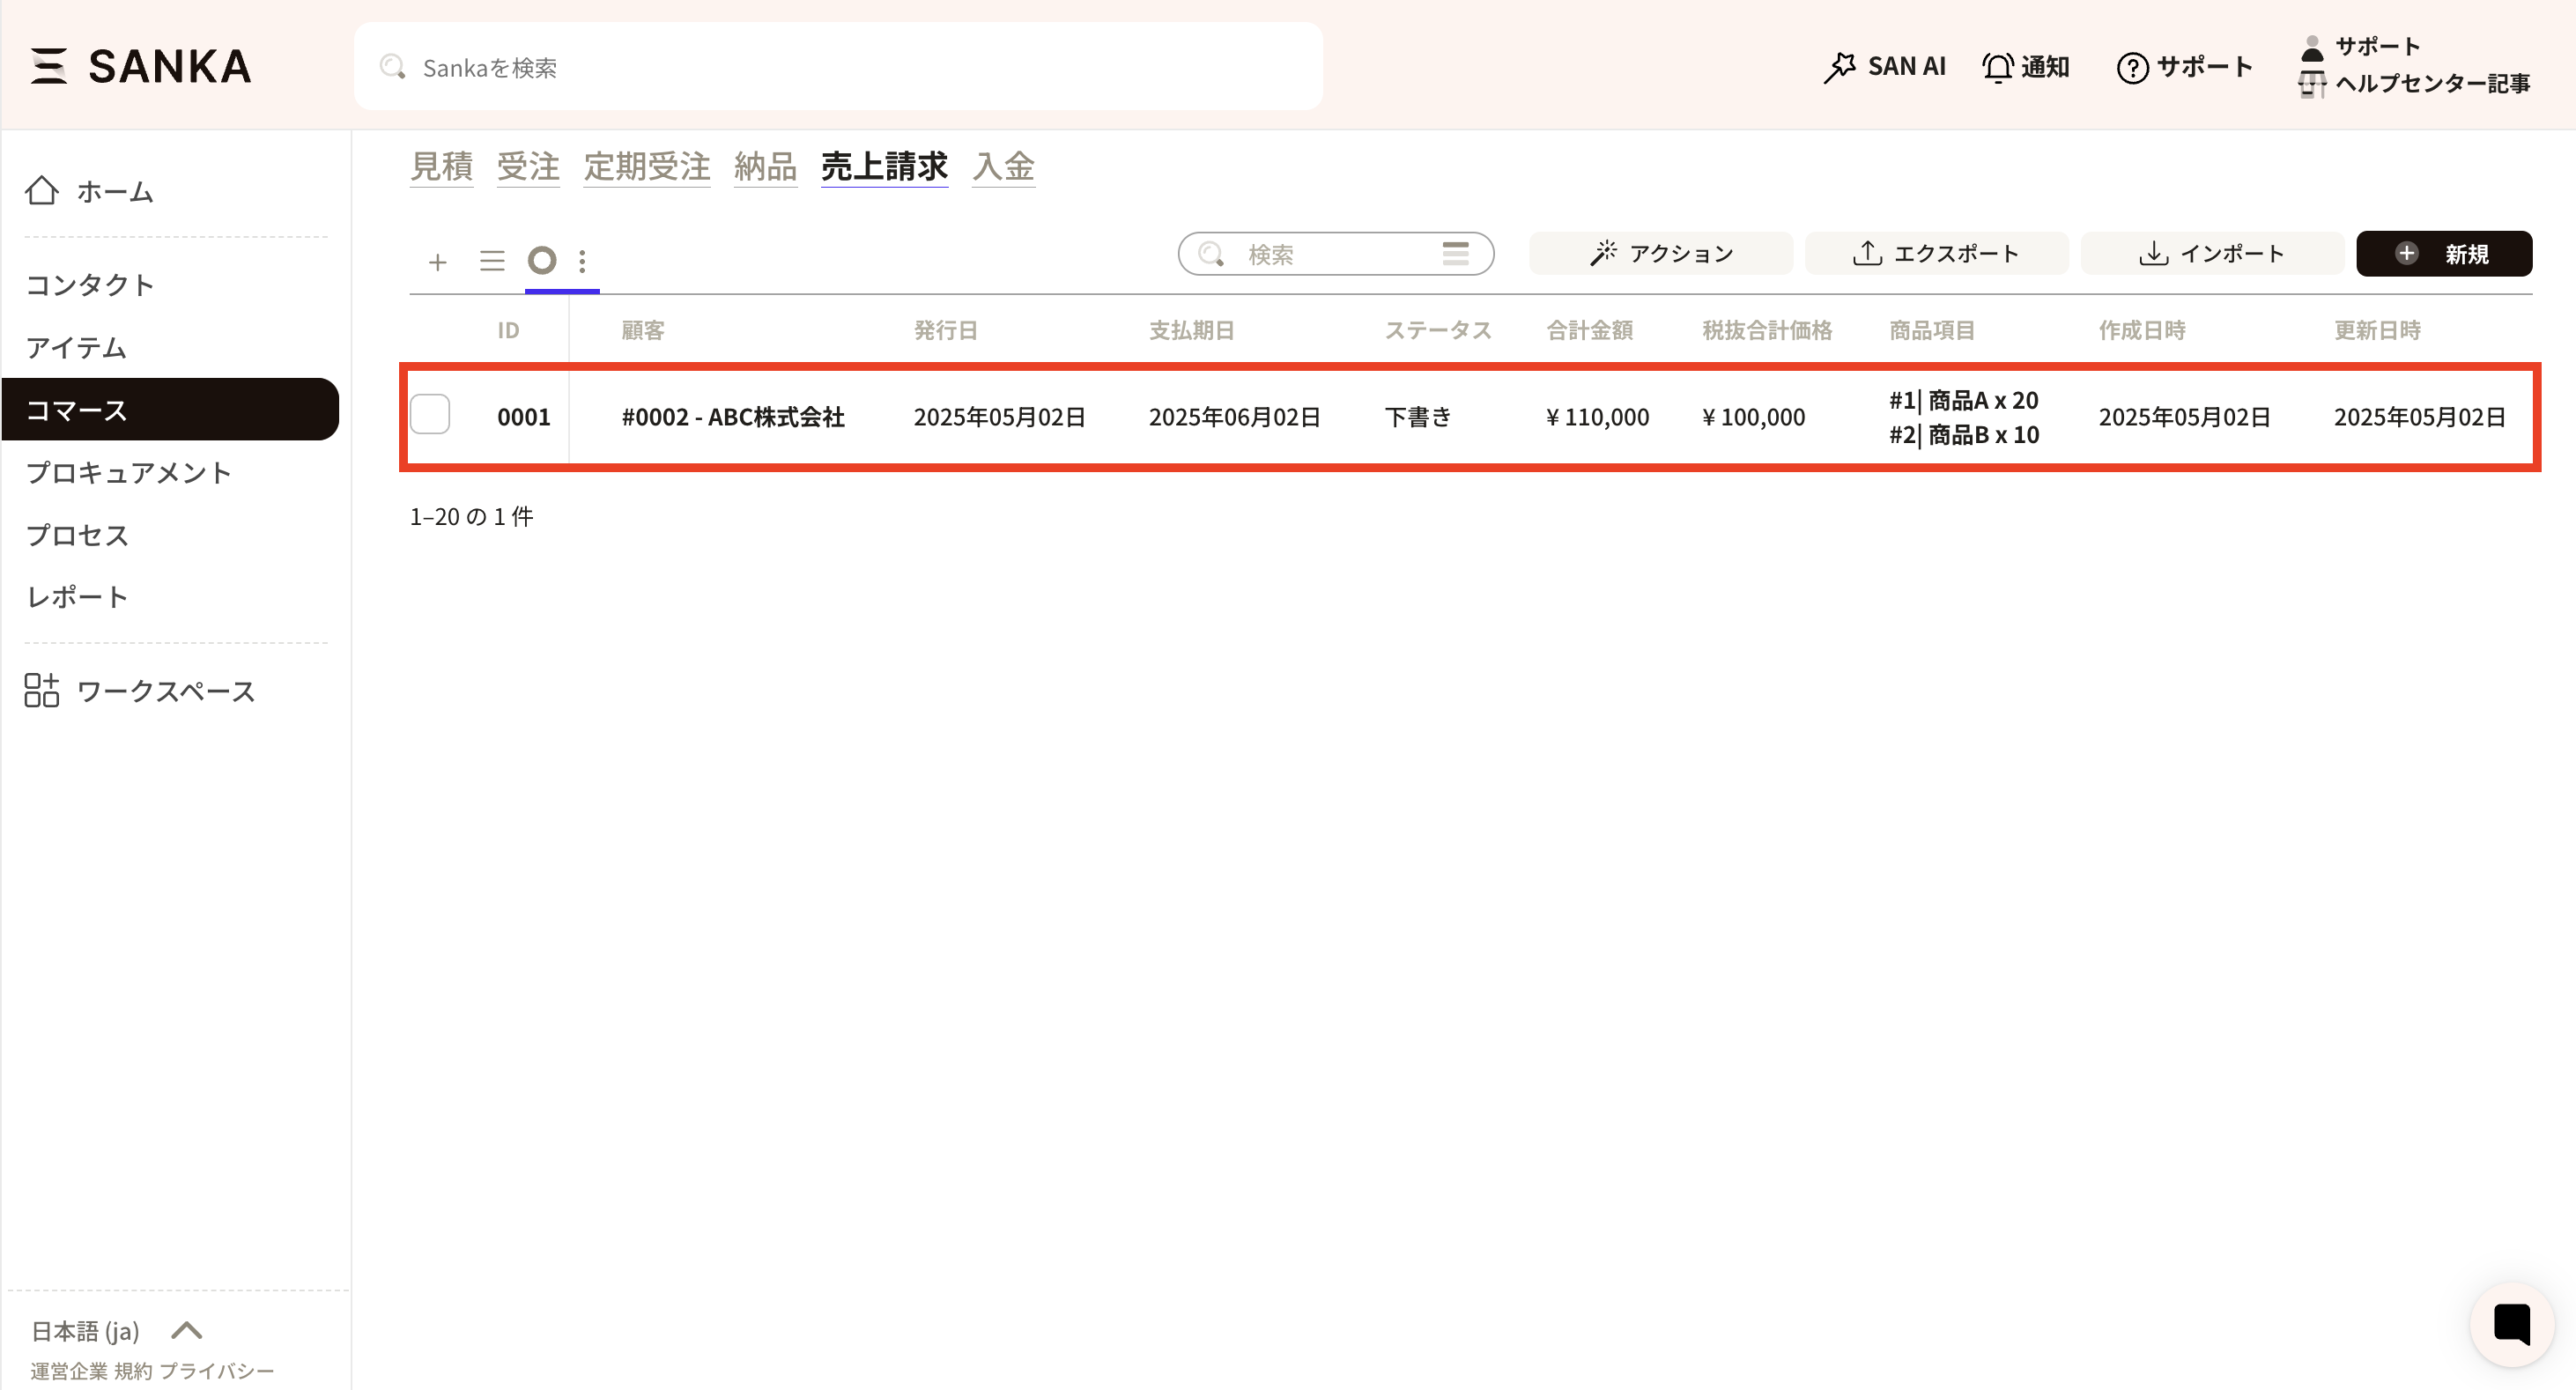
 ⑭The registered contents will be displayed on the record list screen.
The "total amount" and "total price excluding tax" will be automatically calculated.
⑭The registered contents will be displayed on the record list screen.
The "total amount" and "total price excluding tax" will be automatically calculated.
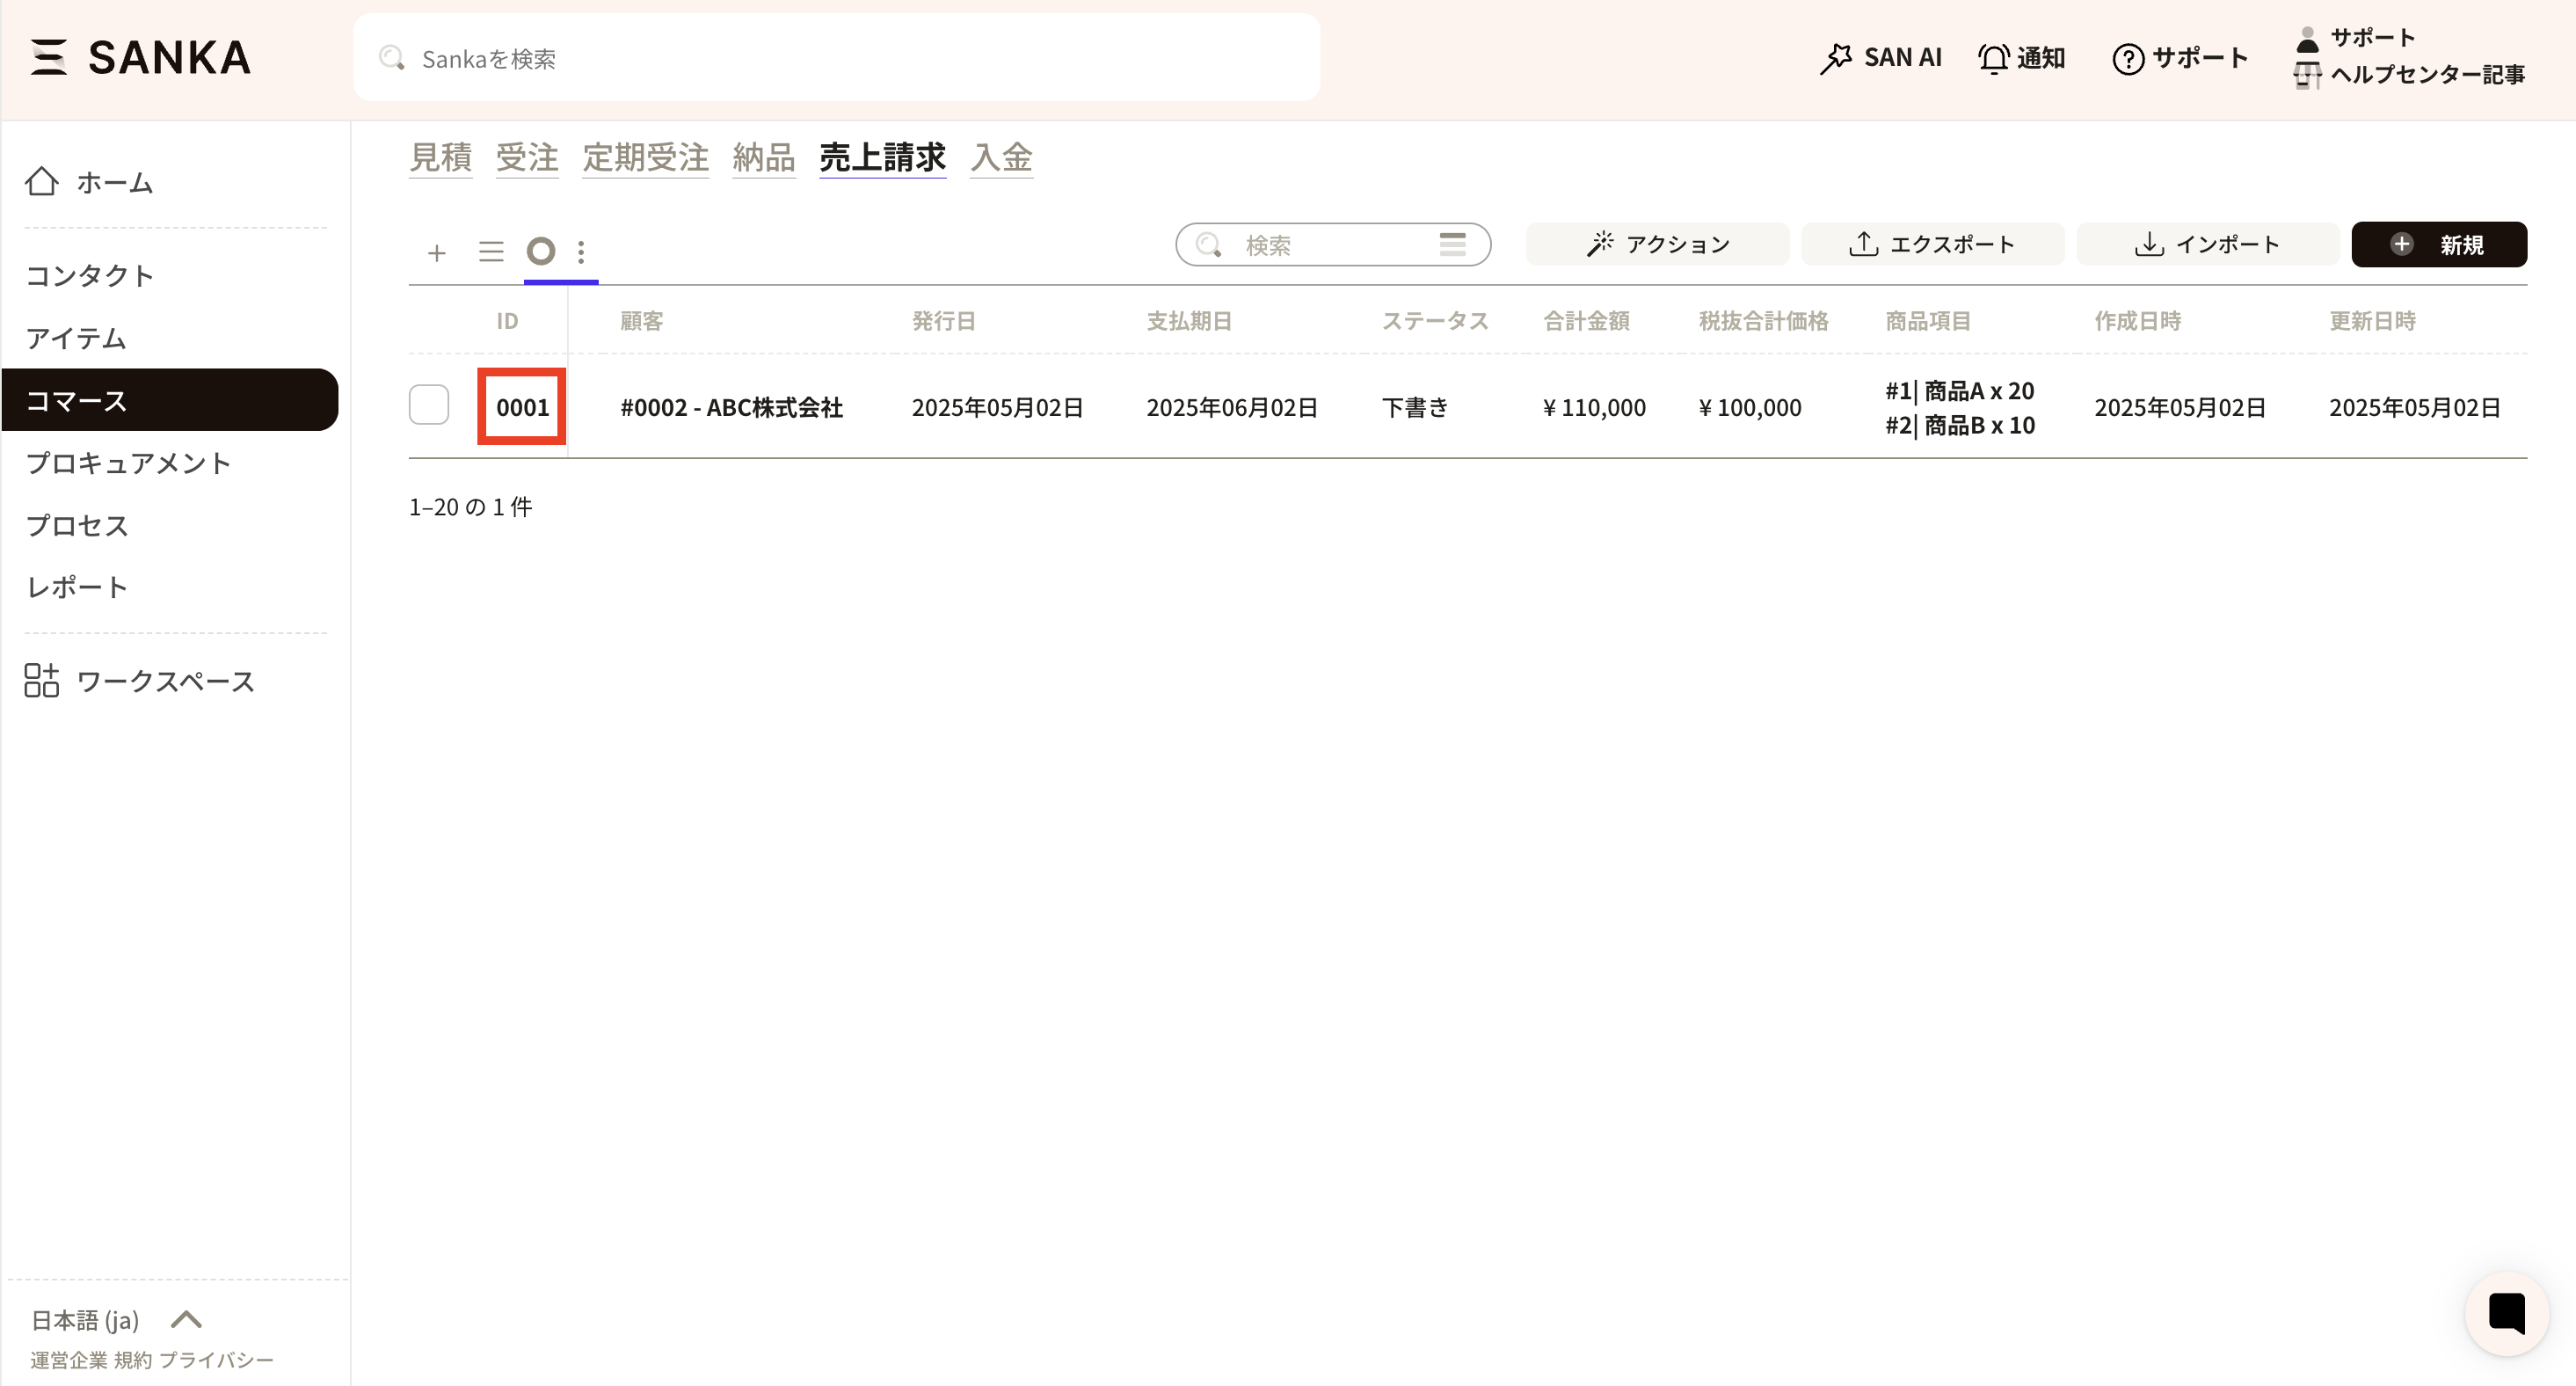
 ⑮Click the ID of the registered record.
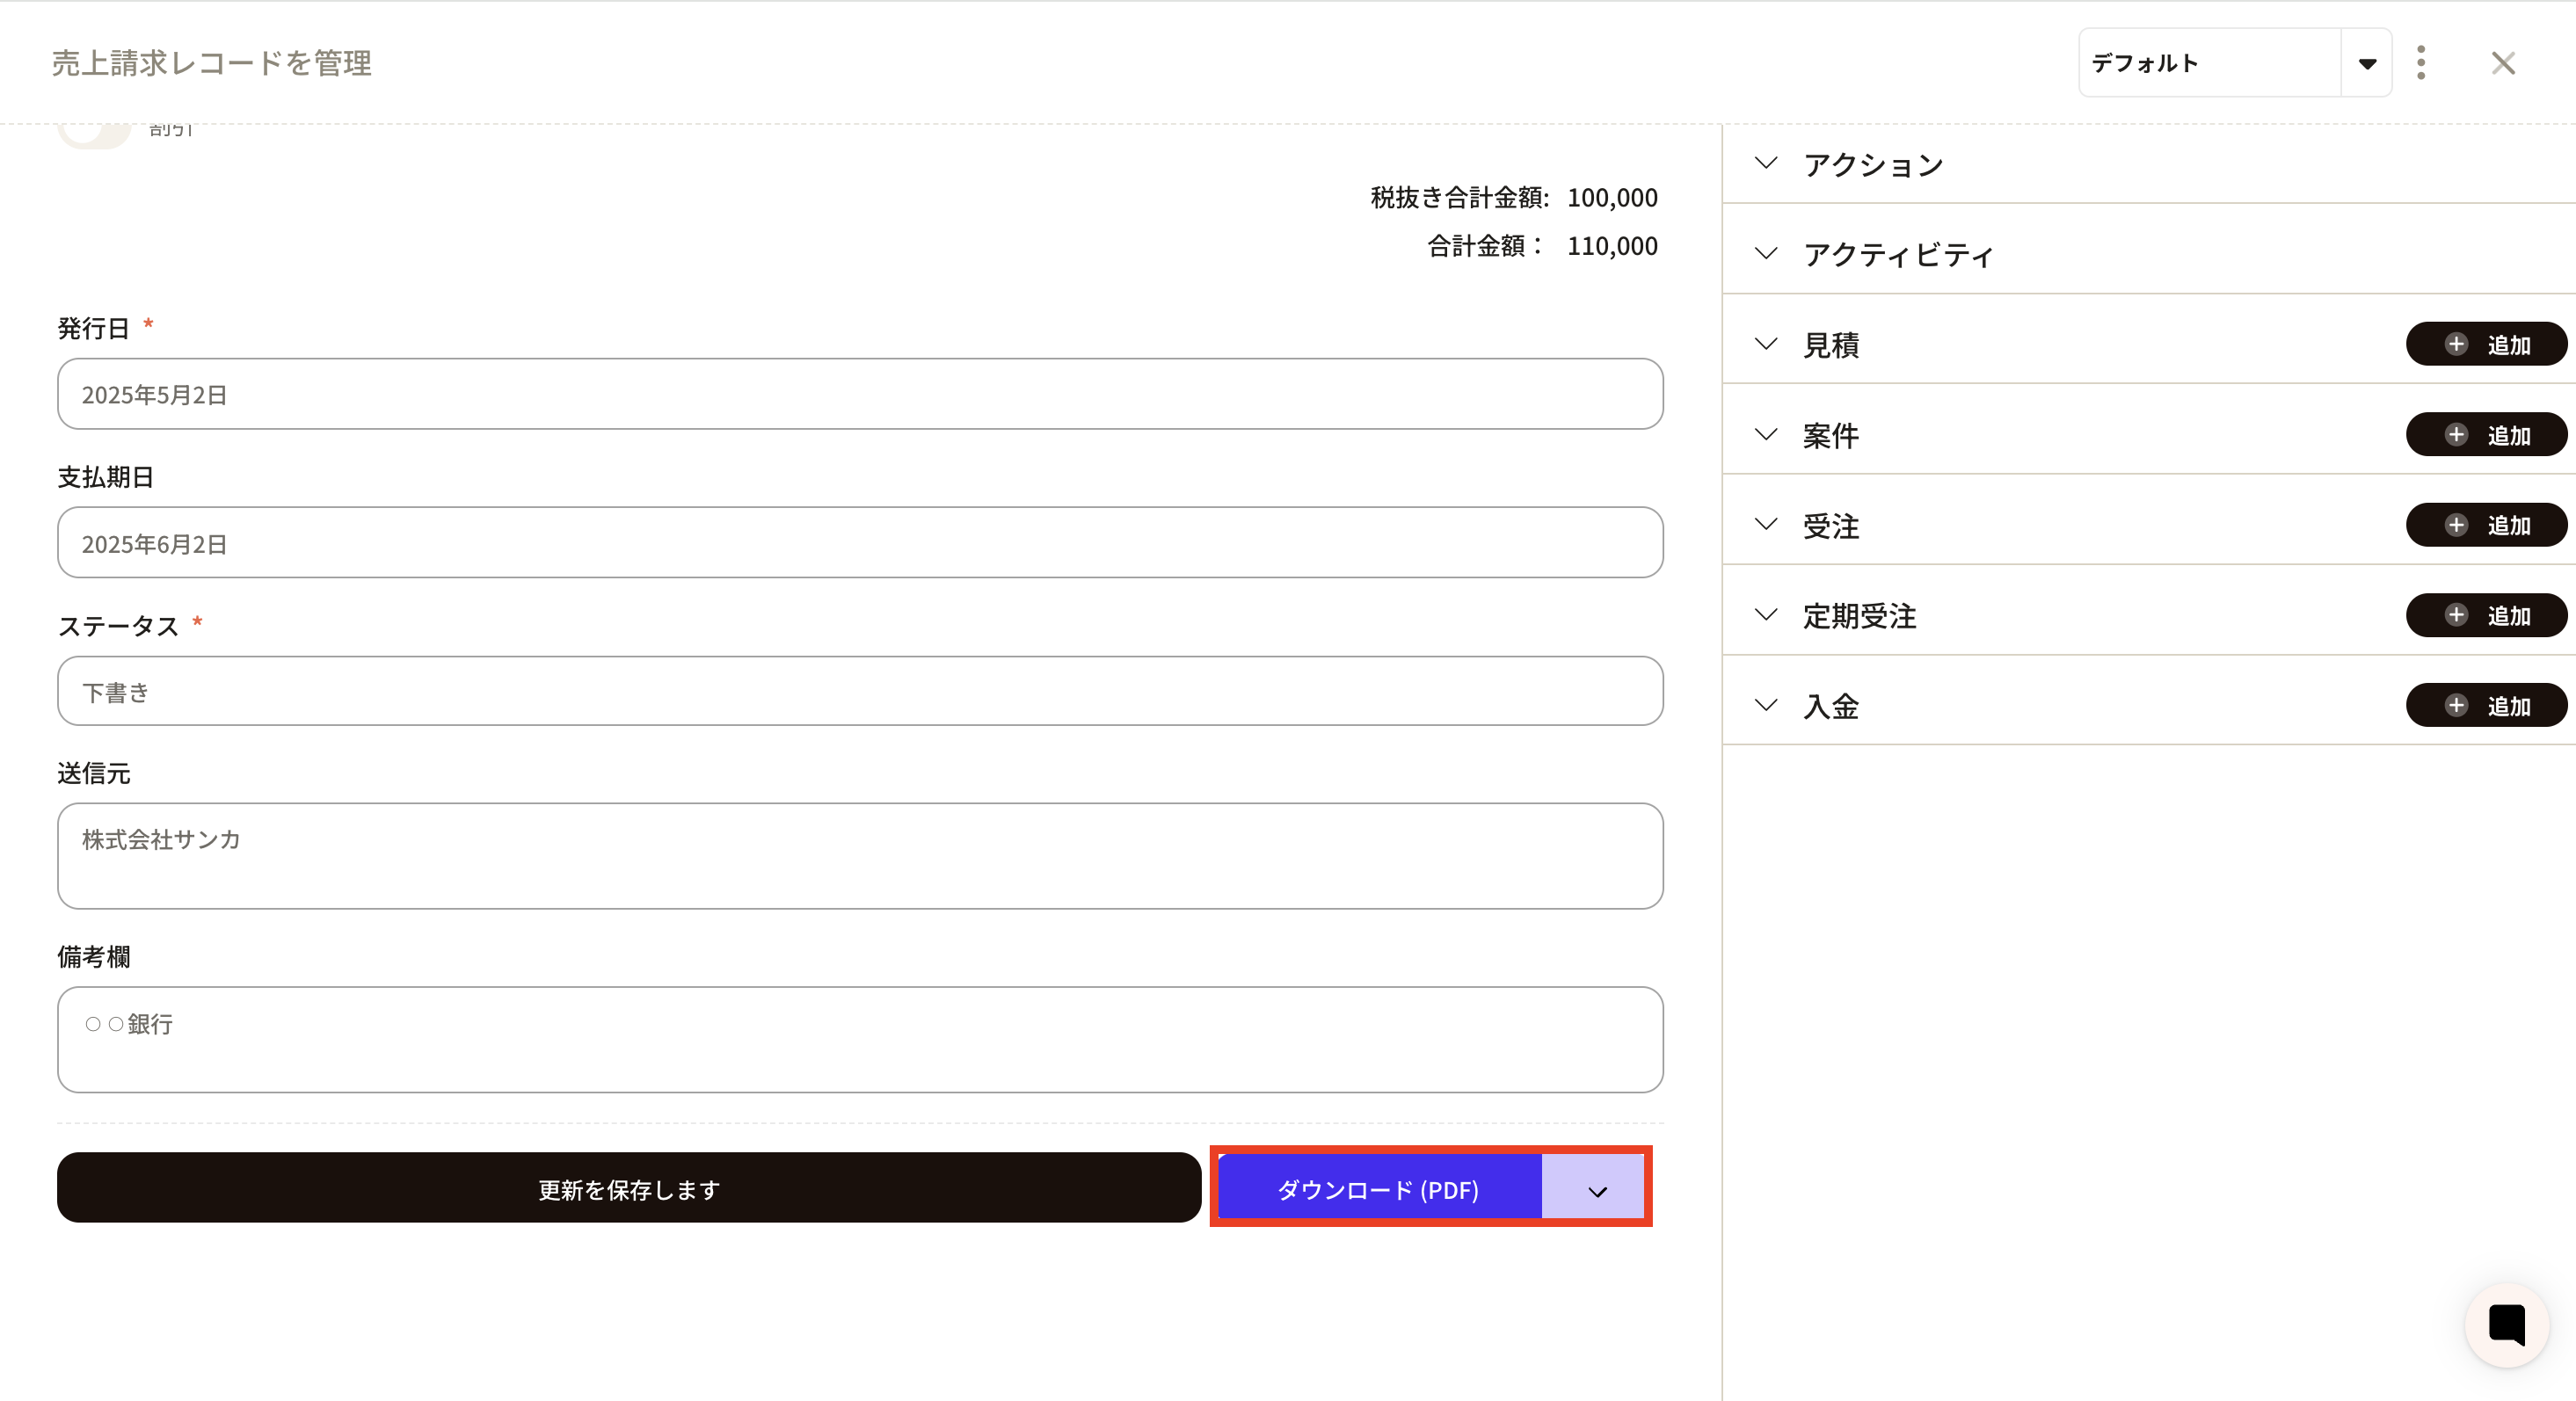
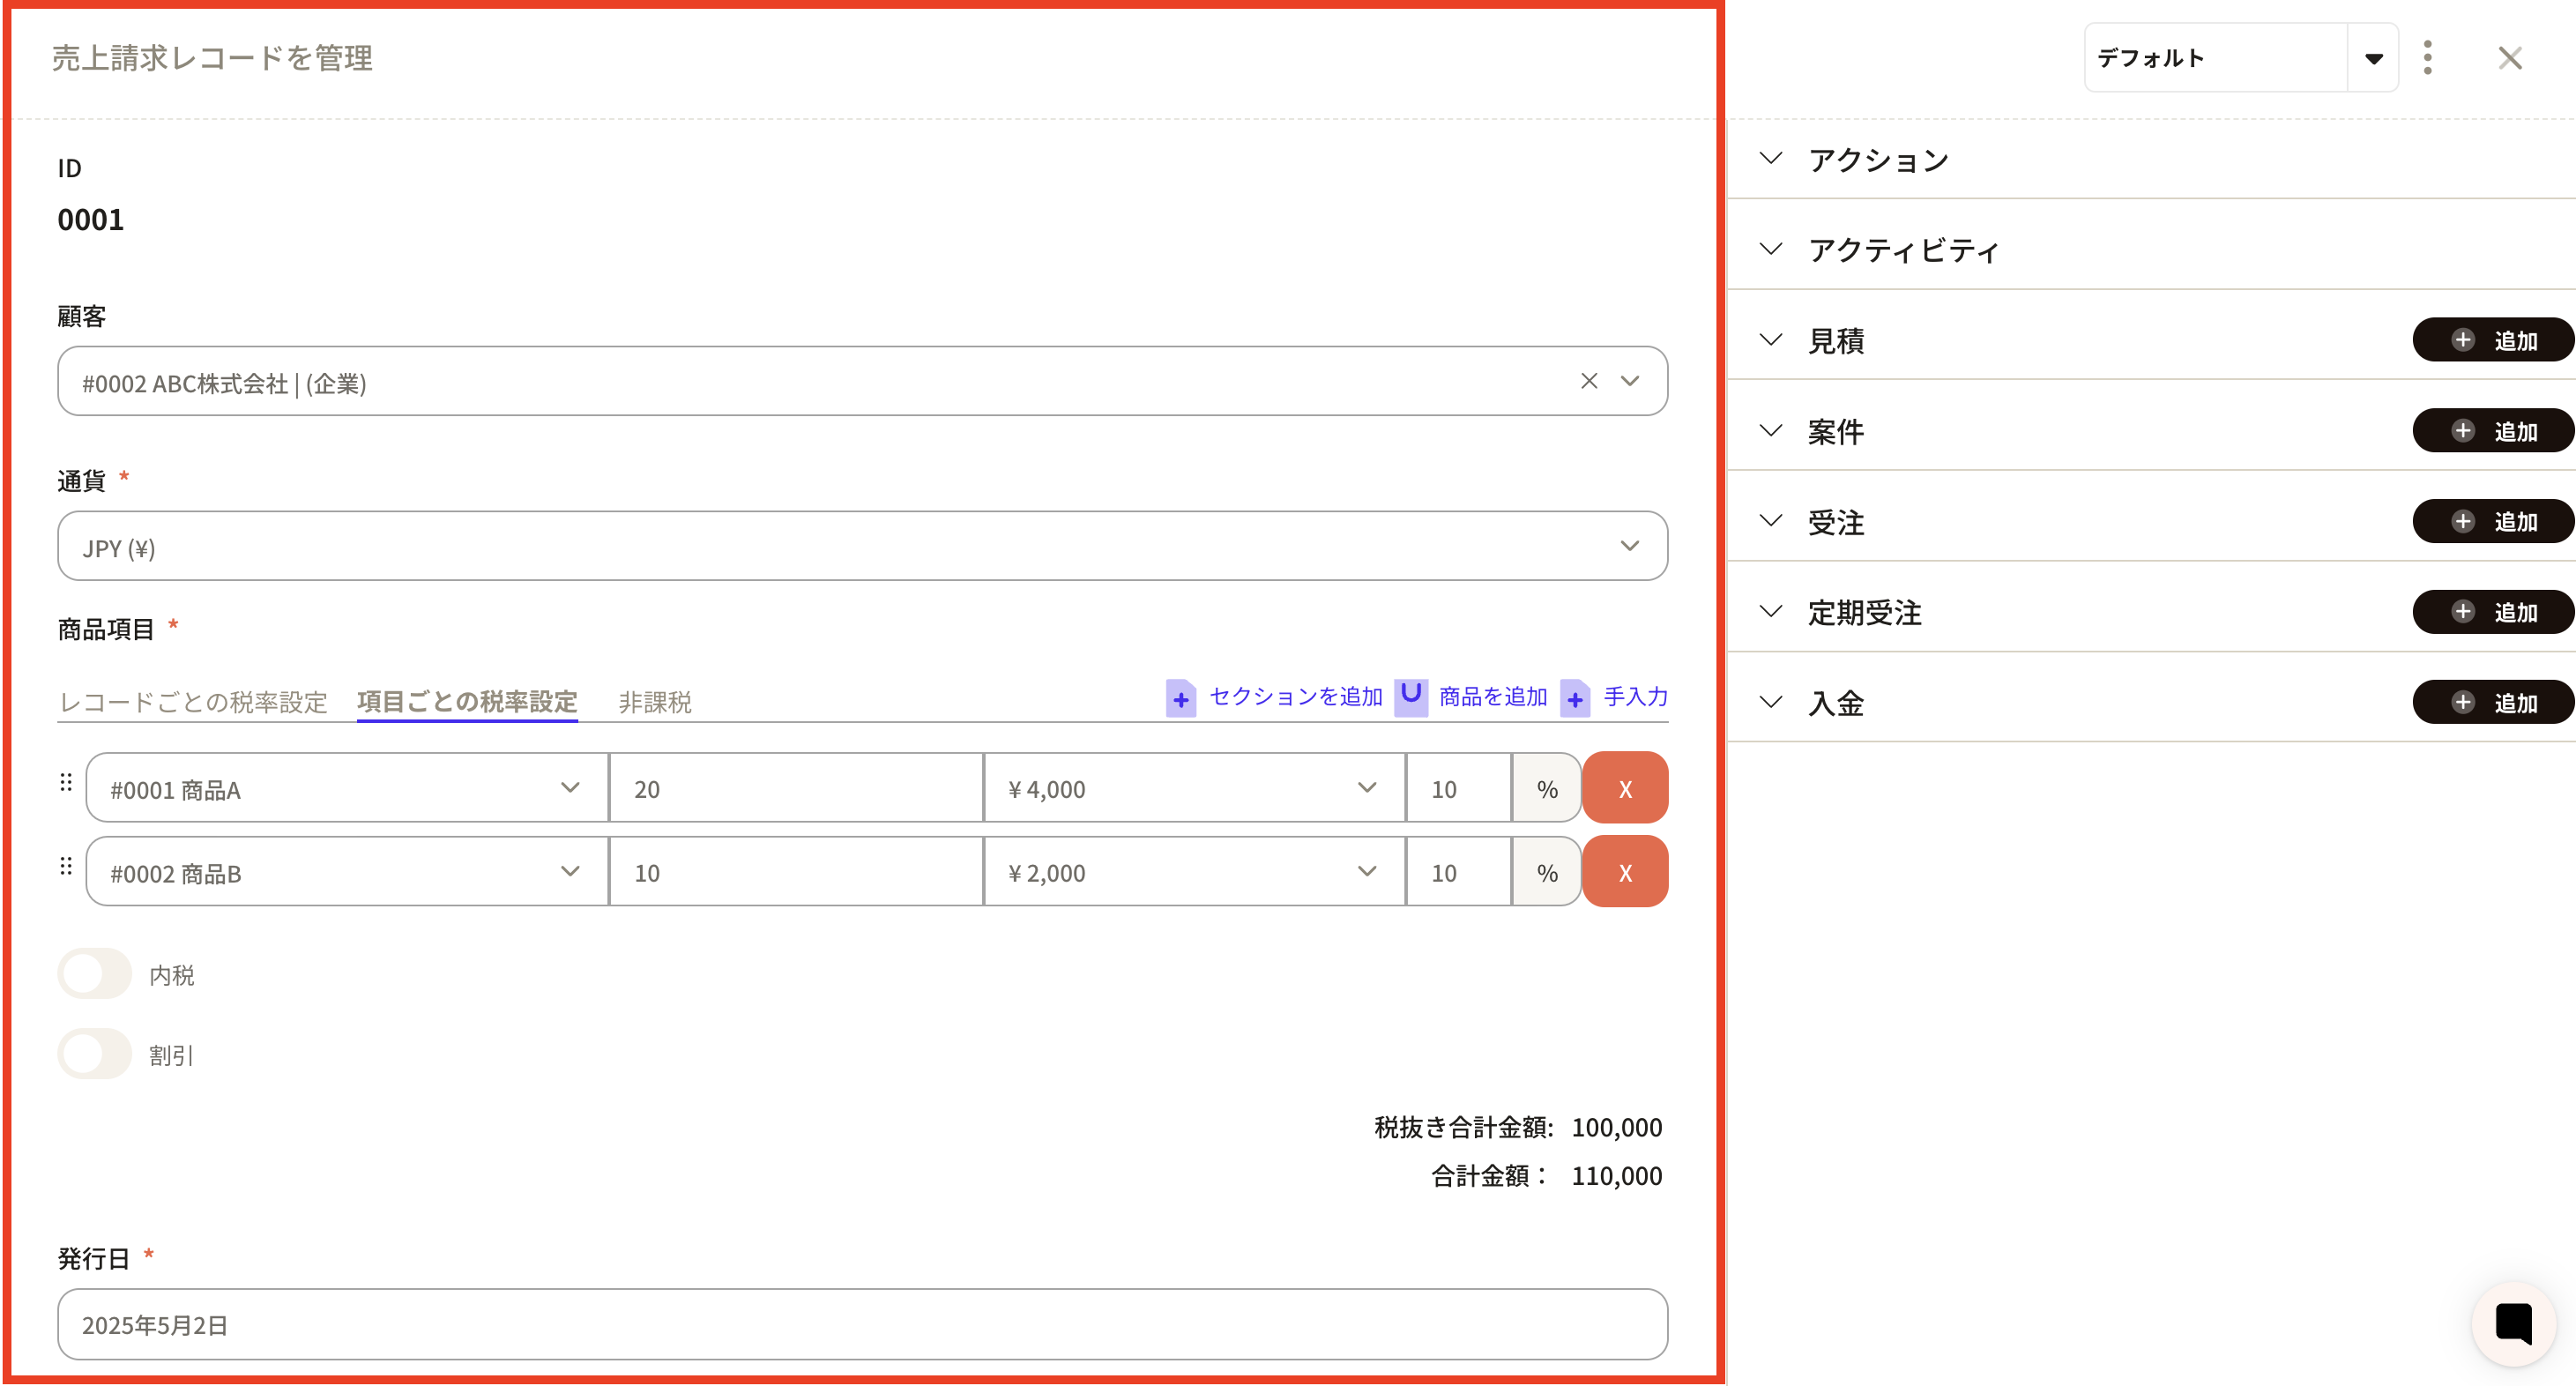
 ⑯The Manage Sales Invoice Records screen will appear, so you can download the sales invoice by clicking Download PDF at the bottom.
How to modify registered information
① Select the “Sales Billing Record” object. Click on the record ID you want to modify.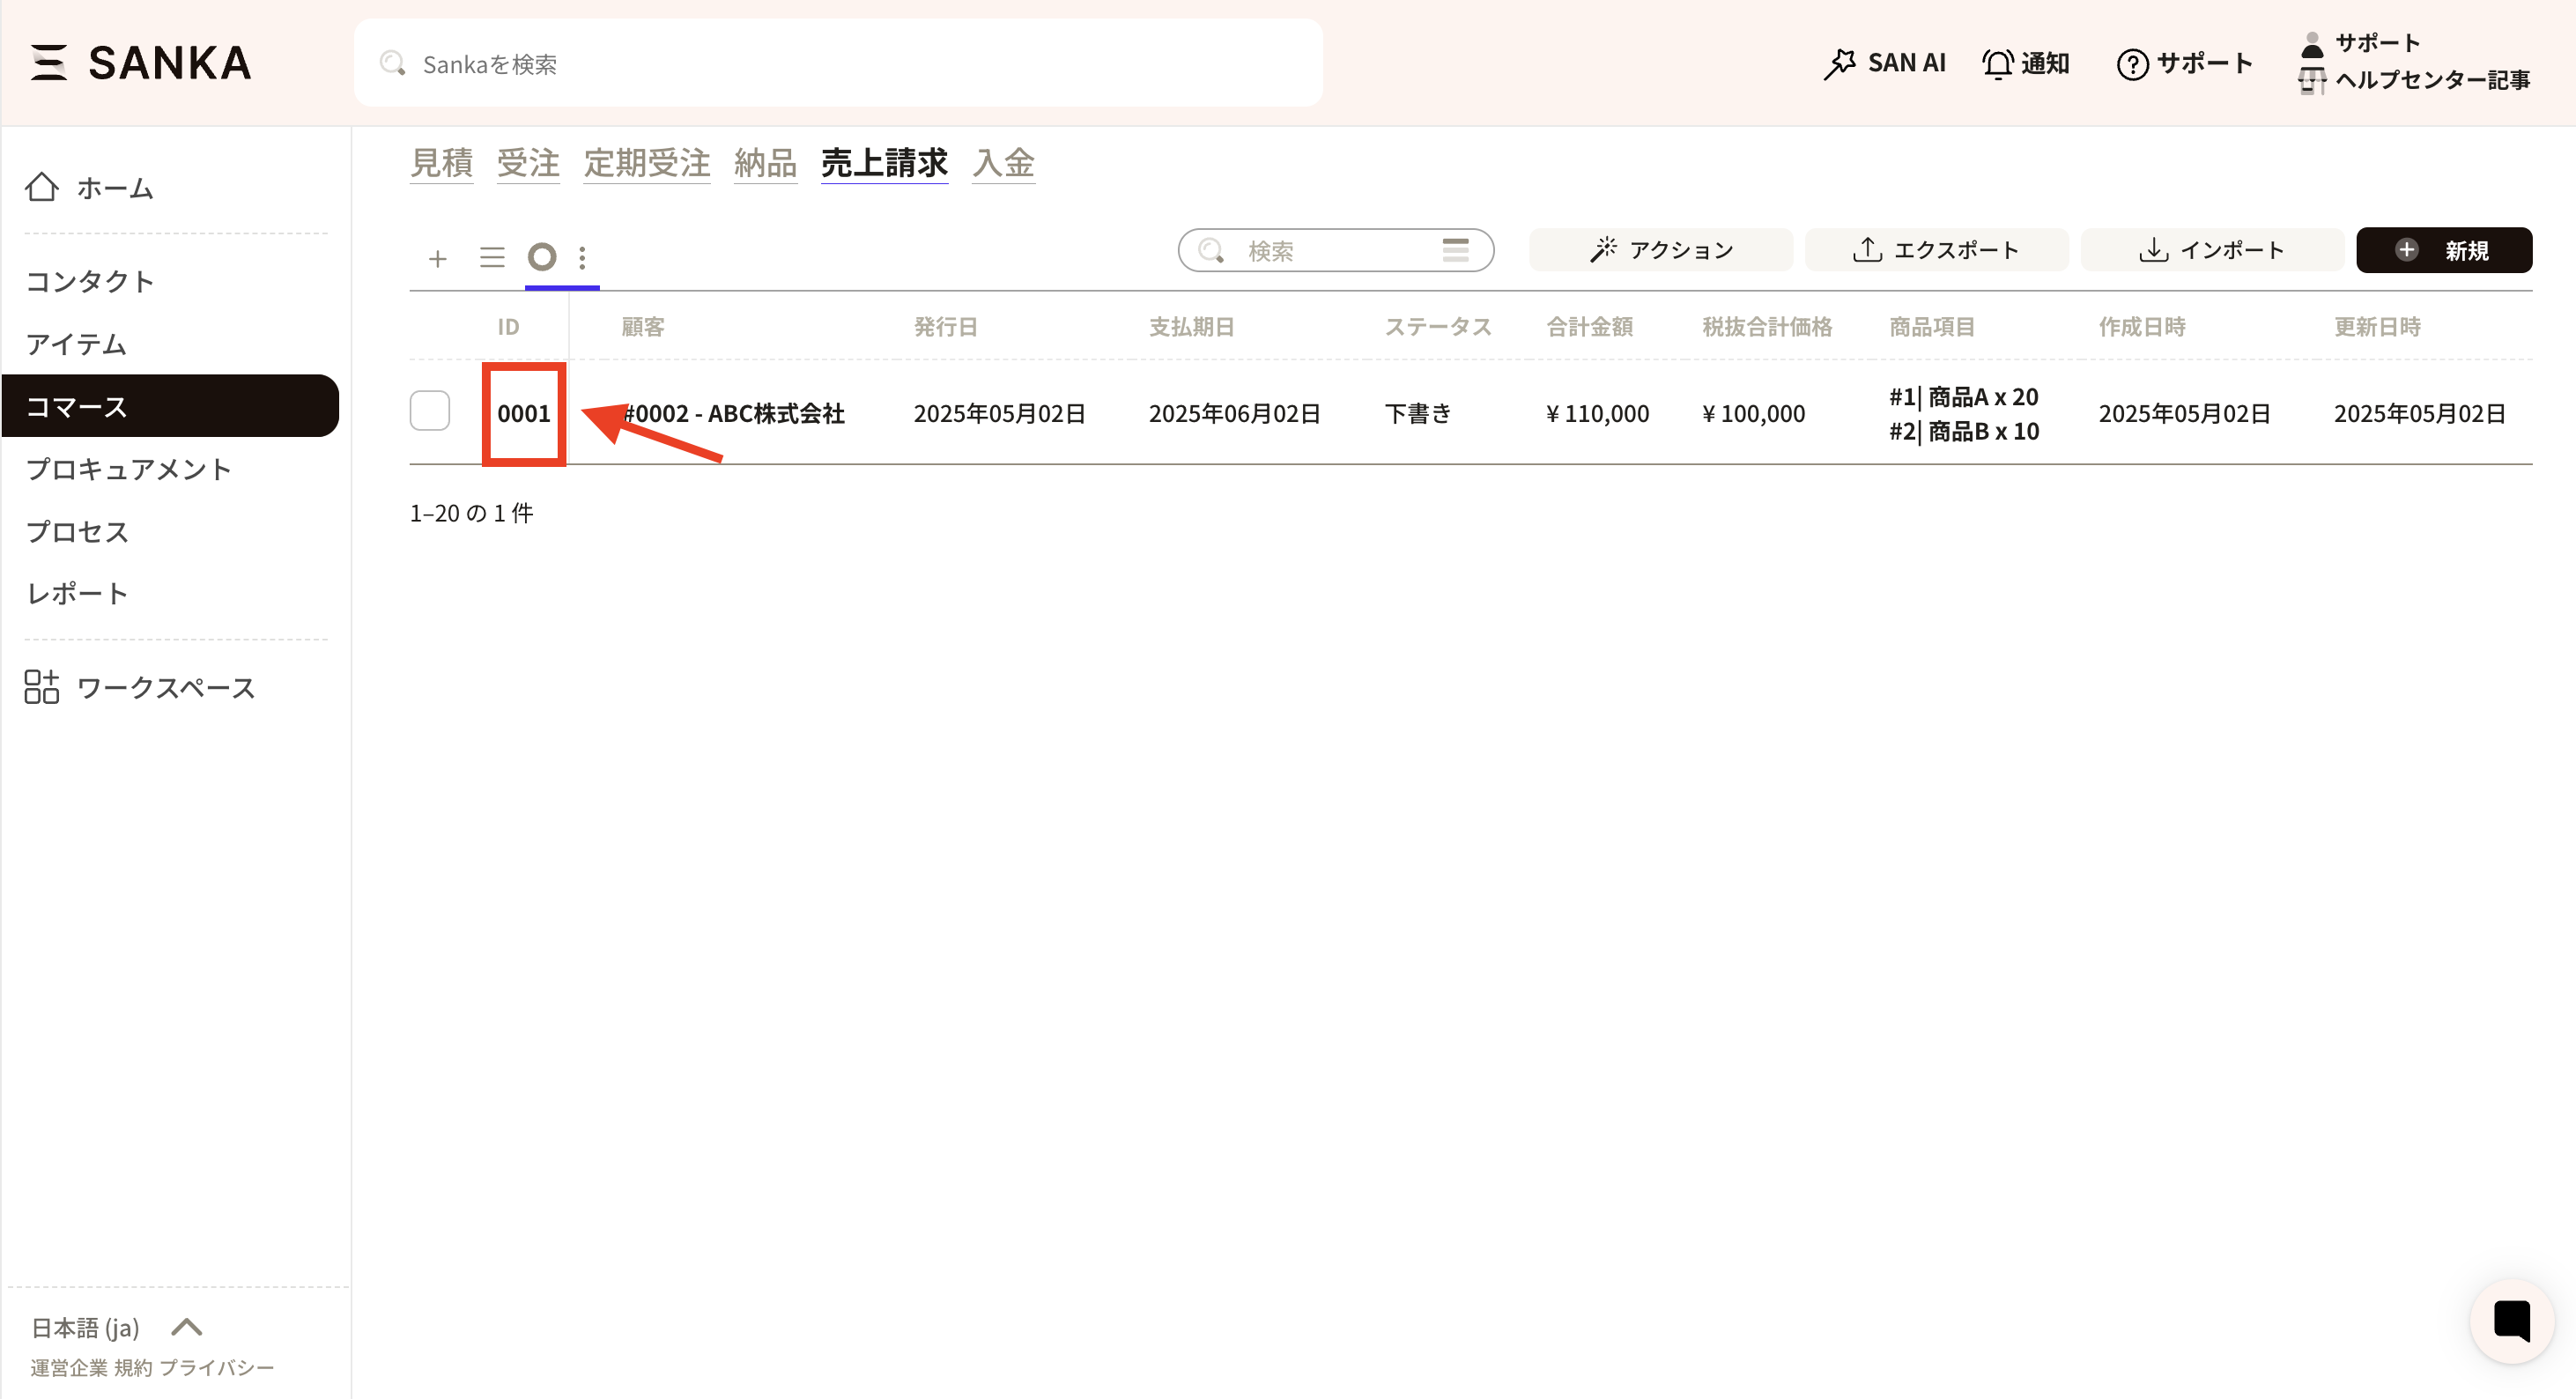 ②Click on "ID" and the "Manage sales billing records" screen will be displayed, so please correct the information.
Finally, press the "Save update" button to register.
②Click on "ID" and the "Manage sales billing records" screen will be displayed, so please correct the information.
Finally, press the "Save update" button to register.
How to archive sales invoice information
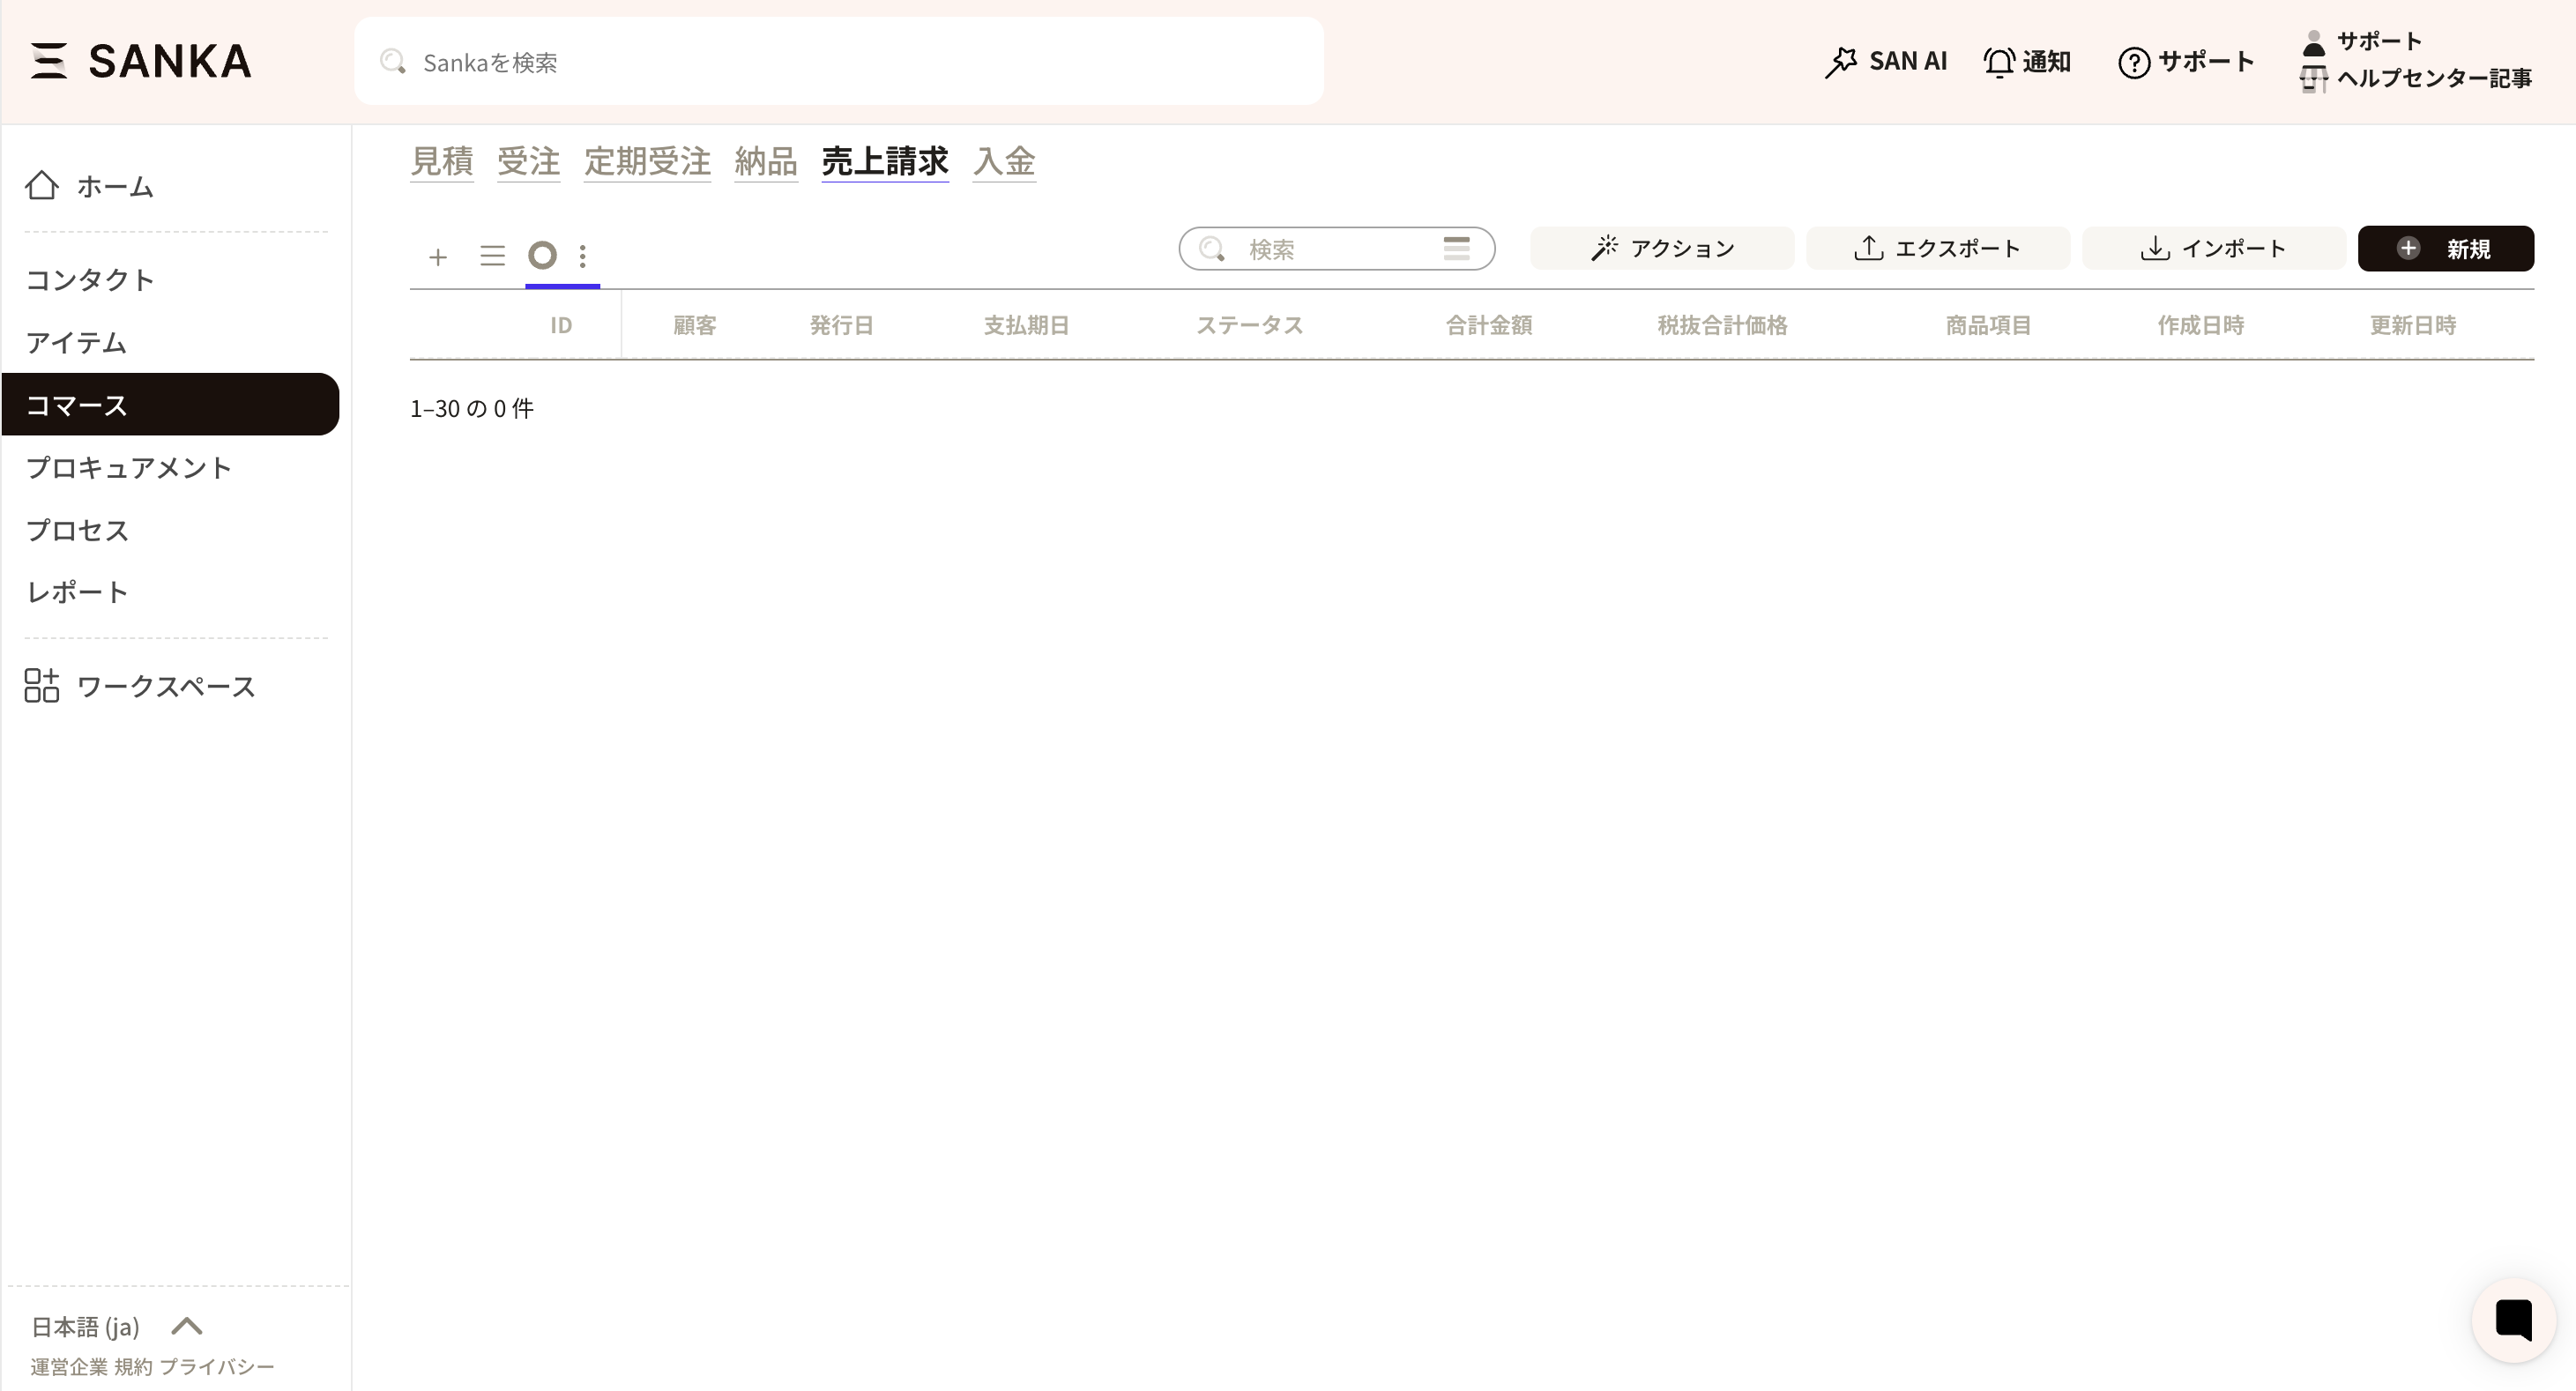
By using the archive function, you can hide registered sales invoice information from the table. ①Click the box of the sales invoice you want to archive and select "Archive".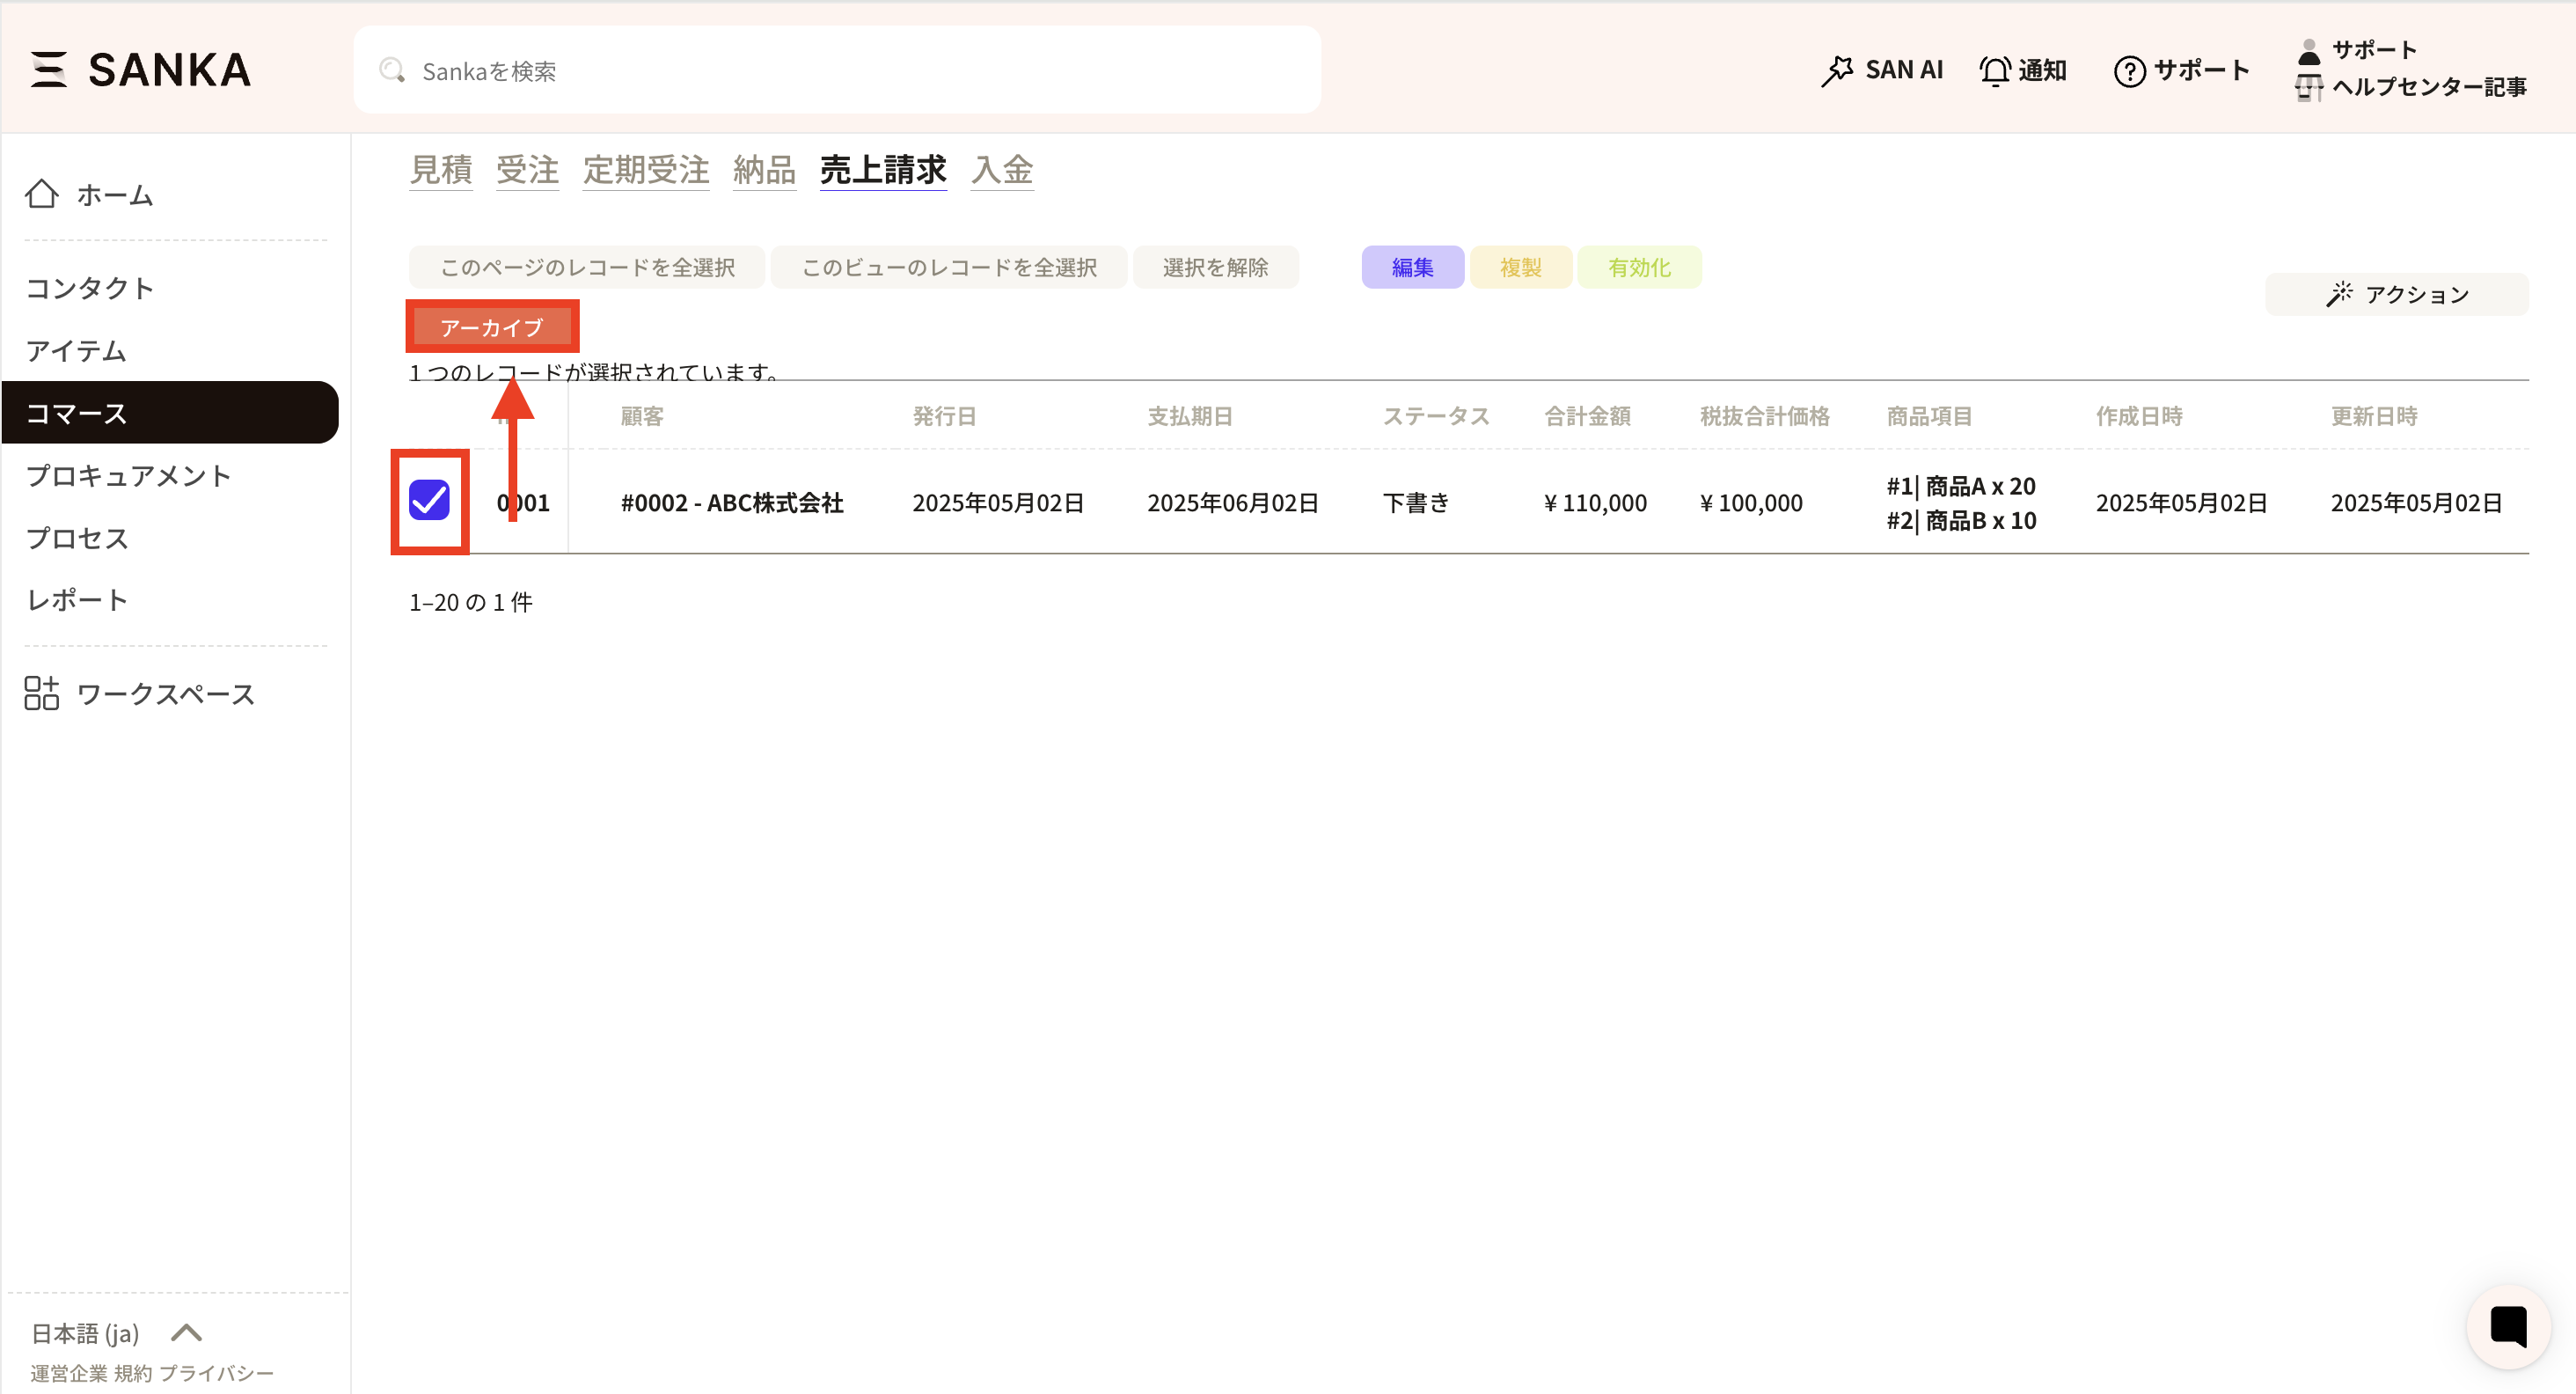 ② Archived records will no longer be displayed.
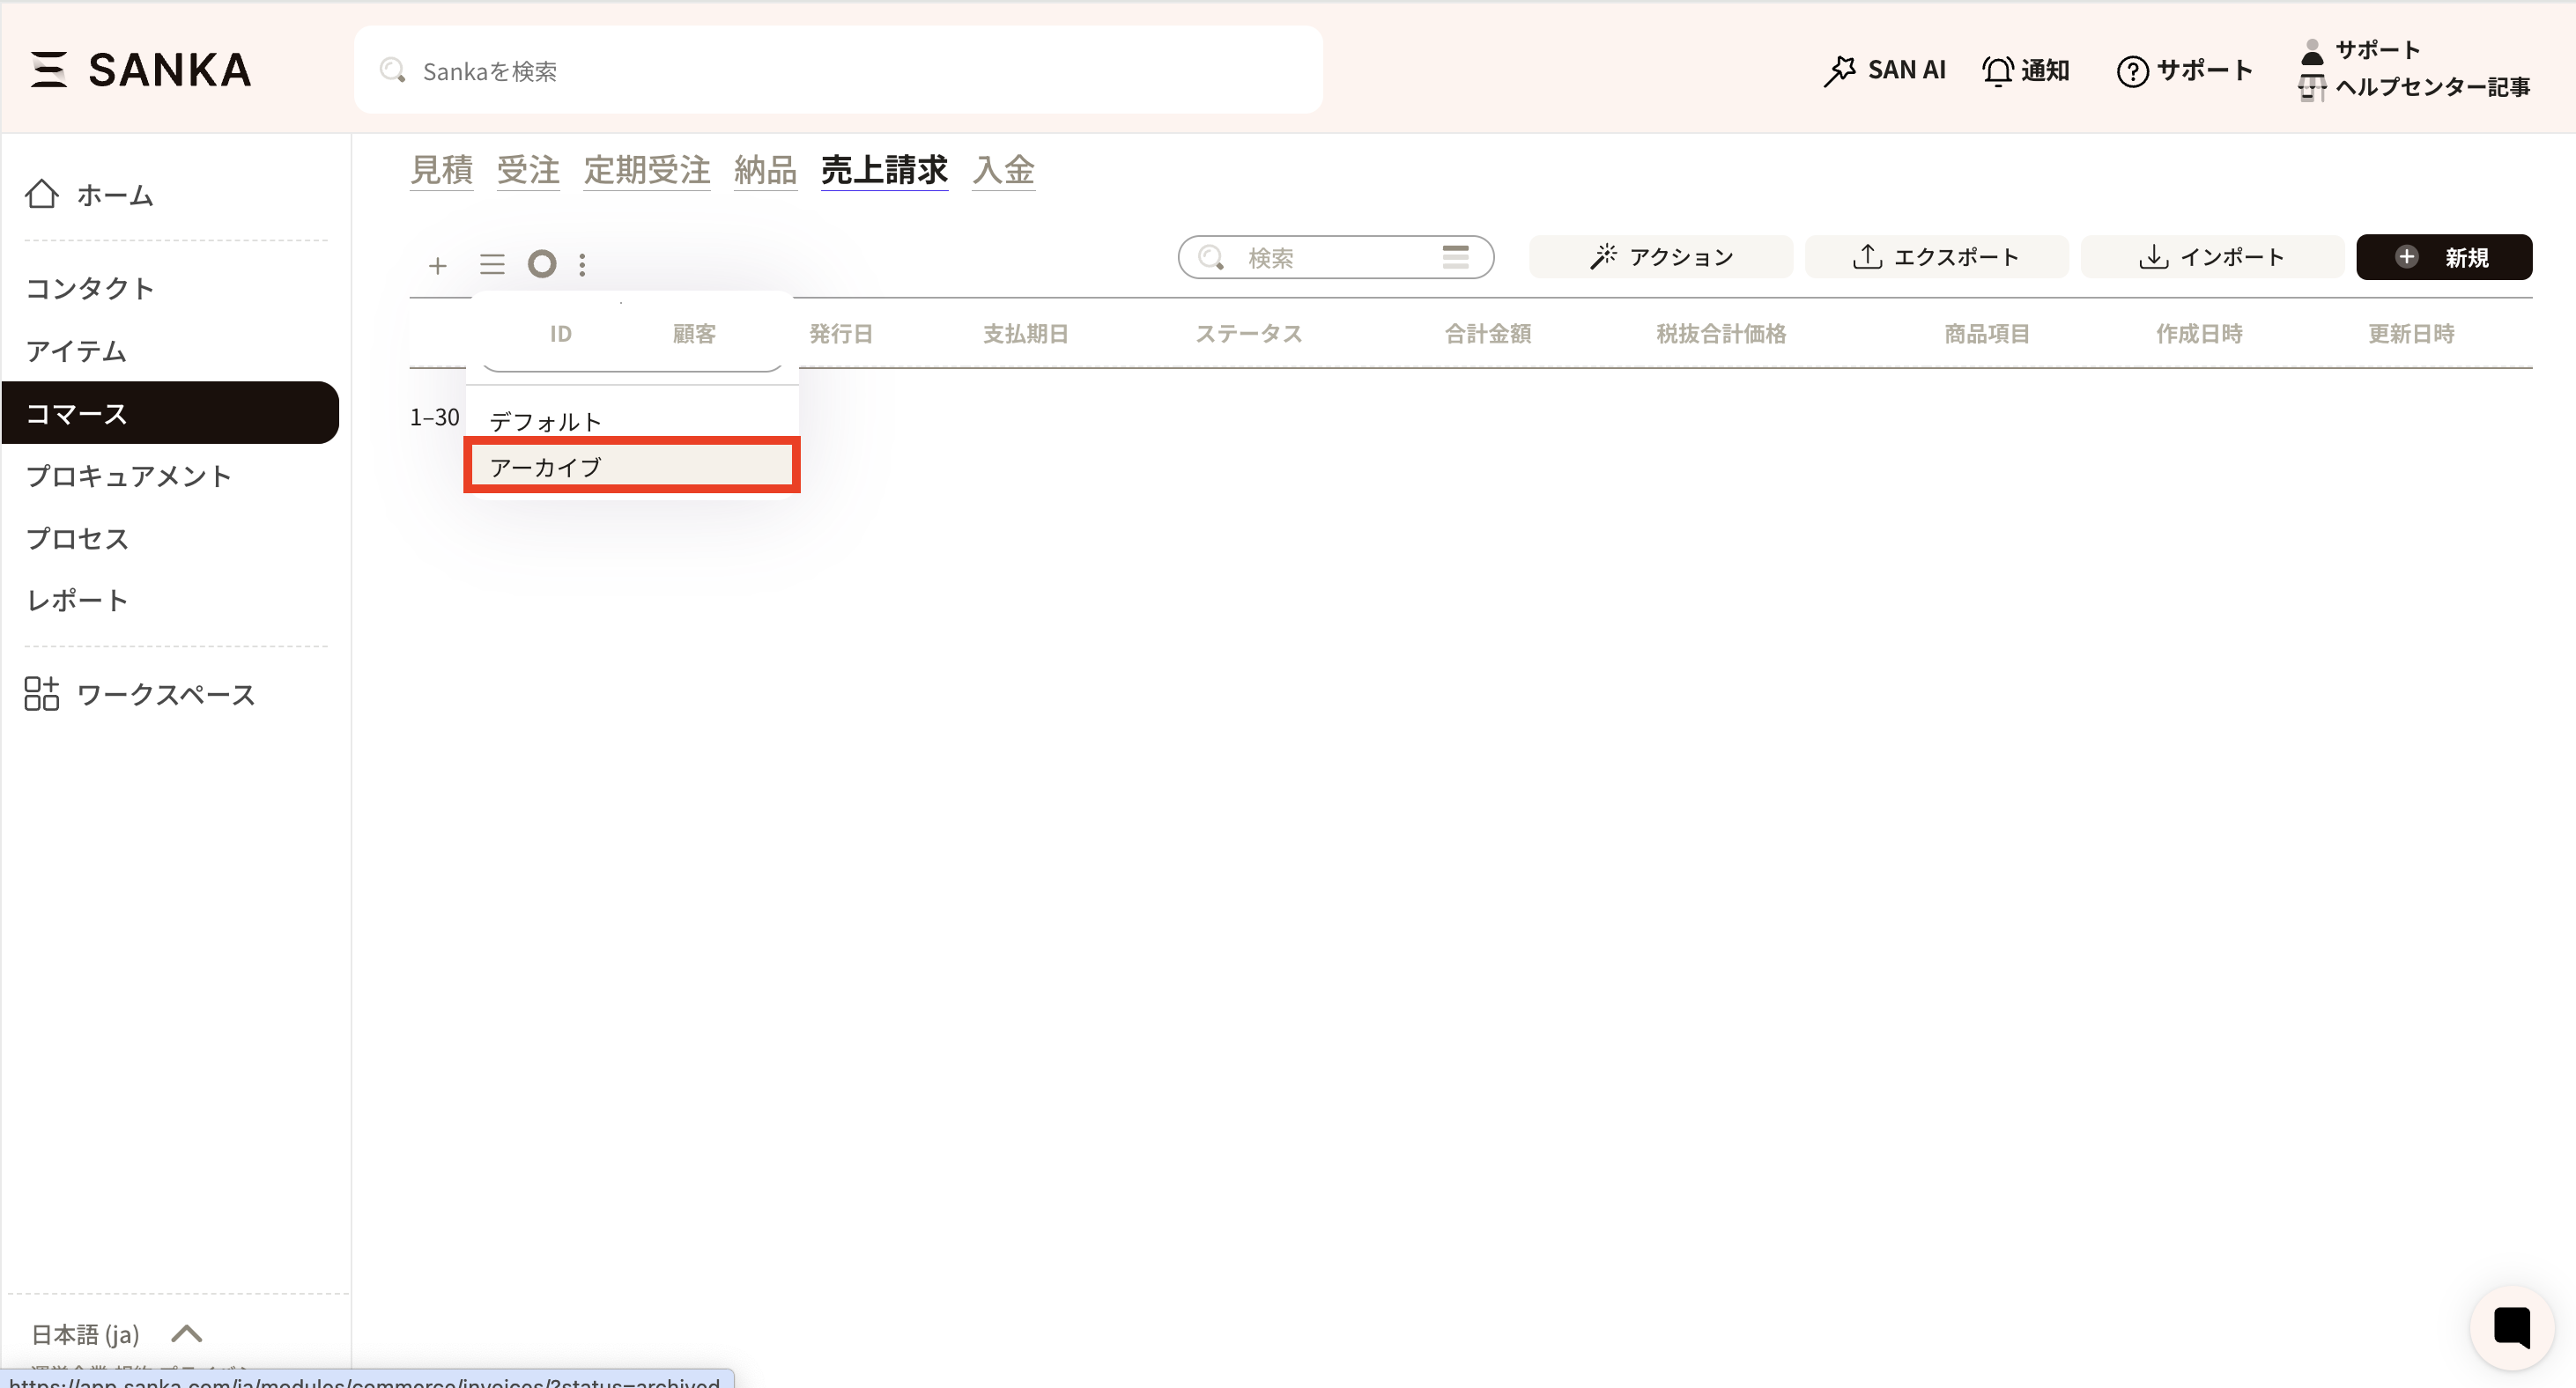
 ③ If you want to cancel the archive, press the three-line mark on the record list screen.
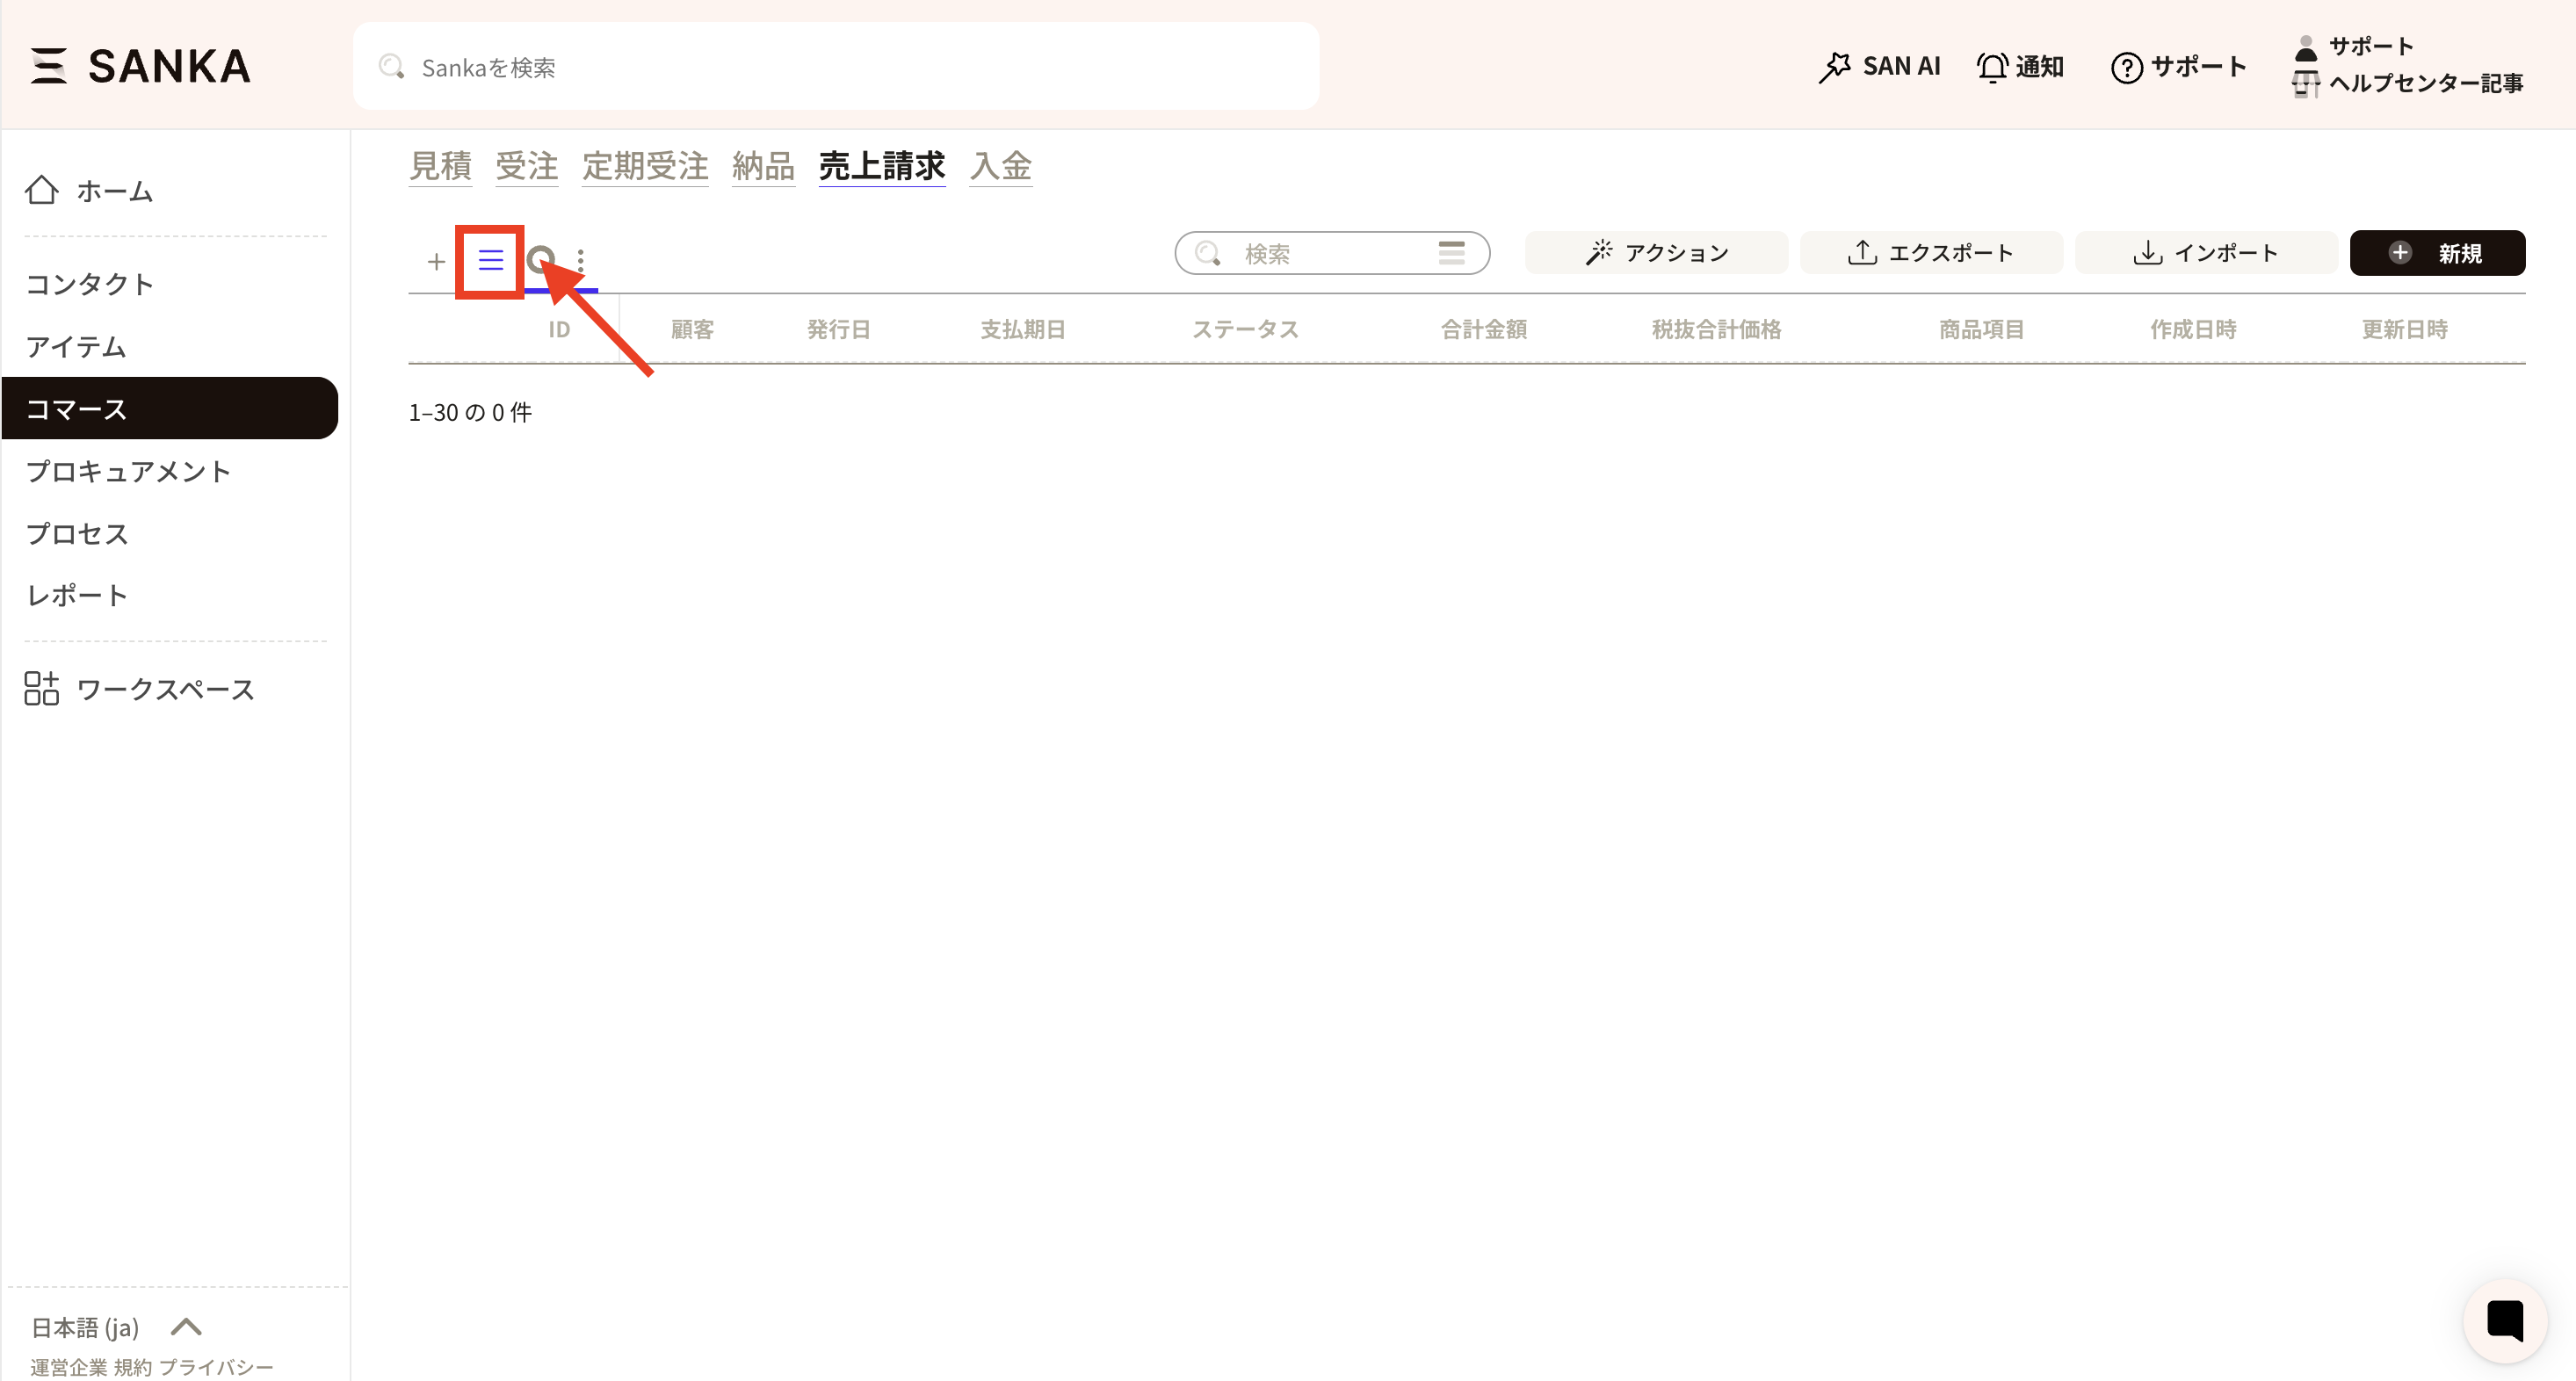 ④ Select the archive.
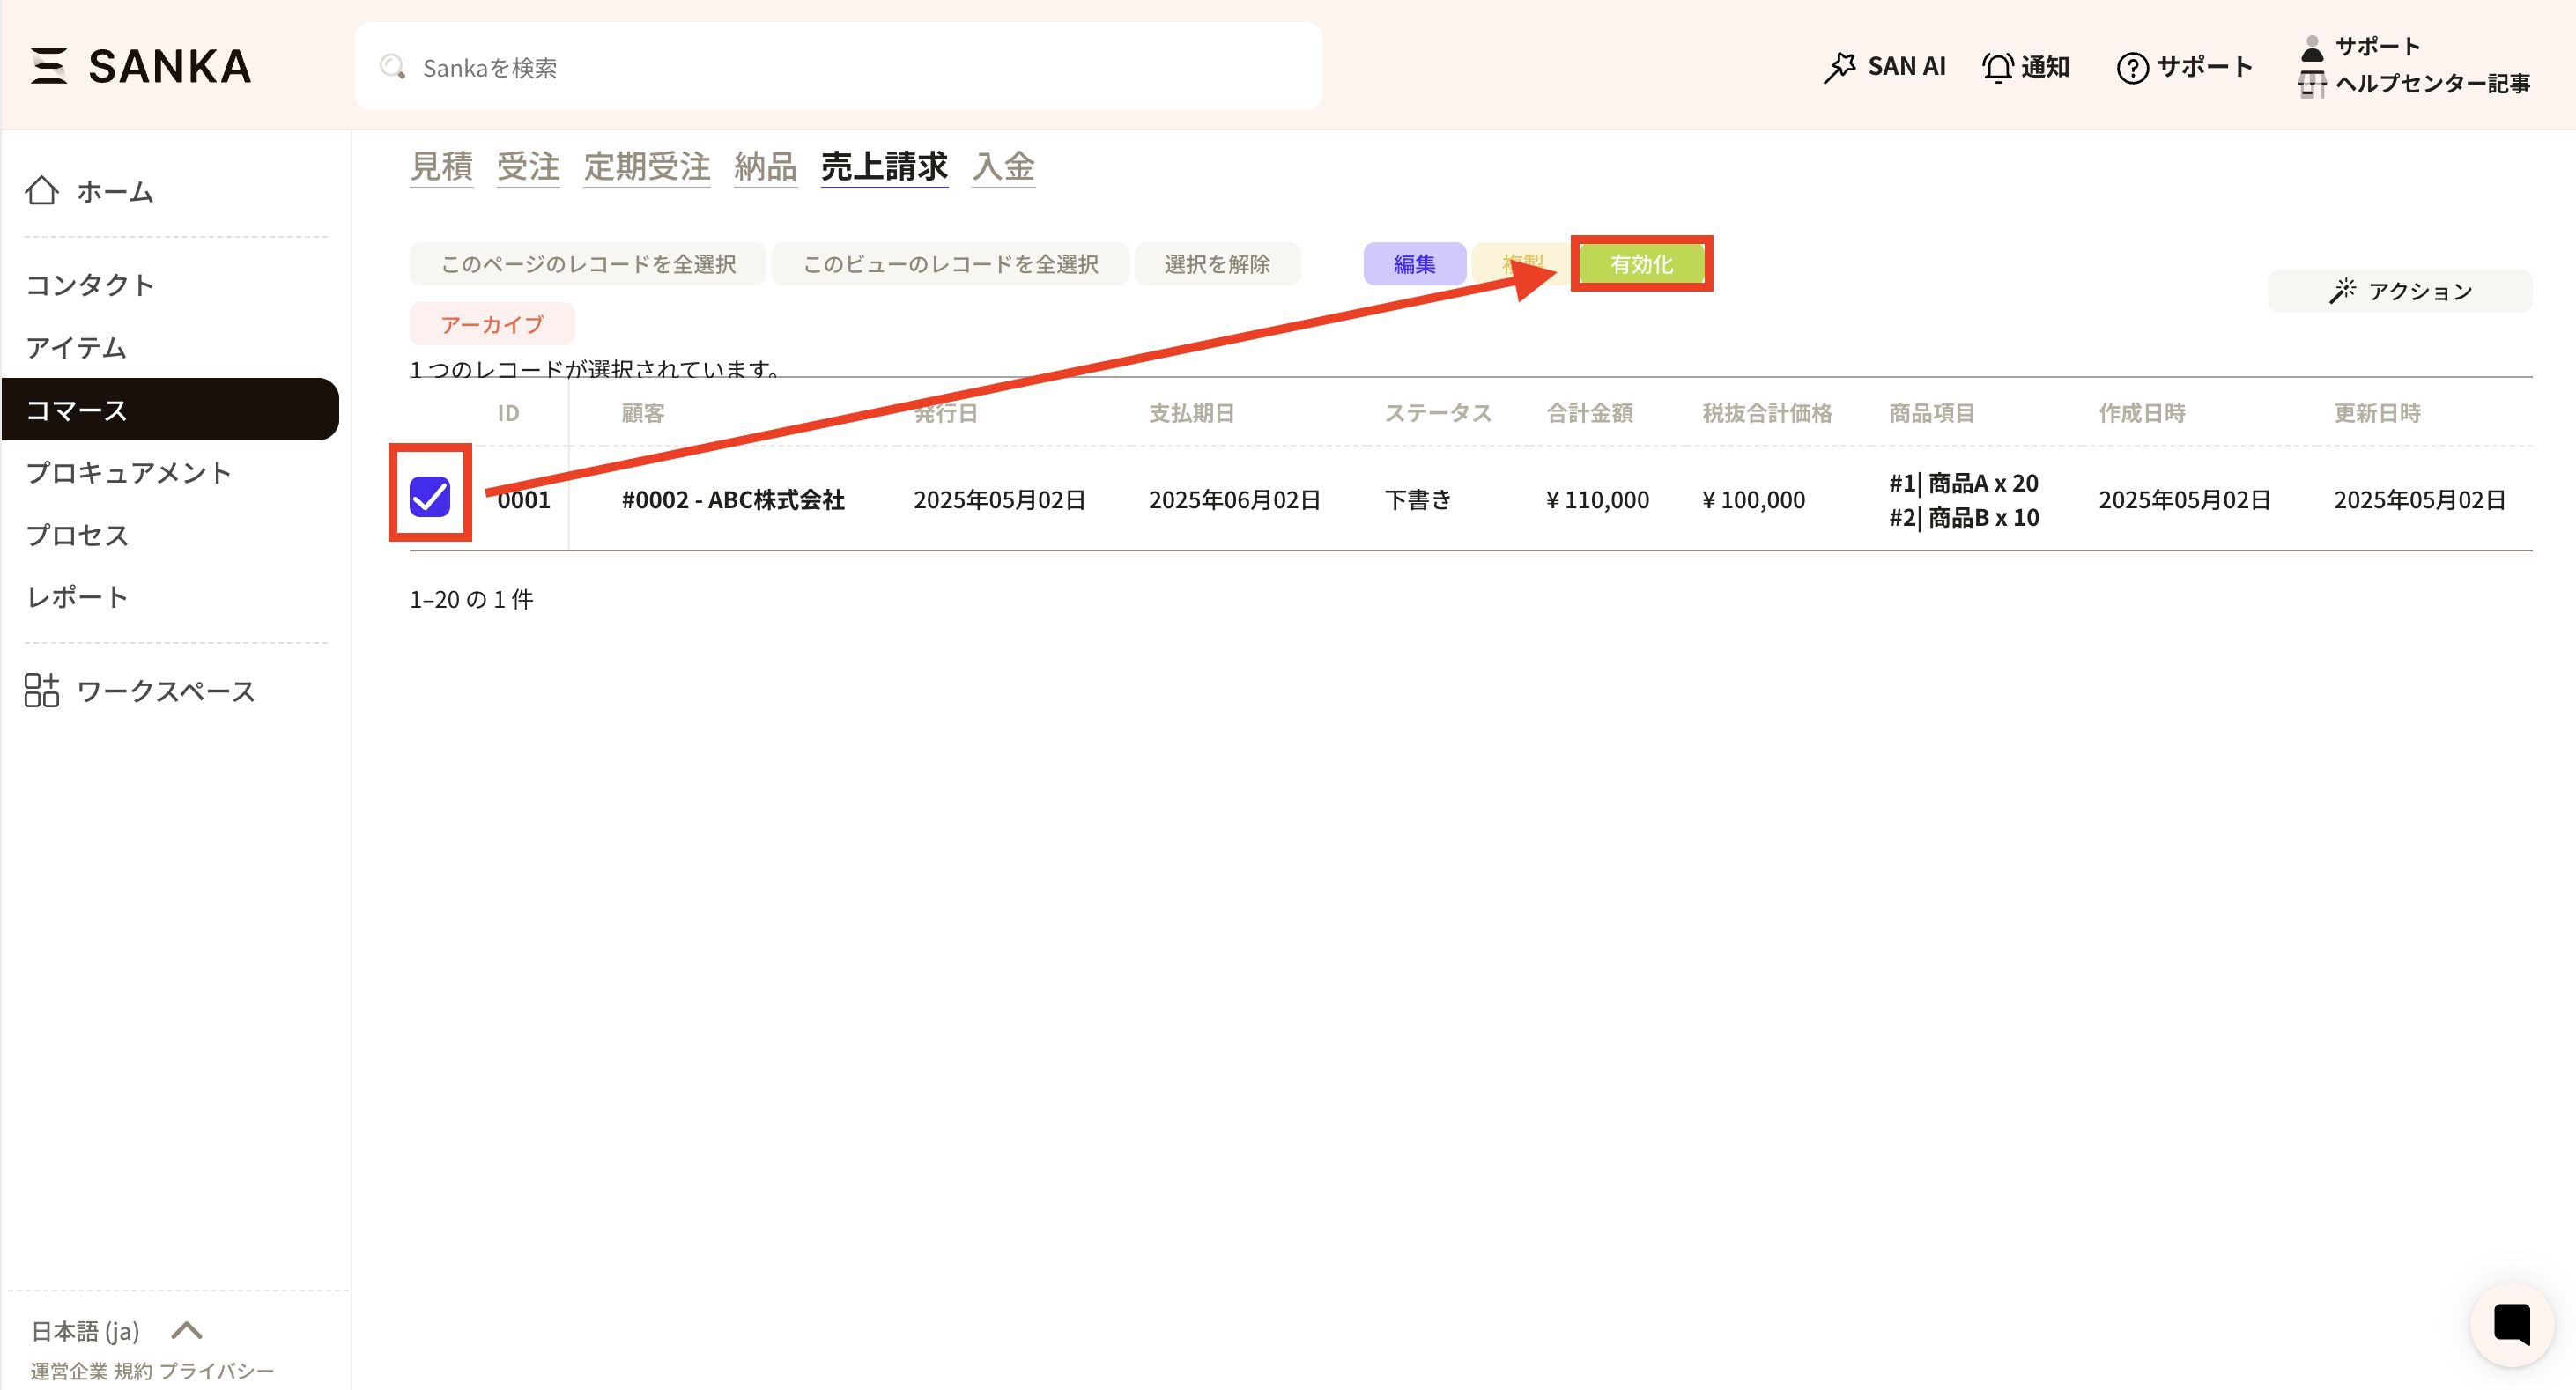
 ⑤ Archived records will be displayed, so check the records you want to unarchive and press the Activate button.