Expense object overview
How to create and manage expense records
Expense object overview
Expense objects are databases that are used to track business expenses and ensure that funds are used appropriately.What you can do with expense objects
- Improving work efficiency for accounting personnel You can easily perform tasks from employee submission of expenses to reimbursement from accounting staff.
- Understand expenses Centrally manage business expenses and make it easy to understand.
Default properties for expense objects
- Submitter: The account that created the record will be the submitter.
- Business partner: Enter the payment partner.
- Payment date: Enter the date of payment.
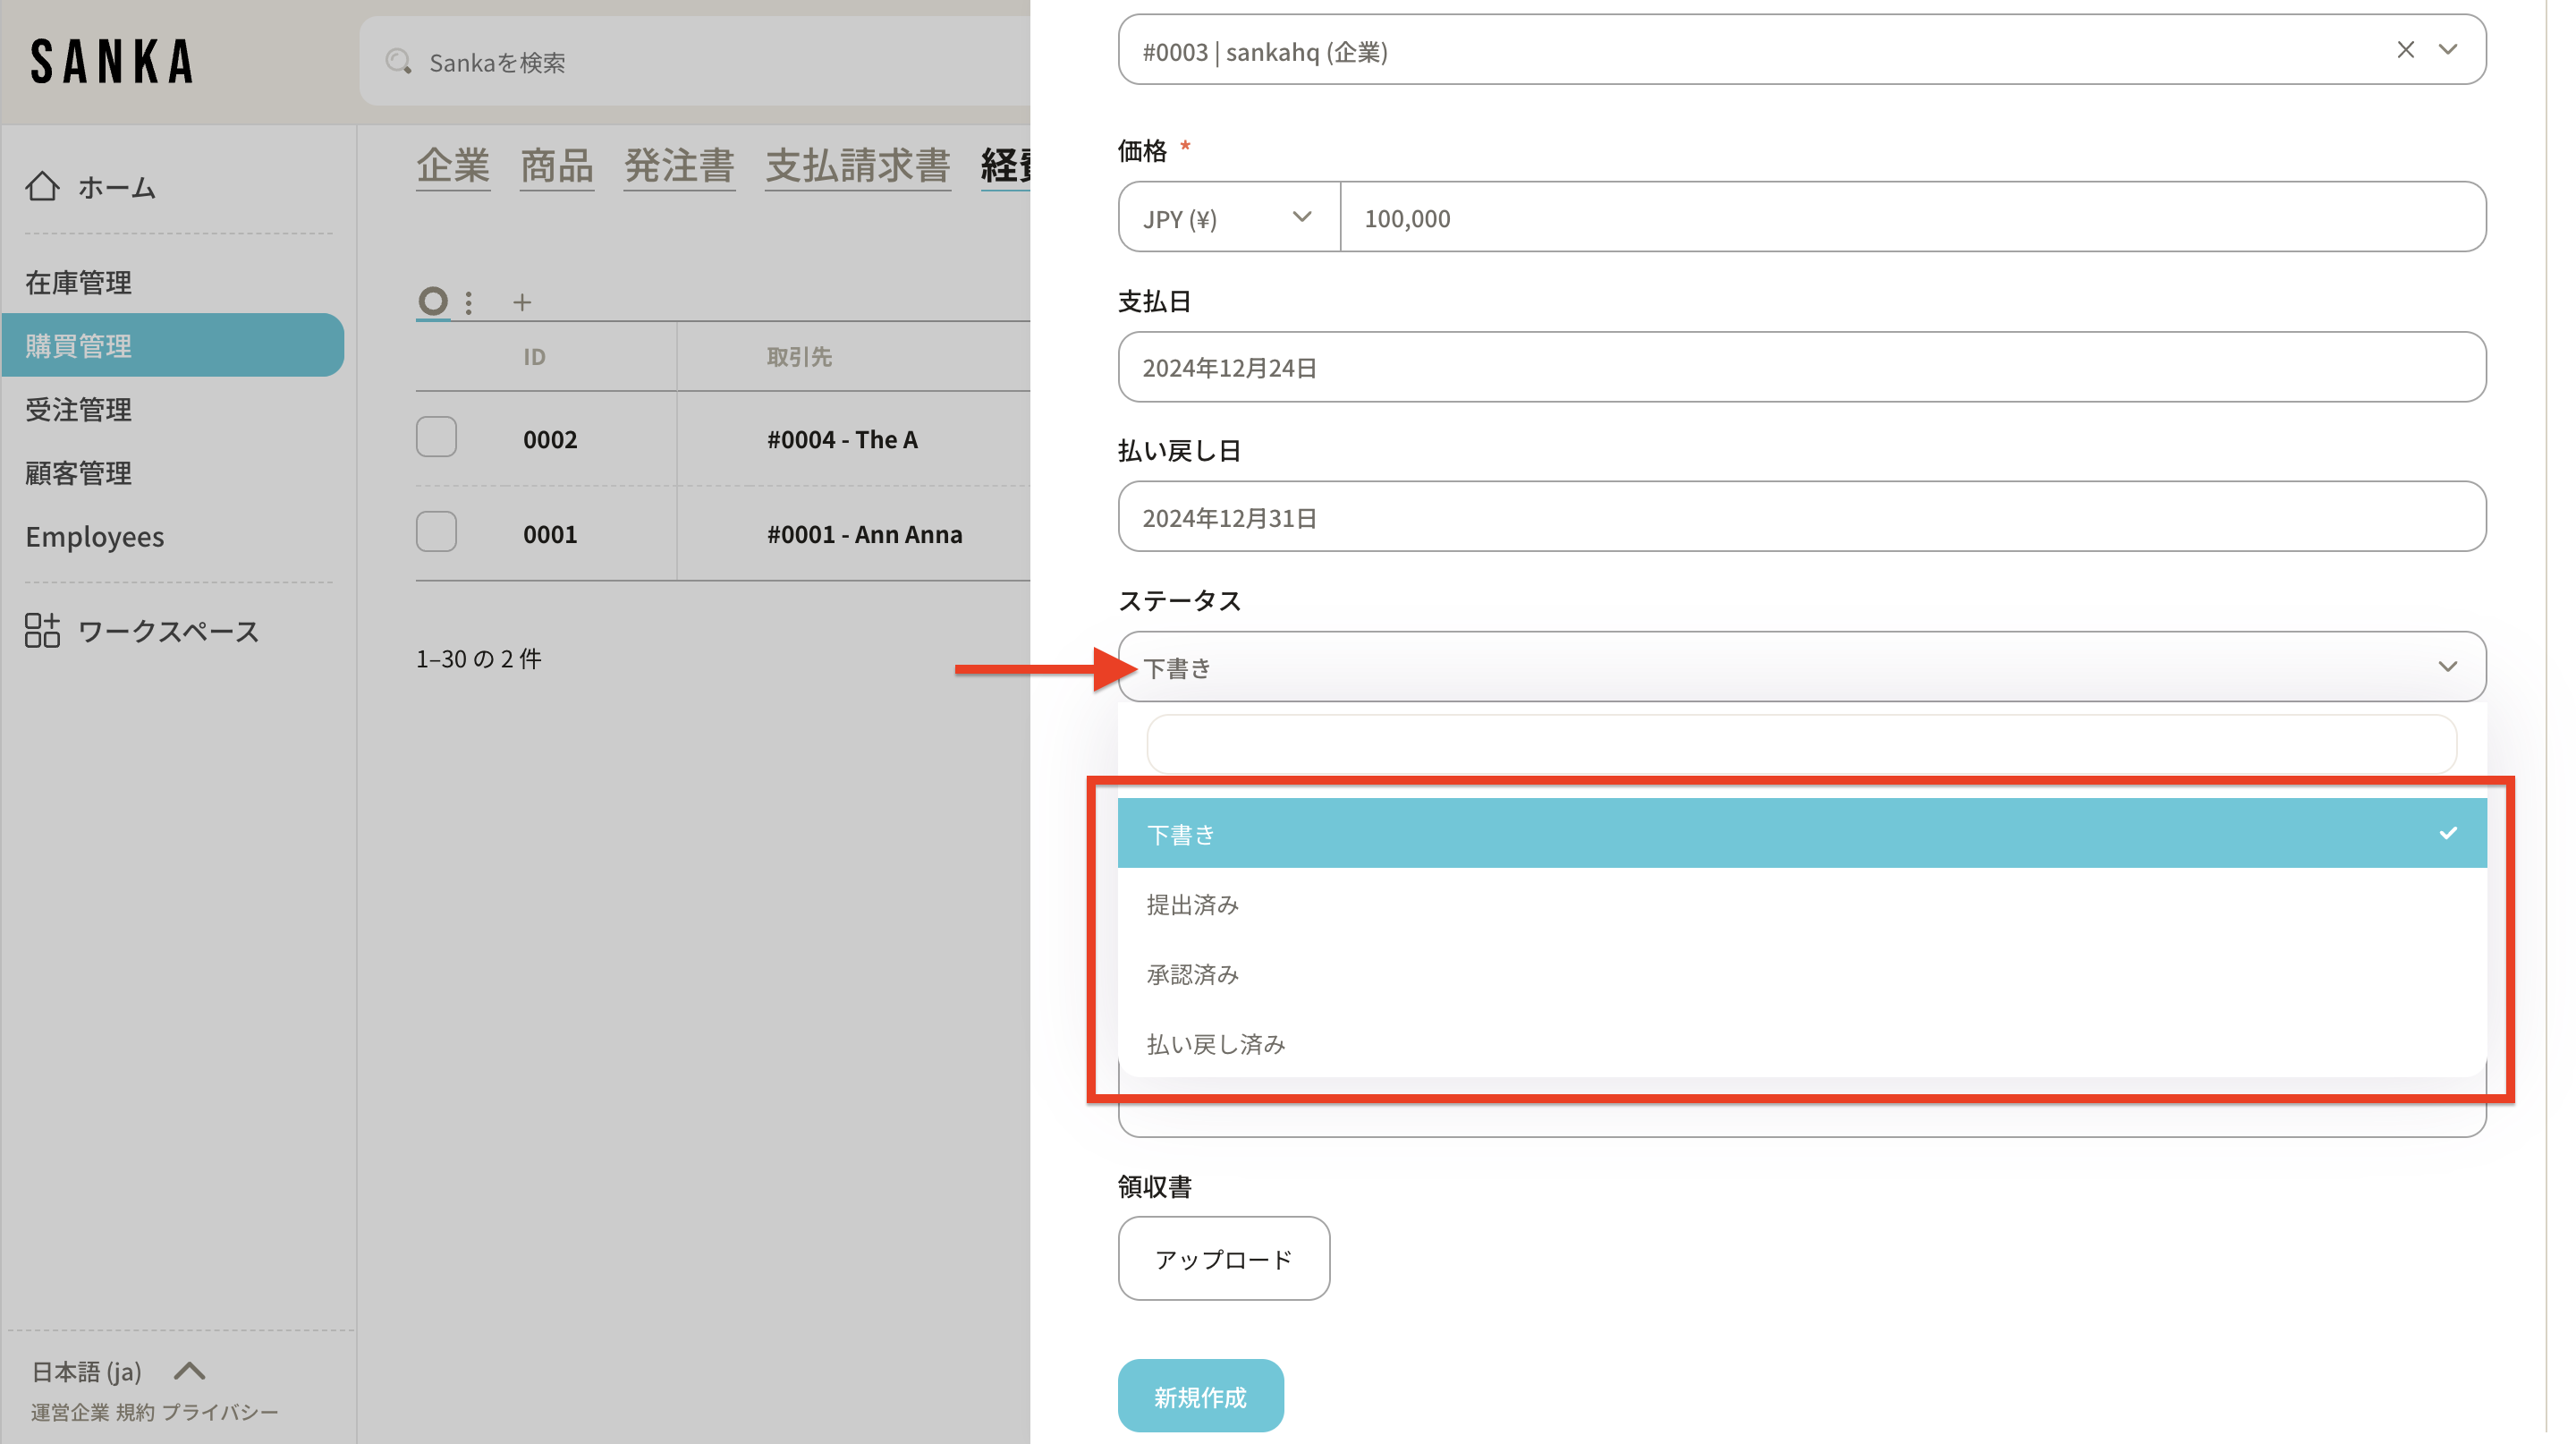
- Refund date: Enter the date of refund. -Status: Select from "Draft", "Submitted", "Approved", and "Refunded" according to the current situation.
How to create expenses
1: Log in to Sanka, go to Expense object and create a new one.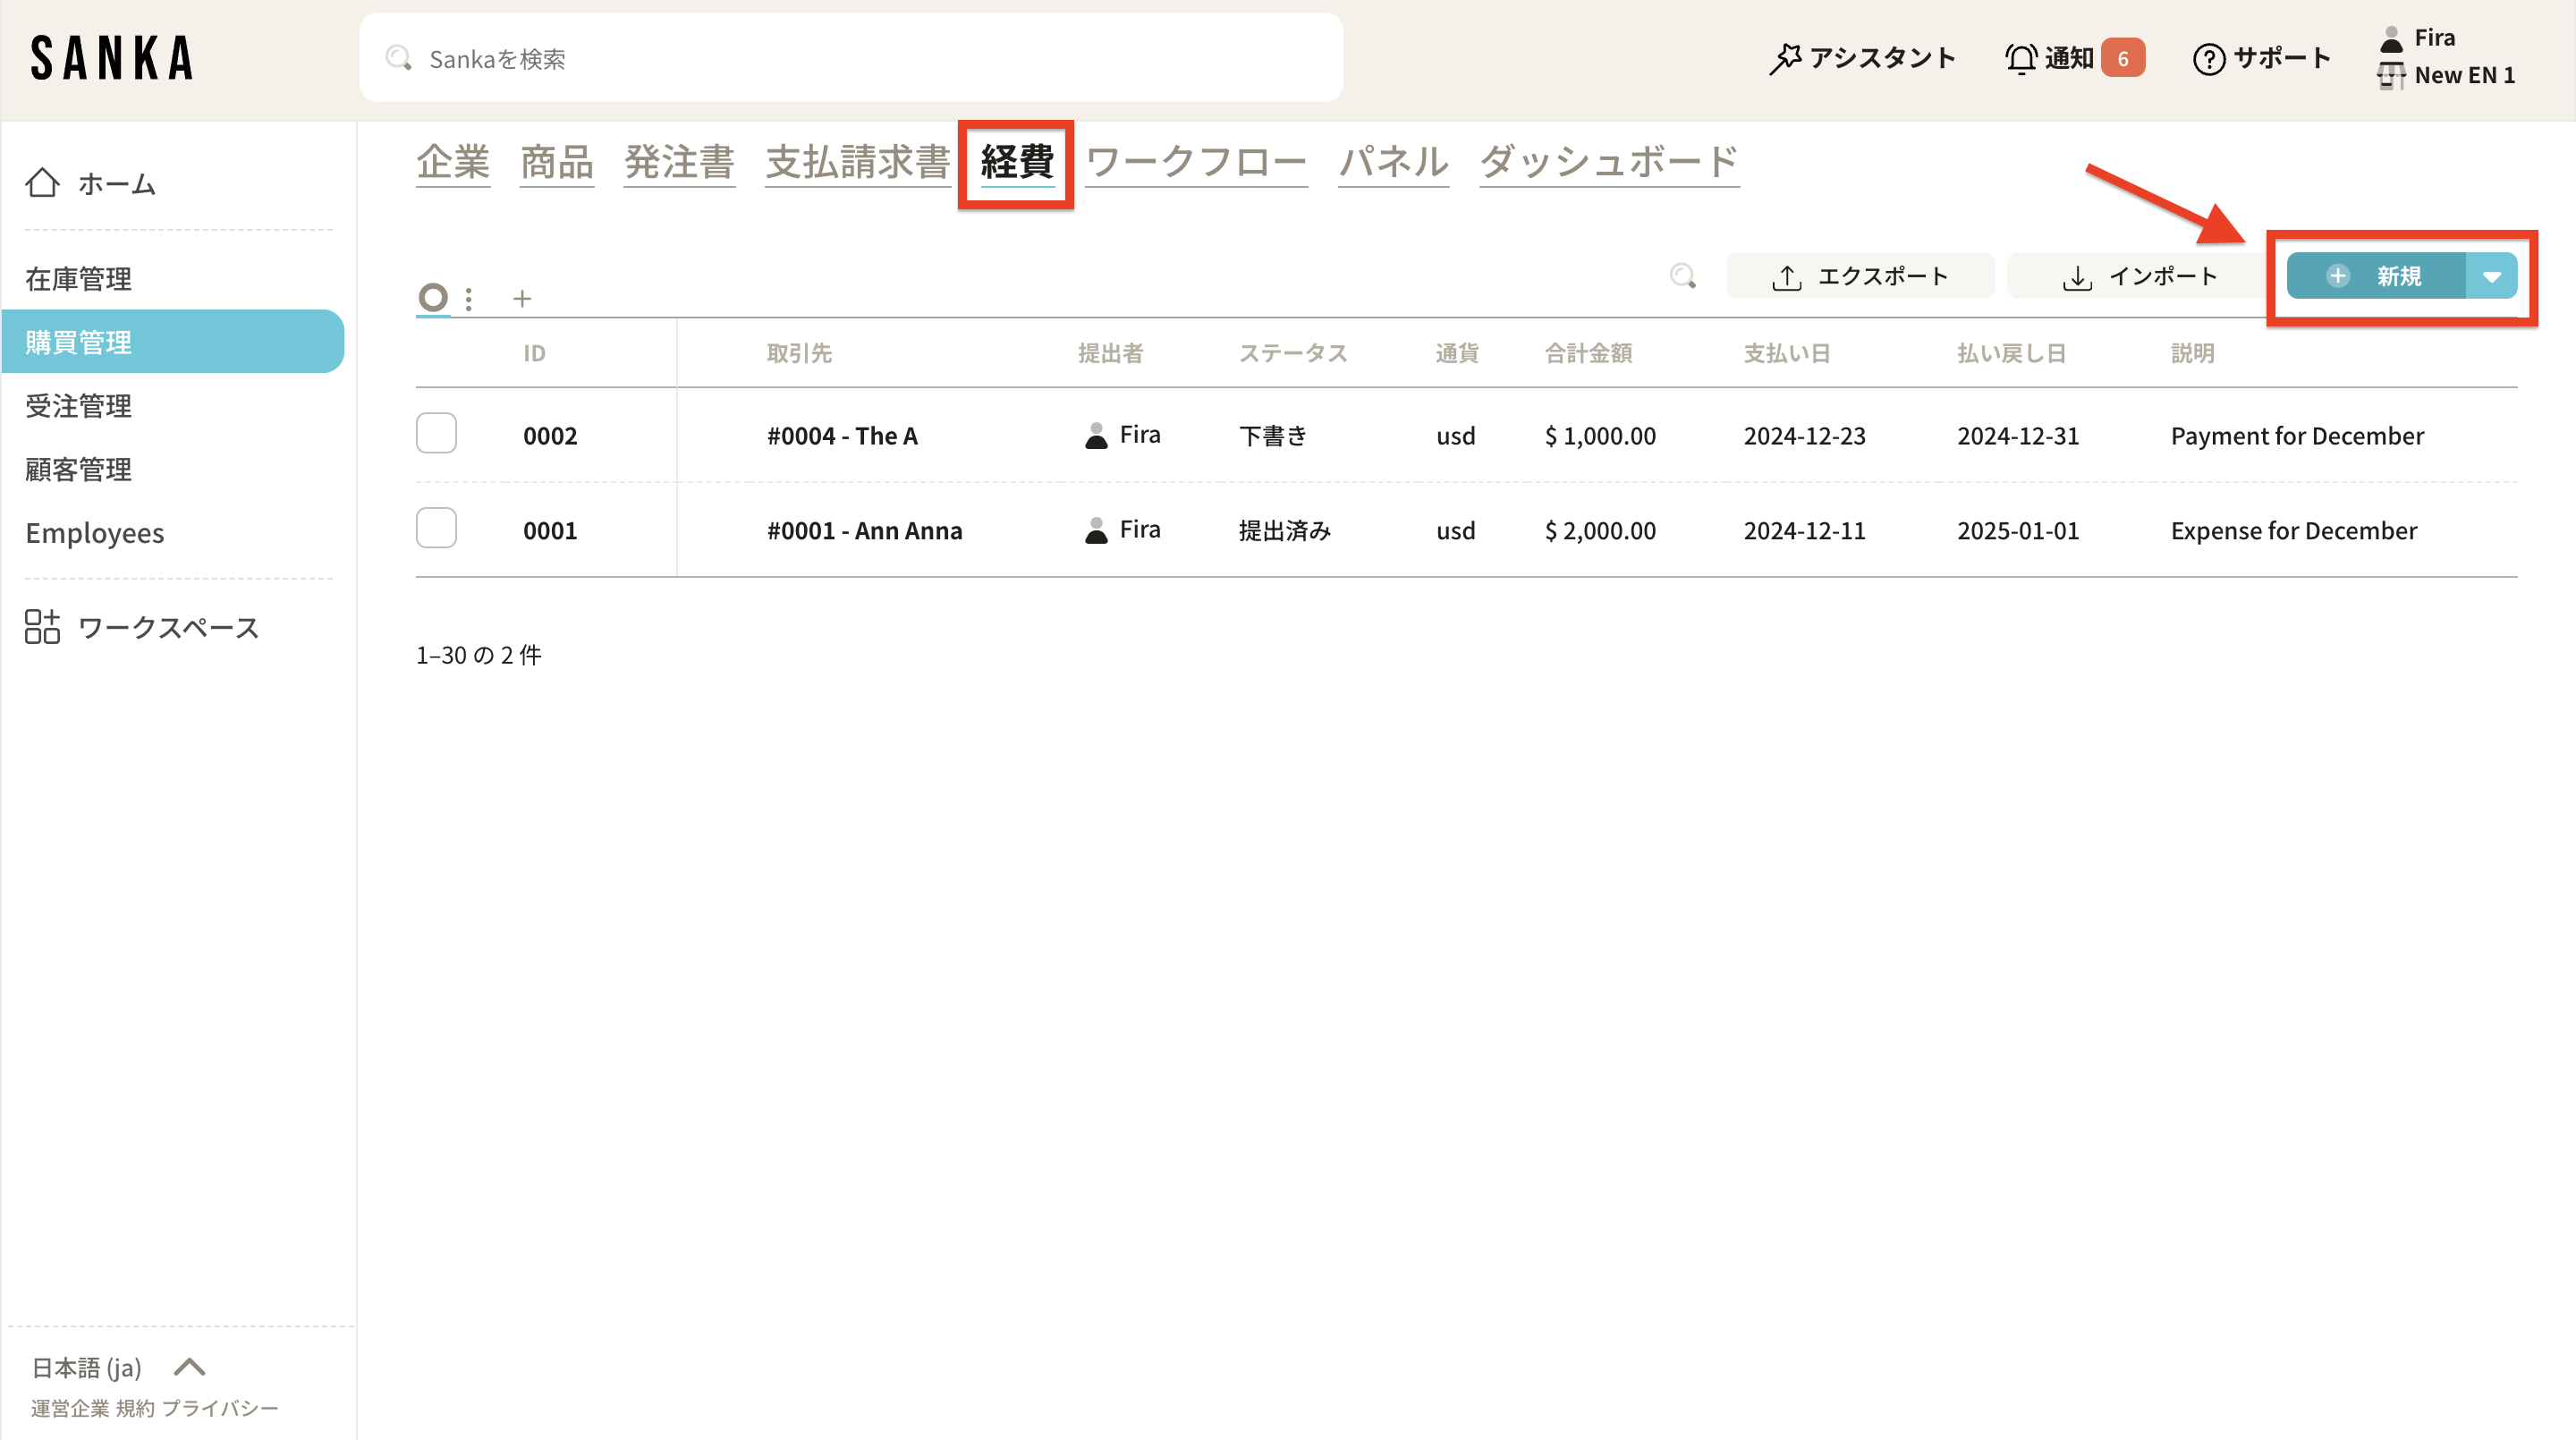 2: The details page will be displayed. Enter the required information. First, select a partner from your registered contacts and companies.
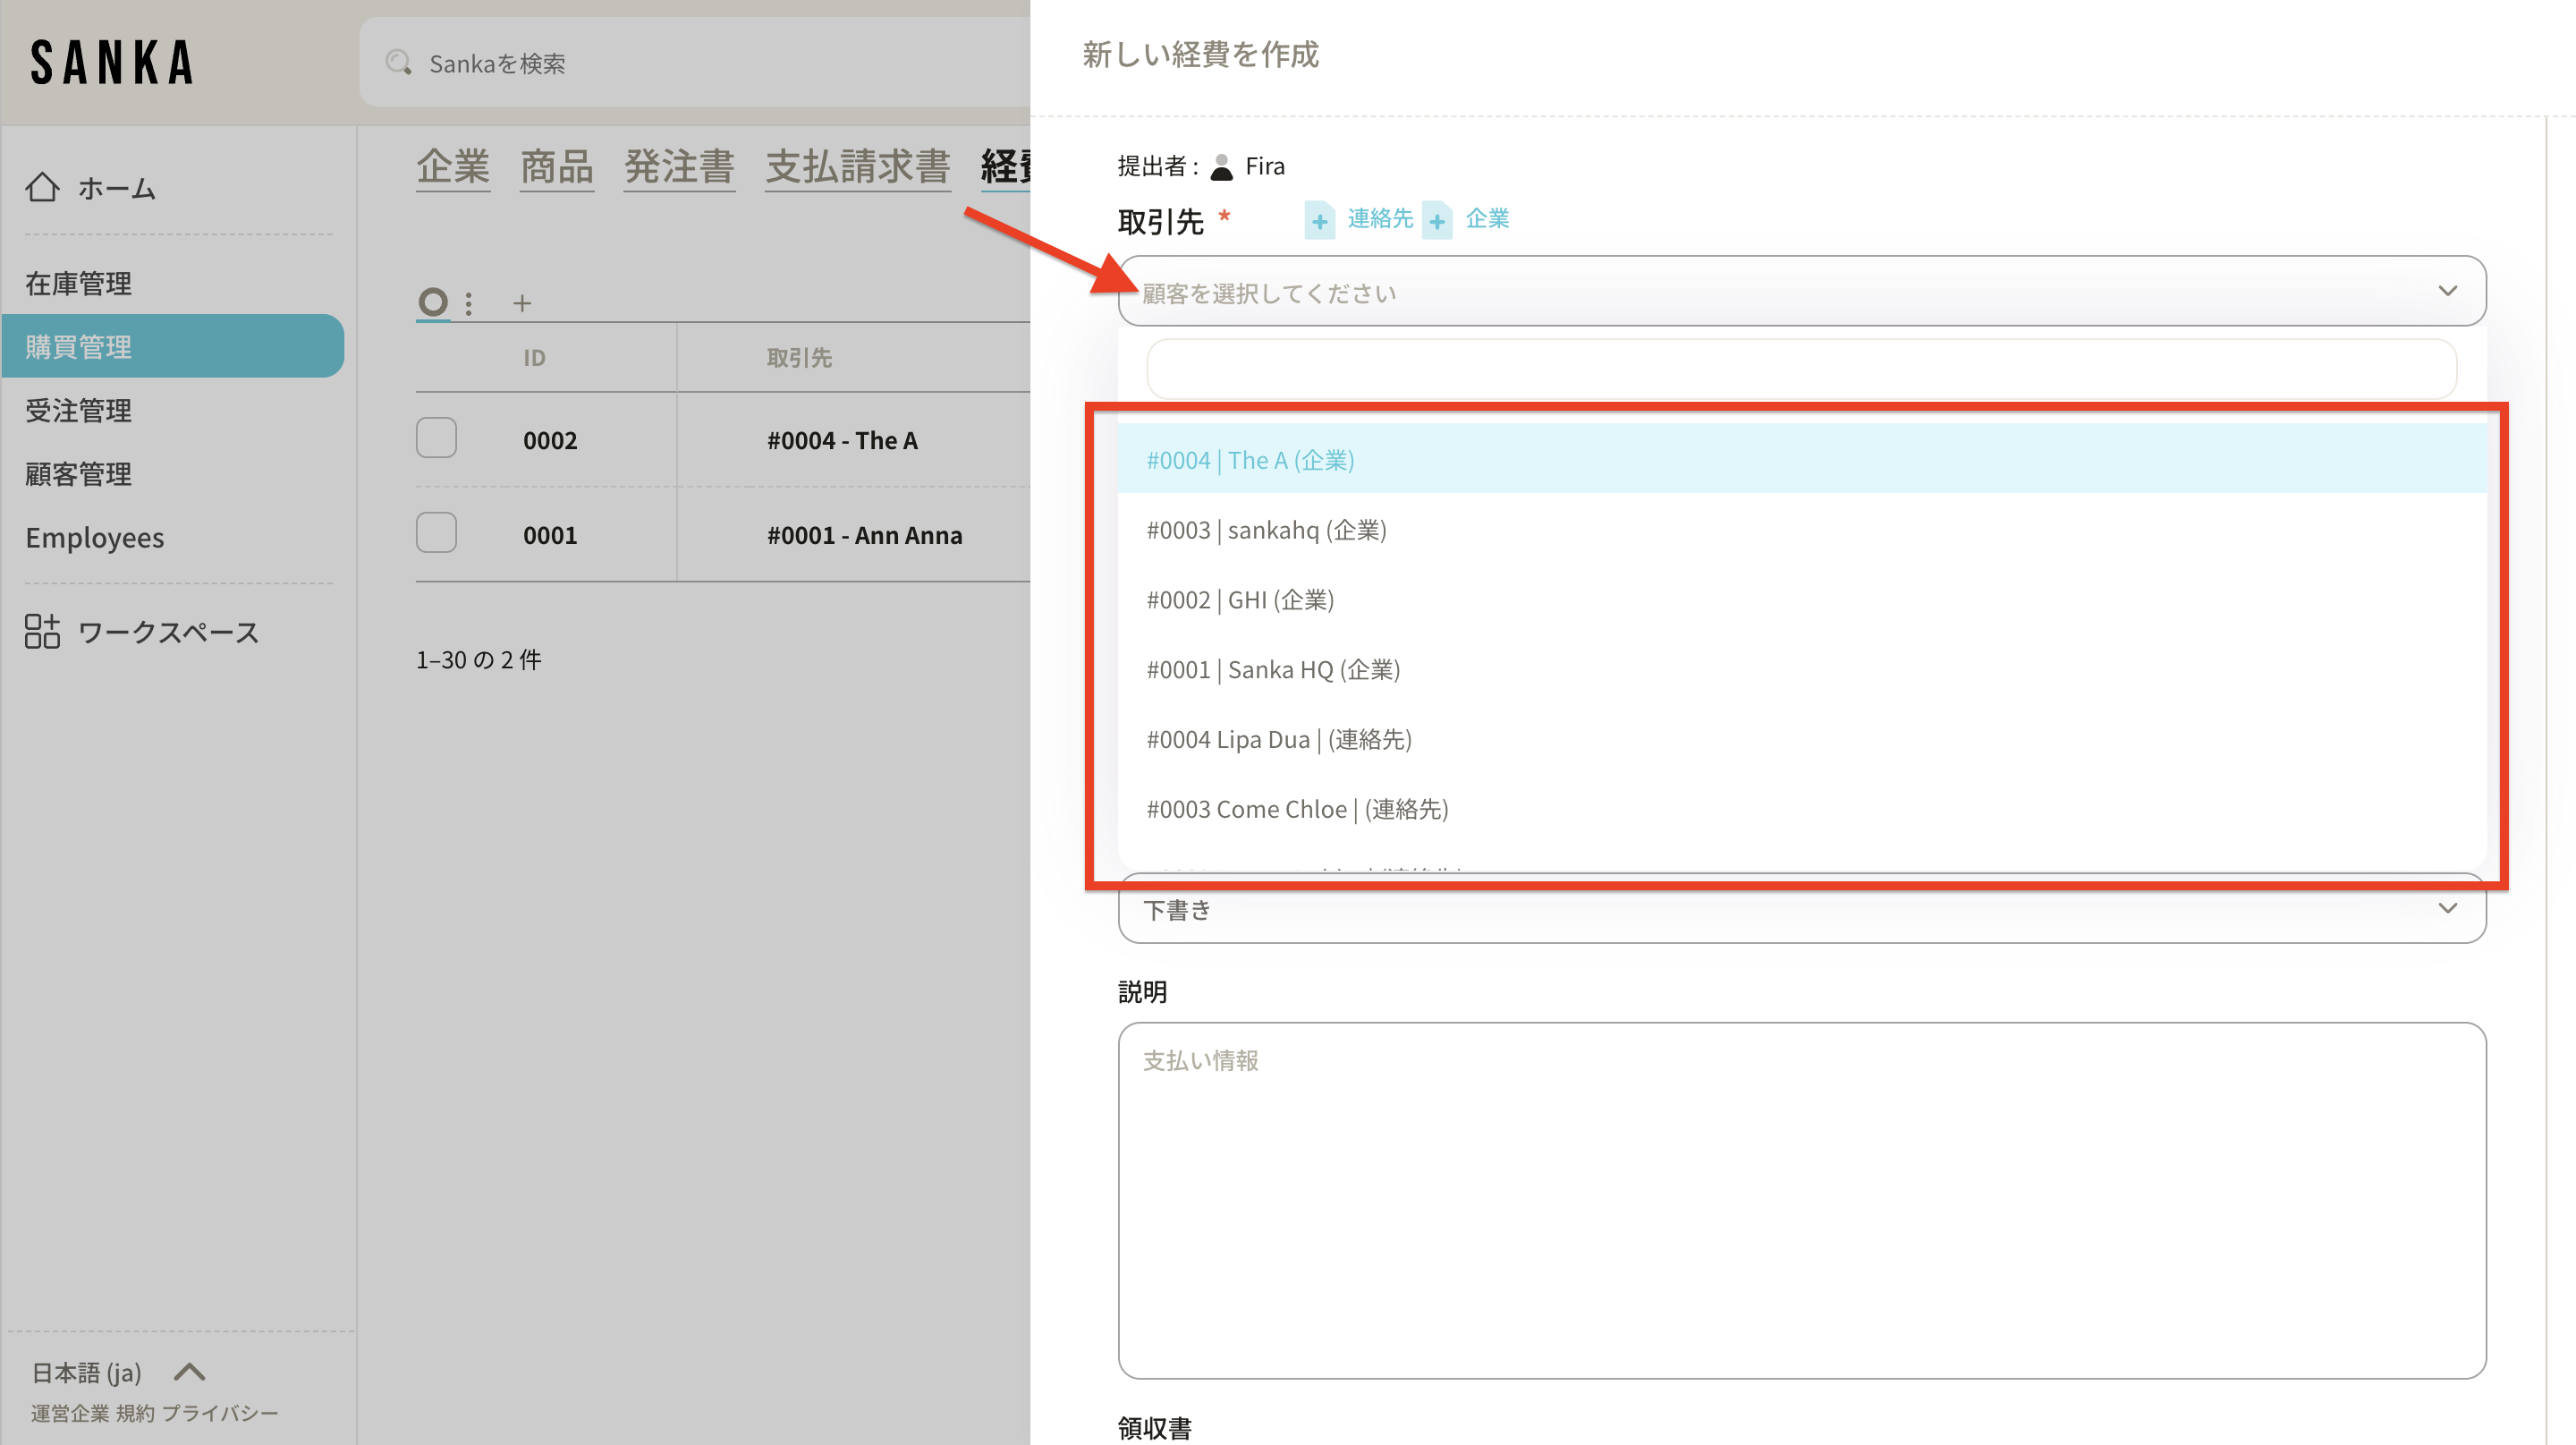 3: If you don't have a registered partner (contact or company), find out how to register your contact or company here.
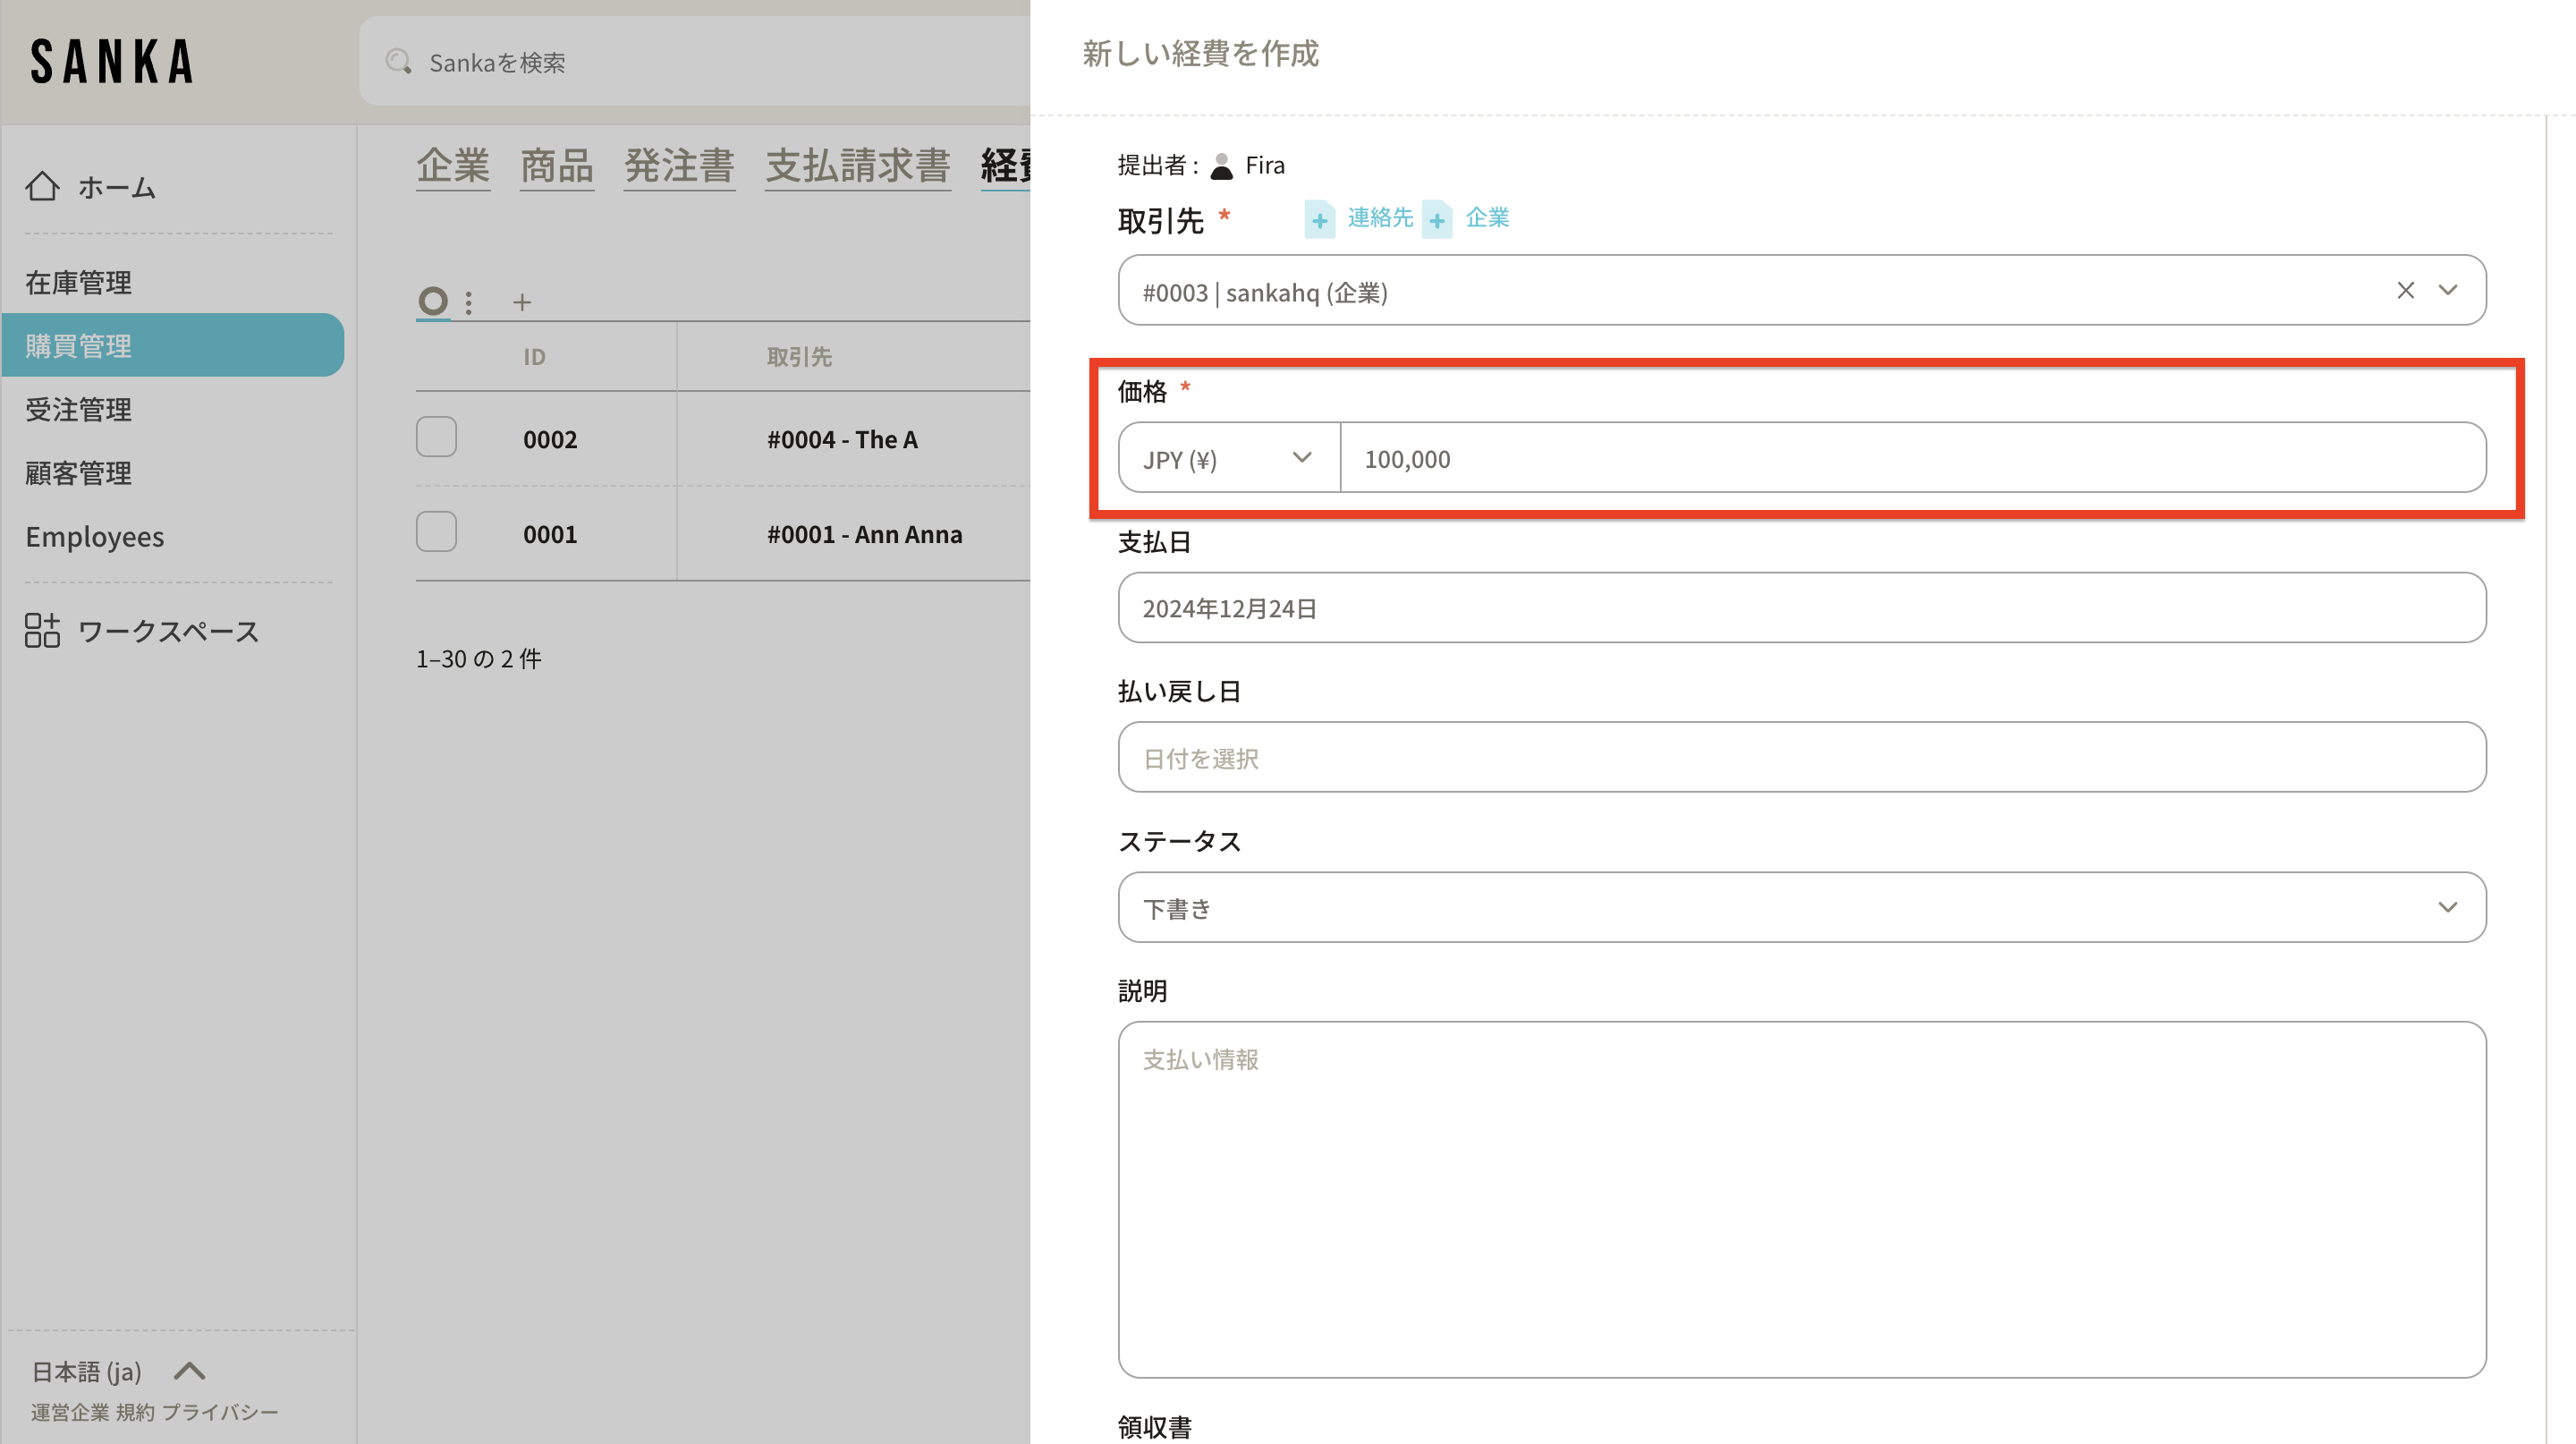
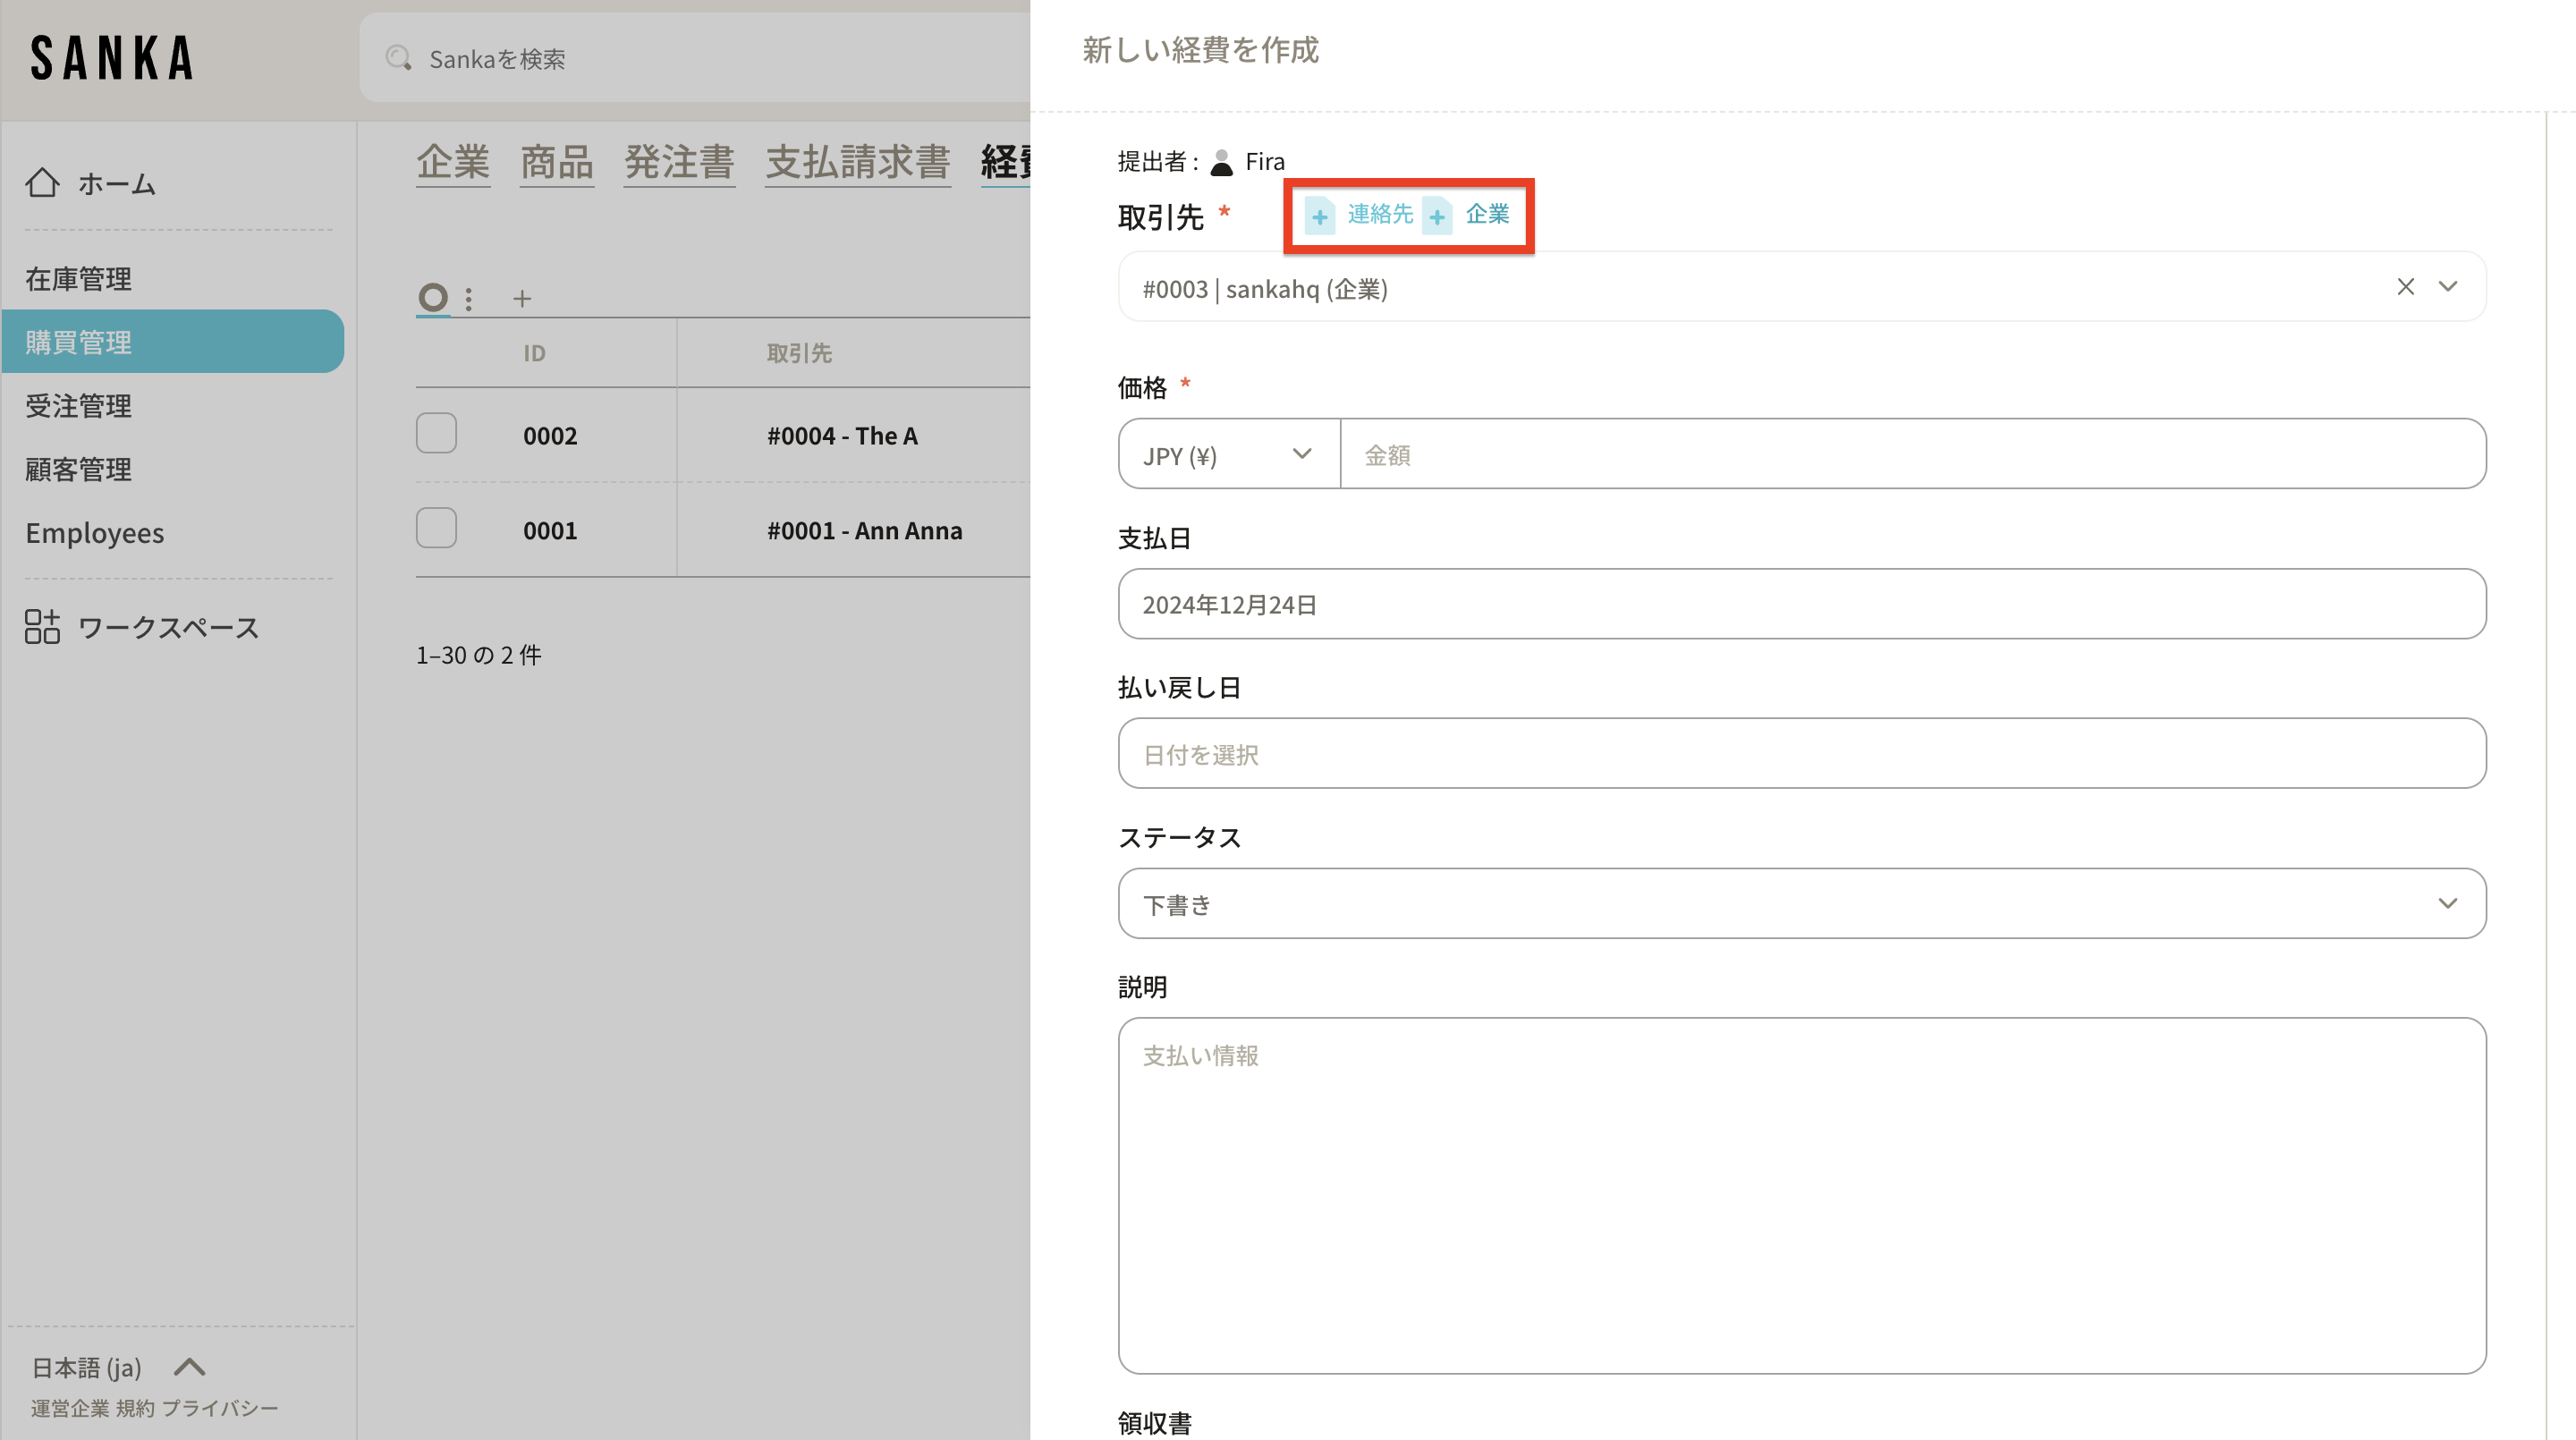 4: Enter the payment amount.
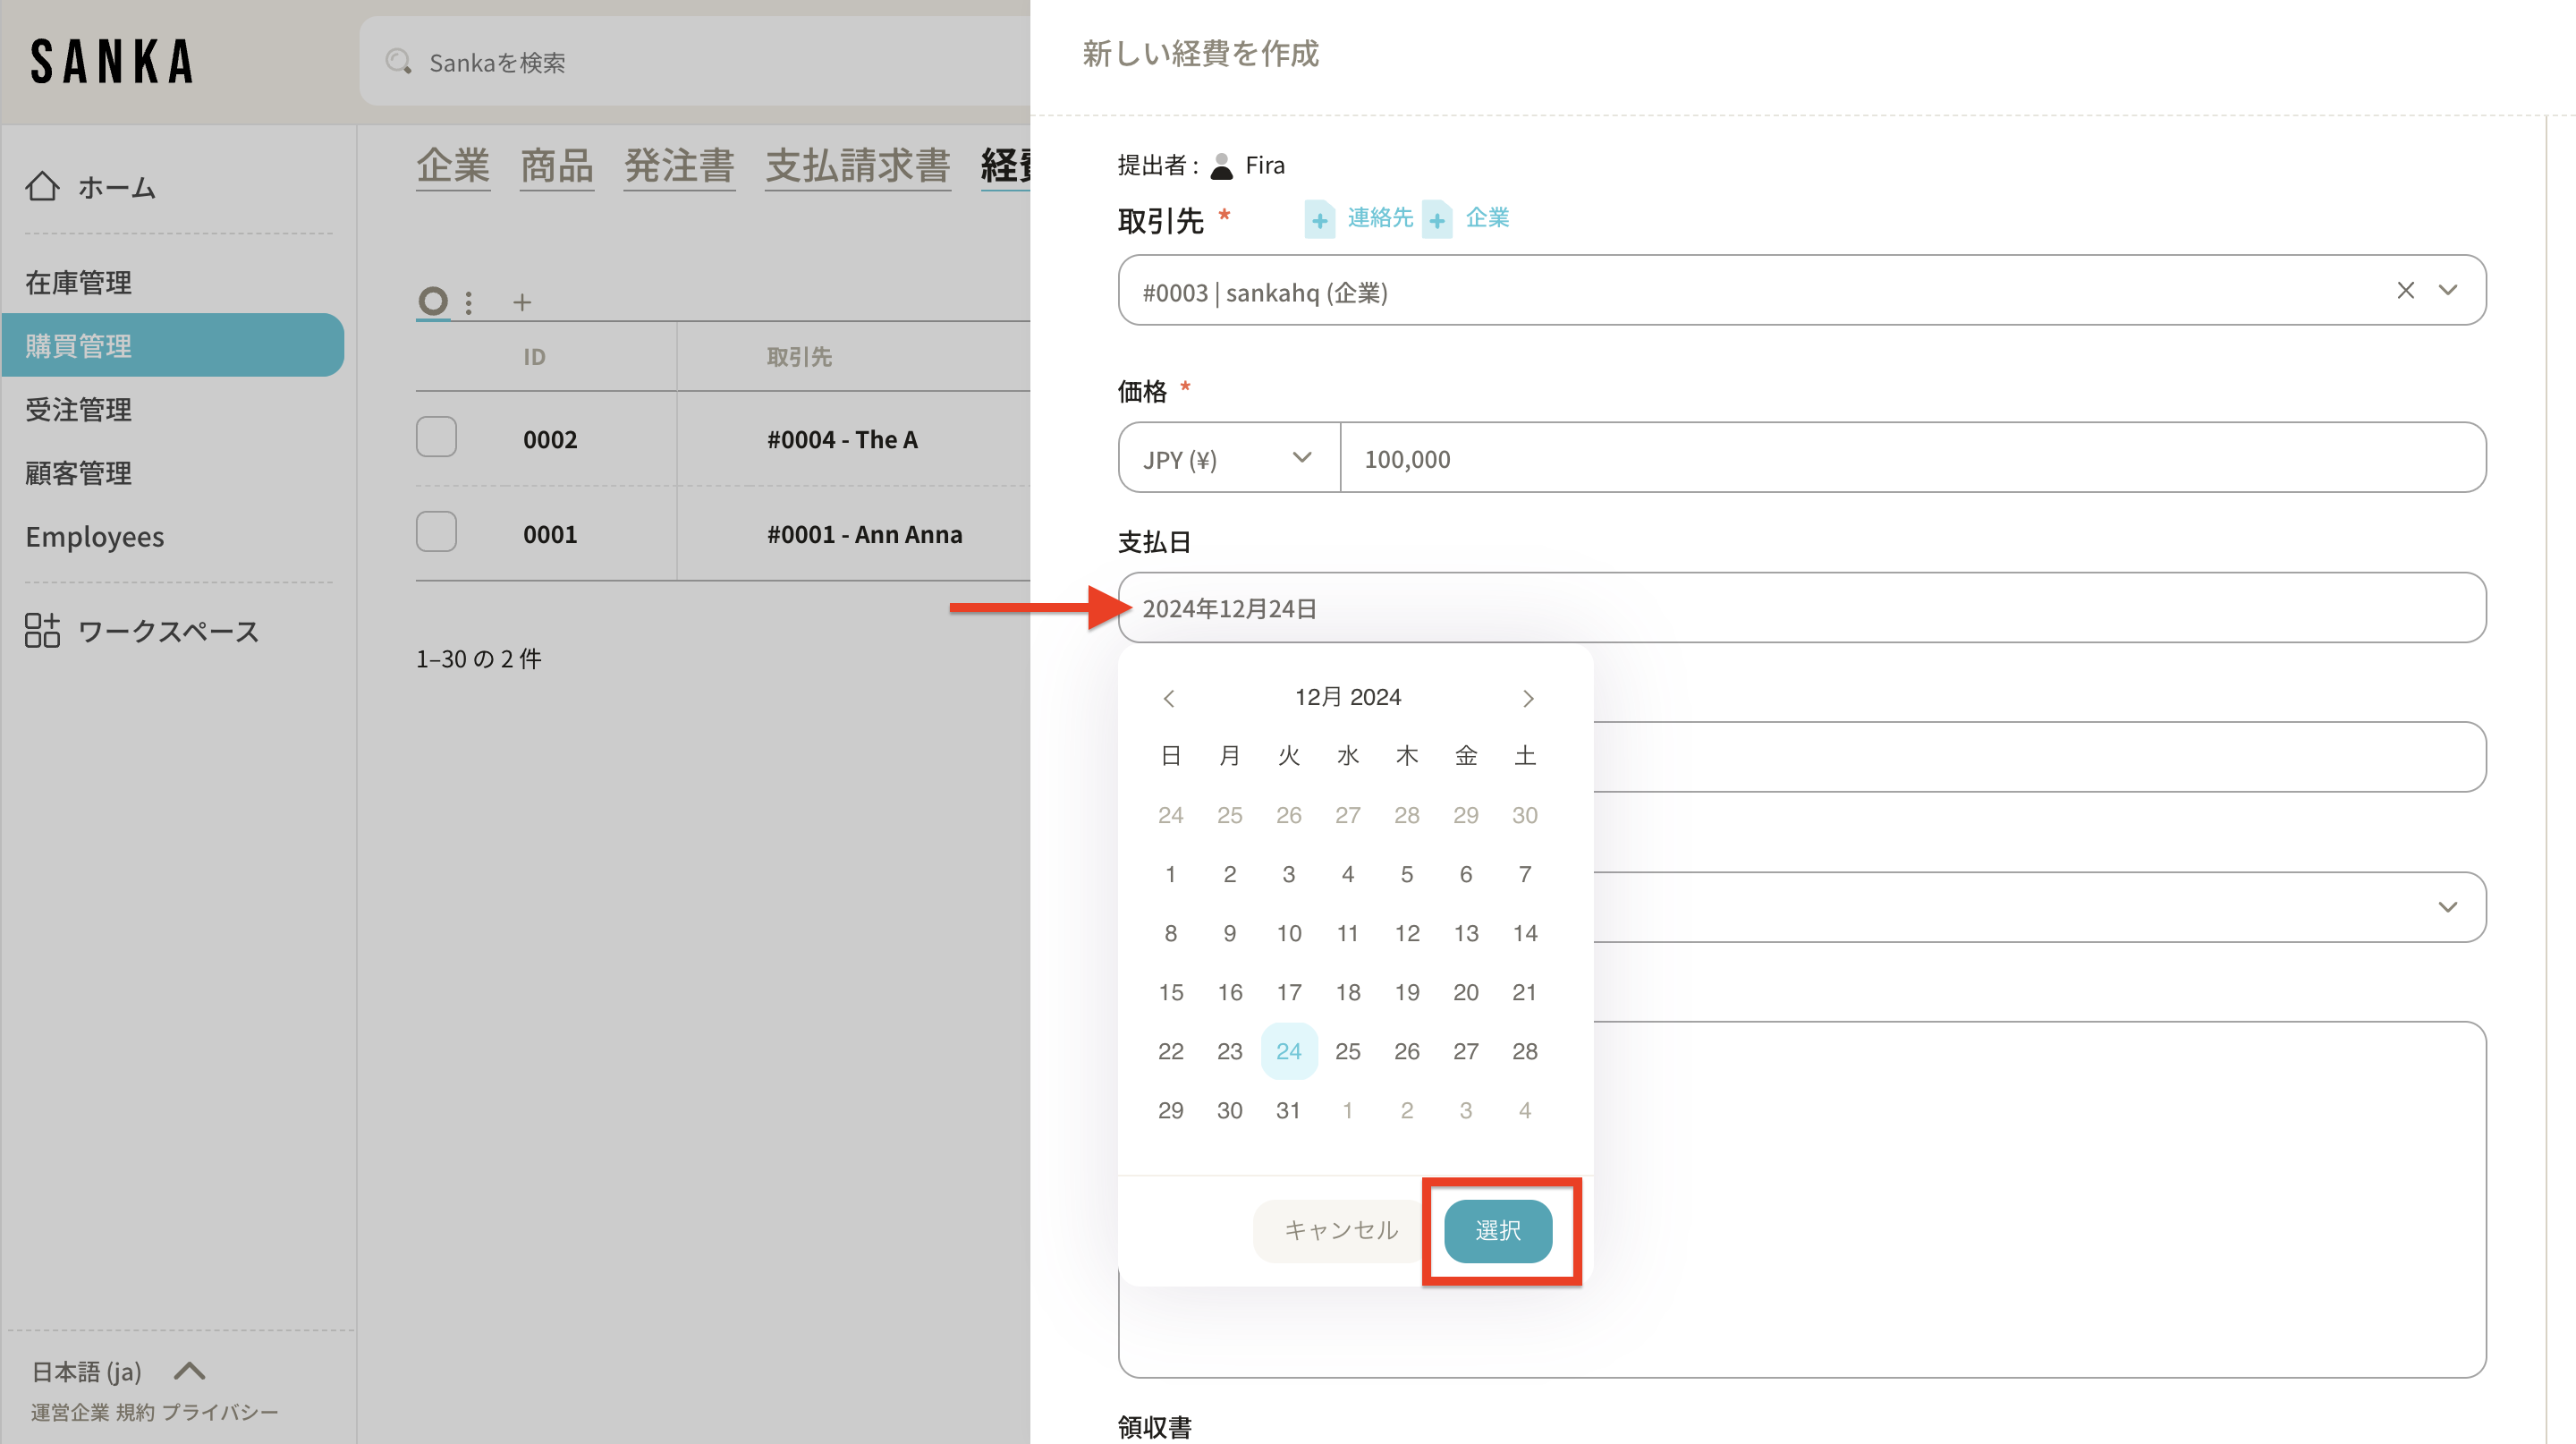
 5: Today's date is set by default. You can click on a date to display a calendar and click Apply to make changes.
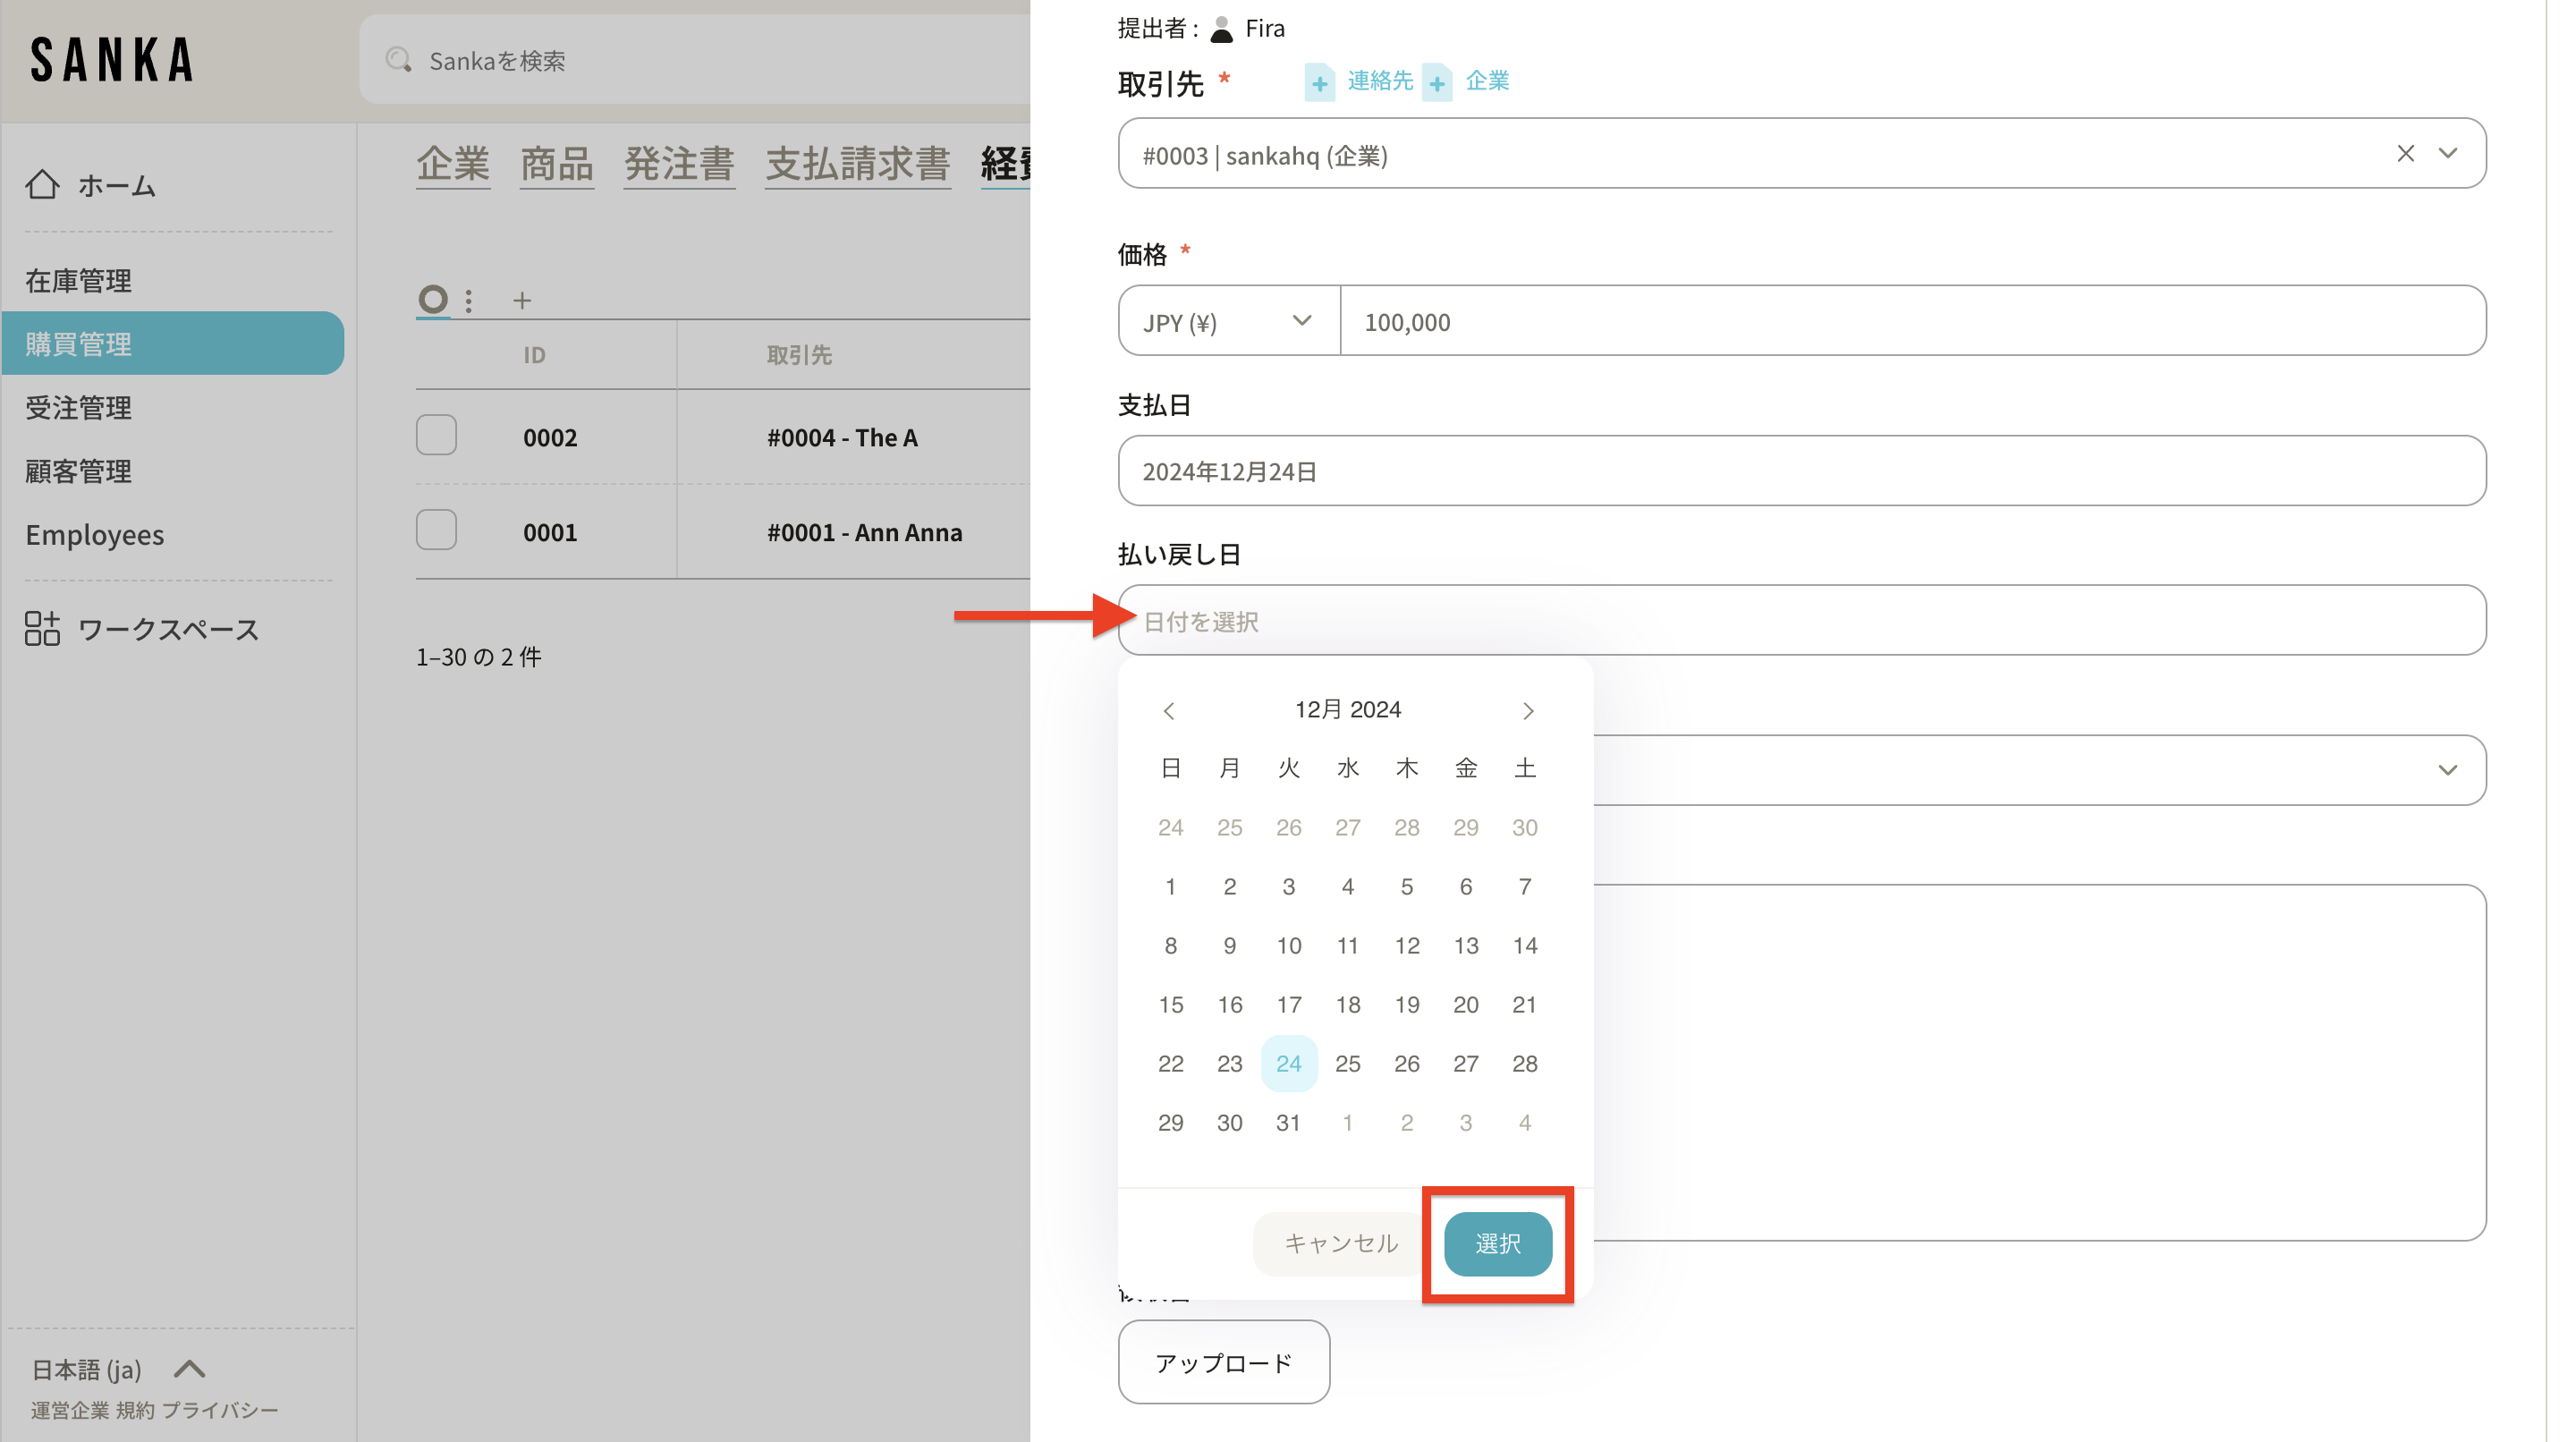
 6: Click the payment due field to display the calendar and enter the date.
 7: Change status for easier tracking.
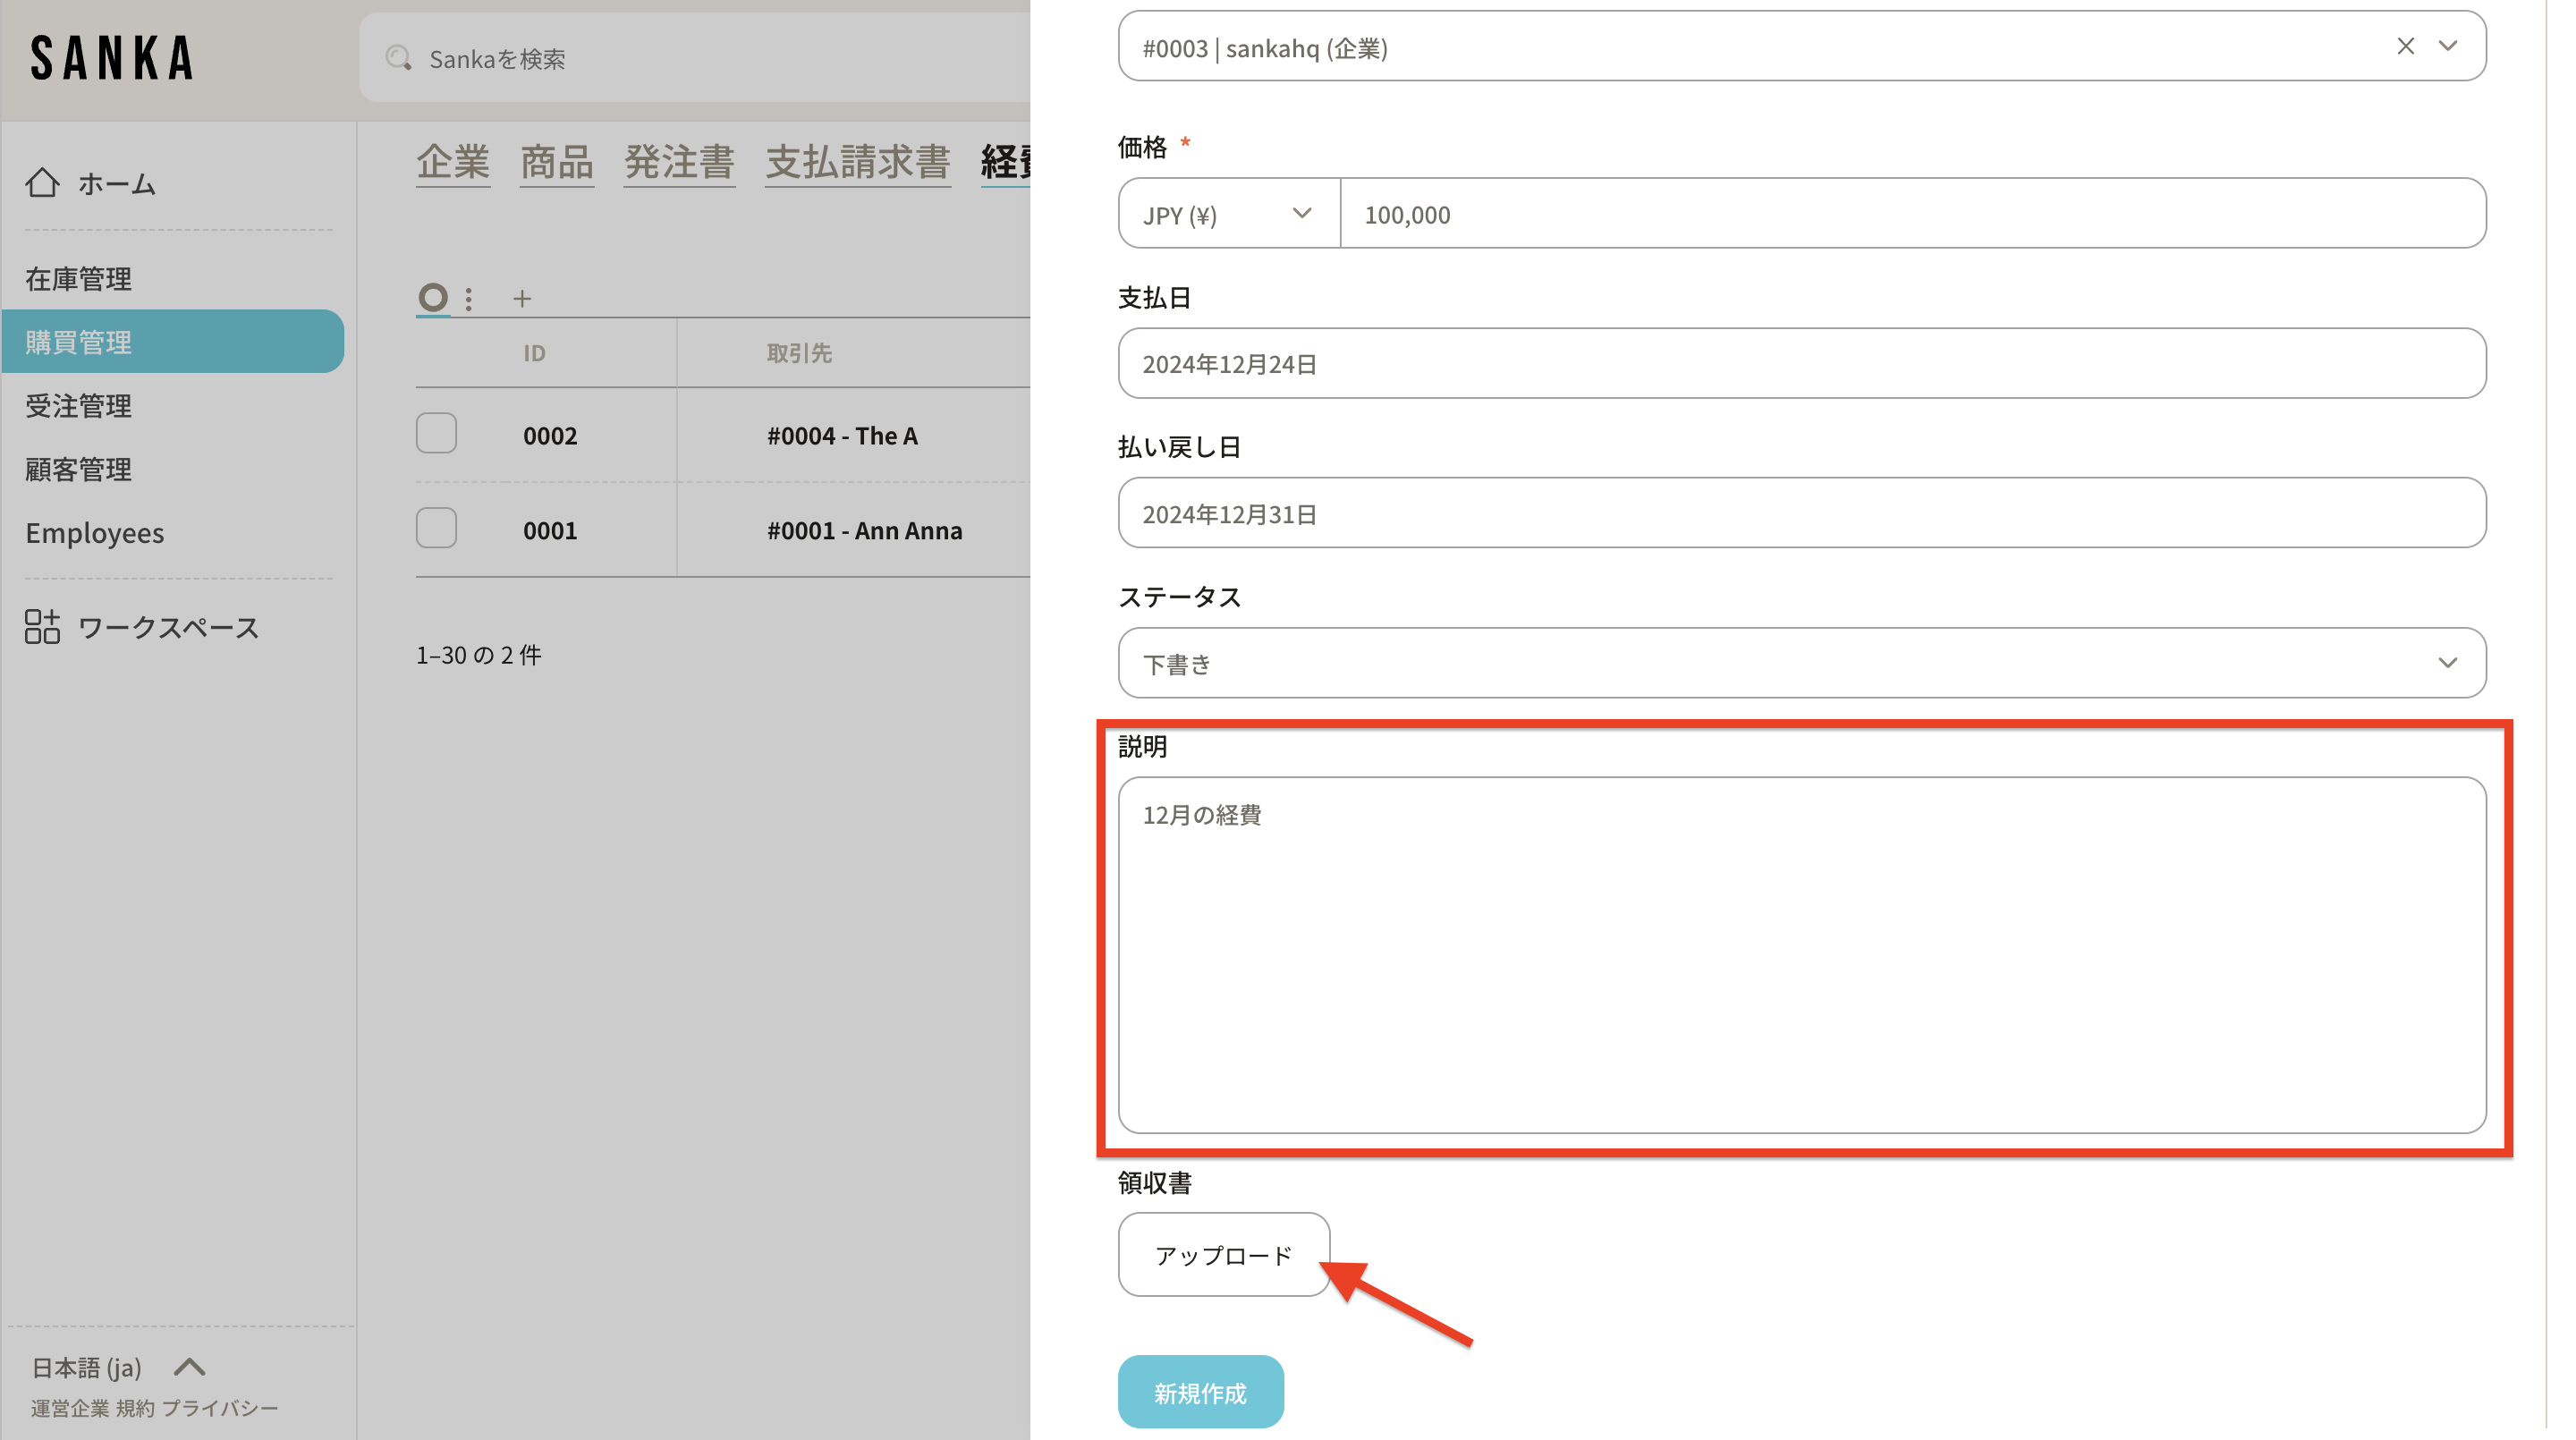
 8: You can add an expense file by entering an expense description and optionally clicking the upload button and selecting a file from your local disk.
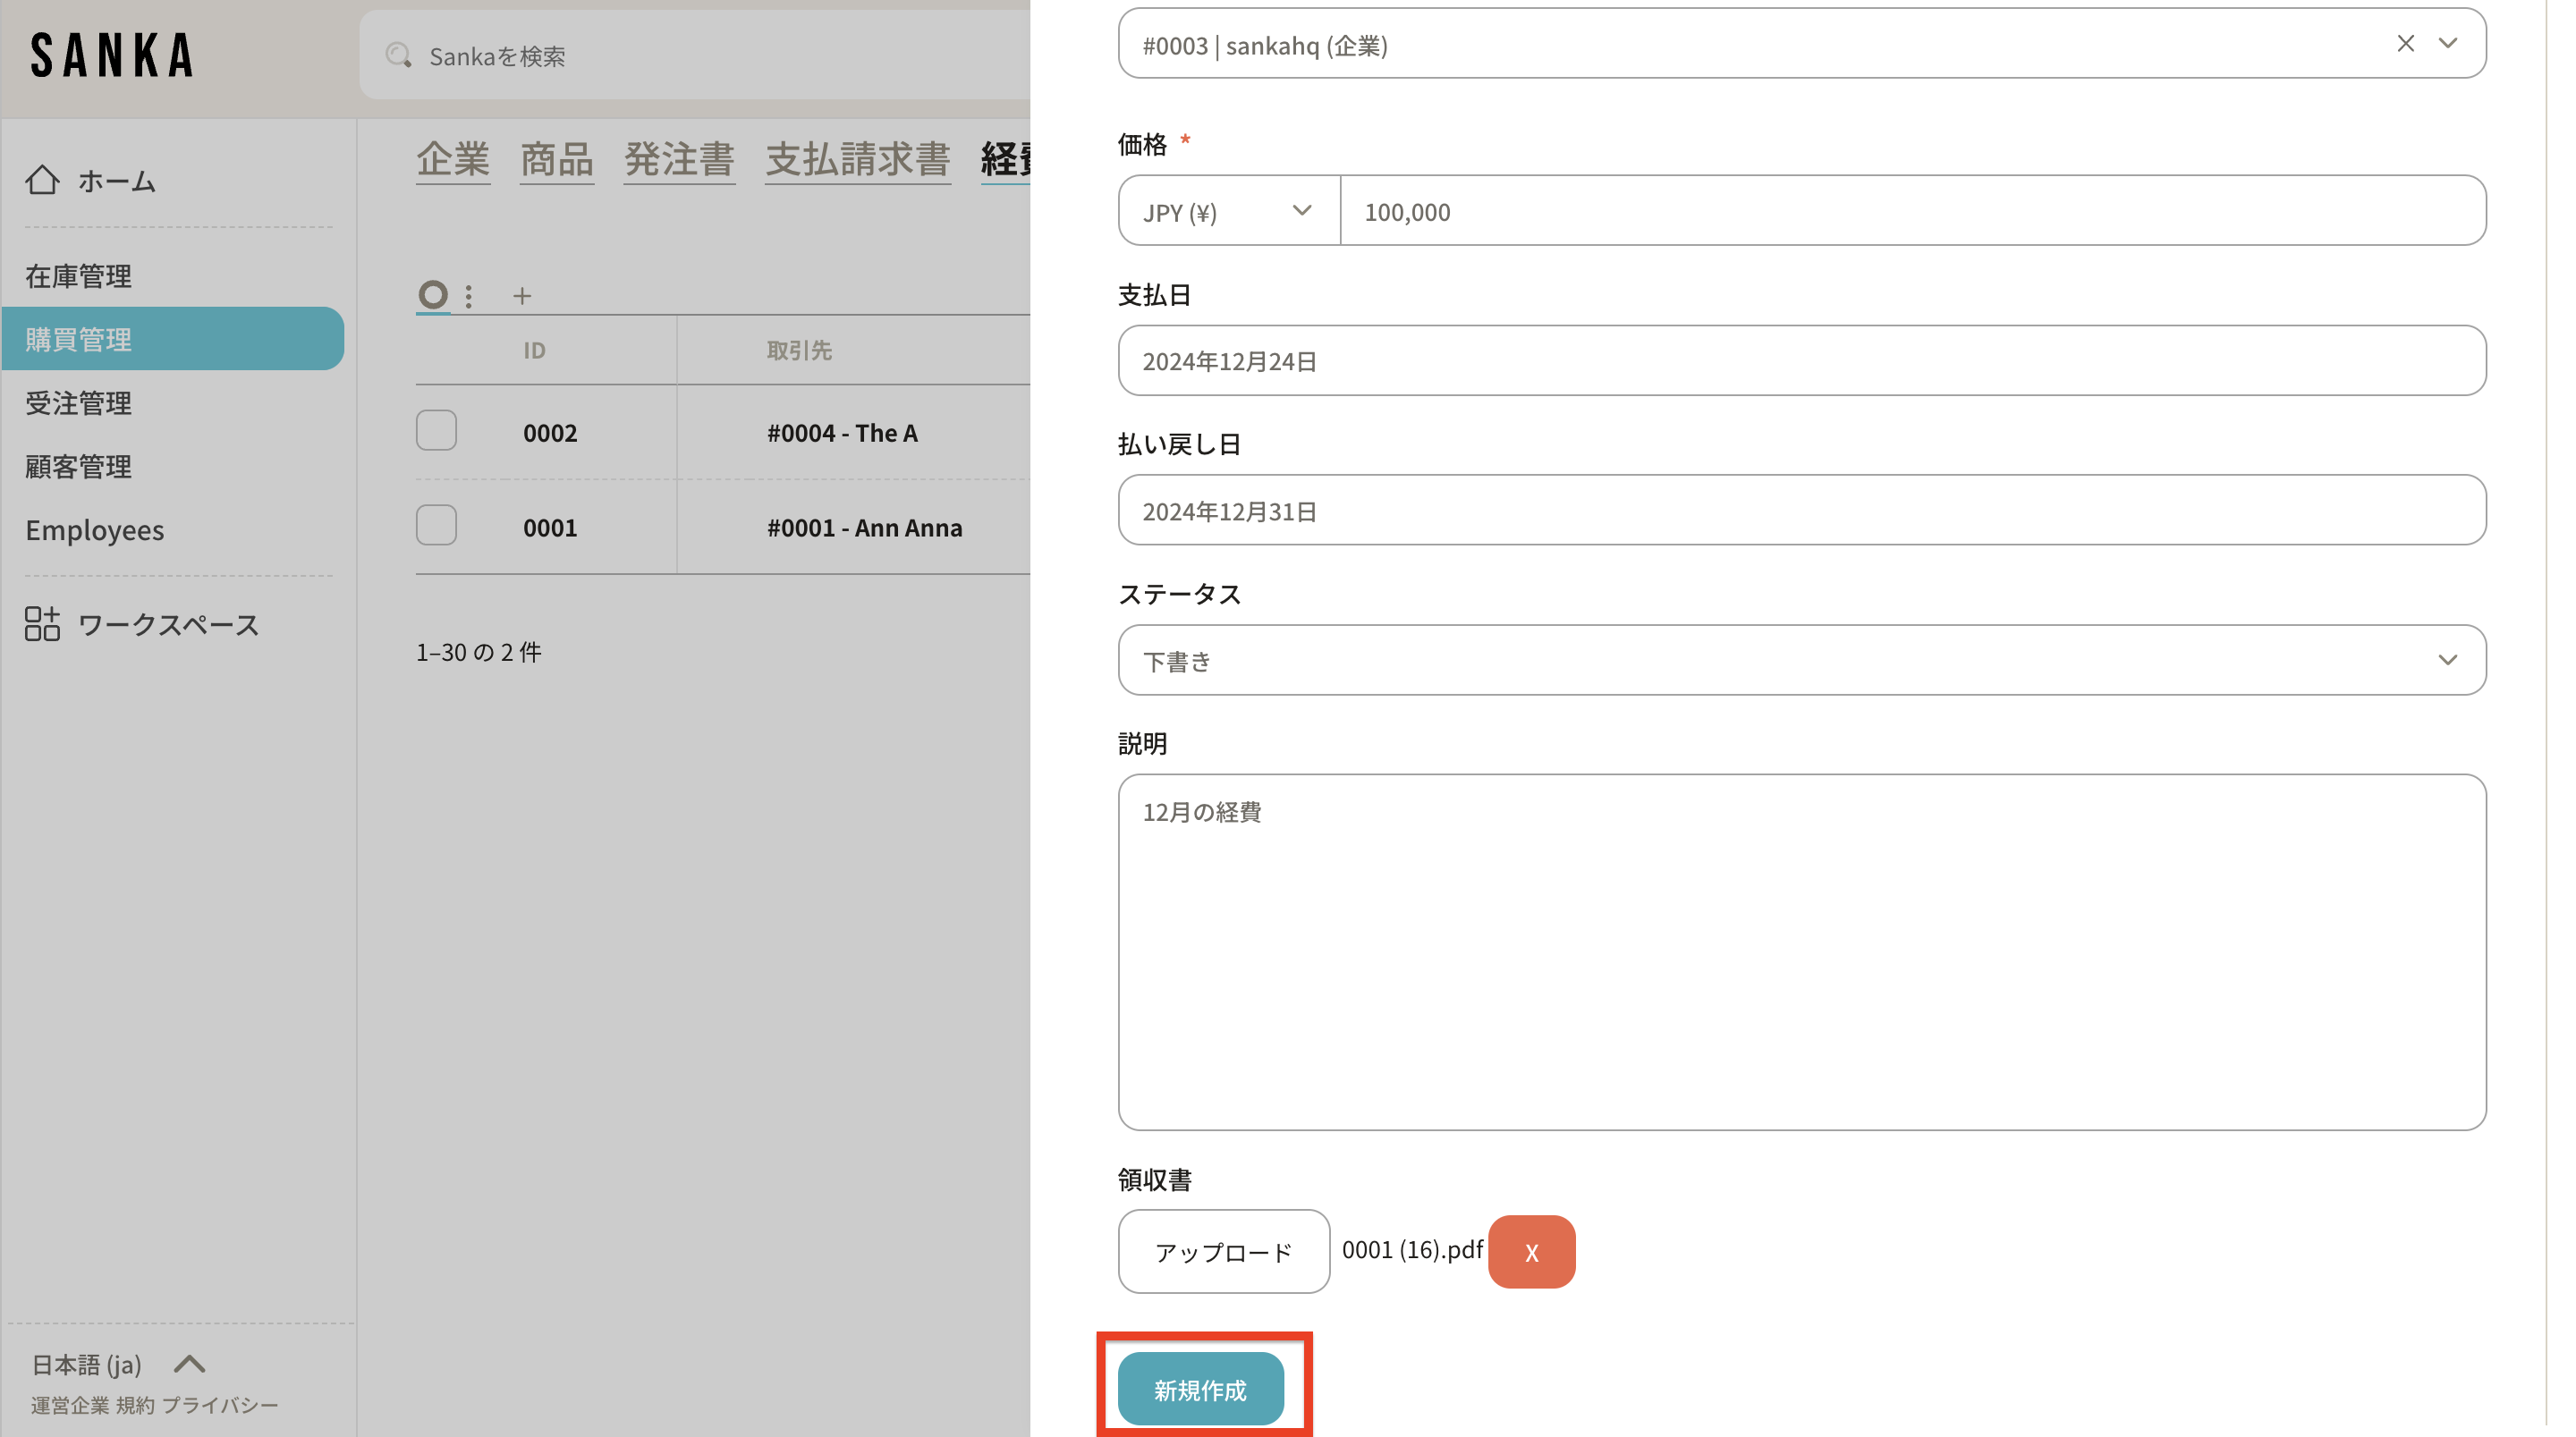
 9: After entering the information, click Create.
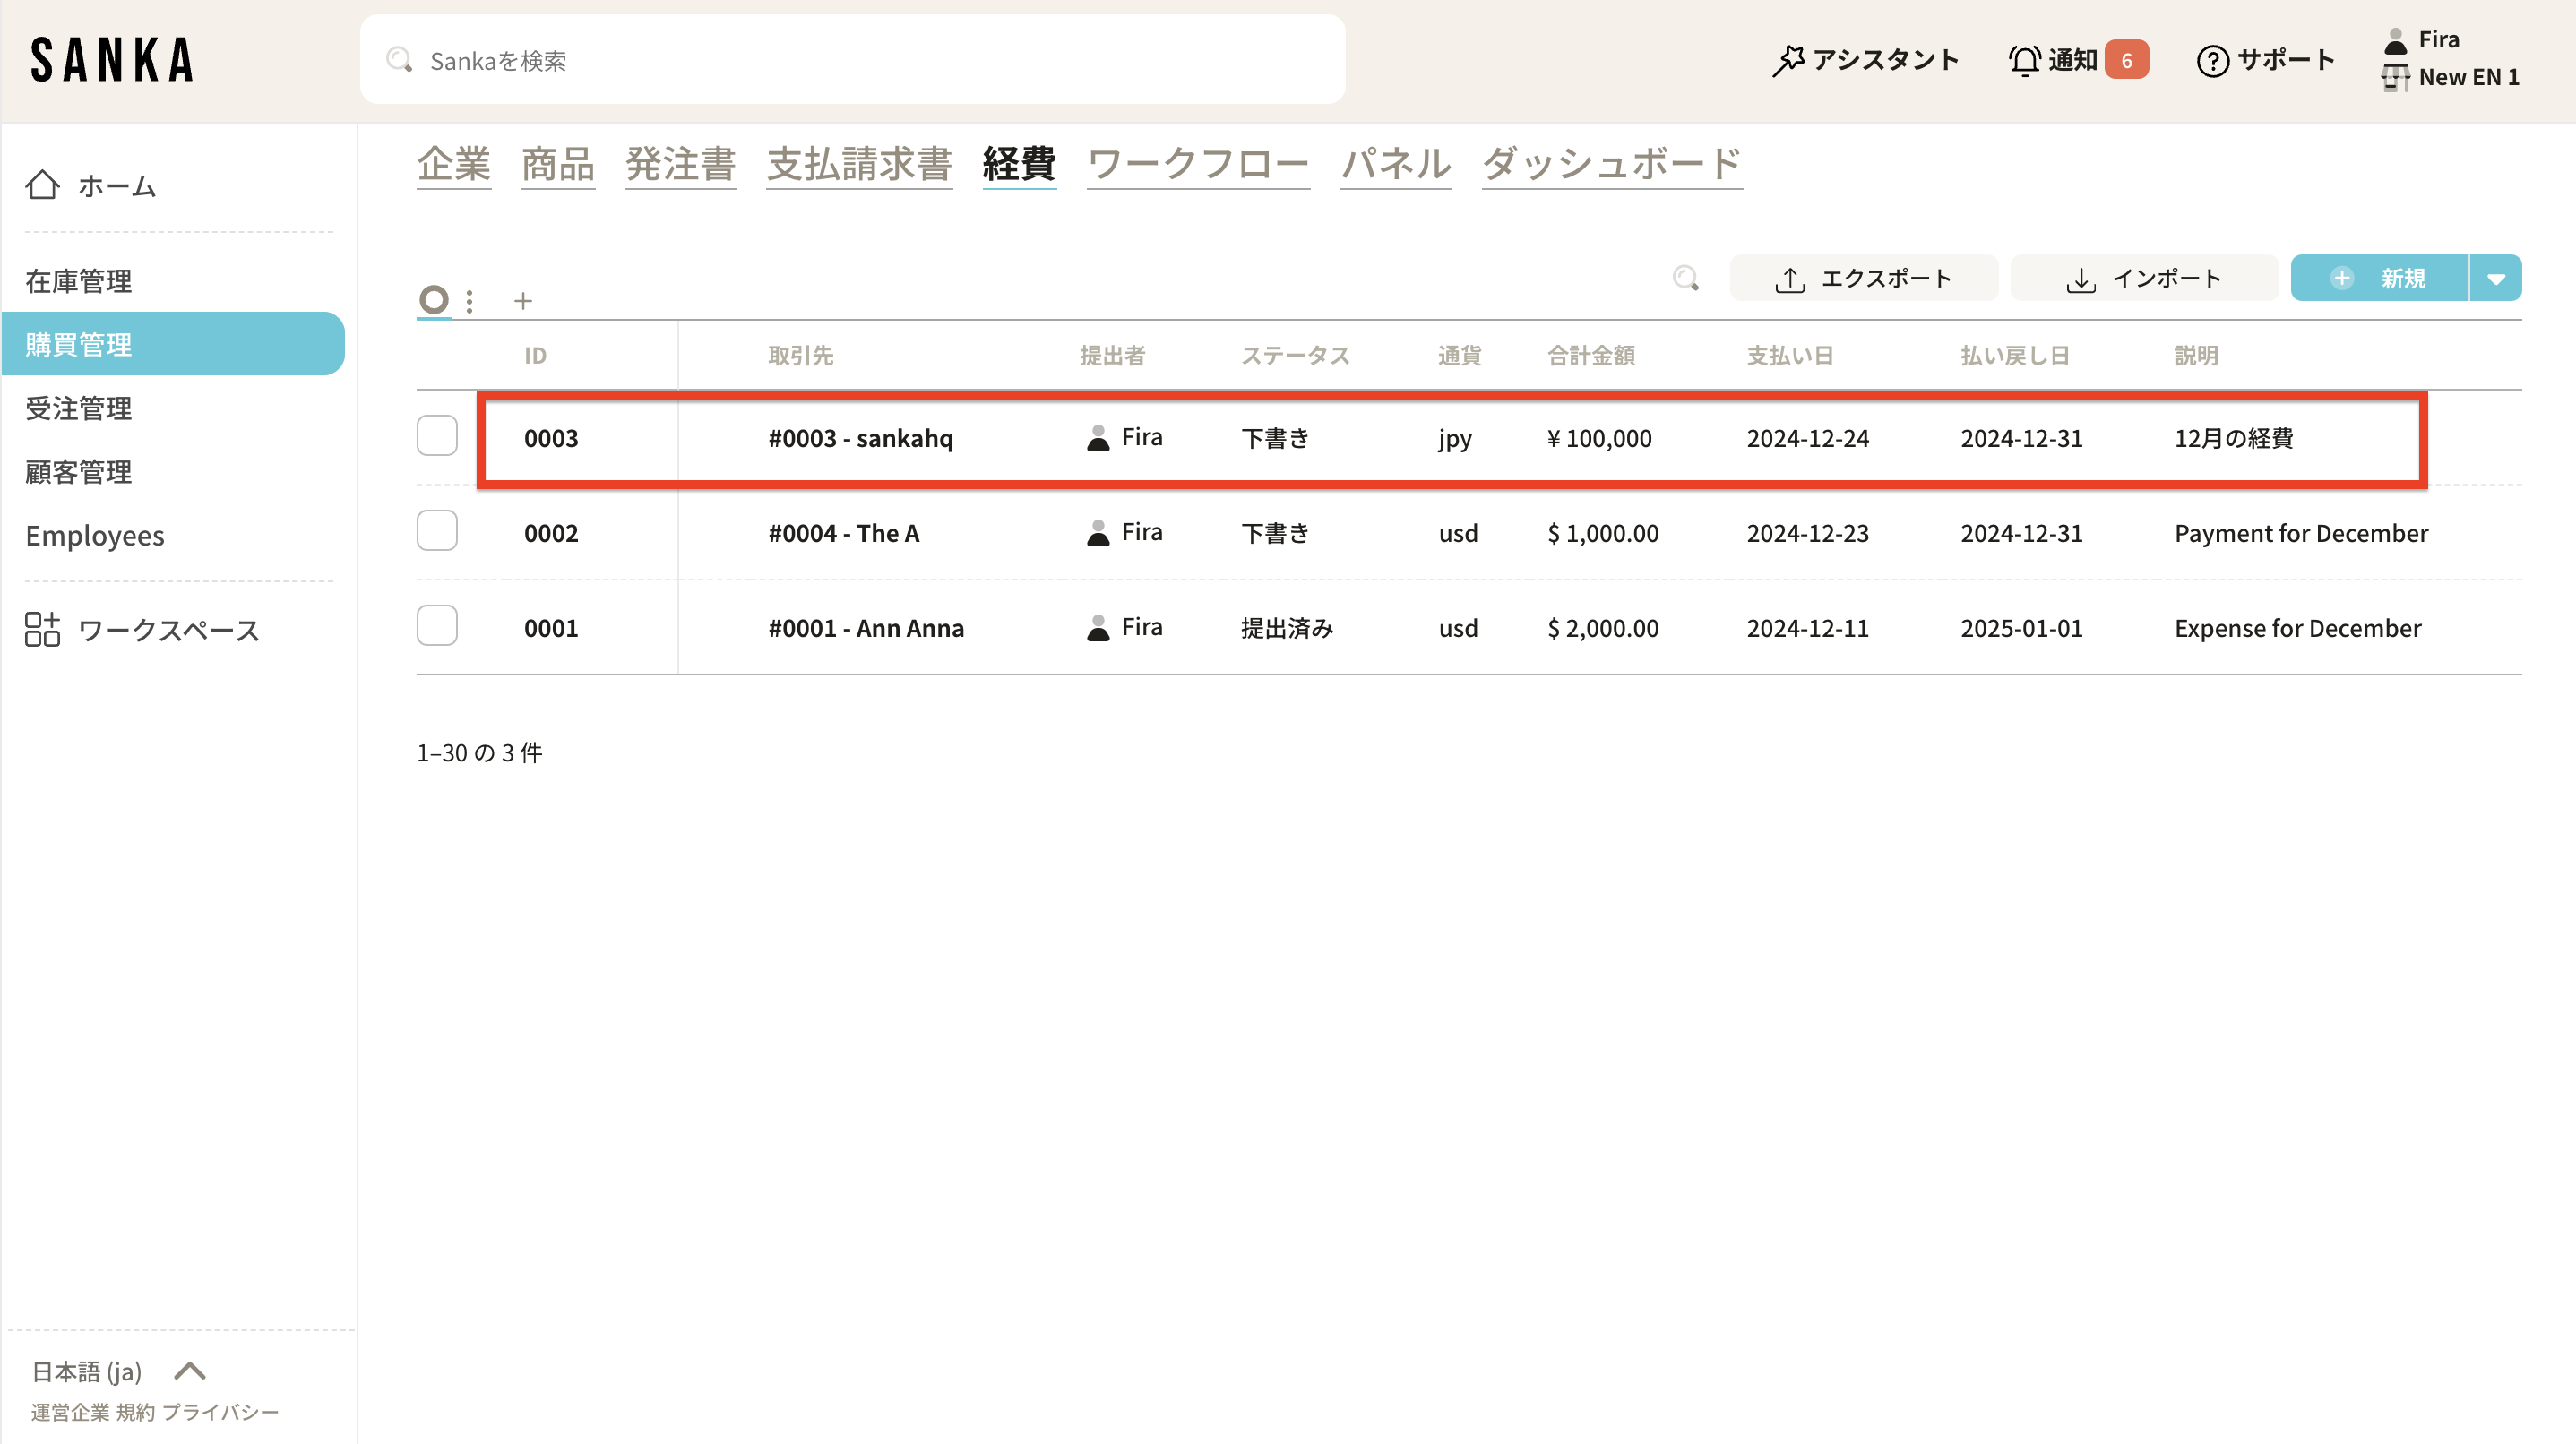
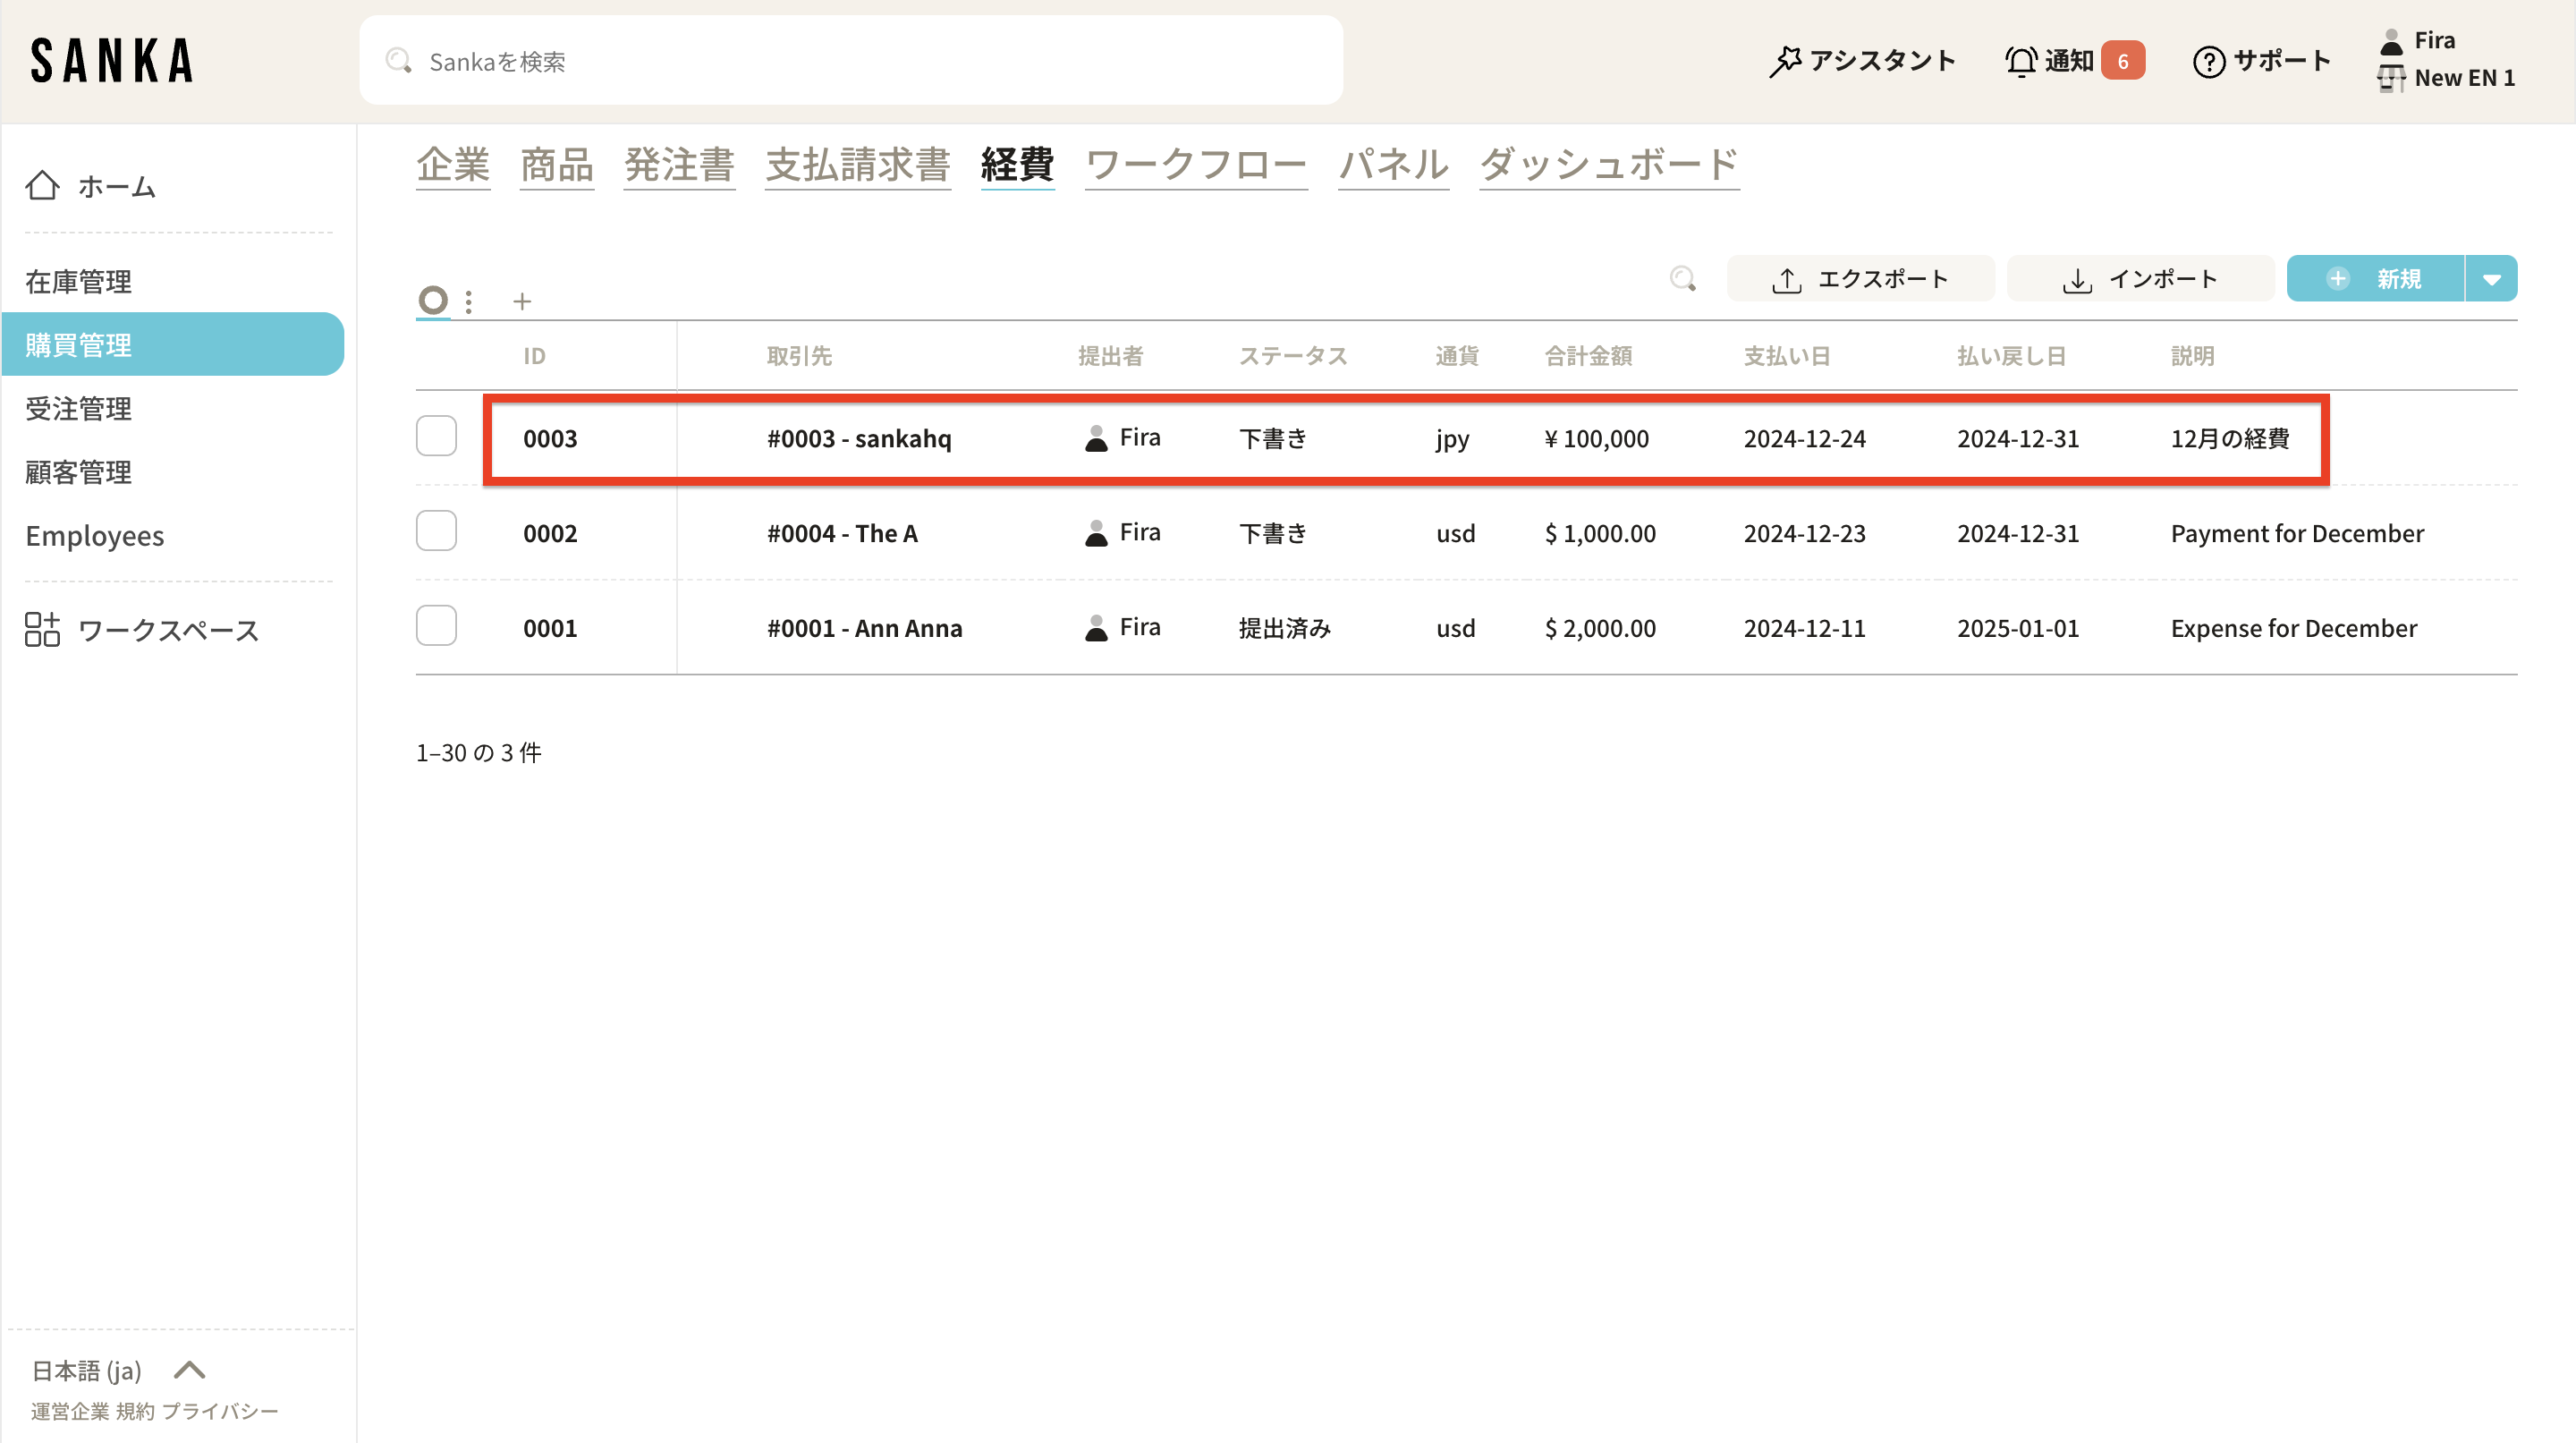
 10: Registered expenses are recorded and displayed here.
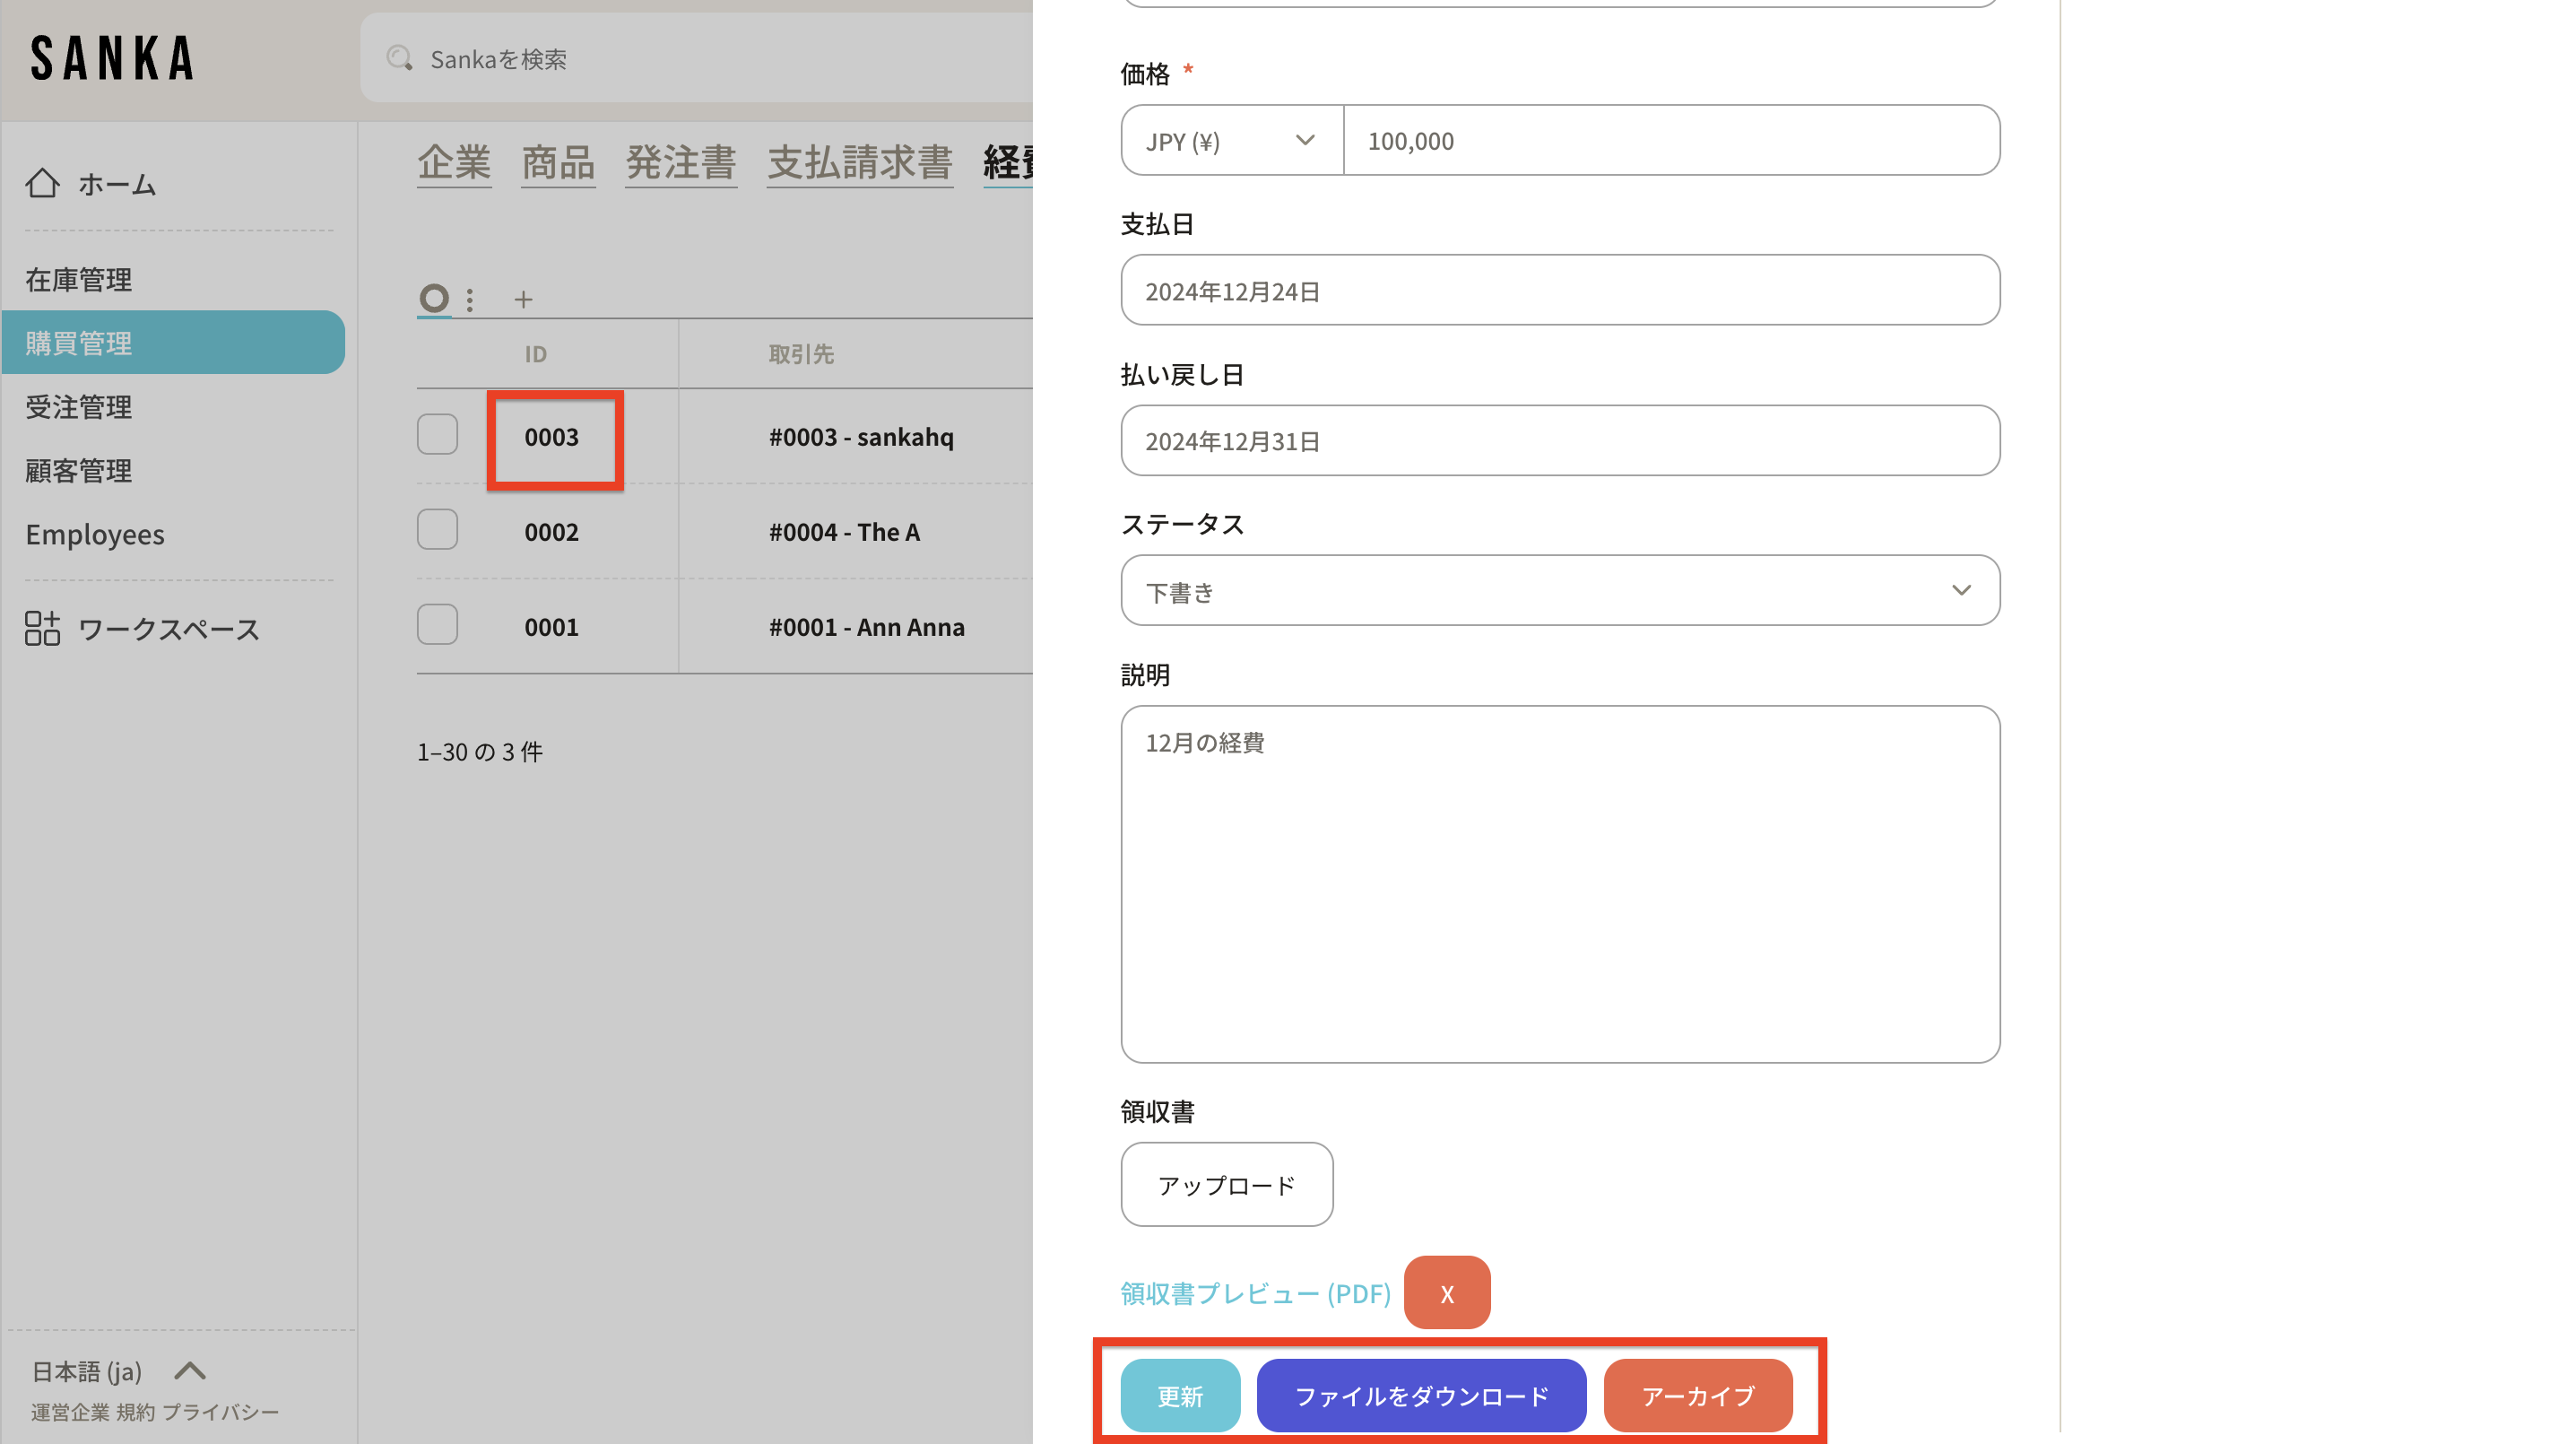
 11: If you want to edit the information, click the ID, edit the information, and click Update.
How to archive billing information
The archive function allows you to hide registered invoice information from the table. 12: Click the box for the expense you want to archive and select Archive. 13: Archived expenses are grayed out.
 14: If you want to reinstate it, click the box for the appropriate expense and select Activate.
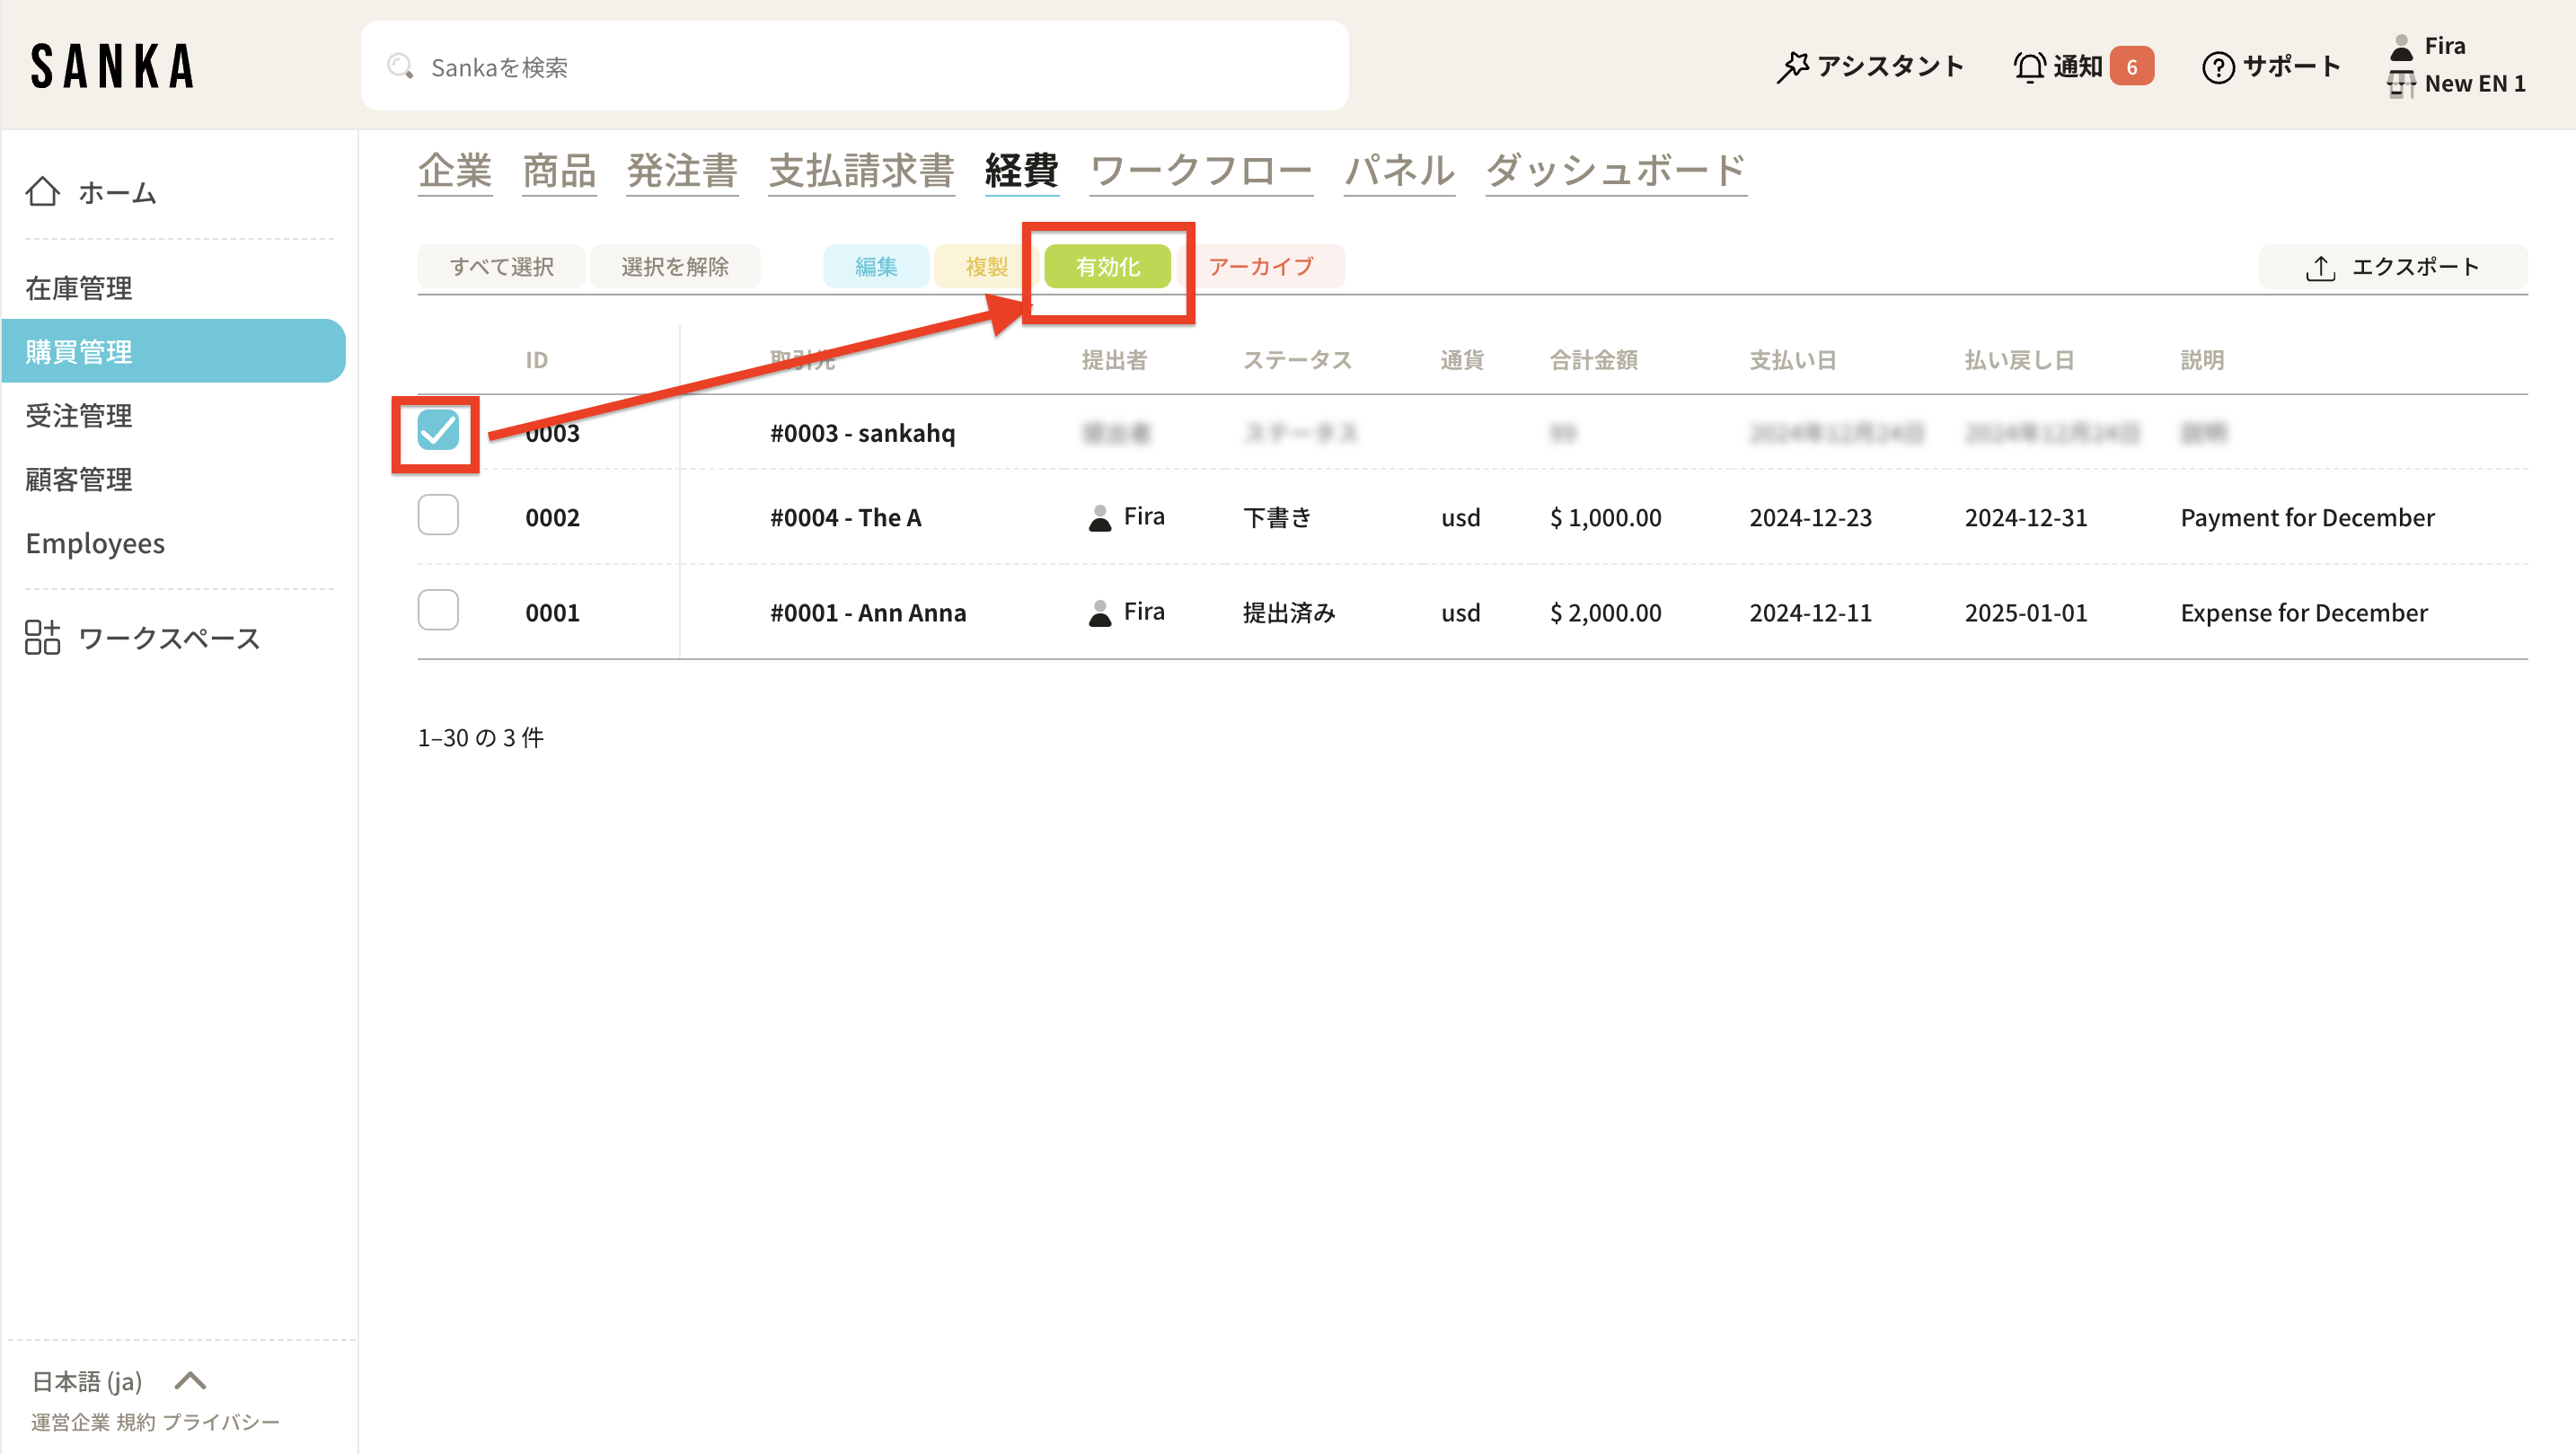 15: Activated expenses are no longer grayed out and return to normal display.